
Ever tried to impress friends with your sleek home theater setup, only to be greeted by the tangled mess of unsightly cables snarled behind your furniture? I remember the first time I set up my surround sound system—excited to create the perfect movie night atmosphere—and then realized the chaos of visible wires ruined the vibe. That lightbulb moment made me realize: those cables are the invisible enemies of an aesthetic and safe living space.
Why Hiding Your Surround Sound Cables Really Matters
Not only do exposed cables make your space look cluttered, but they also pose safety hazards—tripping over them or accidentally yanking equipment down while stringing up holiday lights or cleaning. Plus, cables that are left out in the open can degrade faster, exposing your investment to unnecessary wear and tear. Yet, I understand many folks are skeptical—”Does hiding cables really make that much difference?” might be their first thought. Well, the secret is that well-hidden cables truly enhance your room’s look and even improve sound clarity, according to recent research by the experts at Premium Sound Deals.
Is This Overkill for a Casual Listener?
Early in my journey, I made the mistake of thinking backyarding cables was unnecessary—until one day, a friend tripped over my system’s loose wires. It was a wake-up call. That experience taught me that taking simple steps to conceal cables isn’t just about looks; it’s about maintaining the longevity and safety of your gear. If you’ve found yourself frustrated by visible cords or worried about accidents, then this guide will walk you through five straightforward ways to hide your surround sound cables along the baseboard, turning chaos into clean class.
Ready to transform your entertainment corner? Let’s get into the methods that will help you achieve a tidy, safer setup—without needing a degree in cable engineering.
Plan Your Cable Path
Start by visualizing the route your cables will take from your speakers or soundbar to your receiver or amplifier. Use painter’s tape to outline a tentative path along the baseboard or wall, ensuring minimal exposure and avoiding foot traffic areas. I once spent an afternoon laying tape along my living room baseboards, which helped me see potential obstacles and plan for discreet routing. This initial step prevents surprises later and sets a clear foundation for a tidy setup.
Choose the Right Concealment Materials
Use Cable Covers and Raceways
Opt for paintable cable raceways or covers that adhere firmly to walls or baseboards. These materials hide the cables effectively and can be painted to match your room decor, making them nearly invisible. When I installed mine, I chose a low-profile, paintable raceway and carefully painted it to match my wall color, resulting in a professional look that blended seamlessly.
Employ Cord Clips and Ties
For shorter runs or to secure excess cable slack, use adhesive-backed cord clips or reusable zip ties. Secure cables neatly against the wall or baseboard, avoiding loose loops that can appear messy. I found that pre-measured cable clips made the process quicker and kept the cables securely in place, preventing accidental tugging or sagging.
Discreet Routing Under Furniture
Whenever possible, run cables beneath or behind furniture to keep them out of sight. Use the space behind your sofa or entertainment stand to conceal wires without drilling holes. In my living room, running cables behind an entertainment cabinet not only hidden the wires but also protected them from accidental yanks, extending their lifespan.
Utilize Existing Architecture
Leverage door thresholds, crown molding, or existing conduits to hide wiring. For example, running cables through a conduit within a crown molding can make them virtually invisible. I once used a flexible conduit inside a decorative crown molding piece, achieving a seamless appearance while maintaining easy access for future changes.
Opt for Wireless Alternatives When Possible
Reduce cable clutter by choosing wireless speakers or streaming devices. For instance, consider a wireless soundbar or multi-room audio system to eliminate the need for extensive wiring. I upgraded to a wireless subwoofer, which significantly reduced the number of visible cords and simplified my setup.
Monitor and Maintain Your Setup
Regularly check your cable routes and securing points to ensure they remain tidy and safe. Replace any worn or loose clips and add additional concealment if cables are growing slack over time. Keep your space organized not just during setup but as an ongoing routine to preserve your aesthetic and safety.
Many enthusiasts assume that choosing the most expensive speakers or the latest soundbar guarantees perfect audio, but in my experience, this belief oversimplifies a much more nuanced landscape. For example, a common misconception is that more wattage in amplifiers always translates to louder, clearer sound. However, this isn’t true—it’s about the quality of power delivery, not just the raw numbers. Overlooking this can lead to purchasing an underpowered amp that strains to drive high-sensitivity speakers, resulting in distortion or damage. For an in-depth understanding, check out how to evaluate if your amplifier matches your speakers.
Beware the Myth of Gold-Crafted Cables
Another prevalent myth is that gold-plated or heavily shielded cables inherently deliver superior sound quality. While shiny connectors do prevent corrosion, studies suggest that the actual impact on sound fidelity is minimal—often indistinguishable in blind tests. Instead, focus on using quality, well-made cables that are appropriate for your system’s impedance and length; unnecessary upgrades rarely reap audible benefits, and can sometimes introduce interference. This aligns with the insights from experts who debunk cable snake oil.
Advanced Question: How do room acoustics influence perceptions of sound quality?
It’s a misconception that hardware is the sole determinant of audio quality. In reality, even the finest speakers can’t deliver their true potential without considering room treatment. Reflections, standing waves, and absorption significantly affect sound clarity and imaging. For example, placing bookshelf speakers too close to walls can cause bass muddiness, undermining the system’s performance. Effective acoustic treatment or smart speaker positioning can drastically improve your listening experience without additional gear. For more on this, see tips on proper speaker placement.
Finally, be cautious of the trap that newer isn’t always better. High-end brands occasionally release models with exaggerated specs that appeal on paper but may not translate into superior real-world performance. Knowledge of these hidden nuances helps you avoid costly missteps, ensuring your investment genuinely enhances your audio environment. Remember, the art of great sound is as much about understanding these subtleties as it is about the gear itself. Have you ever fallen into this trap? Let me know in the comments.
Invest in Quality Toolkits for Long-Term Peace of Mind
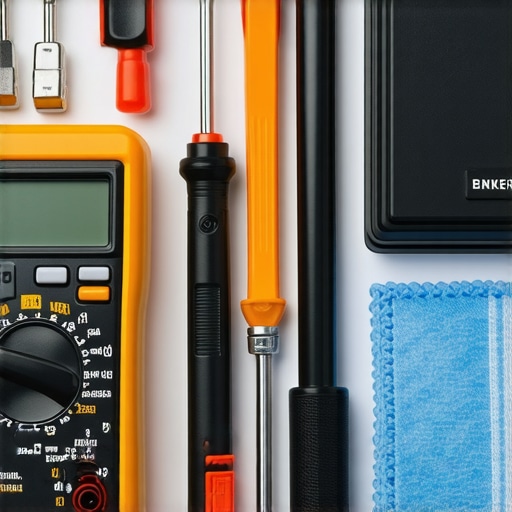
To ensure your audio setup remains flawless over the years, I recommend assembling a dedicated toolkit tailored for audio maintenance. A high-quality soldering iron, such as the Weller WES51, allows for precise repairs of loose connections or damaged cables. Additionally, a multimeter like the Fluke 117 helps you diagnose electrical issues, ensuring your components are functioning correctly. I personally keep a set of small screwdrivers, wire strippers, and a deoxIT contact cleaner in my toolkit to handle routine upkeep and minor fixes with confidence.
Regular Cleaning and Inspection Make a Difference
Dust and grime can degrade sound quality and cause overheating or corrosion. I use a soft, lint-free cloth and compressed air to gently remove dust from speakers and amplifiers. For connectors, applying deoxIT or contact cleaner ensures good conductivity. I check all cables periodically for signs of wear, such as cracks or frayed insulation, replacing them proactively before issues arise. Maintaining a clean, dust-free environment extends the lifespan of your equipment and preserves audio clarity.
Implement Remote Monitoring and Firmware Updates
Many modern amplifiers and soundbars support firmware updates that enhance performance and fix bugs. I recommend subscribing to manufacturer notifications and checking for updates routinely. For example, Yamaha’s AV receivers often have downloadable firmware that improves compatibility and stability. Some advanced users set up remote monitoring with smart home integrations or networked tools like SentriX, enabling real-time alerts for temperature or power anomalies. This proactive approach keeps your system running smoothly without constant manual checks.
Plan for Scalability and Future Upgrades
As your audio needs evolve, investing in modular components like upgradable amplifiers or wireless speakers ensures longevity. I utilize a high-quality multi-zone amplifier, such as the Denon AVR-X3700H, which supports multiple sources and seamless expansion. When adding new speakers, I use impedance-matching tools to prevent overloads, aligning with the guidance found in this resource. Planning for future growth now reduces the hassle and cost of major overhauls later.
Maintain Your Equipment to Keep the Sound Clear
Every component benefits from careful handling and regular upkeep. For example, dusting speaker cones gently preserves their movement, while checking cable connections prevents signal degradation. I also recommend scheduling quarterly deep cleanings and inspections—it’s a small effort that prevents costly repairs down the line. Remember, proper maintenance isn’t just about fixing issues; it’s about optimizing performance and enjoying your setup at its best.
Looking ahead, emerging tools like smart diagnostic apps for amplifiers and Bluetooth systems are poised to make maintenance even easier. Devices from brands like AudioControl integrate seamlessly with home automation, providing real-time health monitoring. Getting familiar with these innovations now will keep you ahead of potential issues and ensure ongoing listening pleasure.
How do I maintain my home audio gear over time?
Start by investing in a tailored toolkit, perform routine cleaning and inspections, and stay updated with firmware releases. These practices will extend your equipment’s lifespan and keep your sound crisp. One advanced tip I urge you to try is using a multimeter to regularly check and confirm cable continuity and electrical health—preempting problems before they affect performance. Properly maintained gear translates into consistent, high-quality listening experiences for years to come.
The Hardest Lesson I Learned About Speakers and Soundbars
- My biggest surprise was realizing how much clutter can diminish the immersive experience. Tucking away cables not only improved aesthetics but also cleared up soundstage clarity, giving me a noticeably better listening environment.
- Over time, I discovered that patience and precise planning are essential. Rushing to hide cables without envisioning the route often leads to messes that require redoing, wasting time and resources.
- Investing in quality concealment materials saved me from frustration. Cheap plastic covers crack or fall off; opting for paintable raceways and durable clips made a lasting difference.
- Wireless options are game-changers. Swapping to wireless speakers or streaming devices reduced cable chaos dramatically, but I learned that proper placement remains crucial for optimal sound.
- Ongoing maintenance, like checking cables and securing points regularly, keeps everything running smoothly and preserves that sleek look. It’s a routine worth establishing for long-term enjoyment.
My Essential Toolkit for a Tidy Audio Environment
- A high-quality soldering iron like the Weller WES51 proved invaluable for minor repairs, preventing the need to replace entire cables or components.
- A reliable multimeter such as the Fluke 117 allows for quick diagnostics, ensuring connections are sound and preventing unexpected issues.
- Small screwdrivers, wire strippers, and contact cleaners like deoxIT help me perform routine upkeep and fix loose connections efficiently.
- Additionally, having a set of cable management clips and paintable raceways on hand enables me to customize and conceal wiring seamlessly, maintaining a professional look.
Your Turn to Elevate Your Audio Setup
Enhancing your speakers and surround sound system by concealing cables and optimizing placement transforms not just your space but your listening experience. Small, deliberate steps today will reward you with a safer, cleaner, and more immersive environment tomorrow. Don’t wait—start planning your cable routes and upgrading your concealment materials now. Your audiophile journey is just beginning, and the reward is a space that looks as good as it sounds.
What has been your biggest challenge in hiding cables or positioning speakers? Share your story below—I’d love to hear about your experiences!
,