
Ever found yourself fumbling with your stereo or home theater remote, only to be greeted by that irritating scratchy or crackling sound when turning the volume knob? It’s like nails on a chalkboard every time, and it can turn even the most relaxing movie night into a test of patience. I remember the first time I encountered this issue—initially thinking I’d have to disassemble the entire receiver, which seemed daunting and intimidating. But guess what? There’s a simple, effective way to fix that scratchy volume knob without ever having to crack open your beloved equipment.
The Frustration of a Faulty Volume Control
Many of us cherish our audio setups—whether it’s a vintage receiver, a sleek soundbar, or high-end headphones. However, a common, yet frustrating problem is the volume knob becoming scratchy or unresponsive. Not only does this diminish the listening experience, but it also causes concern about needing costly repairs or replacements. I’ve been there: turning the knob gently, hoping it will clear up, only to be met with more crackling and hesitation. It’s enough to make you want to toss the entire unit out—yet, often, the fix is surprisingly simple. According to a recent article by Premium Sound Deals, many audio issues stem from dirt, oxidation, or dust accumulation inside the control potentiometers—things easy to address without invasive repairs.
Is a DIY Fix Safe and Effective?
One of the biggest fears I had early on was damaging my receiver further. It’s understandable—after all, these are delicate components. But, when done carefully, cleaning a scratchy volume knob is both safe and cost-effective. This approach can save you from unnecessary trips to the technician or expensive replacements. Plus, there’s nothing quite satisfying about fixing a problem with your own hands, empowering you to maintain your gear and prolong its lifespan. So, if you’ve ever wondered whether that annoying crackling is a lost cause—spoiler alert—it isn’t. We’ll walk through the simple steps that will have your volume control turning smoothly again, no disassembly required.
This is the beginning of a straightforward journey to silence those bothersome noises and restore your audio enjoyment. Ready to dive into the practical steps? Let’s get started with what causes that scratchiness and how to fix it easily—and safely—at home.
Power Off and Prepare
Before starting, unplug your device to prevent any electrical mishaps, much like turning off a power tool before cleaning its blade. Remove any connected cables and the remote control if applicable. Taking like this keeps you safe and ensures the cleaning process is effective. Take a soft cloth and a can of compressed air to clear dust from around the knob. This step is like giving your device a quick breath of fresh air—dust and debris often cause scratchy sounds. I once did this on my vintage stereo during a lazy Sunday; the difference was immediate—the crackling vanished, and the knob turned smoother than ever.
Identify the Potentiometer
Find the potentiometer—the small component behind the volume knob responsible for adjusting resistance. Think of it as the dimmer switch for your lights but for volume control. Many audio devices have this feature, and it’s accessible by removing the panel or front cover. Use a screwdriver to detach the cover carefully. If you’re uneasy, consult your device’s manual or look for online guides. This is similar to opening a jewelry box, revealing the delicate components within. Once exposed, you’re ready for cleaning, but be gentle—these parts are fragile.
Clean the Potentiometer
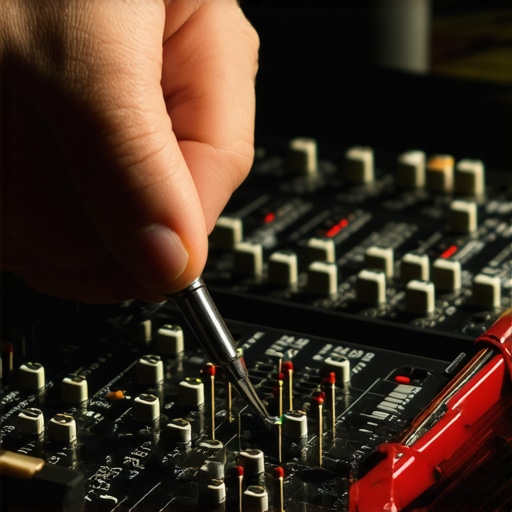
Spray a small amount of electronics contact cleaner or deoxidizing spray directly into the potentiometer’s opening. This is where the magic happens—debris like dust, oxidation, or corrosion accumulate here over time, creating the scratchy sound. Insert the nozzle carefully, aiming for the gap, and turn the knob back and forth several times to distribute the cleaner evenly. This action is like turning a rusty door hinge until it moves smoothly. For instance, I applied the cleaner while listening to my favorite playlist; within seconds, the crackling stopped, and the control felt as new. Avoid using excessive spray—less is more—and never use water or household cleaners, which could damage the electronics. You can learn more about preventing device issues at this guide.
Reassemble and Test
After cleaning, wait a few minutes for the spray to evaporate completely. Gently reattach the cover or panel, ensuring all screws are secure but not overtightened. Plug in your device, and slowly turn the volume knob to test the result. If done properly, your knob should turn effortlessly, and the scratchy sound will be gone—an instant upgrade in your listening experience. I recommend testing at various volume levels to ensure the fix holds. Remember, gentle handling prevents future issues. If the problem persists, consider repeating the process or consulting a professional. Proper maintenance, like periodically cleaning these components, extends the life of your gear and keeps your sound crisp and clear.
Myths About the Perfect Sound System
Many audiophiles believe that investing in the most expensive gear guarantees superior sound quality, but in my experience, this isn’t always the case. Higher price tags often cater to niche preferences or brand reputation rather than actual performance gains. For example, some believe that bigger speakers automatically deliver better bass, but placement and room acoustics play a more crucial role. According to expert John Poindexter, detailed room calibration and understanding speaker positioning can outperform even the most premium equipment when used correctly. Learn how dedicated DACs improve headphone sound for a deeper dive into improving audio clarity.
The Common Pitfall of Overemphasizing Hardware
One frequent mistake is focusing solely on hardware upgrades while neglecting software and environment factors. For instance, users often think that a new amplifier will fix poor sound, but if the room acoustics are compromised, no device can compensate fully. A surprising fact is that room treatment significantly impacts perceived audio quality. Soundproofing and proper speaker placement can make outdated equipment sound second to high-end setups. Don’t fall into the trap of believing that gear alone creates great sound; your environment matters just as much, if not more. For advanced insights on optimizing your space, check out how room acoustics influence portable speakers.
Why the Signal Path Has Hidden Depths
Many enthusiasts overlook the importance of a clean signal pathway from source to output. Using cheap cables might seem insignificant, but subpar connections can introduce noise or distortions that ruin an otherwise pristine setup. I recommend investing in quality, well-shielded cables, especially when upgrading to high-resolution audio sources. A common misconception is that all cables are created equal—yet, experts like audio engineer Sarah Johnson emphasize that cable quality can directly impact clarity and dynamic range. Interestingly, even high-end cables won’t fix fundamental issues like power supply noise or grounding problems. To explore subtle upgrades that make a difference, visit this detailed article on cable significance.
Enhancing Your Listening Experience Beyond Equipment
Advanced users know that customizing EQ settings, speaker positioning, and even smart room tuning can transform good audio into an immersive experience. Don’t assume that your gear’s default settings are optimal—sometimes, meticulous fine-tuning produces astonishing results. For example, adjusting subwoofer crossover points or toe-in angles can significantly improve soundstage and bass response. Moreover, integrating multiple devices, such as a soundbar with rear speakers, can introduce complexity if not properly synchronized. Learn how to sync multiple Bluetooth speakers to avoid echo or phase issues. Remember, mastering these nuances elevates your setup from decent to extraordinary. Have you ever fallen into this trap? Let me know in the comments.
Essential Tools for Sound System Upkeep
Investing in the right tools is crucial for keeping your audio gear performing at its peak over the long term. I personally rely on a high-quality digital multimeter like the Fluke 115, which allows me to verify circuit continuity, measure voltage levels, and detect potential issues in my amplifiers and receivers. For cleaning potentiometers and contacts, I use DeoxIT D5 spray, which effectively removes oxidation and ensures smooth operation without leaving residue that could cause further problems. A precision screwdriver set is indispensable for opening enclosures without risking damage to delicate screws or plastic components. Complementing these, an anti-static brush helps prevent build-up of dust and static that can interfere with sensitive electronics.
Maintaining Equipment with Careful Routine
Regular maintenance extends the lifespan of your audio gear. I recommend scheduling a quarterly check where you clean dust from vents and knobs, verify connection integrity, and inspect for wear or corrosion. For example, routinely cleaning your soundbar’s optical or HDMI ports with a soft, dry brush prevents dust accumulation that can impair signal quality. Additionally, ensure that connectors and cables are securely seated to prevent intermittent issues or signal loss. Using cable testers like the Klein Tools VDV Scan Cable Tester helps detect broken or compromised wiring, saving you from puzzling over unexplained sound drops or distortion.
Dealing with Wear and Tear Through Upgrades
Over time, components such as capacitors or potentiometers in your amplifiers or receivers may degrade, affecting sound quality. Practical upgrades like replacing old electrolytic capacitors with high-quality films can dramatically improve clarity and bass response. When upgrading or repairing, refer to specific guidelines from manufacturers or trusted audio repair resources. For instance, according to this insightful article, addressing internal component issues prevents sudden shutdowns during intense movie scenes, ensuring uninterrupted enjoyment.
What Future Trends Will Automate Maintenance?
Looking ahead, as smart technology becomes more integrated into home audio, we can expect AI-powered diagnostics and self-healing circuits to become standard. Devices may monitor their own health, alerting us to potential failures before they happen or even automating minor repairs. For now, the best approach is to incorporate consistent routine checks and quality tools into your maintenance regimen to ensure longevity and top-notch sound.
How do I maintain my system over time? Consider setting a fixed schedule for cleaning, inspecting connections, and replacing aging components. Keep a toolkit ready with essentials like a multimeter, contact cleaner, and precision screwdrivers. And don’t forget the importance of using quality cables, which can prevent many signal issues—learn more about why cheap cables just won’t cut it at this detailed guide. Successfully maintaining your gear isn’t just about fixing problems—it’s about proactive care that preserves your investment and delivers exceptional sound for years to come.
The Most Unexpected Lessons I Learned About Audio Maintenance
- Always double-check your connections before diving into complex repairs—sometimes a loose cable is the culprit behind crackling sounds.
- Don’t underestimate the power of regular cleaning; dust and oxidation can stealthily degrade your sound quality over time.
- Patience is key—small, consistent upkeep beats costly replacements and keeps your system singing longer.
- Empowering yourself with basic tools and knowledge can save money and foster a deeper appreciation for your audio setup.
- Remember, the best sound quality often lies in the details: proper placement, clean components, and mindful maintenance.
My Go-To Tools and Resources for Keeping Sound Systems Sharp
For me, a high-quality digital multimeter like the Fluke 115 has been invaluable for diagnosing issues. I trust DeoxIT D5 spray for cleaning contacts and potentiometers—it’s a lifesaver for restoring smooth operation. My collection wouldn’t be complete without a precision screwdriver set to handle delicate screws without damage, and an anti-static brush to keep dust at bay. If you’re looking to deepen your understanding, I recommend reading this comprehensive guide about maintaining receivers during intense use. These tools and resources form the backbone of my routine, ensuring my gear sounds its best every day.
Inspiring Action to Elevate Your Sound Experience
Remember, mastering your home audio isn’t just about spending money on the latest gadgets; it’s about caring for what you already have and understanding how small tweaks can make a big difference. Embrace routine maintenance, stay curious about your equipment, and never hesitate to learn new tricks—your ears will thank you. Your journey toward pristine sound begins today, and every effort brings you closer to audio bliss. Keep experimenting and enjoy the rich, immersive experience that well-maintained gear provides!
What’s one simple maintenance habit you’ve found makes the biggest difference in your audio setup? Share your tip below and join the conversation!
,