
I remember finishing my first DIY car audio install, sweating in the driveway after four hours of pulling panels. I turned the key, cranked the volume, and it sounded thin. Empty. I’d spent a fortune on gear, but the music lacked that thump I was craving. It felt like I was listening to the music through a tin can. I checked every connection and wondered why your car speakers crackle when you turn the volume up, thinking maybe I’d blown something. Then my neighbor, a retired sound engineer, walked over with a 9V battery and a grin. He showed me that I’d accidentally swapped the wires on one side. The speakers were fighting each other. One was pushing air out while the other was sucking it in, effectively canceling out my bass. Today, I am going to show you this exact battery trick so you never have to guess which wire is positive and which is negative again. [image_placeholder]
Stop Guessing Which Wire is Which
When you are dealing with old vintage gear or wires that aren’t clearly marked, it is easy to get things backwards. This leads to what we call out of phase audio. It is one of those 3 budget upgrades that is not really an upgrade—it is just fixing a basic mistake that makes cheap speakers sound expensive when done right. I once made the mistake of assuming the wire with the white stripe was always positive. Spoiler alert: it is not always the case. Using a battery is the best way to test speakers at a garage sale without an amp because it gives you a physical, visual confirmation of the driver’s movement. According to research published by the Audio Engineering Society (AES) on loudspeaker phase response, even a single inverted driver in a multi-speaker array can lead to a 6-10dB drop in mid-bass frequencies, essentially gutting the soul of your music.
Is sticking a battery on your speakers actually safe?
I get it. You do not want to fry your precious drivers. But we are talking about a tiny amount of DC current for a split second. It is significantly safer than guessing and running your system out of phase for weeks, which can lead to fatigue or thinking you need a new amp. Have you ever spent hours wiring a system only to realize the sweet spot is completely missing? Leave a comment if you have ever felt that frustration. It is time to stop the guessing game and use a bit of physics to get your soundstage back where it belongs.
Get Your Wires Ready for the Pop Test
First, you need access to the bare ends of the speaker wires. If the terminals are looking a bit corroded or loose, you might want to learn how to repair a loose speaker terminal in under five minutes before proceeding. I remember a time I found a pair of floor-standing speakers at a thrift shop; the back labels were completely peeled off. I didn’t want to risk my home receiver until I knew what I was dealing with. This is exactly the best way to test speakers at a garage sale without an amp.
Identify the Movement
Take a standard 9V battery—the same kind you might worry about when researching why your car audio system drains your battery overnight—and hold it in one hand. Touch one speaker wire to the negative (-) terminal and briefly tap the other wire to the positive (+) terminal. You aren’t trying to power the speaker; you are just looking for a “pop.” If the speaker cone jumps outward (towards you), then the wire touching the positive terminal is your positive lead. If the cone sucks inward, you have the wires swapped. 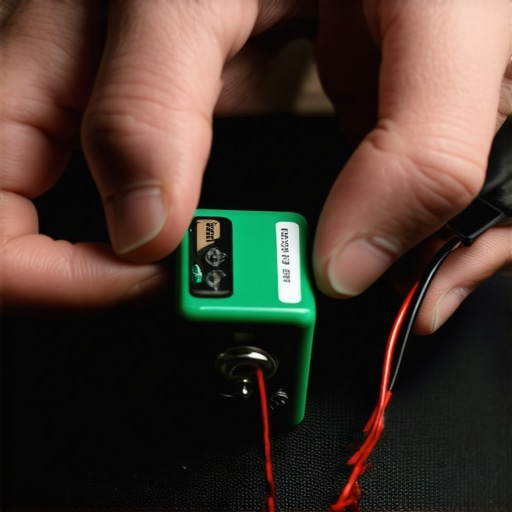
Don’t Ignore a Frozen Driver
If you tap the battery and absolutely nothing happens—no sound, no movement—you might have a bigger issue on your hands. You should investigate how to fix a speaker driver that is frozen and wont move. This often happens with older gear where the voice coil has shifted or the internal glue has failed over decades of storage.
Why In-Phase Speakers Save Your Soundstage
When your speakers are “in phase,” they work like a synchronized team of rowers. They push and pull together, creating a unified wave of air that hits your ears with impact. When they are out of phase, one speaker creates a high-pressure wave while the other creates a low-pressure vacuum. This phase cancellation is a major reason why your car door vibration is ruining your mid-bass performance, as the lack of constructive interference makes the music sound hollow. It is a common DIY pitfall that can make even high-end gear sound thin.
Handle Multi-Driver Cabinets with Care
In cabinets with multiple drivers, such as three-way speakers, you want to focus on the largest driver, the woofer. This is the one you will see move the most clearly with a 9V battery. Smaller tweeters move so little that the battery trick is harder to see and potentially riskier due to the high sensitivity of the voice coils. For those, relying on the manufacturer’s markings after confirming the woofer is usually the safest bet. Keeping your drivers aligned ensures the crossover functions correctly, preventing that boxy sound that plagues many unoptimized setups.While the battery trick solves the basic wiring puzzle, there is a massive misconception that haunts the audiophile world: the idea that exotic wiring can ‘fix’ a fundamental setup error. In my experience, people will drop a month’s salary on boutique cables when expensive speaker cables are mostly a marketing trick. If your speakers are fighting each other because of phase cancellation, no amount of silver-plated wire will bring the bass back. The real nuance lies in room interaction. I’ve seen enthusiasts blame their gear for a ‘thin’ sound, unaware that why your studio monitors sound boxy against a wall is often a matter of boundary interference rather than the equipment itself. 
Does this battery trick work for active soundbars or Bluetooth speakers?
This is where things get tricky for the modern listener. You should never apply a battery directly to the input of an active speaker. Understanding the difference between active and passive speakers is crucial here; active systems have built-in amplifiers that won’t appreciate a DC voltage spike from a 9V battery. If your soundbar sounds off, it is more likely a software issue, which is why your soundbar needs a firmware update to fix audio drops or internal processing errors. The ‘Oops’ factor often comes from ignoring the heat. If you’ve wired your system incorrectly and are pushing high volumes to ‘compensate’ for the thin sound caused by phase issues, you might notice why your amplifier gets hot enough to burn your hand. This unnecessary strain can lead to premature component failure. Dr. Floyd Toole, a renowned expert in acoustics, emphasizes in his book ‘Sound Reproduction’ that while absolute polarity is debated, the relative phase between loudspeakers is non-negotiable for a stable stereo image. If you are still struggling with a muddy sound after checking your wires, try the simple rug trick that instantly improves your room acoustics. It’s a low-tech fix that yields high-tech results. Have you ever fallen into the trap of buying gear to fix a problem that was actually just a setup error? Let me know in the comments below.Once you’ve mastered the 9V battery pop test, you’ve graduated from ‘guessing’ to ‘knowing.’ But knowing the phase is only the first step in a long-term relationship with your audio gear. If the pop test is weak or inconsistent, you might be facing a degrading voice coil rather than just a simple wiring issue. This is where I move from the battery to a digital multimeter. I use it to check the DC resistance of the driver directly at the terminals. If an 8-ohm speaker reads something incredibly low like 1.2 ohms, you don’t have a phase problem; you have a short. This is often how to tell if your headphones have a blown driver before you ever plug them into an expensive amp and risk a protection circuit trip. I also swear by a can of specialized contact cleaner like DeoxIT. It is the easy way to fix a scratchy volume slider on your radio without taking the whole unit to a professional repair shop. If you notice a physical vibration while testing the low-end frequencies, you might need to look at how to fix a rattling speaker grill with a simple rubber band to stop unwanted resonance from masking your true audio quality. 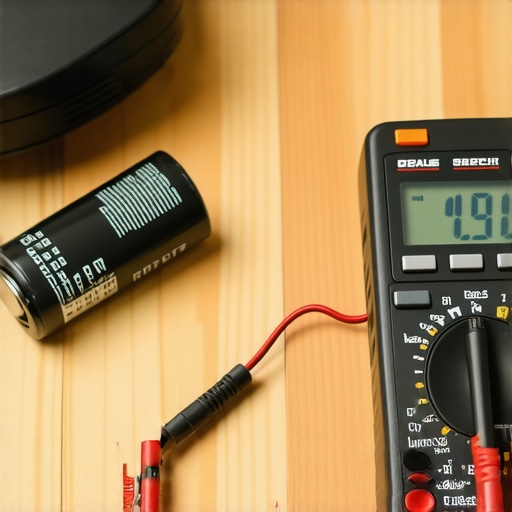
How do I maintain my home audio system over time?
Consistency is more important than expensive upgrades. Dust and heat are the silent killers of high-fidelity sound. If you are running a classic setup, you need to know how to tell if your vintage amplifier needs new capacitors. According to Douglas Self in his ‘Audio Power Amplifier Design Handbook,’ electrolytic capacitors have a finite lifespan, often limited to a few thousand hours at their maximum rated temperature. If your amp is thirty years old, those caps are likely dried out, leading to increased hum and a loss of punchy transients. Keep your gear ventilated; remember why your amplifier gets hot enough to burn your hand when it is shoved into a tight cabinet without airflow. Physical distance matters too, specifically why your phono preamp needs to be far away from the power amp to avoid picking up electromagnetic interference from the transformer. Looking ahead, I see a world where the manual battery trick becomes a nostalgic memory. We are already seeing why your smart speaker is actually listening to your room acoustics to perform digital phase correction and time alignment. In the coming years, even entry-level receivers will likely use built-in DSP to detect and flip the phase of an incorrectly wired speaker automatically using ultrasonic pings. For now, take ten minutes this weekend to perform a ‘resistance sweep’ on your speakers with a digital multimeter. It is the single best way to ensure your drivers are actually healthy and matched across your soundstage. This proactive maintenance prevents the dreaded scenario why your surround sound receiver keeps clicking into protect mode during the middle of a movie. While you are at it, check your cable runs. Knowing 4 ways to hide speaker wires in a rental apartment without drilling can prevent someone from tripping and yanking those freshly tested terminals right out of the cabinet.I remember finishing my first DIY car audio install, sweating in the driveway after four hours of pulling panels. I turned the key, cranked the volume, and it sounded thin. Empty. I’d spent a fortune on gear, but the music lacked that thump I was craving. It felt like I was listening to the music through a tin can. I checked every connection and wondered why your car speakers crackle when you turn the volume up, thinking maybe I’d blown something. Then my neighbor, a retired sound engineer, walked over with a 9V battery and a grin. He showed me that I’d accidentally swapped the wires on one side. The speakers were fighting each other. One was pushing air out while the other was sucking it in, effectively canceling out my bass. Today, I am going to show you this exact battery trick so you never have to guess which wire is positive and which is negative again. [image_placeholder]
Stop Guessing Which Wire is Which
When you are dealing with old vintage gear or wires that aren’t clearly marked, it is easy to get things backwards. This leads to what we call out of phase audio. It is one of those 3 budget upgrades that is not really an upgrade—it is just fixing a basic mistake that makes cheap speakers sound expensive when done right. I once made the mistake of assuming the wire with the white stripe was always positive. Spoiler alert: it is not always the case. Using a battery is the best way to test speakers at a garage sale without an amp because it gives you a physical, visual confirmation of the driver’s movement. According to research published by the Audio Engineering Society (AES) on loudspeaker phase response, even a single inverted driver in a multi-speaker array can lead to a 6-10dB drop in mid-bass frequencies, essentially gutting the soul of your music.
Is sticking a battery on your speakers actually safe?
I get it. You do not want to fry your precious drivers. But we are talking about a tiny amount of DC current for a split second. It is significantly safer than guessing and running your system out of phase for weeks, which can lead to fatigue or thinking you need a new amp. Have you ever spent hours wiring a system only to realize the sweet spot is completely missing? Leave a comment if you have ever felt that frustration. It is time to stop the guessing game and use a bit of physics to get your soundstage back where it belongs.
Get Your Wires Ready for the Pop Test
First, you need access to the bare ends of the speaker wires. If the terminals are looking a bit corroded or loose, you might want to learn how to repair a loose speaker terminal in under five minutes before proceeding. I remember a time I found a pair of floor-standing speakers at a thrift shop; the back labels were completely peeled off. I didn’t want to risk my home receiver until I knew what I was dealing with. This is exactly the best way to test speakers at a garage sale without an amp.
Identify the Movement
Take a standard 9V battery—the same kind you might worry about when researching why your car audio system drains your battery overnight—and hold it in one hand. Touch one speaker wire to the negative (-) terminal and briefly tap the other wire to the positive (+) terminal. You aren’t trying to power the speaker; you are just looking for a “pop.” If the speaker cone jumps outward (towards you), then the wire touching the positive terminal is your positive lead. If the cone sucks inward, you have the wires swapped.
Don’t Ignore a Frozen Driver
If you tap the battery and absolutely nothing happens—no sound, no movement—you might have a bigger issue on your hands. You should investigate how to fix a speaker driver that is frozen and wont move. This often happens with older gear where the voice coil has shifted or the internal glue has failed over decades of storage.
Why In-Phase Speakers Save Your Soundstage
When your speakers are “in phase,” they work like a synchronized team of rowers. They push and pull together, creating a unified wave of air that hits your ears with impact. When they are out of phase, one speaker creates a high-pressure wave while the other creates a low-pressure vacuum. This phase cancellation is a major reason why your car door vibration is ruining your mid-bass performance, as the lack of constructive interference makes the music sound hollow. It is a common DIY pitfall that can make even high-end gear sound thin.
Handle Multi-Driver Cabinets with Care
In cabinets with multiple drivers, such as three-way speakers, you want to focus on the largest driver, the woofer. This is the one you will see move the most clearly with a 9V battery. Smaller tweeters move so little that the battery trick is harder to see and potentially riskier due to the high sensitivity of the voice coils. For those, relying on the manufacturer’s markings after confirming the woofer is usually the safest bet. Keeping your drivers aligned ensures the crossover functions correctly, preventing that boxy sound that plagues many unoptimized setups.While the battery trick solves the basic wiring puzzle, there is a massive misconception that haunts the audiophile world: the idea that exotic wiring can ‘fix’ a fundamental setup error. In my experience, people will drop a month’s salary on boutique cables when expensive speaker cables are mostly a marketing trick. If your speakers are fighting each other because of phase cancellation, no amount of silver-plated wire will bring the bass back. The real nuance lies in room interaction. I’ve seen enthusiasts blame their gear for a ‘thin’ sound, unaware that why your studio monitors sound boxy against a wall is often a matter of boundary interference rather than the equipment itself.
Does this battery trick work for active soundbars or Bluetooth speakers?
This is where things get tricky for the modern listener. You should never apply a battery directly to the input of an active speaker. Understanding the difference between active and passive speakers is crucial here; active systems have built-in amplifiers that won’t appreciate a DC voltage spike from a 9V battery. If your soundbar sounds off, it is more likely a software issue, which is why your soundbar needs a firmware update to fix audio drops or internal processing errors. The ‘Oops’ factor often comes from ignoring the heat. If you’ve wired your system incorrectly and are pushing high volumes to ‘compensate’ for the thin sound caused by phase issues, you might notice why your amplifier gets hot enough to burn your hand. This unnecessary strain can lead to premature component failure. Dr. Floyd Toole, a renowned expert in acoustics, emphasizes in his book ‘Sound Reproduction’ that while absolute polarity is debated, the relative phase between loudspeakers is non-negotiable for a stable stereo image. If you are still struggling with a muddy sound after checking your wires, try the simple rug trick that instantly improves your room acoustics. It’s a low-tech fix that yields high-tech results. Have you ever fallen into the trap of buying gear to fix a problem that was actually just a setup error? Let me know in the comments below.Once you’ve mastered the 9V battery pop test, you’ve graduated from ‘guessing’ to ‘knowing.’ But knowing the phase is only the first step in a long-term relationship with your audio gear. If the pop test is weak or inconsistent, you might be facing a degrading voice coil rather than just a simple wiring issue. This is where I move from the battery to a digital multimeter. I use it to check the DC resistance of the driver directly at the terminals. If an 8-ohm speaker reads something incredibly low like 1.2 ohms, you don’t have a phase problem; you have a short. This is often how to tell if your headphones have a blown driver before you ever plug them into an expensive amp and risk a protection circuit trip. I also swear by a can of specialized contact cleaner like DeoxIT. It is the easy way to fix a scratchy volume slider on your radio without taking the whole unit to a professional repair shop. If you notice a physical vibration while testing the low-end frequencies, you might need to look at how to fix a rattling speaker grill with a simple rubber band to stop unwanted resonance from masking your true audio quality.
How do I maintain my home audio system over time?
Consistency is more important than expensive upgrades. Dust and heat are the silent killers of high-fidelity sound. If you are running a classic setup, you need to know how to tell if your vintage amplifier needs new capacitors. According to Douglas Self in his ‘Audio Power Amplifier Design Handbook,’ electrolytic capacitors have a finite lifespan, often limited to a few thousand hours at their maximum rated temperature. If your amp is thirty years old, those caps are likely dried out, leading to increased hum and a loss of punchy transients. Keep your gear ventilated; remember why your amplifier gets hot enough to burn your hand when it is shoved into a tight cabinet without airflow. Physical distance matters too, specifically why your phono preamp needs to be far away from the power amp to avoid picking up electromagnetic interference from the transformer. Looking ahead, I see a world where the manual battery trick becomes a nostalgic memory. We are already seeing why your smart speaker is actually listening to your room acoustics to perform digital phase correction and time alignment. In the coming years, even entry-level receivers will likely use built-in DSP to detect and flip the phase of an incorrectly wired speaker automatically using ultrasonic pings. For now, take ten minutes this weekend to perform a ‘resistance sweep’ on your speakers with a digital multimeter. It is the single best way to ensure your drivers are actually healthy and matched across your soundstage. This proactive maintenance prevents the dreaded scenario why your surround sound receiver keeps clicking into protect mode during the middle of a movie. While you are at it, check your cable runs. Knowing 4 ways to hide speaker wires in a rental apartment without drilling can prevent someone from tripping and yanking those freshly tested terminals right out of the cabinet.
Why Precision Beats Expensive Gear Every Time
I once spent an entire weekend chasing a dead channel only to realize a speck of dust was causing a short in a terminal. It taught me that audio troubleshooting is often about the small, unglamorous details rather than the big equipment. First, never assume a new cable is a working cable; check it with a meter before routing it through a wall. Second, if you are working with vinyl, knowing how to properly ground your turntable to stop that buzzing noise is just as important as getting your speaker phase correct. Third, trust your ears over the marketing; the truth about gold-plated audio connectors for home stereos is that they cannot compensate for a system that is physically wired out of sync.
The Gear I Never Leave Behind for a Weekend Project
Beyond the trusty 9V battery, I always have a few staples in my bag when I am helping friends or digging through thrift shops. A digital multimeter is my primary tool for identifying if the reason your subwoofer makes a humming sound when nothing is playing is a grounding loop or a more serious internal component failure. I also suggest keeping a steady hand and a vacuum handy, because knowing how to safely remove a pushed-in speaker dust cap is an essential skill for any restorative work. For those looking to expand their system, understanding the best way to test a used receiver before you buy it is the ultimate shield against a bad investment. Finally, I highly recommend picking up a copy of Floyd Toole’s Sound Reproduction for a deep dive into why we hear what we hear.
It is Time to Hear What You Have Been Missing
Proper speaker testing is not just about avoiding technical damage; it is about finally unlocking the high-fidelity performance you already paid for. When those drivers move in unison, the music stops being a collection of separate sounds and starts being a cohesive, emotional experience. Go grab that battery and give your current setup the check-up it deserves. Did the battery trick reveal any out-of-phase surprises in your home or car setup? Let me know your results in the comments below!”,”image”:{“imagePrompt”:”A macro shot of a 9V battery being held against two bare speaker wires connected to a large woofer, with the cone visibly pushed outward and a clear focus on the positive and negative terminals.”,”imageTitle”:”Testing speaker polarity with a 9V battery”,”imageAlt”:”A close up photo of using a battery to find the positive speaker wire terminal”},”categoryId”:0,”postTime”:””}