
I’ll never forget the look on my wife’s face when I finally finished dialing in my new SVS Ultra. The room shook, the floorboards rattled, and the low-end was absolutely glorious. Then, she looked down. There it was: a thick, black, coiled RCA cable snaking its way across our cream-colored baseboards like a lost garden hose. It was a total eyesore. I tried to ignore it for a week, but after I nearly tripped and had to learn how to repair a loose speaker terminal in under five minutes because I yanked the wire too hard, I knew I had to act. My living room looked like a construction zone rather than a sanctuary for sound.
Stop Looking at That Ugly Black Wire
Let’s be real. We spend thousands on high-end drivers and amplifiers, but we often forget that the visual noise of a messy setup can ruin the whole experience. If you’ve spent time figuring out the best way to position your subwoofer for clearer lows, you’ve likely realized that the ideal spot for sound is rarely the most convenient spot for your wiring. My first attempt at a fix was a total disaster—I used clear packing tape to secure the wire to the trim. Not only did it look cheap, but it also took the paint right off the wood when I tried to adjust it a month later. It was a classic rookie mistake that I’m still paying for today in touch-up paint. Today, I’m going to share the secrets I’ve learned for tucking those bulky cables away so they’re practically invisible, without ruining your drywall or your marriage.
Can’t I Just Buy a Wireless Subwoofer Adapter Instead?
It’s a fair question. Why deal with the headache of physical wires when 2.4GHz transmitters exist? While those are great for casual listening, any true bass-head knows that a physical connection is still king for zero-latency performance and avoiding the interference that plagues wireless signals. In fact, research cited by Electronic House suggests that poor cable management remains one of the top three reasons homeowners hesitate to install dedicated home theaters. We want the power, but we don’t want the clutter. Have you ever looked at your setup and felt like the wires were winning the battle against your decor? If so, you aren’t alone. Sometimes the solution is as simple as the best way to run speaker wire under your rug, but when you’re dealing with the stiff, heavily shielded cables that subwoofers require, you need a strategy specifically designed for baseboard runs. Let’s look at the actual hardware that makes this happen.
Use D-Line or Go Home
When it comes to hard floors, you have to decide if you are going to let the wire win or if you are going to take control of the aesthetics. I recommend using D-Line raceways. These are essentially half-round PVC tubes with an adhesive backing that sit flush against your existing baseboard. I remember a project in my first apartment where I tried to use those little plastic nail-in clips. I ended up with twenty tiny holes in my rental’s trim and a cable that still looked like a tangled mess. It was a disaster. Switching to a raceway was a game-changer because you can paint it. When you match the raceway color to your baseboard, it doesn’t just hide the wire; it becomes part of the architecture. Just be aware that taking the long way around a room increases the distance your signal has to travel, and why cheap speaker wire causes signal loss over 50 feet is a very real factor to consider if your subwoofer is on the opposite wall of your receiver.
The Gap Method for Carpeted Rooms
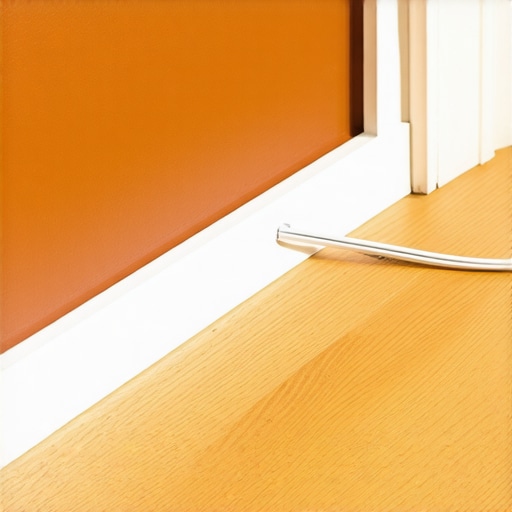
If your room is carpeted, you have a secret weapon: the tack strip gap. Most baseboards are installed with a tiny 1/4 inch gap between the wood and the floor to allow for carpet tucking. You can often slide a standard RCA cable right into this void using nothing but your fingers or a plastic shim. I once spent an entire Saturday morning trying to force a thick, high-end cable into a gap that was far too tight using a metal flathead screwdriver. I ended up stripping the outer jacket of the cable and had to start over. If you feel resistance, stop. A damaged cable can lead to ground loops, and understanding why your subwoofer makes a humming sound even when off often starts with checking if your cable’s shielding was compromised during a rough installation. Always use a plastic tool to tuck the wire to avoid any accidental cuts to the insulation.
Will an XLR Cable Solve Your Noise Problems?
If you are running a cable longer than 15 feet, you might start picking up interference from the electrical wires buried inside your walls. This is where hardware choice becomes critical. While most home theater subs use standard RCA, the real performance benefit of using balanced XLR cables is their ability to cancel out noise over long distances. If your equipment supports it, XLR is the gold standard for long baseboard runs. If you’re stuck with RCA, try to ensure your cable is ‘double shielded.’ It’s like wearing a heavy coat in a storm; the better the shielding, the less likely your signal will be drowned out by the ‘weather’ of nearby power cords. You might wonder is gold plated hardware really worth the extra cash in this scenario, and the truth is that it helps more with preventing corrosion in humid environments than it does with blocking interference, so focus on the shielding first.
The Secret to Seamless Corners
The hardest part of any baseboard run is the corner. Cables have a ‘minimum bend radius,’ which is just a fancy way of saying they don’t like being folded like a piece of paper. If you force a 90-degree kink into your subwoofer cable, you risk damaging the internal copper strands. When I’m installing raceways, I always use pre-cut corner pieces that provide a gentle curve inside the joint. This keeps the signal path clean and ensures the cable doesn’t pop the raceway off the wall from the internal tension. If you’re doing a DIY tuck without a raceway, leave a tiny bit of slack at the corner rather than pulling it tight. It’s better to have a slightly visible loop than a broken wire that requires you to tear up your whole setup just to find the short.
A common trap that even seasoned audiophiles fall into is the ‘thicker is better’ myth. We see those massive, garden-hose-sized RCA cables and assume they must be superior because of the shielding. However, in my experience, the stiffest cables are the worst enemies of a clean baseboard run. If the cable is so rigid that it puts constant pressure on your sub’s input, you’re eventually going to be looking for how to repair a loose speaker terminal in under five minutes. The real nuance isn’t the thickness of the copper; it’s the quality of the geometry and the flexibility of the jacket. You want a cable that can hug the corner of your trim without acting like a spring that wants to jump out of the raceway.
Stop Running Your Signal Parallel to the Power
Here is the ‘oops’ factor that ruins more DIY home theaters than anything else: running your subwoofer cable directly alongside your power cables inside the same baseboard channel. This creates an electromagnetic ‘field’ that induces a 60Hz hum into your audio path. Bill Whitlock, a renowned expert cited by the Audio Engineering Society (AES), has extensively documented how magnetic coupling between AC lines and unbalanced cables is the primary culprit for system noise. If you must cross a power cord, do it at a 90-degree angle. This tiny adjustment can be the difference between a silent background and a constant, annoying buzz that makes you wonder why your subwoofer makes a humming sound even when off.
Is Your Long Cable Run Secretly Choking Your Amp?
When you start tucking 30 or 40 feet of cable behind a baseboard to reach the back of the room, you aren’t just hiding a wire; you are increasing the resistance of the circuit. While line-level subwoofer signals are less sensitive to this than speaker-level signals, the principle remains: distance is the enemy. If you’re also running wires for your surrounds, you might find why your bookshelf speakers need more power than you think becomes a glaring issue as the voltage drops over the distance. Always check how to tell if your amplifier has enough headroom for your speakers before committing to a massive room-scale layout. A weak signal over a long distance forces you to crank the gain, which can lead to clipping or even explain the real reason your amp is getting hot to the touch as it struggles to maintain clarity through the resistance.
The Secret Polarity Check You Probably Skipped
After you’ve successfully tucked the wire and everything looks beautiful, there’s one more advanced step. Moving your subwoofer to a new location often changes how it interacts with your main speakers. If your bass feels ‘hollow’ despite the clean installation, you might have a phase issue. You can actually how to use a 9v battery to check your speaker polarity on your passive components to ensure everything is moving in the same direction. For active subs, simply toggling the 0/180-degree switch can fix what you thought was a ‘bad cable’ problem. Don’t be fooled by marketing gimmicks, either; while we often debate if is gold plated hardware really worth the extra cash, the truth is that the physical integrity of the connection matters far more than the color of the metal. Have you ever fallen into the trap of spending hours hiding a wire only to realize the sound quality actually got worse? Let me know in the comments.
Don’t Let Your Connections Rot in Silence
Once you’ve successfully tucked those wires behind the baseboards, it’s easy to adopt a ‘set it and forget it’ mentality. That’s a mistake. Over time, humidity and heat cause a slow degradation that most people don’t notice until their system starts sounding dull. I make it a habit to pull my gear out once every six months to check for oxidation. If you see a dull film or, worse, that dreaded fuzzy residue, you need to learn how to clean green oxidization off your copper speaker terminals immediately. I personally swear by DeoxIT D5; it’s a contact cleaner that doesn’t just wash away the grime but leaves a microscopic protective layer to prevent future corrosion. It’s the difference between a connection that lasts three years and one that stays pristine for thirty.
How do I maintain my home theater gear over the long haul?
Maintenance isn’t just about the electronics; it’s about the physical materials. If you have vintage speakers or even modern high-end drivers, the rubber surrounds on the woofers can become dry and brittle. I’ve seen $2,000 monitors ruined because the owner used a harsh household cleaner on them. Knowing how to clean sticky speaker surrounds without damaging the rubber is a foundational skill for any enthusiast. Additionally, as your system ages, you should perform periodic ‘health checks’ with a frequency sweep. Listen for any rattling or distortion in the high frequencies, as learning how to spot a blown tweeter before it ruins your crossover can save you from a much more expensive repair bill down the road. According to Dr. Floyd Toole in his seminal work Sound Reproduction, even the best-engineered systems are subject to the ‘entropy of the listening room,’ where small physical changes in the equipment significantly alter the intended frequency response.

The Essential Toolkit for Any Serious Audiophile
If you’re serious about this hobby, you need more than just a screwdriver. My ‘go-kit’ always includes a digital multimeter, a label maker, and a pack of Velcro cable ties—never use plastic zip ties on signal cables, as they can pinch the dielectric and mess with the impedance. I use the multimeter to check for continuity whenever I’m troubleshooting a dead channel. It’s also the only way to accurately determine how to tell if your amplifier has enough headroom for your speakers by measuring the actual voltage output during peaks. Labeling both ends of your long baseboard runs is another pro tip I learned the hard way. There is nothing more frustrating than having four identical black cables emerging from the wall and having no idea which one goes to the sub and which one goes to the rear surrounds.
The Future of Hiding Wires is No Wires at All
We are currently on the cusp of a major shift in how we handle audio data. While I currently advocate for physical cables for subwoofers due to reliability, the rise of the WiSA (Wireless Speaker and Audio) standard is quickly closing the performance gap. In the next five to ten years, I predict that even high-end home theaters will move away from physical baseboard runs entirely, opting for high-bandwidth, uncompressed wireless protocols that operate on the 5GHz spectrum to avoid interference. Until then, your best bet is a clean, well-maintained physical install. My challenge to you this weekend: don’t just hide your wires—clean your terminals and recalibrate your phase. You’ll be surprised at how much ‘free’ performance you can unlock just by refreshing your connections.
Three Hard Truths About Long Cable Runs
Over the years, I’ve realized that the ‘perfect’ setup is never truly finished; it’s maintained. One lightbulb moment for me was realizing that cable tension is the silent killer of equipment. If your baseboard run is too tight, it pulls on the RCA jack, which is exactly how people end up needing to know how to repair a loose speaker terminal in under five minutes. Another hard truth? Labeling is your best friend. When you have multiple runs for your theater, and you’re trying to identify which wire goes to the back left, you’ll wish you had a simple piece of tape on each end. Finally, remember that while you’re hiding the wire, you might be changing the acoustics. If the new wire route moves your sub even six inches, you should re-evaluate the best way to position your subwoofer for clearer lows to ensure you haven’t hit a room null.
What’s Inside My Cable Management Box
I don’t start any home theater project without a specific set of tools that I’ve curated over the last decade. My must-haves include a plastic pry tool for carpet tucking, high-quality Velcro ties, and a digital multimeter. I use the multimeter specifically to check how to tell if your amplifier has enough headroom for your speakers after a long cable run. I also suggest keeping an eye out for cable management accessories and even high-end wiring when finding legitimate high-end gear at local thrift stores; you’d be amazed at the quality of cabling people throw away simply because they don’t know what they have. #IMAGE_PLACEHOLDER_E# If you’re looking to improve your overall sound while you’re at it, check out these 3 budget upgrades that make cheap speakers sound expensive.
It’s Time to Reclaim Your Living Room
You’ve spent the time researching and the money buying the best drivers, so don’t let a messy installation detract from the joy of your home theater. Taking that extra hour to hide your subwoofer cables properly doesn’t just make the room look better—it protects your investment and creates a sanctuary where you can focus on the music or the movie, not the clutter. Your home theater should be a source of pride, not a tripping hazard. Once you’ve mastered the sub, you might even consider the best way to position rear speakers for a 5.1 system to complete the transformation. Have you ever started a cable management project and realized midway that you didn’t have enough wire? Let me know in the comments below!