
I’ll never forget the sinking feeling in my gut when my “mint condition” thrift store find started wailing like a tired accordion. I’d spent all morning finding high-quality vinyl records at thrift shops, only to have my turntable give up the ghost three songs in. It wasn’t a dead motor or a fried circuit. It was that thin, pathetic strip of black rubber—the belt—stretched out and tired. It was slipping, sliding, and ruining my afternoon. If you are hearing that dreaded pitch drop, don’t panic. You don’t need a degree in electrical engineering to fix this. We are going to get that platter spinning at a perfect 33 and 1/3 RPM again without spending a fortune.
Stop the Slur and Get Your Platter Back Up to Speed
The reality is that most vintage belt-drive systems suffer from the same inevitable fate: physics. Rubber degrades. It loses its “snap.” When that happens, the reason your turntable speed keeps drifting mid-record is almost always a lack of friction between the motor pulley and the platter. I made a massive mistake when I first started out by trying to “refresh” an old belt with hairspray to make it tacky. It worked for ten minutes before it turned into a sticky, black sludge that took me two hours to clean off the motor. Don’t be like younger me. Sometimes, you might even think the stylus is the problem, but if your record player skips whenever someone walks by, that’s an isolation issue—speed is strictly a belt and motor dance.
Is this old gear even worth the headache anymore?
You might be tempted to toss the whole weight of that vintage deck and buy a cheap plastic unit from a big-box store. Resist that urge. While vinyl records skip when you walk near the turntable on poorly isolated floors, these vintage heavyweights usually have better tonearms and motors than anything you’ll find for under $200 today. Plus, the RIAA reports in their recent industry data that vinyl revenue grew significantly last year, proving that the hardware is worth the investment. Keeping these machines alive isn’t just about nostalgia; it’s about preserving a superior way to listen to music. Today, I’m going to show you how to clean the path, check the tension, and decide if you need a replacement or just a little bit of elbow grease. Have you ever had a perfectly good listening session ruined by a turntable that sounds like it’s running on a dying battery? I want to hear about your garage sale nightmares.
Pull the Platter Without Breaking the Spindle
The first hurdle is getting under the hood. Most people assume the platter is permanently attached, but on a belt-drive system, it is designed to come off easily. Remove the rubber mat first, and you will likely see two large access holes in the platter itself. Rotate it until you can see the brass motor pulley through one of those holes. If the platter doesn’t just lift off, check for a small C-clip securing it to the center spindle. I once spent twenty minutes yanking on a vintage Pioneer only to realize a tiny metal ring was holding the whole thing hostage. Once that clip is off, lift with equal pressure on both sides. If it’s stuck, a gentle tap on the spindle with the handle of a screwdriver while pulling upward usually breaks the tension of decades of stasis.
Scrub the Path for Maximum Grip
Once the platter is off, you’ll see the motor pulley—that small metal cap that spins when you hit start—and the inner rim where the belt actually rides. This is where the magic (and the mess) happens. You need to clean every surface that the rubber touches. I use 91% isopropyl alcohol and a lint-free cloth. If you’ve ever wondered why your record player speeds up and slows down randomly, the culprit is often a microscopic layer of oil from your skin or old, liquefied rubber on these surfaces. Scrub the motor pulley until your Q-tip comes away white. Then, move to the inner rim of the platter. Treat this with the same care you would when you clean sticky speaker surrounds without damaging the rubber; you want to remove the grime without scratching the metal surface. 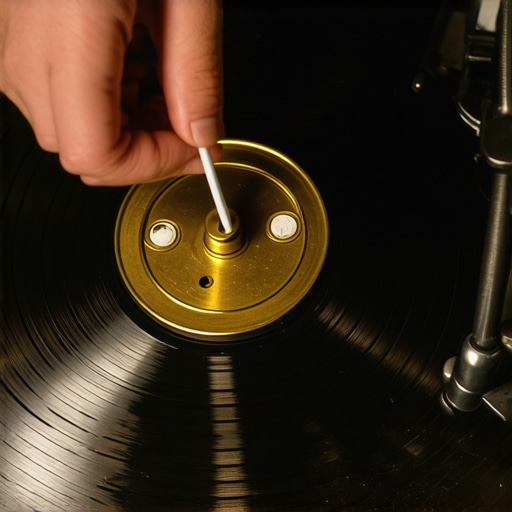
The Stretch Test: Is It Trash or Just Tired?
Hold your old belt up. If it looks like a limp noodle or has visible cracks when you stretch it, it’s done. A healthy belt should have a bit of ‘snap’ and return to its original shape immediately. I’ve seen belts that looked fine but had actually stretched by just half an inch—enough to cause the pitch to sag like a melting ice cream cone. If you are replacing it, make sure you buy the specific width for your model. A belt that is too wide will rub against the speed-change fork, causing a mechanical scraping sound that ruins the noise floor.
Reinstall the Loop and Check the Timing
When you put the new belt on, stretch it around the inner hub of the platter first. Use one of the access holes to hold the belt with your finger, then lower the platter back onto the spindle. Carefully guide the belt over the motor pulley. Before you put the mat back on, spin the platter by hand a few times to ensure the belt is centered and not twisted. A single twist will create a rhythmic ‘thump’ in your audio. Once it’s spinning smoothly, you might want to connect your old record player to a new soundbar or your main hi-fi to test a familiar track. While you are at it, ensure your phono preamp needs to be far away from the power amp to prevent any electrical interference from masking the speed stability you just fought so hard to reclaim. If the vocals sound steady and the piano notes don’t flutter, you’ve won the battle against physics.Now that your platter is spinning true, let’s look at the hidden hurdles that usually trip up people who have just graduated from entry-level gear. There is a persistent myth in the audiophile community that buying gold-plated everything is the silver bullet for clarity. In my shop, I see people spend hundreds on fancy leads while their turntable sits right next to a vibrating washing machine. The reality is that is gold-plated hardware really worth the extra cash? Usually, the answer is no. If your connectors aren’t oxidized, you are far better off spending that money on a better cartridge or a dedicated isolation platform. One massive “oops” factor I see constantly involves power management. I have had clients complain about muddy sound and speed instability, only to find they are running their 100-watt receiver off a flimsy, 15-foot daisy-chained cord. This is a huge trap because why you should avoid using an extension cord for your power amp comes down to voltage sag and electrical noise that can manifest as a lack of dynamic punch and timing errors.
Why Shiny Gold Connectors Won’t Save Your Sound
Many enthusiasts believe that if a connection is shiny, it is better. While gold doesn’t corrode, it is actually less conductive than copper or silver. The obsession with high-end interconnects often masks the real issues of signal loss over long distances. If you are noticing a drop in clarity, check your wire runs; why cheap speaker wire causes signal loss over 50 feet is a far more common problem than the material of your RCA plugs. Focus on the integrity of the signal path rather than the marketing fluff of the connectors.
Does Your Power Outlet Influence the Rhythm of the Record?
It might sound like snake oil, but high-frequency noise on your home’s electrical line can actually mess with the sensitive timing of some AC motors. According to research by the IEEE (Institute of Electrical and Electronics Engineers), transient voltage surges and electromagnetic interference in residential circuits can degrade the performance of sensitive analog equipment. This is why you might notice your speed stability feels more consistent late at night when your neighbor’s heavy appliances aren’t cycling on and off. If you’ve been wondering why your record player speeds up and slows down randomly, it might not be the belt at all; it could be “dirty” power or a failing capacitor in the motor’s power supply circuit. 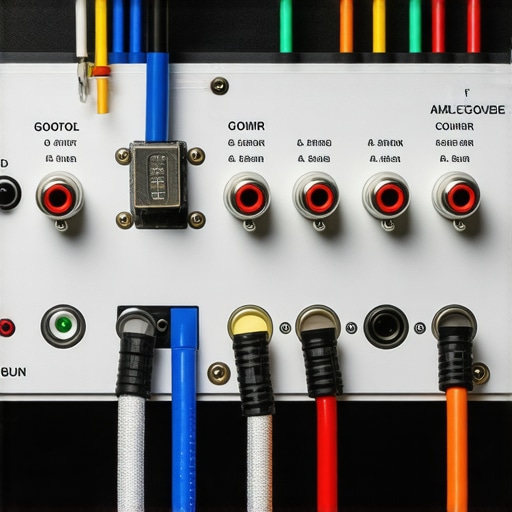
Stop Letting Your Floor Eat the Bass
Beyond power, where you put things matters more than what you spent. Many folks buy a beautiful set of towers and shove them into the corners or right against the baseboards to save space. You absolutely have to stop placing your speakers directly on the floor for better bass because the boundary reinforcement creates a boomy, undefined mess that masks the mid-range. If you are dealing with a compact setup, remember that why your bookshelf speakers need more power than you think is often due to their lower sensitivity compared to massive floor-standers. They need more “juice” to move that air effectively, and if you starve them with a weak amp, you lose the very detail you were trying to preserve. Have you ever fallen into the trap of buying premium cables only to find the problem was just a vibrating floor or a bad power strip? Let me know in the comments.If you really want to protect your investment, you need more than just a microfiber cloth. I keep a can of DeoxIT D5 on my workbench at all times because it doesn’t just clean; it chemically improves the connection. I’ve seen systems that sounded ‘thin’ or ‘scratchy’ instantly come back to life once I managed to clean green oxidization off your copper speaker terminals. It’s that invisible barrier of non-conductive crust that ruins the damping factor of your amp. If you notice a weird ‘pop’ when you touch your volume knob, it’s not the ghost of Jimi Hendrix; it’s just dirt in the potentiometer. 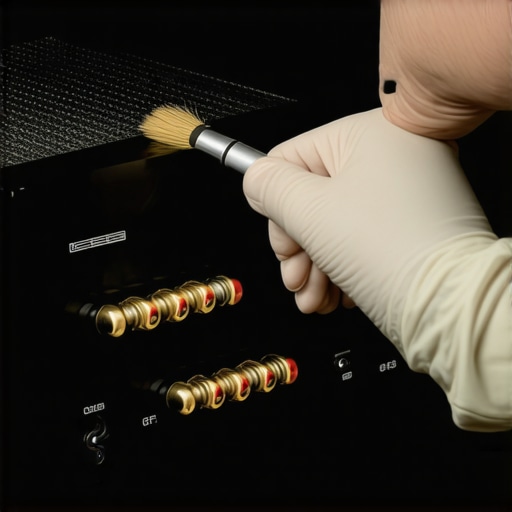
How do I keep my audio gear running for decades?
Maintenance isn’t just about cleaning the outside. It’s about monitoring the electrical health. Every six months, I do a full sweep. I’ll use a 9V battery to check your speaker polarity just to make sure a cable hasn’t been swapped during a cleaning session. If your woofers are moving in opposite directions, your bass will cancel out, and you’ll waste hours chasing a ‘broken’ amp that is actually fine. If you find a connection that feels wobbly, don’t ignore it. You can usually repair a loose speaker terminal in under five minutes with a simple soldering iron. As legendary amplifier designer Nelson Pass often notes in his technical papers, thermal management is the biggest killer of high-end components. Make sure your gear has at least three inches of breathing room, or you’re literally baking the life out of your capacitors.
Scale Up Without Breaking the Bank
You don’t need to buy a $5,000 streamer to get into high-resolution audio. In fact, one of my favorite ‘hacks’ is to use an old smartphone as a high-res music streamer by connecting it to an external DAC. It’s a dedicated, low-noise way to feed your amp without the interruptions of your daily notifications. As you grow your system, you might start looking at pro-level gear. I often get asked if there is a real performance benefit of using balanced XLR cables. For home setups with short runs, it’s debatable, but if you’re running lines near power transformers, that noise rejection is a lifesaver. Looking forward, the next big shift is AI-driven room correction. We are moving toward a world where your speakers will use machine learning to adapt to your specific room geometry in real-time. My advice? Grab a basic calibration mic like a UMIK-1 now and start learning Room EQ Wizard (REW). It’s the single most effective way to see exactly what your room is doing to your sound. Go check your speaker terminals right now—if they aren’t shiny, get cleaning.
Lessons Learned From a Decade of Rescuing Vintage Decks
After years of tinkering, I’ve realized that most ‘broken’ gear is actually just dirty or misaligned. It is easy to assume the motor is dead when the belt is simply tired, but it is even easier to ignore the room itself. If your listening space feels hollow or muddy, learning how to fix the annoying echo in your minimalist home theater is just as important as the hardware. I have also found that if you are wondering why your headphones sound slightly different in each ear, it’s often a sign that your balance pots or speaker terminals need the same deep cleaning we gave that motor pulley.
Tools That Saved My Sanity More Than Once
I never start a vintage restoration project without a few specific items in my workspace. Beyond the basic isopropyl alcohol, you need to know how to spot a blown tweeter before it ruins your crossover, which makes a simple multimeter a non-negotiable part of my kit. For those diving into the world of old-school cabinets, the trick to making vintage speakers sound modern again usually involves a simple capacitor swap in the crossover. If you are just starting out and need a reliable way to test your sources, I always recommend keeping the $50 amp that drives high impedance cans without a struggle on your bench as a known-good reference point.
#IMAGE_PLACEHOLDER_E#
Your Music Deserves This Kind of Attention
Getting your turntable speed back to a perfect 33 and 1/3 RPM is a rite of passage for any vinyl enthusiast. It connects you to the mechanical soul of the medium and ensures you are hearing the artist exactly as intended. Once the platter is spinning true, don’t forget to dial in the rest of the room by mastering the best way to position your subwoofer for clearer lows. This hobby is a marathon of small adjustments that eventually lead to a breathtaking wall of sound. Have you ever managed to resurrect a ‘dead’ turntable with a simple belt or cleaning fix? Let me know your success story in the comments below.