
I was standing in the middle of my living room, clutching a pair of rear speakers like they were orphaned puppies. My wife looked at me, then at the thirty-foot expanse of open kitchen behind our sofa, and asked, ‘Where exactly do you think those are going?’ I didn’t have an answer. I had already spent hours researching the best way to position rear speakers for a 5.1 system, but every diagram I found showed a perfect rectangular room with solid walls. I felt like a fool who had bought a Ferrari for a gravel road. The dream of hearing a T-Rex stomp behind me seemed dead until I realized that walls are just a suggestion, not a requirement. Today, we are going to fix your layout once and for all. Whether you have a massive open-concept home or a glass-walled condo, you don’t have to settle for just a front soundstage. My biggest mistake when I started was thinking I had to mount everything at ear level on a flat surface. I ended up with wires trailing across the floor like a tripwire trap. If you’ve ever wondered why cheap speaker wire causes signal loss over 50 feet, it’s usually because we’re trying to route cable all the way around a room just to avoid the open space in the middle. We are going to solve the placement, the wiring, and the spouse-approval factor in one go.
The Day I Almost Gave Up on Surround Sound
The frustration of an open-concept house is real. When I moved into my current place, the theater area was basically just a rug in a sea of hardwood and windows. I tried sticking my rears on the side walls, but the sound was lopsided and pulled my attention away from the screen. It was distracting. I spent three hours on my hands and knees with a tape measure, getting angrier with every inch. I was trying to find a way to justify running a wire across a high-traffic walkway. If you’ve ever dealt with a situation where your soundbar sounds tiny in a vaulted ceiling room, you know that large, open volumes of air can swallow your audio whole. I realized I needed a way to bring the speakers to the listener, rather than forcing the listener to find a wall. It was a lightbulb moment that changed how I view room acoustics forever. You don’t need a back wall to create a back soundstage; you just need the right hardware and a bit of courage to break traditional rules.
Stop Waiting for a Wall That Isn’t There
The reality is that your speakers don’t care about your drywall; they care about the air. According to a technical brief by Dolby Laboratories, the key to an immersive Atmos or 5.1 experience is the angle of the sound relative to your ears, not the mounting point itself. This means we can get creative. I used to think I needed a contractor to build a custom bulkhead just for my rears. Instead, I discovered that sleek stands or even ceiling drops could do the trick. You can even how to build your own speaker stands for under twenty dollars if you want a custom height that matches your couch perfectly and looks like a deliberate design choice. The goal is to create a localized bubble of sound that tricks your brain into thinking the room has boundaries it doesn’t actually have. Once you stop looking for a place to screw a bracket into and start looking for a place to rest a stand, your options explode.
Will My Living Room Look Like a Science Project?
This is the fear that keeps most people from even trying. We worry that without a wall to hide the speakers, we’ll end up with a cluttered mess of tech. I promise you, it is possible to have a high-end theater feel without the clutter. I have seen setups where the rears were integrated so well they looked like designer lamps. Have you ever looked at your open floor plan and just sighed in frustration? Let me know in the comments if you’ve been holding off on a 5.1 setup because of your layout. We’re going to dive into the specific mounting hardware and invisible wiring tricks that make this look professional next.
Map Your 110-Degree Arc on the Floor First
Instead of looking for a shelf or a wall, start by looking at your couch as the center of a clock face. Your front speakers are at 12 o’clock. For a true 5.1 experience, those rear speakers actually belong at 110 to 120 degrees—roughly at the 4 and 8 o’clock positions. When I first set mine up, I literally taped a piece of string to the center of my sofa and swung it around like a compass. It felt ridiculous, but it showed me exactly where the sound needed to originate. If you just guess, you’ll end up with a lopsided soundstage where the helicopter in your favorite action movie sounds like it’s crashing into your refrigerator instead of flying past your ear. Once you find these two spots on the floor, mark them with a tiny piece of painter’s tape. Don’t worry if they are in the middle of a walkway for now; we are going to fix the physical footprint next.
Stands Are the Walls You Didn’t Have
If you don’t have a wall, you have to bring the height to the speaker. This is where adjustable stands become your best friend. In my last setup, I tried using end tables, but they were too low, and the sound just hit the back of the sofa. You want the tweeters—those little speakers that handle the high-frequency sounds—to be about two feet above your ear level when seated. This prevents the person sitting next to you from blocking all the sound. If you’re on a budget, you can learn how to build your own speaker stands for under twenty dollars to get that perfect custom height without the ‘audiophile tax’ usually found at big-box stores. Using stands allows you to float the speakers exactly where the math says they should be, rather than where the architecture allows them to go.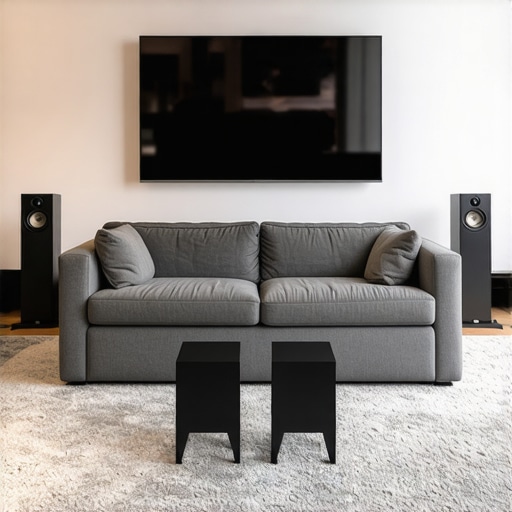
Run Cables Through the Dead Space Secretly
The biggest hurdle is the ‘cable snake’ crawling across your floor. In my house, I had to cross a ten-foot gap of hardwood. I used two tricks that kept me out of the doghouse with my wife. First, for the long stretches against the perimeter, I found that the best way to hide bulky subwoofer cables along a baseboard works just as well for rear channels if you use paintable cord channels. But for the open floor, you need a rug. I used a flat, adhesive-backed 14-gauge wire that is as thin as a piece of tape. Knowing the best way to run speaker wire under your rug involves keeping the runs parallel and avoiding high-traffic ‘pinch points’ where feet will constantly grind the copper into the floor. If you’re reusing old wire and aren’t sure which side is positive, you can always how to use a 9v battery to check your speaker polarity before you finish the tuck-and-hide process.
Correct for Your Room’s Appetite for Bass
In an open room, your speakers have to work harder because there are no walls to reflect the sound back to you. This often leads to a ‘thin’ sound. I remember cranking my volume to 70% and still feeling like the rears were missing their ‘thump.’ This is where your receiver’s calibration mic comes in. Don’t skip the auto-setup. The receiver will send pings to each speaker to calculate distance. Because your ‘rear’ wall might be twenty feet away in a kitchen, the receiver needs to know it shouldn’t wait for a reflection that’s never coming. If the sound still feels a bit hollow or echoey because of your hard floors and high ceilings, you might need to look into how to fix the annoying echo in your minimalist home theater by adding localized absorption like heavy curtains or acoustic panels behind the listening position.The biggest lie in the world of home audio is the ‘Total Power’ sticker plastered on the front of cheap boxes. We have all seen it: a budget receiver claiming 1,000 watts of earth-shaking power for under two hundred bucks. If you are trying to fill a massive, open-concept living room, you might think you need that high number to get the job done. However, this is where most beginners trip up. Those numbers are usually ‘Peak’ ratings, which are essentially a marketing fairy tale. You should be looking for the RMS rating, and more importantly, your speaker sensitivity. I have seen many enthusiasts fry their setups because they didn’t realize the difference between peak and rms power explained simply. They thought they had power to spare, but they were actually pushing their amplifiers into ‘clipping’ mode, sending distorted DC voltage straight to their expensive tweeters. In a room without walls to bounce sound back to you, your speakers have to work significantly harder, and that makes power management your number one priority.
Watts Don’t Tell the Whole Story
When you push a mid-range amplifier to its limits in a wide-open space, it generates a massive amount of internal heat. You might think the device is just working hard, but the real reason your amp is getting hot to the touch is often a lack of thermal headroom or an impedance mismatch. If your speakers are 4-ohm and your receiver is only rated for 8-ohm, you are essentially forcing the electronics to run a marathon in a sauna. According to research by Dr. Floyd Toole, a leading expert in acoustics and author of ‘Sound Reproduction,’ the way a speaker interacts with its boundaries—or lack thereof—drastically changes the necessary voltage swing from the amplifier. In an open floor plan, you lose roughly 6 decibels of sound pressure for every doubling of distance from the speaker. This means your amplifier has to work four times harder than it would in a smaller, enclosed room just to maintain the same perceived volume.
Stop Killing Your Amps with Extension Cords
One common ‘oops’ factor I see in open-concept homes involves the power source itself. Because your ‘floating’ speaker stands or couch-adjacent equipment might be ten feet away from the nearest wall outlet, the temptation to use a standard household extension cord is massive. This is a critical mistake. Most people don’t realize that why you should avoid using an extension cord for your power amp comes down to simple physics: voltage drop. A thin, unshielded cord can’t deliver the instantaneous current required for a deep bass hit. This starves your equipment, leads to muddy audio performance, and can even cause internal capacitors to fail prematurely. Have you ever fallen into this trap and wondered why your system sounded ‘choked’ during loud action scenes? Let me know in the comments.
Why Does Your Modern Receiver Struggle with High-Impedance Gear?
It is a common myth that any high-end receiver can handle any speaker or headphone you throw at it. This is a trap for those moving into more advanced territory. If you are using professional-grade, high-impedance speakers or headphones in your open-plan setup, you might notice the sound feels thin or lacks ‘punch.’ You need to understand how to tell if your amplifier has enough headroom for your speakers before you spend thousands on hardware that your receiver simply can’t drive. In these long-distance layouts, you might also find that the real performance benefit of using balanced xlr cables becomes obvious, as they reject the electromagnetic interference that common power lines in your open floor can introduce to your signal path.
Once you’ve wrestled with your amplifier’s headroom and managed to hide those cables under the rug, you might think the job is done. I certainly did. But three years later, my pristine open-concept setup started sounding ‘fuzzy’ around the edges. It wasn’t the equipment failing; it was the environment winning. In a large, high-traffic room, dust and humidity are your silent enemies. I noticed a weird film on my terminals and realized I needed a toolkit that went beyond just a screwdriver and a dream.
Why Your Connections Are Slowly Rotting Away
In an open floor plan, air circulation is much higher than in a dedicated media room, which means more oxygen and moisture hitting your metal contact points. I was shocked when I pulled my cables back and saw that dull, greenish tint on the copper. Learning how to clean green oxidization off your copper speaker terminals became a seasonal ritual for me. According to a technical paper by the Audio Engineering Society (AES) on ‘Contact Resistance and Audio Quality,’ even microscopic layers of oxidation can introduce non-linear distortion that muddies the high-end frequency response. I now use a specific 100% synthetic contact cleaner (like DeoxIT) every six months. It’s a five-minute job that brings back the ‘sparkle’ you didn’t even realize you’d lost.
Rescuing Your Gear From Pushed-in Dust Caps and Rips
Life happens in a living room. If you have kids or a curious cat, your beautiful speakers are essentially targets. I remember the heart-stopping moment I found my toddler poking the center of my woofers. If you find a dent, don’t panic; you can learn how to safely remove a pushed-in speaker dust cap using the vacuum hose or tape method before you consider a costly replacement. Even worse, sometimes the rubber around the edge gets brittle or sticky. I’ve had to figure out how to clean sticky speaker surrounds without damaging the rubber using nothing but a mild soapy solution and a microfiber cloth. And if a stray toy causes a tear, knowing how to fix a small rip in a speaker surround with glue can save a vintage driver from the landfill.
How do I keep my audio system sounding new for years?
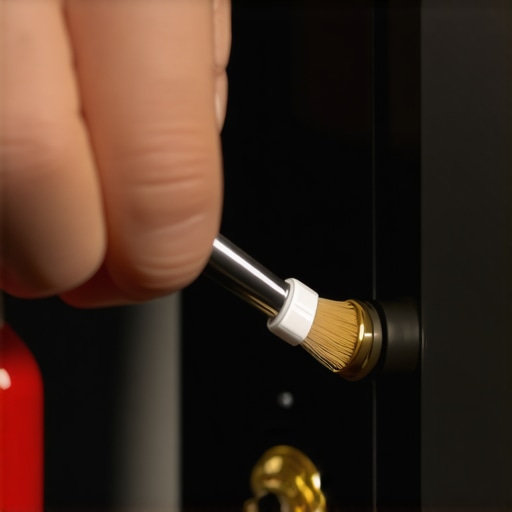
Maintenance isn’t just about fixing what’s broken; it’s about prevention. I’ve started using a high-quality horsehair brush as the trick to removing dog hair from speaker grilles safely without snagging the delicate fabric. Every time I vacuum the house, I give the amp vents a quick pass to ensure the airflow remains optimal. If you let dust cake onto the internal heat sinks, you’re inviting thermal shutdown. I also recommend checking your cable runs under the rug twice a year to ensure they aren’t being crushed. If you see the jacket flattening, it’s time to move the rug pad or reroute.
The End of the Cable Snake is Closer Than You Think
Looking ahead, the ‘open concept struggle’ is going to change drastically. We are moving toward a world where wireless power—not just wireless signal—is becoming a reality. Imagine speakers that pull power from the air or via transparent, micro-thin conductive films on your windows. For now, we rely on smart software. Future receivers will likely use AI-driven room correction that doesn’t just ping the room once, but constantly adjusts the EQ in real-time as people move through the space, effectively ‘sculpting’ the sound around moving obstacles. If you haven’t done it yet, I challenge you to go to your receiver right now and re-run your auto-calibration. You’d be amazed at how much your furniture shifting an inch here and there has changed your soundstage since you first set it up.
Once you have wrestled with your amplifier’s headroom and managed to hide those cables under the rug, you might think the job is done. I certainly did. But three years later, my pristine open-concept setup started sounding ‘fuzzy’ around the edges. It wasn’t the equipment failing; it was the environment winning. In a large, high-traffic room, dust and humidity are your silent enemies.
Secrets the Floor Plan Won’t Tell You
If there is one thing I’ve learned, it’s that your ears don’t read architectural blueprints. I spent years trying to make my setup look like a factory manual, but I eventually realized that a slight tilt of a stand or a strategically placed rug mattered more than a ‘perfect’ wall mount. You have to trust what you hear more than what you see on a diagram. Also, remember that your room’s furniture acts as a natural diffuser; don’t be afraid to move a bookshelf if it helps how to fix the annoying echo in your minimalist home theater. Finally, never underestimate the power of a small physical tweak. Sometimes the easiest way to fix a rattling speaker grill for good is just a bit of dampening tape, rather than buying expensive new drivers.
Hardware I Keep in My Toolbox
For those who want to get serious about their audio environment, I highly recommend picking up a copy of ‘Sound Reproduction’ by Dr. Floyd Toole. It is the absolute bible of acoustics. I also never start a project without my ‘wire-stealth’ kit: paintable cord channels for the baseboards and flat adhesive wire for the floors. If you find yourself needing to span a huge room, remember why cheap speaker wire causes signal loss over 50 feet and opt for 12-gauge or 14-gauge oxygen-free copper. And for the final touches under the carpet, mastering the best way to run speaker wire under your rug will keep your setup looking like a professional install rather than a DIY hazard.
#IMAGE_PLACEHOLDER_E#
Build the Soundstage Your Room Deserves
Your home is meant to be lived in, and your theater system should enhance that life, not complicate it. Don’t let an open floor plan or a lack of walls stop you from achieving cinematic immersion. When you finally implement the best way to position rear speakers for a 5.1 system in your specific space, the rewards—the way a soundtrack wraps around you during a late-night movie—make every hour of cable-hiding and stand-building worth it. Did you finally manage to hide those wires, or is your cat still using them as a chew toy? Let me know your setup success stories in the comments!