
The first time I walked into my new living room with its twenty-foot vaulted ceilings, I felt like a king. Then I turned on the TV. My $800 soundbar—the one that shook my old apartment—sounded like a mosquito buzzing in a cathedral. It was flat, distant, and frankly, heartbreaking. I spent weeks messing with the EQ, thinking I could just ‘boost’ my way out of physics. I was wrong. If you are sitting there right now wondering why your expensive setup feels like it’s lacking any real ‘oomph,’ you aren’t alone. It’s a common frustration for anyone living in a modern, airy home. Today, I’m going to show you why those beautiful architectural angles are the enemy of your ears and how you can actually reclaim the cinematic weight you paid for. Have you ever felt like your soundbar was working twice as hard just to reach your couch?
Your High Ceilings Are Literally Swallowing the Sound
When you have a massive amount of cubic air to fill, a single soundbar often hits a physical wall—or rather, it doesn’t hit enough of them. In a standard room, sound reflects off the ceiling and walls to give you a sense of ‘fullness.’ In a vaulted space, that energy just escapes into the rafters. I made the classic mistake of thinking I needed more volume, but that just made the situation worse by increasing reflections. Maybe you have already tried to fix the annoying echo in your minimalist home theater, but the thinness persists because the primary sound waves are dissipating before they ever reach your seating position.
Is my soundbar just too cheap for this room?
This is the big fear, right? That you need to drop another three grand on a full-blown component system to get decent audio. While it is true that soundbars struggle with music compared to stereo sets in large spaces, the price tag isn’t always the culprit. The real issue is the way soundwaves dissipate in a larger volume of air. Research from the Acoustical Society of America suggests that larger room volumes significantly increase reverberation times, which can lead to a loss of ‘intimacy’ and detail in audio playback. Sometimes, it feels like your tv speakers sound better than your cheap soundbar simply because the sound isn’t trying as hard to be ‘big’ and failing. To fix this, we need to focus on how to keep the sound focused on your ears rather than the ceiling fan. [image_placeholder_1] You can still learn how to get theater-quality sound out of a small living room setup even if your room is actually quite large, provided you understand how to manage your acoustic space properly.
Reclaim Your Audio Without Redesigning the House
Sound in a high-ceiling room behaves like a ball in a pinball machine; it bounces everywhere except where you want it. To get that ‘hit in the chest’ feeling back, you have to stop the energy from scattering. I once used a laser pointer taped to the top of my soundbar to see exactly where the sound was ‘aimed.’ I realized the upward-firing drivers were hitting a beam fifteen feet up and reflecting into a corner where no one was sitting. By slightly tilting the bar forward, I brought the sweet spot back to my ears. This is the first rule of physics in a big room: if the speaker can’t see your ears, your ears won’t hear the speaker clearly.
Stop Aiming Your Dialogue at the Ceiling Fan
Most people shove their soundbar deep into a cubby or flat against the wall under the TV. In a vaulted room, this is a disaster because the sound reflects off the shelf surface before it even gets to you. Pull the bar to the very front edge of your media console. This reduces ‘early reflections’ that make voices sound muddy. This is a foundational reason why your center channel should always be at ear level whenever possible. If your furniture is too low, use a few small rubber wedges to angle the bar upward. While you are at it, checking how to stop your soundbar from blocking your tv remote sensor is a quick way to make sure your functional setup remains convenient while you optimize the acoustics.
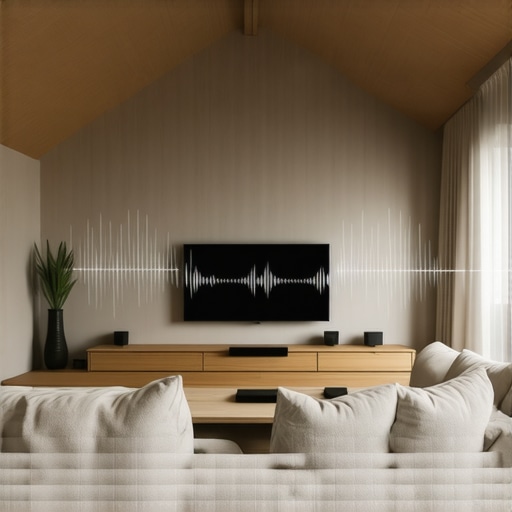
Let the Subwoofer Handle the Heavy Lifting
In a standard room, a soundbar can sometimes fake a bit of bass. In a room with twenty-foot ceilings, that small driver is going to give up. You need a dedicated subwoofer, but placement is twice as critical here. Don’t just tuck it in a corner. A corner placement in a large room often creates a ‘boomy’ but ‘hollow’ sound. Instead, try moving the sub closer to your actual seating position. This ‘near-field’ placement ensures the physical vibration reaches you before the room volume can swallow it. If you are struggling with muddy bass, looking into the best way to position your subwoofer for clearer lows can transform the entire cinematic experience from thin to thumping.
Force the Software to Do the Math
Most modern systems come with a calibration microphone or a phone-based app. Do not skip this. In a high-ceiling environment, the software will detect that it takes longer for sound to return to the mic, and it will automatically adjust the ‘delay’ and ‘gain’ to compensate for the massive air volume. It is like giving your soundbar a map of the cavern it’s living in. If your gear is older and lacks these features, you can still find 3 budget upgrades that make cheap speakers sound expensive, such as adding simple isolation pads or better interconnects. If you decide to go the extra mile and add physical rear speakers to anchor the sound stage, make sure you know the best way to run speaker wire under your rug so you do not end up with a tripping hazard in the middle of your beautiful open-concept living room.
Why More Power Often Makes Your Room Sound Worse
The biggest mistake I see enthusiasts make in large, airy rooms is the ‘Brute Force’ fallacy. Everyone assumes that because the room is twice as large, they need twice the wattage. In my experience, simply cranking the gain on a high-power system in a vaulted space actually destroys your soundstage. This is due to something called the ‘Critical Distance.’ According to Dr. Floyd Toole, a pioneer in acoustic research, if you sit beyond the point where the reflected sound energy exceeds the direct sound from the speaker, you lose all detail. By just adding more power, you are exciting the room’s echoes faster than your ears can process the original signal. It’s like trying to fix a blurry photo by making it brighter—it doesn’t work. Before you go out and buy a massive amplifier, consider that the truth about gold-plated audio connectors for home stereos is that they won’t save you from basic physics, even if the salesman says otherwise.
The Deadly Trap of Under-Powered Circuits
Here is the ‘oops’ factor that almost cost me a brand-new subwoofer. In massive rooms, we often place our heavy-hitting gear far from the main wall outlet. I’ve seen people run their $1,500 subs on thin, cheap power strips or long, household-grade extensions. You should absolutely avoid using an extension cord for your power amp or active subwoofer. These components need instantaneous current to produce low-end ‘slam.’ A long cord creates a voltage drop, which starves the power supply, causes the amp to run hot, and results in that ‘mushy’ bass you are trying to avoid. If you’ve ever wondered is gold-plated hardware really worth the extra cash, the answer is a hard ‘no’ compared to the massive benefit of just plugging your gear directly into a dedicated wall outlet.
Does High Peak Power Actually Matter in a Massive Space?
This is where the marketing teams love to trick you. You will see soundbars at big-box stores screaming about ‘1000 Watts Peak Power!’ In a vaulted ceiling environment, ‘Peak’ is a useless metric. You need to focus on RMS (Root Mean Square) power, which tells you what the system can actually sustain. When you are trying to push sound through 4,000 cubic feet of air, a system that can only hit high volumes for a millisecond will sound thin and strained. Understanding the difference between peak and rms power explained simply will save you from buying a system that looks good on the box but fails in the real world. I’ve seen $300 systems claim more power than $3,000 professional setups, yet the high-end gear sounds ten times ‘larger’ because its power is consistent and clean. Have you ever fallen into this trap of buying based on the biggest number on the box? Let me know in the comments. We also need to be careful with mobile sources; often why your expensive headphones sound thin on a basic smartphone comes down to the same power-delivery issues—the hardware just can’t drive the drivers to their full potential in a demanding environment.
Clean Connections Matter More Than Fancy Cables
Longevity in audio isn’t just about buying the right gear; it’s about the maintenance we all tend to forget once the initial excitement wears off. I’ve seen incredible systems degraded to static-filled messes simply because of a little humidity and neglect. If you live in an area with any moisture, you need to know how to clean green oxidization off your copper speaker terminals. That crusty buildup adds resistance, which effectively chokes the signal before it can reach your speakers. It’s also a reminder that why gold-plated connectors aren’t always better often comes down to the fact that they don’t oxidize like bare copper, but they also won’t fix a poor physical connection.
How do I keep my home theater sounding fresh for years?
The secret is a biannual stress test. Every six months, I go through my entire signal chain. I check for loose connections that happen naturally from floor vibrations. Learning how to repair a loose speaker terminal in under five minutes has saved me hundreds in shop fees. I also inspect the speaker surrounds for any signs of drying or cracking. If you catch a small tear early, you can actually learn how to fix a small rip in a speaker surround with glue before it turns into a catastrophic failure that requires a full driver replacement. Maintenance is the difference between a system that lasts five years and one that lasts twenty.
The Cheap Toolkit That Saves Expensive Drivers
You don’t need a degree in electrical engineering to troubleshoot your audio gear. My most used tool isn’t a fancy oscilloscope; it’s a simple 9V battery. I use it to verify the phase of my speakers when I can’t see the wire colors. Knowing how to use a 9v battery to check your speaker polarity ensures your drivers are moving in unison, preventing the phase cancellation that makes even a expensive system sound like a tin can. If you’re experiencing drops in your wireless setup, a quick the 5-minute fix for crackling bluetooth signals on your laptop can often be as simple as resetting the local cache or moving a wireless dongle away from interference.
AI Is About to Solve Your Room’s Physics Problems
Looking ahead, the future of home audio in difficult rooms like vaulted lounges is shifting toward active beamforming and AI-driven correction. We are moving away from passive treatments and toward speakers that can steer soundwaves away from your ceiling in real-time. Dr. Sean Olive of Harman International has published extensive research on listener preferences, noting that while flat frequency response is the goal, the room’s interaction is the final frontier. In his study The Relationship between Perception and Measurement of Loudspeaker Sound Quality, he demonstrates that digital compensation can bridge the gap between a bad room and a great experience. I predict that within five years, your soundbar will use lidar to map your ceiling and automatically create an acoustic map to eliminate echoes without you lifting a finger. Try this advanced tip: Download a free RTA (Real Time Analyzer) app on your phone today. Play some white noise through your system and walk around your vaulted room. You will see exactly which frequencies are being swallowed by your architecture, giving you the data you need to adjust your EQ settings with surgical precision.
Lessons I Learned the Hard Way While Chasing the Perfect Soundstage
After years of tweaking my setup in a room that felt more like a basketball court than a lounge, I realized that raw volume is a trap. I used to think that throwing money at higher-wattage gear would solve the thinness of the audio, but the real breakthrough came from focusing on directionality. If I could go back, I would tell my younger self to prioritize physical placement over spec sheets. It is also vital to keep your connections clean; for instance, knowing how to clean green oxidization off your copper speaker terminals is worth more than a thousand-dollar cable upgrade. Finally, never underestimate the power of a near-field subwoofer; it literally saved my low-end when the room tried to swallow it whole.
The Gear and Guides That Keep My Setup Singing
Whenever I hit a wall with my acoustics, I do not just guess anymore. I rely on a few specific tools that provide objective data. First, Dr. Floyd Toole’s book Sound Reproduction is my go-to guide for understanding how speakers and rooms interact. For daily maintenance, I keep a small kit that helps me with quick fixes, like how to repair a loose speaker terminal in under five minutes. I also frequently use the Room EQ Wizard software for my laptop—it is free and offers professional-grade analysis of frequency response. If you are using cheaper gear as a placeholder, don’t worry, because 3 budget upgrades that make cheap speakers sound expensive can get you remarkably close to high-end results without the mortgage-sized investment.
Take Control of Your Acoustic Space Today
Living with high ceilings does not mean you have to settle for a compromised experience. By managing your reflections and ensuring your power delivery is solid—remember to avoid using an extension cord for your power amp—you can create a soundstage that rivals the best cinemas. You have put the effort into your home’s aesthetic; now it is time to give it the voice it deserves. Do not be afraid to move your couch or tilt your soundbar just a few degrees; in the world of home audio, the smallest adjustments often yield the biggest rewards. Have you ever tried to dampen the echo in a large room only to find it made things sound dead? Let me know how you handled your vaulted ceilings in the comments below!