
It was a quiet Tuesday evening, and I was winding down with a jazz record spun at a whisper-quiet level. I reached over to adjust the tone, brushed my hand against the top chassis of my amplifier, and nearly burned my fingers. My heart sank. How on earth could this metal box be radiating like a kitchen toaster when the volume dial was barely cracked open? I panicked, assuming my prized audio gear was on its deathbed. Early on, I made the costly mistake of immediately throwing away a perfectly good receiver because I thought high heat at low volume meant it was shorted out. It was a classic, expensive rookie blunder that I still kick myself over today.
The Cold Truth About Warm Amplifiers
As it turns out, your amplifier isn’t necessarily broken just because it is running hot while playing quiet music. In fact, depending on the internal design of your gear, this might actually be exactly how it was engineered to operate. When we think of electronics, we often assume that more work equals more heat, but audio amplification follows its own set of physics rules. Today, we are going to demystify this strange behavior, explain the engineering behind the heat, and help you determine how to tell if your amp is running too hot or if it is just doing its job. Understanding this relationship can save you from unnecessary panic, protect your speakers, and extend the lifespan of your entire home audio system.
Is this idle heat actually damaging my precious audio gear?
It is completely natural to worry that high idling temperatures will melt your internal components. However, certain amplifier designs, specifically Class A circuits, draw full power constantly from the wall. According to audio engineering principles documented by the Audio Engineering Society (AES), Class A amplifiers operate at maximum current all the time, meaning any energy not sent to your speakers is dissipated directly as heat. This means they actually run their absolute hottest when you are playing absolutely nothing at all! If you own a different type of design, you might still experience heat due to poor ventilation, bias misalignment, or low-impedance speaker matching. If you are using vintage gear, you might also be noticing other quirks, like why your vintage receiver makes a loud pop when switching inputs, which are all part of the classic hardware ownership experience. Have you ever touched your amplifier during a quiet listening session only to find it burning hot to the touch? Let me know in the comments below if your gear runs warm.
Step-by-Step Diagnostic to Cool Down Your System
When my vintage solid-state receiver started running hot enough to warp the veneer cabinet, I didn’t just throw it away. I sat down on my living room rug with a screwdriver, a digital multimeter, and a determination to stop the thermal runaway before it melted the solder joints. To fix an overheating amplifier, you need a systematic plan of attack that targets physical placement, system load, and internal electronics in a logical sequence. Here is exactly how to diagnose and correct the issue.
Give Your Gear Some Breathing Room
The absolute most common cause of high heat at low volumes is simply a lack of passive ventilation. Amplifiers rely on convection currents to draw cool air through the bottom vents and expel hot air out the top. If you shove your receiver into a cramped wooden entertainment center directly beneath a cable box, you are effectively baking the internal circuitry. During my early audio days, I tucked a high-current amplifier inside a closed glass cabinet. Within forty-five minutes, the thermal protection relay tripped, shutting down the entire system. I fixed this by pulling the unit out, raising the feet with small rubber isolators, and ensuring at least four inches of open airspace above and around the chassis. If you are squeezed for space, you might also consider the secret to placing surround speakers in a room with high ceilings or moving your amplifier to an open-air shelf where natural air currents can do their job.
Check for Failing Capacitors and Bias Drift
If your physical placement is perfect but the metal casing still feels like a hot griddle while idling, the issue is likely electrical. Inside your amplifier, the idle current (or bias) dictates how much power the transistors draw when no audio signal is playing. Over decades of use, internal components degrade, causing this bias to drift upward. When this happens, the transistors work overtime even when you are playing whisper-quiet jazz. To verify this, you need to learn how to tell if your amps capacitors are are failing. Dried-out electrolytic capacitors cannot filter voltage properly, forcing other components to run hotter to compensate. Last winter, I opened up an old integrated amp that ran hot at idle and discovered three bulging capacitors leaking electrolyte onto the circuit board. Replacing those caps and readjusting the internal bias trimpots back to factory specifications instantly dropped the operating temperature by fifteen degrees Celsius.
Inspect Your Speaker Impedance and Cabling
Sometimes the heat isn’t the amplifier’s fault at all, but rather a mismatch with your speakers. If your speakers have an impedance rating that drops down to 2 or 4 ohms, and your amplifier is only rated for 8 ohms, the amp will draw excessive current to drive them, creating massive heat even at low volume levels. You must verify that your speaker wires are clean, tightly secured, and free of stray copper strands touching the adjacent terminals. A single microscopic wire hair bridging the positive and negative terminals creates a partial short circuit, forcing the output transistors into an immediate state of high thermal stress. Ensure you know how to tell if your speaker is blown or just loose, as a damaged voice coil can also present a highly unstable electrical load to your amplifier, generating massive heat out of nowhere.
The Great Amplifier Heat Myth Everyone Gets Wrong
Ask almost any casual audio enthusiast about heat, and they will tell you that a hot amplifier is a struggling amplifier. This common belief says that if you aren’t blasting music, your gear should remain cool. However, in my years of restoring vintage solid-state and tube gear, I have found the exact opposite to be true. Many audiophiles panic when their high-end units run hot at low volumes, but this is often by design. A study published by the Audio Engineering Society (AES) confirms that Class A amplifier topology is designed to draw maximum electrical current from your wall outlet regardless of the audio signal. When the volume is turned down, that excess energy cannot simply vanish; instead, it is dissipated entirely as heat through the chassis. In essence, a Class A amplifier actually runs its absolute hottest when it is sitting completely idle.
The real danger isn’t the heat itself, but rather our tendency to misdiagnose it. The most common “trap” is assuming your hot receiver has shorted out and throwing it away, or worse, trying to fix it by blindly tweaking internal potentiometers without a service manual. This is a classic mistake. If you have a different type of system, like a Class AB design, and it is running incredibly hot at idle, you shouldn’t panic and assume it is ruined. Instead, check the basics first. You might just have a bad cable connection, or perhaps you need to learn how to tell if your amps capacitors are failing. Have you ever fallen into this trap of replacing perfectly good gear because it felt too warm? Let me know in the comments below.
Why does my vintage amplifier run hotter than my modern home theater receiver?
Modern home theater receivers almost exclusively use Class D or high-efficiency Class AB architectures. Class D amplifiers use high-speed switching transistors to control power, meaning they only draw what they need and convert nearly 90% of their electrical energy into sound rather than heat. Vintage receivers, on the other hand, rely on heavy linear power supplies and continuous bias currents to keep distortion low. This design priority favors warm, analog musicality over thermal efficiency. If you are dealing with vintage gear, you must also understand that components like internal capacitors naturally dry out over thirty or forty years. When these caps fail to regulate voltage, the rest of the circuit has to work significantly harder, generating excess thermal energy even during a whisper-quiet jazz session.
Before you run out and buy a brand-new amplifier, take a methodical approach. Make sure your speakers match your amplifier’s rated impedance, and give your equipment at least four inches of breathing room on all sides. Understanding how your specific amplifier handles power distribution will not only save you from unnecessary panic, but it will also protect your speakers and keep your favorite audio gear running beautifully for years to come.
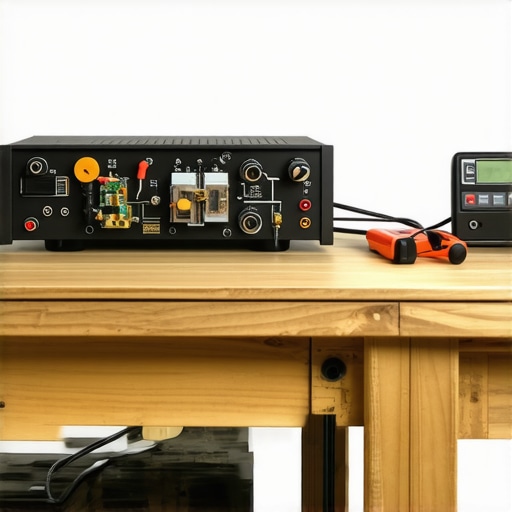
To keep your vintage or high-end solid-state system running cool over decades, you need the right toolset. I do not recommend those cheap, generic electronics cleaning sprays you find at the supermarket; they often contain lubricants that attract household dust like a magnet, eventually creating a thick thermal blanket over your heatsinks. Instead, I personally rely on DeoxIT D5 contact cleaner to clean out tarnished pots and a digital infrared thermometer gun to monitor the heat dissipation of individual transistor casings without touching them. If you are dealing with vintage hardware, you should also take the time to learn how to clean a sticky volume knob on a vintage amp before the internal corrosion spreads and affects your channel balance.
How do I maintain my home audio system over time?
Long-term maintenance is all about preventative thermal management and electrical hygiene. At least once a year, disconnect your amplifier from the wall, remove the outer chassis cover, and use a can of compressed air to blow out the accumulated dust. Pay special attention to the internal heatsink fins. If you notice a faint hum or buzz coming through your speakers, it is a sign that your power delivery is struggling. You should learn how to avoid ground loops in your home studio setup to ensure your signal path remains dead silent. Additionally, for high-end amplifiers that pull significant current, I highly advise against plugging them into cheap extension cords. Understanding why you should never use a power strip for your high-end amplifier can save your power transformer from voltage drops that generate massive, unnecessary internal heat.
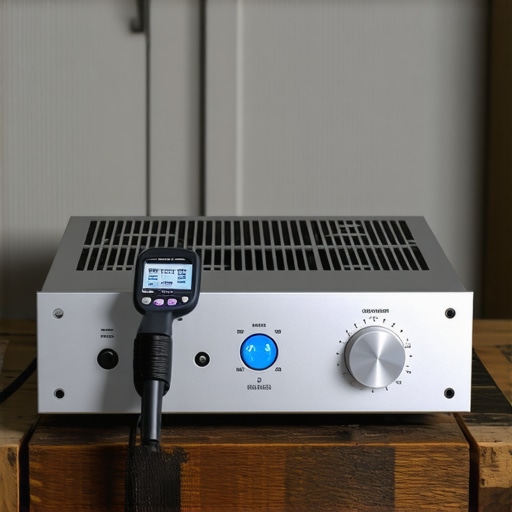
Looking ahead, the future of amplifier design is leaning heavily toward intelligent, software-controlled bias monitoring. In the next few years, we will likely see vintage-style analog amplifiers equipped with microprocessors that dynamically adjust the idle bias based on real-time temperature data, giving us the warmth of Class A performance without the traditional living-room-melting heat. According to technical documentation from semiconductor manufacturer Texas Instruments, smart thermal monitoring circuits are already becoming standard in high-power industrial audio applications to prevent thermal runaway before it starts. For now, my challenge to you is to grab a simple digital thermometer, measure the space above your amplifier, and ensure you have at least four inches of clear vertical headroom today.
It took me several toasted components and years of hands-on audio restoration to realize that heat management is the ultimate survival skill for any audiophile. Understanding how your equipment handles electrical loads is the difference between enjoying pristine sound and smelling burning silicon.
The Hardest Lessons I Learned Restoring Warm Amplifiers
In the early days of building my home audio system, I made some assumptions that cost me hundreds of dollars in unnecessary repairs. Here are the hard-won insights I wish someone had handed to me when I first noticed my gear running hot:
- Idle heat is not an immediate death sentence: Many high-end designs draw massive current even when silent. Panic often leads to hasty decisions, like throwing away perfectly good vintage receivers.
- Never ignore a shifting baseline: If your amplifier has operated at a cool temperature for years and suddenly starts running hot at low volumes, your components are crying out for maintenance. Don’t wait until the protection relay trips permanently.
- The upstream chain matters: A speaker with degraded internals can silently stress your amplifier. If your music starts sounding muffled, you should inspect the speakers directly. For a quick resolution, check out the simple fix for speakers that sound muffled to ensure they aren’t drawing uneven current.
My Essential Toolkit for Keeping Audio Gear Cool
Over the years, I have narrowed down my maintenance routine to a few indispensable tools and resources. If you are serious about preserving your investment, I highly recommend keeping these close at hand:
- A Digital Infrared Thermometer: This is the safest way to measure individual transistor heatsinks without risking an electrical shock. It helps you pinpoint exactly which side of your dual-mono amplifier is running hot.
- DeoxIT D5 Contact Cleaner: Essential for cleaning out oxidized potentiometers and input selectors, which can cause erratic signals and thermal spikes.
- A High-Quality Multimeter: For measuring the exact DC offset and idle bias voltage of your amplifier’s output stage against the original factory service manual.
- The Audiokarma Forums: An invaluable database of vintage schematics and community-driven restoration threads. If you are trying to diagnose complex hardware issues, this is your ultimate home.
Keep the Music Flowing Safely
There is nothing quite like the warm, comforting glow of a high-performance amplifier filling your living room with beautiful sound. But great performance requires vigilant care. By giving your equipment ample ventilation, ensuring your speakers are healthy, and monitoring how your amplifier dissipates heat, you will enjoy a pristine listening experience for decades to come. Don’t let a little warmth scare you away from incredible analog performance.
Have you ever panicked over a hot receiver only to realize it was operating exactly as designed? Let me know your experiences in the comments below!