
I remember sitting on my living room floor, staring at a pair of brand-new floor-standing speakers that I’d saved three months of paychecks for. I put on a favorite record, expecting to be transported to another dimension. Instead, it sounded like the band was performing from inside a thick wool blanket. I was devastated. I honestly thought I’d bought lemons. Before you go returning your gear or dragging it to the curb, let me tell you something: that muffled, muddy sound is almost always a fixable symptom of your environment, not a death sentence for your hardware.
Today, I’m going to show you the simple, often free adjustments that will peel that metaphorical blanket off your audio. We’ll look at everything from physical obstructions to the dreaded phase issues. I’ve spent years obsessing over why my setups didn’t sparkle, and I’ve learned that the solution is usually much closer than you think. Have you ever felt like your expensive setup sounded worse than a cheap pair of earbuds? Tell me your story in the comments so we can troubleshoot it together.
Your Speakers Aren’t Broken—They’re Just Suffocating
We’ve all been there. You sit down for a movie or a jam session, and the clarity just isn’t there. The highs are buried, and the vocals sound like they’re coming from the basement. My biggest mistake early on was thinking I could just EQ my way out of a bad situation. I cranked the treble so high on my vintage receiver that I actually smelled something burning. Spoiler: it wasn’t the music that was fire. That was a costly lesson in physics that I don’t want you to repeat.
The truth is that sound waves are fickle. High frequencies are directional and easily absorbed or reflected. According to research from the Audio Engineering Society, room acoustics and placement can account for up to 50% of the perceived sound quality. This means even the most expensive drivers will sound like garbage if they are fighting their surroundings. Sometimes the fix is as simple as realizing why your portable speaker sounds muddy on a glass table and moving it to a more stable surface.
Is it actually possible to fix this without buying new gear?
I get it. You’re skeptical. You think your drivers are blown or your amp is toast. But before you start looking for deals on used receivers, we need to check the basics. I once spent an entire afternoon rewiring a system only to realize my soundbar was blocked by my TV stand. It felt ridiculous, but it happens to the best of us. Muffled sound often comes down to frequency cancellation or poor isolation. If your speakers are vibrating against a hollow shelf, they are going to sound bloated and indistinct. We’re going to go through a checklist that starts with the easiest physical fixes and moves into the technical tweaks like checking if your speakers are out of phase. Let’s get that clarity back.
Clear the Path for Your Audio Waves
Sound is essentially a series of air vibrations. If you put a physical barrier between the driver and your ears, you are filtering out the most delicate parts of the signal. High frequencies, which provide that crisp feeling, are the first to go. I once spent an hour trying to figure out why my left channel sounded dim, only to realize I’d placed a large decorative vase directly in front of the tweeter. It sounds silly, but even something as thin as a speaker grille can soften the impact. That’s why your floor speakers sound better when you take the grilles off; you’re removing a literal filter between you and the music.
Stop Your Furniture from Stealing the Bass
Low-end frequencies are a different beast. They aren’t as directional as highs, but they are incredibly sensitive to boundaries. If you’ve tucked your bass source away to keep the room looking tidy, you’re likely killing the performance. For instance, why you should never place your subwoofer inside a cabinet comes down to resonance. The cabinet becomes a secondary, vibrating box that creates a boomy mess. I tried this in my first apartment to save space, and it sounded like the neighbors were running a lawnmower in the next room. If you must hide things, learn how to hide a subwoofer in plain sight without muffled bass by keeping the firing port clear of obstructions.
Kill the Reflections That Muddle the Mix
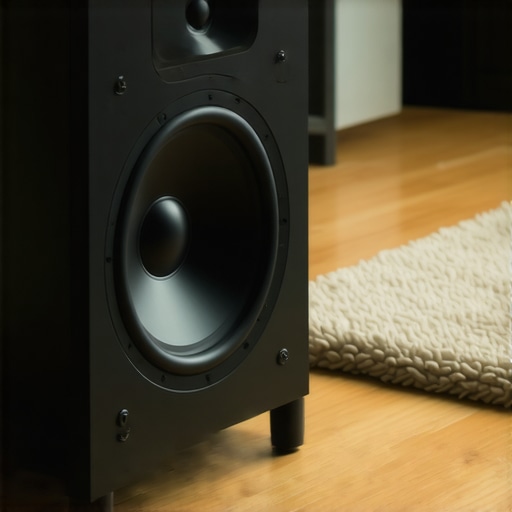
When sound hits a hard surface—like a hardwood floor or a glass coffee table—it bounces back. This creates a tiny delay that hits your ears just milliseconds after the original sound, causing phase smearing. It makes everything feel blurry. Think of it like trying to read a book while someone is shining a strobe light on the pages. One of the cheapest and most effective upgrades you can make is adding soft textures. You can learn how to use a rug to stop your speakers from sounding harsh by placing it at the first reflection point between your seat and the speakers. This absorbs those stray waves before they can mess with the direct sound.
Flip the Switch on Phase Issues
If your speakers are positioned perfectly and the room is treated, but the center image still feels hollow or the bass is non-existent, you might be out of phase. This happens when the positive and negative wires are swapped on just one speaker. Imagine two people pushing a swing from opposite sides; they cancel each other out. This is the easy way to test if your speakers are out of phase: play a track with heavy mono vocals. If the singer sounds like they are coming from the walls instead of the center, swap the wires on one speaker and listen to the magic return.
Don’t Ignore Your Ears and Cables
Sometimes the muffled sound isn’t the speaker at all. If you’re a heavy earbud user, the culprit might be simpler (and grosser) than you think. Learning the best way to clean earwax out of mesh earbuds can restore lost decibels instantly. Similarly, check your signal chain. If you are using high-end cans with a weak source, they will sound thin and lifeless. You need to know how to tell if your headphones need an external amp to drive them to their full potential. Without enough power, the drivers simply cannot move fast enough to produce clear, sharp audio.
Stop Waiting for Your Ears to Adjust
Let’s talk about the elephants in the room that even some self-proclaimed audiophiles get wrong. One of the most heated debates involves the concept of ‘burn-in.’ For years, I believed that the idea of a speaker needing to ‘warm up’ was just my brain getting used to a new sound signature. I was wrong. The mechanical components of a speaker, specifically the spider and the surround, are stiff out of the box. Scientific testing using the Klippel R&D System has demonstrated that the resonant frequency of a driver can shift by several hertz as these materials loosen up. Learning how to properly break in a new set of high-end floor speakers isn’t just a ritual; it’s waiting for the physics of the device to settle. That’s why your new speakers sound better after 20 hours of use—the suspension is finally moving as the engineers intended.
Your Power Strip is Killing Your Highs
You’ve spent thousands on a high-fidelity amplifier, only to plug it into a $15 power strip you found in a junk drawer. This is a classic mistake. High-end amplifiers require sudden, massive draws of current to handle musical peaks. Most cheap power strips act like a bottleneck, introducing resistance that can lead to current starvation. I once troubleshoot a friend’s system that sounded ‘thin’ and ‘jittery’ despite high-end components. The culprit? A daisy-chained power strip. This is why you should never use a power strip for your high-end amplifier. If you want the full dynamic range you paid for, your amp needs a direct, stable path to the wall or a dedicated power conditioner that can handle the load.
Is your ‘Class A’ amp actually just a marketing gimmick?
The term ‘Class A’ is thrown around by marketing teams because it implies the highest quality, but it has a very specific technical meaning. A true Class A amplifier has its output transistors conducting 100% of the time, which is incredibly inefficient but eliminates crossover distortion. The nuance here is that true Class A units are heavy and get incredibly hot. If you’ve bought a small, lightweight unit that claims to be Class A but barely gets warm, you’re likely dealing with a Class AB or even a Class D amp with a fancy label. Knowing how to tell if your amplifier is truly class a will save you from overpaying for a sticker. Furthermore, be wary of the allure of vintage-style gear; there is a significant hidden cost of buying a cheap tube amplifier, often manifesting as high maintenance and poor component longevity.
The Cross-Environment Trap
Another nuance people overlook is the difference between home and automotive audio engineering. I’ve seen enthusiasts try to save money by mounting home theater drivers in their vehicle doors. This is almost always a disaster. Home speakers are usually 8-ohm, while car systems are designed for 4-ohm (or lower) loads to maximize power from a 12V DC source. Beyond impedance, home gear isn’t built to survive the extreme temperature swings and humidity of a car. Avoiding the mistake of using home speakers in a car audio setup is critical for protecting your electronics. While you’re at it, keep an eye on your hardware’s health; learning how to tell if your amps capacitors are failing can prevent a total system meltdown before it happens. Have you ever fallen into one of these traps, thinking you were getting a deal or a shortcut? Let me know in the comments so we can swap stories.
I’ve realized that the ‘set it and forget it’ mentality is the quickest way to end up with a system that sounds like it’s underwater after a few years. To keep that crystal-clear response, you have to treat maintenance like a ritual rather than a chore. For my vintage pieces, I swear by a can of DeoxIT D5. If you’ve ever noticed a crackling sound when you adjust the volume, it’s not a ghost in the machine; it’s simple oxidation. Learning how to clean a sticky volume knob on a vintage amp with a quick spray of contact cleaner can literally shave decades off the ‘age’ of your sound. I also make it a point to check my physical connections every six months. Vibration from the music itself can cause things to back out over time. It’s worth checking how to fix a loose speaker terminal on your cabinet before you assume your internal crossover is failing.
How do I keep my audio gear sounding like new for years?
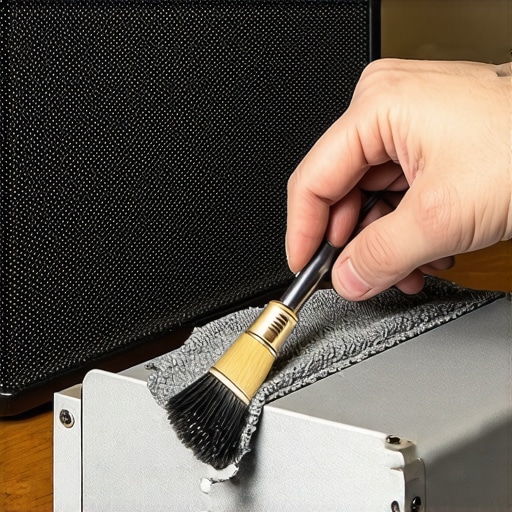
For my headphone enthusiasts, your worst enemy isn’t the driver—it’s hygiene. Sweat and skin oils break down materials faster than you’d think. I recently swapped my old, flaking leather pads for a hybrid set, and the difference in the acoustic seal was massive. You should look into how to choose between leather and velour headphone pads for sound to see which fits your climate and listening style. And please, for the love of clarity, keep a soft-bristled brush nearby for your IEMs. Knowing the best way to clean earwax out of mesh earbuds is often the difference between a 10kHz sparkling high and a dull, muffled thud. Even the cones on your main towers need love; I always recommend how to clean your speaker cones without ruining the paper by using a light microfiber cloth and avoiding any harsh chemicals that can dissolve the adhesives.
According to technical documentation by audio engineer Rod Elliott of Elliott Sound Products, the electrolytic capacitors in your power supply have a finite lifespan, often around 15 to 20 years depending on heat exposure. If you ignore them, they can leak or dry out, leading to increased ripple and an audible hum that destroys your noise floor. This is why I predict that in the next few years, we’ll see a massive shift toward AI-based ‘self-healing’ DSPs built into consumer receivers. Instead of you having to buy how to use a rug to fix the echo in your home theater room, your receiver will use internal microphones to constantly recalibrate its output in real-time, compensating for both room changes and component aging automatically. For now, though, the best thing you can do is take ten minutes tonight to tighten your speaker wire connections and wipe down your drivers. That small effort ensures the gear you saved for today is still singing for you in 2035.
Lessons from the Audio Trenches
One thing that took me years to accept is that ‘good enough’ is usually the enemy of ‘great.’ You get used to a slightly veiled sound and forget what real transparency feels like. I once ignored a buzzing sound for a month because I was too lazy to check the front of my towers. It turns out I just needed to know how to fix a rattling speaker grill without using messy glue to restore that sense of precision. Audio is a journey of small wins. I also learned that chaos behind the entertainment center leads to noise in the speakers; knowing the best way to label your messy home theater cables saves hours of troubleshooting when a channel goes dark. Lastly, trust your ears over any spec sheet. If it sounds muffled to you, it is muffled, regardless of how much the salesman praised the ‘warmth’ of the unit.
The Toolkit That Saved My Sanity
When you’re deep in the weeds of troubleshooting, you need a reliable signal path. I always tell people to focus on the source before blaming the speakers. Learning the difference between cheap and expensive dacs that actually matters helped me realize I was bottlenecking my high-res files at the very beginning of the chain. If you are looking for a cost-effective way to get high-quality audio into an older system, you can even learn how to use an old smartphone as a dedicated music streamer to keep your primary device free while ensuring a clean digital output. These small technical pivots are often more effective than spending thousands on new drivers.
Reclaim Your Listening Experience
Fixing a muffled sound profile isn’t about being an engineering genius; it’s about being an observant listener. It is about noticing the rug that is bunched up or the terminal that is slightly loose. You now have the checklist to peel back that metaphorical blanket and let your music breathe the way it was recorded. Don’t let your gear sit idle just because it doesn’t sound perfect today—go turn a few knobs and move a few inches. Your ears will thank you for the effort. Have you ever found a surprisingly simple fix for a rattling speaker or a dull sound? Share your ‘aha!’ moment in the comments below!