
I stood there, heart hammering against my ribs, staring at a pair of vintage cabinets I’d just hauled home from a lucky find using the trick to buying high-end audio at estate sales. They looked like they’d spent the last thirty years in a dusty sawmill. There was so much grey fuzz on the paper cones that I couldn’t even see the texture of the material. My first instinct? Grab a wet wipe and get to scrubbing. Thank goodness my neighbor, an old radio technician, stopped me before I touched them. He told me that one wrong move with moisture or pressure and those pristine-sounding drivers would be little more than expensive coasters. If you’ve ever looked at your woofers and wondered if that layer of dust is muffling your favorite tracks, you’ve come to the right place. Today, I’m going to show you how to restore that factory-fresh look without the heart-stopping sound of tearing paper.
Stop Letting Dust Muffle Your Music
We treat our amplifiers and turntables like royalty, but the speaker cone is the part that actually pushes the air to reach your ears. When it gets weighed down by years of household dander and particulates, the mass of the cone increases. It’s basic physics—heavier cones are slower, less responsive, and lose that crisp detail we all crave. According to research from the Audio Engineering Society (AES), even minor changes in cone mass or stiffness can significantly alter the frequency response and transient behavior of a driver. I learned this the hard way early on. I once tried to ‘deep clean’ a pair of woofers with a high-powered vacuum attachment. I didn’t just get the dust; I nearly sucked the cone right out of its frame, causing a permanent crease that ruined the sound. If you’ve already had a mishap like that, you might want to check how to fix a speaker cone with a simple coffee filter before you give up on them. Have you ever felt that ‘cleaning paralysis’ where you’re too afraid to touch your gear for fear of breaking it?
Is cleaning paper cones really worth the risk?
Absolutely, but only if you use the right tools. Paper is porous, fragile, and often decades old. Unlike synthetic materials, it absorbs liquids and can warp or rot if you get it wet. You have to be even more careful than when you are dealing with other components, much like why you should never use compressed air to clean a silk dome tweeter. We aren’t just going for aesthetics here; we’re aiming for sonic clarity. Once that grime is gone, you’ll likely find yourself wondering how to tell if your speaker is actually blown or just rattling because the increased detail might reveal other minor issues you couldn’t hear through the muck. Let’s dive into the ‘dry method’ that saved my vintage collection.
Grab Your Softest Makeup Brushes
You don’t need a specialized ‘audiophile brush’ that costs fifty bucks; go to the local drugstore and buy the fluffiest, softest makeup brush you can find. I’m talking about the ones designed for sensitive skin. These are perfect because the bristles are thin enough to get into the microscopic pores of the paper without snagging the fibers. I remember my first ‘pro’ attempt: I used a stiff-bristled paintbrush from my garage. I thought I was being thorough, but when I looked closer, I’d actually scratched the top layer of the pulp. It looked like the speaker had a bad case of road rash. Now, I always start with a light-as-air dusting. Before you even touch the cone, set up a bright LED work light at an angle. Side-lighting reveals the texture of the dust and shows you exactly where the buildup is thickest. I once missed a small cluster of spider eggs in the corner of a woofer because I was working under a standard ceiling fan light. In the vintage audio world, you’re often dealing with decades of ‘life’ inside those boxes.
Work from the Dust Cap Outward
Think of the speaker cone like a fragile clock face. You want to start at the center—the dust cap—and move your brush in light, radial strokes toward the outer edge. This prevents you from pushing dirt into the gap between the voice coil and the magnet. If you’ve noticed your audio feels a bit ‘choked’ lately, you might even consider how to tell if your speaker capacitors are starting to leak, as cleaning can only do so much for internal electrical aging. However, for the physical cone, gravity is your ally. Tilt the cabinet slightly forward so the dust falls away from the driver rather than settling back into the crevices. 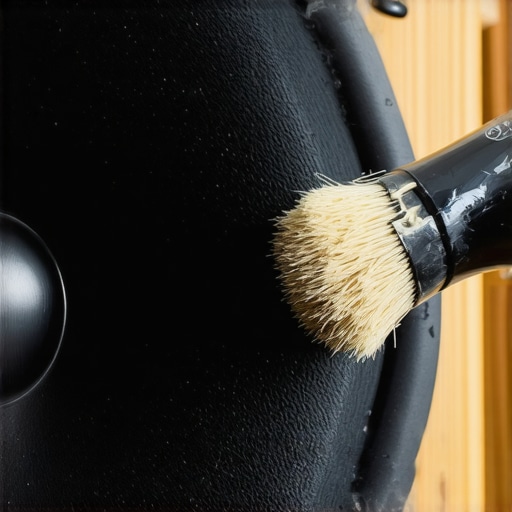
How to Dab Away Sticky Grime Safely
If the dust is ‘caked’ on—which often happens in homes where people smoke or cook with a lot of oil—a brush won’t cut it. You’ll need a clean, dry microfiber cloth. Notice I said dry. Never wipe in a dragging motion. Instead, wrap the cloth around your finger and gently ‘dab’ the surface. This lifts the sticky particulates rather than smearing them deeper into the paper. It’s similar to the simple paper towel trick for finding speaker air leaks; it’s all about tactile feedback and being gentle. I once spent an entire afternoon dabbing a pair of 1970s Wharfedales I found in a damp basement. By the time I was done, the paper had gone from a sickly yellow-grey back to a deep charcoal, and the high-end sparkle returned instantly.
Look for Crumbling Edges While Cleaning
While your eyes are inches away from the cone, look at the edges. If the paper is clean but the foam is crumbling, all that dusting won’t help your bass response. You might need to learn how to revive old speakers with new foam surrounds to get that seal back. If the surrounds are rubber and just look a bit dry, you can look into how to revive a vintage speaker cone with simple rubber treatment. Once the physical structure is sound and the dust is gone, the difference in air movement is massive. It’s the sonic equivalent of taking off a pair of dirty glasses; suddenly, everything has a ‘point’ and a place in the soundstage. You’ll finally hear why some enthusiasts swear why your bluetooth speaker sounds much fuller on a wooden table—it’s all about how that clean air reflects off solid surfaces. Cleaning a paper speaker cone is like dusting a butterfly wing; too much pressure and the magic is gone, but do it right, and the music breathes again.Most enthusiasts will tell you that once you’ve cleared the dust, you’re back to 100% performance. I used to believe that too until I ran into a pair of legendary JBLs that looked mint but sounded like they were underwater. Here’s the contrarian truth: cleaning only addresses the external mass; it doesn’t fix ‘cone fatigue.’ Over decades, the cellulose fibers in paper cones can actually break down at a microscopic level due to humidity and mechanical stress. Some people spend hours debating the truth about speaker break-in periods, but with vintage gear, we’re often fighting the ‘break-down’ period where the paper loses its structural integrity. If you try to ‘stiffen’ these fibers with DIY sprays, hairspray, or wood glue, you’re adding unpredictable mass that ruins the engineer’s original damping calculations. It’s a common trap that turns a classic driver into a muddy, unresponsive mess. In fact, renowned acoustic researcher Dr. Floyd Toole has noted in his work for the Journal of the Audio Engineering Society that while mechanical suspensions like the spider might loosen over time, the actual cone material needs to remain within a specific stiffness-to-mass ratio to maintain accuracy. Have you ever fallen into this trap and tried to ‘improve’ a driver only to have it backfire? Let me know in the comments. 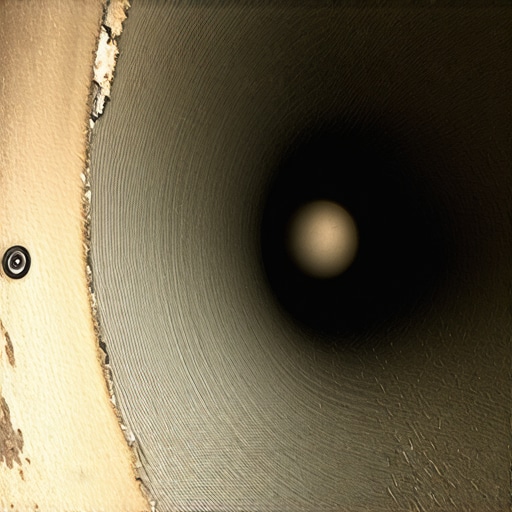
Is that vintage paper too ‘tired’ to sing?
If you find that the high-end clarity is still missing after a deep clean, don’t just reach for the EQ. You might be hearing the internal electronics reaching their expiration date. I’ve seen collectors spend weeks scrubbing cones when the real culprit was how to tell if your speaker capacitors are starting to leak. Sometimes the physical paper is fine, but the signal is being choked before it even reaches the voice coil. If you’re dealing with a lopsided soundstage, you might need to investigate how to fix channel imbalance on a vintage stereo amplifier rather than scrubbing the cone harder. The nuance here is understanding that a clean speaker is only a window; if the view behind it is blurry, the glass doesn’t matter. I once nearly ruined a pair of rare Alnico drivers trying to ‘revive’ the paper with chemicals, only to realize the trick to making cheap bookshelf speakers sound expensive had more to do with proper placement and stable amplification than the color of the pulp. Stick to the dry dusting method and let the paper be what it is: a delicate, aging instrument.If you’ve spent an afternoon meticulously dusting paper cones, don’t let the signal die at the finish line—the binding posts. Even gold-plated connectors aren’t immune to a microscopic film of atmospheric gunk that adds resistance and masks high-frequency detail. I personally swear by a can of DeoxIT D5. It’s the only thing I trust because it doesn’t just clean; it leaves a protective barrier that prevents further oxidation. I’ve seen enthusiasts scrub their gear so hard with abrasive pads that they strip the plating entirely, which is why you really need to learn how to clean gold-plated connectors without ruining the finish. It’s the difference between a connection that just ‘works’ and one that offers near-zero impedance. Once the connectors are shiny, look at where those speakers are actually sitting. If you have floorstanders on a carpet, you’re losing bass definition to the padding. This is why floorstanding speakers need spikes when used on carpet—they couple the cabinet to the subfloor, tightening up the low end and preventing energy from being turned into heat inside your rug. If the room still feels too ‘shouty’ or fatiguing after all your cleaning, why you should use a rug to fix a bright-sounding room becomes the most important acoustic tool in your arsenal.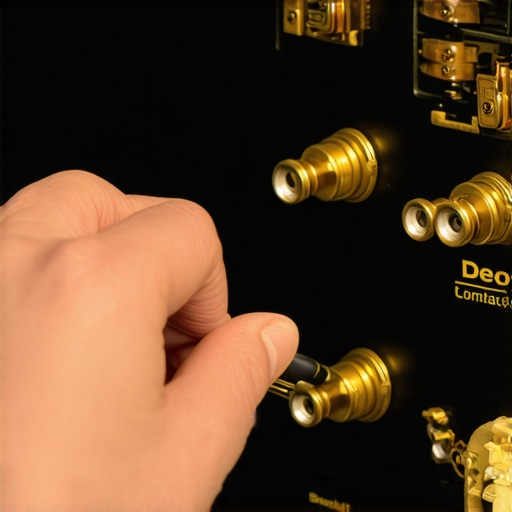
How do I keep my vintage speakers singing for the next decade?
The secret isn’t more cleaning; it’s heat management and electrical stability. According to technical documentation from Nichicon, one of the world’s leading capacitor manufacturers, for every 10°C decrease in operating temperature, the life of an electrolytic capacitor doubles. This means keeping your gear in a well-ventilated area—not shoved into a tight cabinet—is the best ‘maintenance’ you can perform. If you start hearing a low-frequency hum through those clean cones, don’t ignore it. Check why your vintage receiver makes a loud hum with no music playing before a failing component takes out those precious drivers you just restored. I predict that the future of this hobby isn’t going to be about finding ‘purer’ paper materials, but rather using DSP (Digital Signal Processing) to compensate for the physical aging of materials. We are already seeing high-end active speakers that adjust their internal EQ in real-time as they detect heat-related changes in the voice coil impedance. Before you wrap up your maintenance session, I want you to try one thing: if you have an old amp, don’t just blow out the dust. Get a bottle of high-purity contact cleaner and spend ten minutes on the internal potentiometers. If your sound cuts out or crackles, follow the steps on how to fix a scratchy volume knob on an old amp. You’ll be shocked at how much micro-detail was hidden behind a microscopic layer of oxidation.I stood there, heart hammering against my ribs, staring at a pair of vintage cabinets I’d just hauled home from a lucky find using the trick to buying high-end audio at estate sales. They looked like they’d spent the last thirty years in a dusty sawmill. There was so much grey fuzz on the paper cones that I couldn’t even see the texture of the material. My first instinct? Grab a wet wipe and get to scrubbing. Thank goodness my neighbor, an old radio technician, stopped me before I touched them. He told me that one wrong move with moisture or pressure and those pristine-sounding drivers would be little more than expensive coasters. If you’ve ever looked at your woofers and wondered if that layer of dust is muffling your favorite tracks, you’ve come to the right place. Today, I’m going to show you how to restore that factory-fresh look without the heart-stopping sound of tearing paper.
Stop Letting Dust Muffle Your Music
We treat our amplifiers and turntables like royalty, but the speaker cone is the part that actually pushes the air to reach your ears. When it gets weighed down by years of household dander and particulates, the mass of the cone increases. It’s basic physics—heavier cones are slower, less responsive, and lose that crisp detail we all crave. According to research from the Audio Engineering Society (AES), even minor changes in cone mass or stiffness can significantly alter the frequency response and transient behavior of a driver. I learned this the hard way early on. I once tried to ‘deep clean’ a pair of woofers with a high-powered vacuum attachment. I didn’t just get the dust; I nearly sucked the cone right out of its frame, causing a permanent crease that ruined the sound. If you’ve already had a mishap like that, you might want to check how to fix a speaker cone with a simple coffee filter before you give up on them. Have you ever felt that ‘cleaning paralysis’ where you’re too afraid to touch your gear for fear of breaking it?
Is cleaning paper cones really worth the risk?
Absolutely, but only if you use the right tools. Paper is porous, fragile, and often decades old. Unlike synthetic materials, it absorbs liquids and can warp or rot if you get it wet. You have to be even more careful than when you are dealing with other components, much like why you should never use compressed air to clean a silk dome tweeter. We aren’t just going for aesthetics here; we’re aiming for sonic clarity. Once that grime is gone, you’ll likely find yourself wondering how to tell if your speaker is actually blown or just rattling because the increased detail might reveal other minor issues you couldn’t hear through the muck. Let’s dive into the ‘dry method’ that saved my vintage collection.
Grab Your Softest Makeup Brushes
You don’t need a specialized ‘audiophile brush’ that costs fifty bucks; go to the local drugstore and buy the fluffiest, softest makeup brush you can find. I’m talking about the ones designed for sensitive skin. These are perfect because the bristles are thin enough to get into the microscopic pores of the paper without snagging the fibers. I remember my first ‘pro’ attempt: I used a stiff-bristled paintbrush from my garage. I thought I was being thorough, but when I looked closer, I’d actually scratched the top layer of the pulp. It looked like the speaker had a bad case of road rash. Now, I always start with a light-as-air dusting. Before you even touch the cone, set up a bright LED work light at an angle. Side-lighting reveals the texture of the dust and shows you exactly where the buildup is thickest. I once missed a small cluster of spider eggs in the corner of a woofer because I was working under a standard ceiling fan light. In the vintage audio world, you’re often dealing with decades of ‘life’ inside those boxes.
Work from the Dust Cap Outward
Think of the speaker cone like a fragile clock face. You want to start at the center—the dust cap—and move your brush in light, radial strokes toward the outer edge. This prevents you from pushing dirt into the gap between the voice coil and the magnet. If you’ve noticed your audio feels a bit ‘choked’ lately, you might even consider how to tell if your speaker capacitors are starting to leak, as cleaning can only do so much for internal electrical aging. However, for the physical cone, gravity is your ally. Tilt the cabinet slightly forward so the dust falls away from the driver rather than settling back into the crevices.
How to Dab Away Sticky Grime Safely
If the dust is ‘caked’ on—which often happens in homes where people smoke or cook with a lot of oil—a brush won’t cut it. You’ll need a clean, dry microfiber cloth. Notice I said dry. Never wipe in a dragging motion. Instead, wrap the cloth around your finger and gently ‘dab’ the surface. This lifts the sticky particulates rather than smearing them deeper into the paper. It’s similar to the simple paper towel trick for finding speaker air leaks; it’s all about tactile feedback and being gentle. I once spent an entire afternoon dabbing a pair of 1970s Wharfedales I found in a damp basement. By the time I was done, the paper had gone from a sickly yellow-grey back to a deep charcoal, and the high-end sparkle returned instantly.
Look for Crumbling Edges While Cleaning
While your eyes are inches away from the cone, look at the edges. If the paper is clean but the foam is crumbling, all that dusting won’t help your bass response. You might need to learn how to revive old speakers with new foam surrounds to get that seal back. If the surrounds are rubber and just look a bit dry, you can look into how to revive a vintage speaker cone with simple rubber treatment. Once the physical structure is sound and the dust is gone, the difference in air movement is massive. It’s the sonic equivalent of taking off a pair of dirty glasses; suddenly, everything has a ‘point’ and a place in the soundstage. You’ll finally hear why some enthusiasts swear why your bluetooth speaker sounds much fuller on a wooden table—it’s all about how that clean air reflects off solid surfaces. Cleaning a paper speaker cone is like dusting a butterfly wing; too much pressure and the magic is gone, but do it right, and the music breathes again.Most enthusiasts will tell you that once you’ve cleared the dust, you’re back to 100% performance. I used to believe that too until I ran into a pair of legendary JBLs that looked mint but sounded like they were underwater. Here’s the contrarian truth: cleaning only addresses the external mass; it doesn’t fix ‘cone fatigue.’ Over decades, the cellulose fibers in paper cones can actually break down at a microscopic level due to humidity and mechanical stress. Some people spend hours debating the truth about speaker break-in periods, but with vintage gear, we’re often fighting the ‘break-down’ period where the paper loses its structural integrity. If you try to ‘stiffen’ these fibers with DIY sprays, hairspray, or wood glue, you’re adding unpredictable mass that ruins the engineer’s original damping calculations. It’s a common trap that turns a classic driver into a muddy, unresponsive mess. In fact, renowned acoustic researcher Dr. Floyd Toole has noted in his work for the Journal of the Audio Engineering Society that while mechanical suspensions like the spider might loosen over time, the actual cone material needs to remain within a specific stiffness-to-mass ratio to maintain accuracy. Have you ever fallen into this trap and tried to ‘improve’ a driver only to have it backfire? Let me know in the comments.
Is that vintage paper too ‘tired’ to sing?
If you find that the high-end clarity is still missing after a deep clean, don’t just reach for the EQ. You might be hearing the internal electronics reaching their expiration date. I’ve seen collectors spend weeks scrubbing cones when the real culprit was how to tell if your speaker capacitors are starting to leak. Sometimes the physical paper is fine, but the signal is being choked before it even reaches the voice coil. If you’re dealing with a lopsided soundstage, you might need to investigate how to fix channel imbalance on a vintage stereo amplifier rather than scrubbing the cone harder. The nuance here is understanding that a clean speaker is only a window; if the view behind it is blurry, the glass doesn’t matter. I once nearly ruined a pair of rare Alnico drivers trying to ‘revive’ the paper with chemicals, only to realize the trick to making cheap bookshelf speakers sound expensive had more to do with proper placement and stable amplification than the color of the pulp. Stick to the dry dusting method and let the paper be what it is: a delicate, aging instrument.If you’ve spent an afternoon meticulously dusting paper cones, don’t let the signal die at the finish line—the binding posts. Even gold-plated connectors aren’t immune to a microscopic film of atmospheric gunk that adds resistance and masks high-frequency detail. I personally swear by a can of DeoxIT D5. It’s the only thing I trust because it doesn’t just clean; it leaves a protective barrier that prevents further oxidation. I’ve seen enthusiasts scrub their gear so hard with abrasive pads that they strip the plating entirely, which is why you really need to learn how to clean gold-plated connectors without ruining the finish. It’s the difference between a connection that just ‘works’ and one that offers near-zero impedance. Once the connectors are shiny, look at where those speakers are actually sitting. If you have floorstanders on a carpet, you’re losing bass definition to the padding. This is why floorstanding speakers need spikes when used on carpet—they couple the cabinet to the subfloor, tightening up the low end and preventing energy from being turned into heat inside your rug. If the room still feels too ‘shouty’ or fatiguing after all your cleaning, why you should use a rug to fix a bright-sounding room becomes the most important acoustic tool in your arsenal.
How do I keep my vintage speakers singing for the next decade?
The secret isn’t more cleaning; it’s heat management and electrical stability. According to technical documentation from Nichicon, one of the world’s leading capacitor manufacturers, for every 10°C decrease in operating temperature, the life of an electrolytic capacitor doubles. This means keeping your gear in a well-ventilated area—not shoved into a tight cabinet—is the best ‘maintenance’ you can perform. If you start hearing a low-frequency hum through those clean cones, don’t ignore it. Check why your vintage receiver makes a loud hum with no music playing before a failing component takes out those precious drivers you just restored. I predict that the future of this hobby isn’t going to be about finding ‘purer’ paper materials, but rather using DSP (Digital Signal Processing) to compensate for the physical aging of materials. We are already seeing high-end active speakers that adjust their internal EQ in real-time as they detect heat-related changes in the voice coil impedance. Before you wrap up your maintenance session, I want you to try one thing: if you have an old amp, don’t just blow out the dust. Get a bottle of high-purity contact cleaner and spend ten minutes on the internal potentiometers. If your sound cuts out or crackles, follow the steps on how to fix a scratchy volume knob on an old amp. You’ll be shocked at how much micro-detail was hidden behind a microscopic layer of oxidation.
What Decades of Scrubbing Taught Me About Sound
Over the years, I’ve realized that cleaning a paper speaker cone is as much about patience as it is about technique. Here are the hardest lessons I learned: First, if you think you’re being gentle enough, be even gentler. The goal is to tickle the dust off, not sweep the floor. Second, keep your expectations realistic. If the paper has yellowed from sunlight, that’s a permanent chemical change in the cellulose; trying to bleach it back will destroy the driver. Finally, remember that the paper is often the most resilient part of the system compared to the glue and the foam. If you’ve picked up gear from the home of a heavy smoker, you’ll need to know how to get the smell of smoke out of a vintage receiver, as the paper cone acts like a giant scent sponge that requires weeks of airing out in a dry, sunlit room. It’s a holistic process; cleaning the cone is just the first step in a long-term relationship with your gear.
The Tools I Trust Near My Fragile Paper Drivers
Building a proper restoration kit doesn’t have to be expensive, but it must be curated. I trust a large Kabuki-style makeup brush for the main cone and a smaller eye-shadow brush for the delicate areas around the dust cap. For the surrounding electronics, how to clean a laser lens on a skipping vintage cd player is a great companion skill to have if you’re reviving an entire vintage stack. If you’re refreshing an old console, don’t forget to look at how to fix a scratchy fader on a vintage audio mixer to ensure the signal is as clean as the drivers. I also recommend keeping a simple handheld LED inspection light nearby—you simply can’t clean what you can’t see, and standard overhead lighting hides the most stubborn grime.
Time to Bring That Studio Clarity Home
There is something incredibly meditative about sitting down with a pair of classic speakers and slowly bringing them back to life. When you finally hook them back up and that first snare hit sounds like it’s right in the room with you, you’ll know the effort was worth it. This is exactly how we made a 20 dollar thrift store speaker sound like a pro monitor—it’s rarely about the initial price tag and always about the attention to detail. So, take your time, trust your hands, and let your music breathe again. Have you ever been terrified to touch a vintage driver for fear of it crumbling? Let me know your close-calls in the comments below! #IMAGE_PLACEHOLDER_E#