
There I was, sitting in the dark with a glass of bourbon, ready to let some 1970s analog warmth wash over me. I flipped the heavy silver toggle on my ‘new’ thrift-store find, and instead of the sweet crackle of vinyl, I got a low, persistent ‘MMMMMMMM.’ It wasn’t the music. It was the sound of my weekend plans dying. My beautiful, wood-paneled beast was humming like a refrigerator, and it didn’t care that the volume was turned all the way down. If you’ve ever felt that sinking feeling in your chest when your gear starts talking back to you in a language of static and drones, you aren’t alone. Today, we are going to silence that beast once and for all.
That Low-Frequency Drone is a Cry for Help
That hum isn’t just an annoyance; it is a symptom of age, poor connections, or a literal ‘loop’ in your electricity that needs breaking. I remember my first real ‘audiophile’ mistake: I spent three weeks and way too much money shipping a receiver to a specialist because I thought the transformer was toast. It turned out I just had a ground loop because my turntable and amp were fighting over a single outlet. I felt like an idiot. You can get rid of ground loop hum in your audio setup much easier than I did if you know where to look. We are going to walk through the ‘why’ behind this noise—ranging from simple cable issues to those pesky dried-out capacitors that plague old gear.
Is my expensive vintage gear actually just a fire hazard now?
It’s a fair question to ask when you hear a noise that sounds like a power substation living in your living room. You might be worried that the vintage amp is getting too hot or that something is about to pop. The good news? Most of the time, it’s just physics being a nuisance. However, we do have to be realistic. According to the engineering team at Cornell Dubilier, the life expectancy of aluminum electrolytic capacitors is heavily dependent on temperature and usage, often necessitating replacement in vintage electronics to maintain power supply stability. When they fail, they stop filtering the ‘ripple’ out of your power supply, and that ripple is exactly what you’re hearing. Have you ever felt that panic when a piece of gear starts making a noise it shouldn’t? We’re going to figure out if you’re dealing with a simple fix or if you need to check those capacitors more closely. Before we grab the screwdriver, let’s look at the easiest culprits first, because sometimes the fix is as simple as cleaning a scratchy knob or moving a single wire away from a power cable.
Start With the Cables Before Tearing the Amp Apart
Most audio gremlins aren’t hiding inside the chassis; they’re hitching a ride on your wires. I once spent two hours troubleshooting a ‘blown’ left channel on a 1978 Pioneer, only to realize my cat had chewed the RCA shielding just enough to cause a short. Start by stripping your setup down to the bare essentials: just the amplifier and the speakers. If the noise vanishes, you know the culprit is an external source like a DAC or a turntable. If the noise persists, check your speaker wires. Stray copper strands touching the chassis can easily cause a short, which is why your receivers protection mode keeps triggering at high volume.
Check for Crossed Wires and Bad Shields
Think of your audio cables like water hoses. If the hose has a hole (bad shielding), the water (signal) leaks out, and dirt (interference) gets in. Keep your power cables and signal cables at a 90-degree angle to each other. Running them parallel is like inviting the 60Hz hum from your wall outlet to jump right into your music. If you still hear a buzz after tidying the wires, you might need the 5 fix for humming speakers and ground loops, which usually involves a simple ground loop isolator or ensuring all components share a single high-quality power strip.
Kill the Hum by Fixing Your Ground Path
Vintage gear is notorious for grounding issues. If your turntable doesn’t have a solid connection to the ‘GND’ lug on your receiver, you’ll get a buzz that sounds like a swarm of bees. It’s the same principle as when you properly ground a car amplifier to eliminate engine hum. Without a clear path to ground, the electricity wanders around your signal path looking for an exit. I remember a specific project where a beautiful Sansui AU-717 kept humming regardless of the cables. It turned out the internal ground wire to the chassis had oxidized. One quick sanding of the contact point, and it was dead silent.
Scrub the Carbon Off Those Potentiometers
If your noise sounds like ‘skritch-scratch’ every time you turn a knob, you have dirty potentiometers. Over decades, dust and carbon buildup create tiny gaps in the electrical connection. Using a specialized cleaner is the only way to go. You can fix a scratchy volume dial with electrical contact cleaner by spraying a small amount into the small access holes of the component and rotating it back and forth thirty times. This friction literally wipes the grime away. 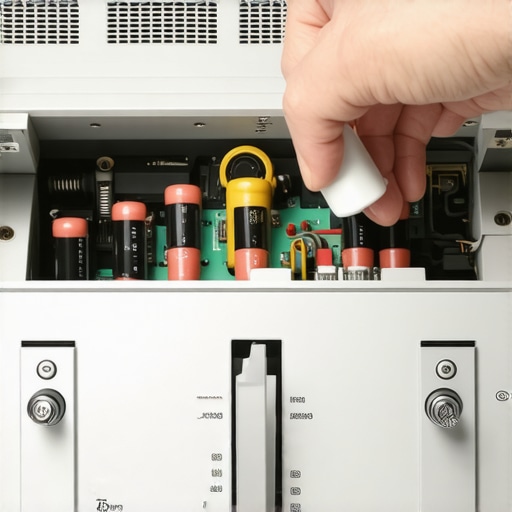
Recognize When a Capacitor is Past Its Prime
If the hum is constant and deep, and none of the cable tricks work, you are likely looking at the power supply capacitors. These are the ‘batteries’ of your amp that smooth out the electrical flow. When they dry out, they leak ‘ripple’ into the audio. You might notice why your vintage receivers lights are flickering with the music, which is a classic sign of a struggling power supply. Visually inspect the caps; if the tops are bulging or there is a crusty residue at the base, it’s time to swap them. It’s a bit of work, but it’s the difference between a paperweight and a masterpiece. You can tell if your speakers capacitor is starting to fail using similar visual cues or a basic multimeter test.
Listen for the Mechanical Click of Health
When you flip the power switch on a high-end vintage unit, you should hear a distinct ‘click’ after a few seconds. This is the protection relay engaging. If you don’t hear it, or if it clicks repeatedly, the amp is sensing DC voltage where it shouldn’t be. This is the reason your expensive receiver makes a clicking sound when it starts, and it’s actually a safety feature designed to save your speakers from being fried. If the clicking won’t stop, avoid the temptation to keep turning it on and off; you need to check the DC offset internal adjustments first.But here is where the ‘experts’ on forums will often steer you wrong. Everyone tells you to buy a $500 power conditioner to ‘clean the electricity’ the second they hear a hum. In my experience, these are often just glorified power strips that do absolutely nothing for a ground loop. In fact, adding more complex circuitry between your wall and your amp can sometimes raise the noise floor if the internal shielding is subpar. If you want to dig deeper into the technical side, the Audio Engineering Society (AES) has published numerous papers on ‘The Pin 1 Problem,’ a concept pioneered by Neil Muncy which proves that most hum is a result of poor equipment design where the shield is tied to the circuit ground instead of the chassis. No amount of expensive gold-plated wire is going to fix a fundamental engineering flaw inside the box itself.
The deadly mistake of using ground-lift adapters
One massive ‘oops’ factor I see all the time is the use of the dreaded 3-to-2 prong ‘cheater’ adapter. You use it to lift the ground and suddenly the hum is gone. Great, right? Wrong. You have just turned your amplifier chassis into a potential ‘hot’ wire. If a component fails internally, that silver faceplate you are touching could deliver a lethal shock. It is a dangerous shortcut that people take when they can not figure out how to get rid of ground loop hum in your audio setup properly. If you are desperate, there are safer isolation transformers that can break the loop without risking a trip to the emergency room.
Why does your high-end gear sound different after a week of use?
You will hear a lot of talk about ‘break-in’ periods. Some manufacturers claim you need 200 hours of pink noise before a speaker sounds ‘right.’ Honestly? Most of that is just your brain getting used to the frequency response—a process called auditory acclimatization. While there is a mechanical reality to the truth about speaker break-in periods, specifically regarding the spider and surround of a woofer loosening up, it happens in minutes of heavy movement, not weeks. You can properly break-in new headphones without using white noise just by listening to your favorite tracks at a moderate volume. Don’t fall for the trap of leaving your gear running for four days straight while you are at work; you are just wasting electricity and component life. 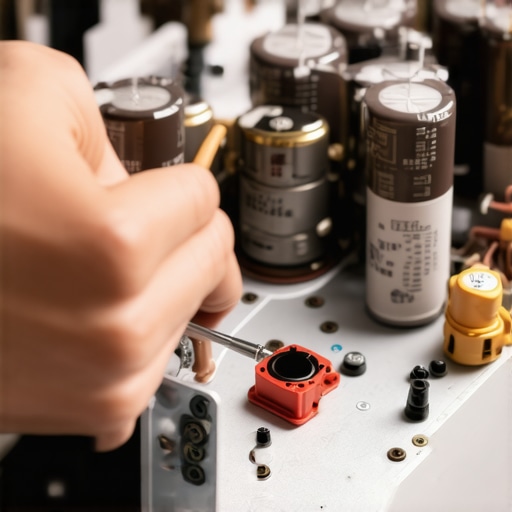
Stop blaming your amp for bad speaker placement
Another nuance that separates the pros from the amateurs is understanding the ‘boundary effect.’ You might think your speakers lack bass, so you buy a bigger amplifier. But the real issue is often placement. If you have rear-ported speakers, why your speakers’ bass port should never be pushed against a wall becomes obvious the moment you hear that muddy, bloated mess. Moving a speaker six inches forward can do more for your soundstage than a $2,000 DAC upgrade. In fact, if you aren’t careful, you might find why your high-end DAC sounds exactly like your laptops headphone jack if the rest of your chain—and your room—is not optimized to reveal the difference. Lastly, do not ignore the physical health of the drivers. Before you blame the electronics, do the ‘push test.’ Gently—and I mean gently—push on the woofer cone. If it feels gritty or resists, you aren’t dealing with a hum; you are dealing with a shifted voice coil. You need to know how to tell if your speaker is actually blown or just rattling before you start desoldering components on the board. Have you ever fallen into the trap of over-engineering a simple fix? Let me know in the comments.Talking about repairs is one thing, but keeping your gear from breaking in the first place is where the real mastery lies. I’ve seen too many beautiful setups die simply because of neglect or poor environment. To keep my bench running, I don’t use generic hardware store tools. I swear by my Hakko soldering station and a Fluke multimeter because cheap irons have a nasty habit of lifting the delicate copper traces on vintage boards, turning a simple repair into a nightmare. If you are serious about this hobby, you need a toolkit that respects the gear. One of the first things I do with any ‘new’ vintage find is revive old speakers with new foam surrounds. Even if they look okay, that 40-year-old poly-foam is usually a gentle breeze away from turning into dust.
How do I keep my audio setup running like new for decades?
The secret is heat management and physical isolation. Heat is the absolute silent killer of capacitors and transistors. This is exactly why your vintage amp gets hot even when you arent playing music; the bias might be set too high, or the airflow is restricted. I keep my amplifiers on open-air racks, never stacked directly on top of each other. Furthermore, I recommend using a simple digital thermometer to check the heatsink temperature after an hour of use. According to the technical documentation by Douglas Self, a renowned authority on power amplifier design, maintaining stable thermal equilibrium is critical because ‘thermal lag’ in the bias compensation circuitry can lead to thermal runaway and eventual component failure. If you want your investment to last, give it room to breathe. 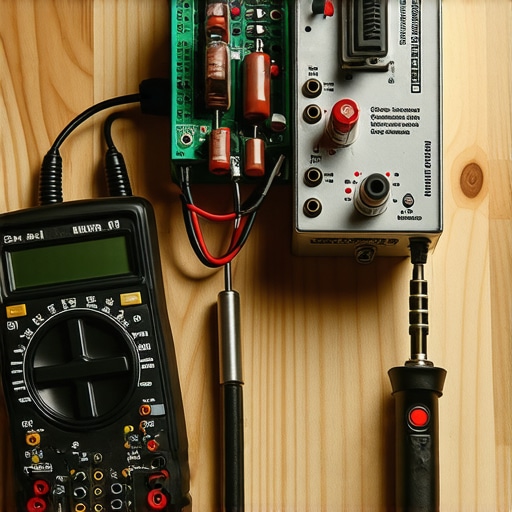
Stop the vibrations before they stop the music
We often think about electricity, but mechanical vibration is just as disruptive to a clean signal. If you have floorstanding speakers on a rug, you are losing detail and clarity to cabinet sway. This is why floorstanding speakers need spikes when used on carpet—they couple the speaker to the subfloor, preventing the energy from being wasted in micro-movements. I even go a step further with my monitors. I’ve found that the reason your speaker stands need to be filled with sand is not just for weight; it changes the resonant frequency of the stand itself, killing that ‘ringing’ sound that can color your midrange.
The future of keeping your gear healthy
Looking ahead, I see the industry moving toward ‘predictive maintenance’ integrated into our streamers and amps. We are already seeing high-end Class D modules that report real-time impedance and temperature data to an app. In the next few years, your phone will likely alert you that a capacitor is drifting out of spec before you ever hear a hum. Until then, we have to rely on our ears and a few manual tests. If you suspect your cabinet is losing its punch, try the simple paper towel trick for finding speaker air leaks. It’s an old-school move that works every time. My best advice? Don’t wait for a total failure. Take five minutes this weekend to check your connections for oxidation and move your speakers three inches away from the wall to see how it changes the soundstage.
Lessons from the Workbench That Saved My Sanity
I’ve spent hundreds of hours staring at circuit boards, and the most important thing I’ve learned is that the simplest solution is usually the right one. Don’t assume your transformer is dead when it might just be a loose screw on the chassis creating a micro-gap in the ground path. Also, always take photos before you desolder anything; your future self will thank you when you can’t remember which way that capacitor was facing. Finally, remember that while specs matter, your ears are the ultimate judge. If the soundstage feels ‘off,’ trust your gut. Sometimes the answer isn’t in a component but in your room layout, which is why understanding why your bookshelf speakers sound better when you move them off the desk can be more valuable than a new soldering iron.
My Personal Audio Restoration Toolkit
You don’t need a professional lab to fix your gear, but you do need the right essentials. I never start a project without DeoxIT D5 for cleaning those scratchy pots—it’s the gold standard for a reason. For testing, a decent auto-ranging multimeter is non-negotiable for checking continuity and DC offset. If you’re looking to upgrade your setup’s performance without spending a fortune, learning the trick to making cheap bookshelf speakers sound expensive can save you thousands in unnecessary upgrades. I also highly recommend ‘The Complete Guide to High-End Audio’ by Robert Harley—it’s the definitive guide for anyone serious about this hobby. And if you find a physical tear in your driver during your inspection, don’t panic; you can actually fix a speaker cone with a simple coffee filter and a little patience.
Your Journey to Sonic Perfection Starts Now
Restoring vintage gear isn’t just about the music; it’s about the connection to the history of sound. There is a deep satisfaction in taking a ‘broken’ piece of history and bringing it back to life. Every small adjustment, from tightening a ground wire to swapping a dried-out capacitor, brings you closer to that ‘aha!’ moment where the noise floor drops and the music truly breathes. Take your time, be patient with the process, and soon your home audio deals and vintage finds will sound better than the day they left the factory. Have you ever found a ‘miracle fix’ for a piece of gear you thought was destined for the trash? Let me know in the comments below.