
I was sitting in my favorite worn-out armchair, eyes closed, expecting the deep, resonant bass of a Pink Floyd record to wash over me. Instead, I got a flat, lifeless thud. It wasn’t that the volume was low, but the soul was gone. I spent hours tweaking the EQ and even checked if I needed to find the sweet spot for my speakers in a rectangular room again. Nothing worked. It turned out my speakers weren’t broken in the traditional sense; they were just aging from the inside out. I made the massive mistake of assuming my drivers were blown and almost threw the whole set away. It was a heartbreaking thought. But then, I opened the cabinet and saw it: a slightly bulged, leaking cylinder. Today, I want to show you how to identify these tiny traitors before they ruin your listening experience. We are going to dive into the subtle sonic cues and physical red flags that scream your capacitors are on their last legs. Have you ever noticed a weird buzzing or a loss of clarity that you just couldn’t pin down? Let me know in the comments because I bet you’re not alone.
That Faint Hiss Is Not Your Imagination
The first sign is usually auditory, and it’s frustratingly subtle. You might start noticing that your high-end sounds a bit “grainy” or that your blown tweeter isn’t actually blown, but just getting bad signal from a failing crossover capacitor. Capacitors act like local energy reservoirs; when they fail, they can’t filter out noise or provide the quick bursts of power needed for dynamic peaks. According to engineering data from Illinois Capacitor, the service life of an electrolytic component can be cut in half for every 10-degree Celsius increase in temperature. This means if your gear runs hot, those caps are ticking time bombs. This is exactly why your vintage speakers are losing their punch over time. It isn’t a sudden death; it’s a slow, agonizing fade into mediocrity.
Is This Just Some Audiophile Paranoia?
I get it. It’s easy to think we’re just imagining things when the sound feels slightly “off.” You might wonder if you just need to make your vintage speakers sound modern again with new wires or better placement. But the reality is that electrolytic capacitors have a liquid dielectric that literally dries up over twenty or thirty years. It’s a chemical certainty, not a conspiracy. When that liquid goes, the capacitance drops, and suddenly your crossover frequencies shift, leaving your music sounding hollow or unbalanced. If you’ve been hearing a persistent hum even when no music is playing, or if your speakers take a few minutes to “warm up” before they sound decent, your capacitors are waving a white flag. It’s time to stop second-guessing your ears and start looking at the hardware.
Open the Hood and Look for These Three Clues
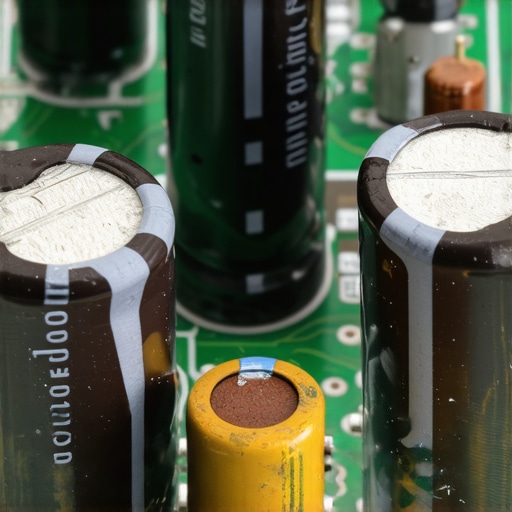
Before you start ordering new drivers, you need to perform a visual inspection. Safety first: unplug your gear and let it sit for a while to discharge. When I finally decided to open up that old Marantz receiver I mentioned earlier, I was looking for a ghost in the machine. I’d been obsessing over how to tell if your amplifier has enough headroom for your speakers, but the physical reality was much simpler. Capacitors are essentially pressurized cans. When they fail, they often ‘vent.’ Look at the top of the electrolytic cylinders; they should be perfectly flat. If you see a slight dome shape or a ‘bulge,’ the internal pressure has reached a breaking point. This is often the real reason your amp is getting hot to the touch, as the failing component creates massive internal resistance and leaks heat like a radiator.
The Smell Test You Can’t Ignore
Sometimes the failure isn’t a bulge, but a slow leak. I remember leaning over a vintage Sansui amp and catching a whiff of something that smelled like a mix of fish and burnt ammonia. That is the smell of electrolyte fluid. If you see a crusty, tea-colored residue around the base of a capacitor, don’t mistake it for glue. Manufacturers do use glue to steady large caps, but that glue is usually uniform. Leaked electrolyte looks like dried soda and often eats away at the circuit board traces. I once spent an afternoon using electrical contact cleaner on a scratchy volume dial thinking I had a dirty pot, only to realize the ‘scratch’ was actually DC voltage leaking through a dead capacitor directly into the audio path.
Why an ESR Meter is Your Best Friend
You can’t always see the damage. Electrolytic capacitors dry out from the inside, especially in gear that sits idle for years. This is the trick to making vintage speakers sound modern again: you have to measure the Equivalent Series Resistance (ESR). A standard multimeter might show the correct microfarad rating, but a high ESR means the capacitor can no longer deliver power quickly enough for those deep bass hits. When I finally bought a dedicated ESR meter, I discovered that half the caps in my ‘mint condition’ thrift store find were electrically dead, even though they looked brand new. This is a common culprit when you’re trying to figure out how to fix a receiver that won’t turn on after a power surge; those old, dried-out caps are the first things to pop when the voltage spikes. If your audio feels thin, lacks ‘slam,’ or has a persistent background hum, stop guessing and start testing the ESR of your power supply filters and crossover caps.
But here is where most people go off the rails. They assume that if one capacitor is bad, they should just ‘shotgun’ the whole board with the most expensive ‘audiophile-grade’ components they can find. This is a classic rookie mistake. In my experience, high-end ’boutique’ capacitors are often just standard industrial caps with fancy shrink-wrap and a 500% markup. While they look pretty, they don’t always offer a measurable performance boost over high-quality Japanese industrial brands like Nichicon or Panasonic. In fact, some boutique caps are physically larger for the same value, which can introduce lead inductance or simply won’t fit without stressing the traces on your board. Have you ever fallen into this trap of buying the hype over the specs? Let me know in the comments.
Stop Chasing the Boutique Label
The contrarian truth is that a standard low-ESR industrial capacitor is often superior for power supply filtering because it is designed for high-reliability environments. If you are working on a crossover, the dielectric material matters far more than the brand name. While most people think ‘a cap is a cap,’ using the wrong type can actually degrade your sound. For instance, replacing a film capacitor with an electrolytic one—even an expensive one—is a downgrade. This subtle nuance is often why your speakers sound harsh when you play high-res files; the component can’t keep up with the high-frequency transients. I’ve seen enthusiasts spend hundreds on gold-labeled capacitors only to realize they’ve changed the tonal signature of their vintage gear in a way that makes it lose its original charm.
The Voltage Trap That Kills Your Gear
One of the most dangerous ‘oops’ factors I see is the misunderstanding of voltage ratings. A common myth is that you can always use a higher voltage rating without consequence. While it is true that a 50V cap can replace a 25V cap of the same microfarad value, doing so often increases the physical size of the component. If the new cap is too large, it might be forced against a heat sink. This is the real reason your amp is getting hot to the touch in some botched repairs—the component is absorbing heat it was never meant to handle. Always check the temperature rating as well; 105°C rated caps are your best bet for longevity, even if the original was only 85°C. This is especially critical because why your bookshelf speakers need more power than you think often leads to you pushing your amp into high-heat territory.
Will ‘Boutique’ Capacitors Actually Make Your Music Sound Better?
If you really want to get technical, look at the research by the late Cyril Bateman. His ‘Capacitor Sounds’ series in Electronics World proved that different capacitor constructions produce measurable harmonic distortion. He found that many cheap ceramic capacitors are shockingly non-linear, which can add a ‘gritty’ texture to your audio. This is similar to how the difference between peak and rms power explained simply shows that the raw numbers don’t always tell the whole story. However, Bateman also showed that once you reach a certain threshold of quality, the ‘magic’ of expensive brands disappears. If you’re struggling with audio quality, you might find that why your expensive headphones sound thin on a basic smartphone has more to do with the output stage capacitors than the headphones themselves. Don’t just throw money at the problem; throw data at it. If you have the choice, focus on the signal path components first and leave the power supply ‘upgrades’ for last. The goal is transparency, not just a different flavor of distortion.
Build Your Personal Audio Repair Kit
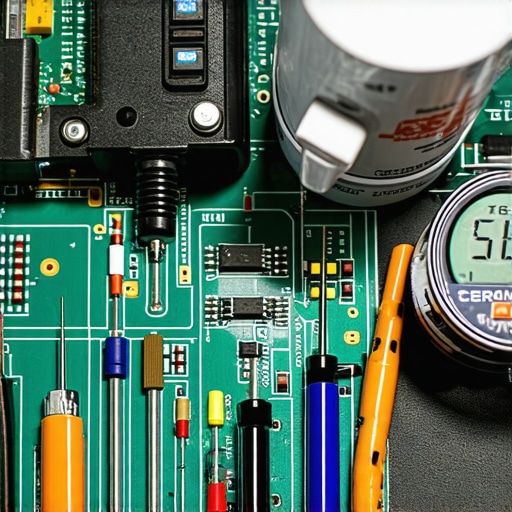
To reach that level of transparency we discussed, you need the right tools on your workbench. I personally swear by a can of DeoxIT D5 and a set of non-conductive probes. You see, most ‘broken’ gear is just suffering from neglect. I have seen enthusiasts give up on an expensive amplifier just because of a simple part or a bit of dust in the wrong place. If you want to keep your system in peak condition, you have to be proactive. For instance, knowing how to clean green oxidization off your copper speaker terminals can prevent signal degradation before it even starts. I also keep a fine-tipped vacuum attachment nearby; it is the best way to clean dust out of your headphone jack without damaging pins. These small habits are what separate the collectors from the true listeners. It is as essential as knowing how to fix a scratchy volume dial with electrical contact cleaner to ensure your signal path remains pristine.
How Can I Keep This Vintage Sound Alive for Decades?
The secret is heat management and regular use. Many people think ‘saving’ their gear by never turning it on is the right move, but that is actually a myth. In their technical guide ‘Aluminum Electrolytic Capacitors’ (TN-0001), Vishay Intertechnology notes that the ‘self-healing’ property of the dielectric layer depends on the presence of a specific voltage. If you leave your gear unpowered for years, that layer degrades. When you finally turn it on, the surge can cause a failure. This is often the real reason your amp is getting hot to the touch or why you hear that distinctive ‘pop’ after a long hibernation. If you use a car system, you also need to be aware of the environment; knowing how to fix a car amplifier that keeps shutting off in summer usually comes down to improving airflow and checking those aging caps that cannot handle the thermal stress anymore.
The Next Wave of Smart Component Monitoring
I predict we are moving toward ‘active monitoring’ within the components themselves. Imagine a high-end soundbar or a receiver that sends a notification to your phone saying, ‘Primary filter capacitor is at 80% health—order a replacement now.’ We already see early versions of this in industrial power supplies, and it is only a matter of time before it hits the consumer market. Until then, we have to rely on our ears and eyes. For example, if the reason your expensive receiver makes a clicking sound when it starts seems to take longer and longer each morning, that is your internal monitoring circuit telling you that the voltage is not stabilizing fast enough. Do not ignore those signs. Because why your bookshelf speakers need more power than you think often leads to you pushing your amp to its limits, the health of your power supply is the most critical factor in your entire signal chain. My advanced tip for you this week: Buy a dedicated ESR meter and test the filter caps on your oldest piece of gear. You will likely find they are ‘electrically’ much older than they look. Stop guessing and start measuring!
Lessons I Learned While Staring at a Hot Soldering Iron
Over the years, I have realized that the biggest mistake isn’t necessarily using the wrong brand of capacitor; it is rushing the physical process. Always take a high-resolution photo of the circuit board before you start pulling components. I once spent three hours hunting down a service manual because I forgot which direction the negative stripe pointed on a main filter cap. Also, do not assume a new component is perfect right out of the box. Even new stock can be ‘New Old Stock’ (NOS) that has been sitting in a damp warehouse for years. Test everything before it touches your board. If you find yourself working on modern tech alongside your vintage finds, you might also want to learn how to fix a loose usb charging port on a bluetooth speaker since these smaller devices have their own specific physical failure points that lead to power issues.
Gear That Belongs on Your Workbench
If you are serious about reviving audio equipment, you need more than just a basic multimeter. I personally rely on the DE-5000 Handheld LCR Meter for precise ESR readings—it is the industry gold standard for a reason. For cleanup, nothing beats a high-quality solder sucker like the Engineer SS-02. Beyond hardware, I highly recommend spending time on the AudioKarma or DIYAudio forums; these communities are treasure troves of specific circuit knowledge you won’t find in a standard manual. While you are optimizing your hardware, remember that even the best-capped amp won’t shine if your speaker placement is working against you. This is why your bookshelf speakers sound better when you move them off the desk and onto isolation stands. Keeping your signal path clean also involves the basics; understanding why cheap speaker wire causes signal loss over 50 feet is a lesson best learned before you run permanent cables through your walls.
Bring the Soul Back to Your Listening Room
Repairing your own gear is a deeply rewarding experience that connects you to your music in a way that simply buying new equipment never can. When you finally hear that crisp, punchy low-end return after replacing those tired capacitors, it feels like hearing your favorite album for the first time again. Do not be intimidated by the technical jargon or the tiny components. Start with a manageable project, like using how to use an old phone as a dedicated high res music player to feed a clean, modern signal into your newly restored vintage amplifier. The future of your high-fidelity audio experience is literally in your hands. Have you ever attempted a ‘re-cap’ project and noticed a night-and-day difference in the soundstage? Let me know your success stories or your toughest struggles in the comments below!