
I remember sitting at my desk, staring at a pair of brand-new, beautiful bookshelf speakers I had just unboxed. I’d spent weeks researching, and I finally pulled the trigger. I fired up my favorite track, expecting to be transported to a front-row seat at a jazz club. Instead, it sounded like the musicians were playing inside a cardboard box under my monitor. The bass was boomy, the vocals felt recessed, and my coffee cup was literally vibrating across the wood. I felt cheated. I even wondered if my bookshelf speakers needed more power than I thought. But the reality was much simpler: my desk was acting as an unwanted amplifier for all the wrong frequencies.
Your Desk is Stealthily Stealing Your Midrange
The problem with a desk isn’t just the space it takes up; it’s the physics of the flat surface itself. When your speakers sit directly on that wood or laminate, two detrimental things happen simultaneously. First, the vibrations from the speaker cabinet transfer directly into the desk, turning the entire piece of furniture into a giant, messy sounding board. It is the same physical principle behind why your subwoofer might be vibrating your furniture and muddying the low end. Second, sound waves bounce off the desk surface and hit your ears a fraction of a second after the direct sound from the drivers. This creates “comb filtering,” a phase issue that effectively cancels out certain frequencies, leaving your music sounding hollow and lifeless.
Is This Just Audiophile Voodoo or Does it Actually Matter?
I used to be a total skeptic about speaker placement. I figured if the speakers were high quality, they should sound great regardless of where they sat. I was wrong. One of the biggest mistakes I made early on was trying to fix a physical acoustic problem with software EQ. I spent hours fiddling with sliders, but you simply cannot EQ out a physical reflection. The difference between a desk-bound speaker and one on a proper stand is profound. According to experts at Genelec, placing a monitor on a large flat surface can cause a boost in the low-mid frequencies by as much as 6dB due to the “boundary effect,” which is why your favorite songs suddenly feel bloated and dark. Have you ever noticed your audio quality seemingly “clumping together” the moment you put your speakers next to your monitor? [IMAGE_PLACEHOLDER]
Getting the Tweeters Where They Belong
When your speakers sit flat on a desk, they are usually pointing at your chest rather than your ears. High-frequency sounds are incredibly directional; if those tweeters aren’t aimed precisely at your head, you are losing the detail and “air” that makes high-end audio worth the investment. When I finally moved my setup to dedicated pedestals and filled those stands with sand to kill the resonance, the change was immediate. The stereo image widened, and the depth appeared out of nowhere. Whether you choose to buy professional mounts or build your own speaker stands for under twenty dollars, the goal remains the same: decouple the speaker and align the height. Today, we are going to look at the exact steps to rescue your soundstage from the clutches of your desktop.
Elevate Your Tweeters to Ear Level
High frequencies are like a flashlight beam; they are extremely directional. If your speakers are sitting flat on your desk, that “beam” is hitting your chest rather than your ears. To fix this, you need to raise the speakers until the tweeters—those smaller drivers—are on the same horizontal plane as your ears. I remember a Saturday afternoon where I finally got fed up and stacked old encyclopedias under my monitors just to test the height. It looked ridiculous, and my wife was convinced I’d lost it, but the moment those tweeters hit eye level, the soundstage opened up. This is easily one of the 3 budget upgrades that make cheap speakers sound expensive because the clarity gain is immediate and cost-free.
Break the Physical Connection with Your Desk
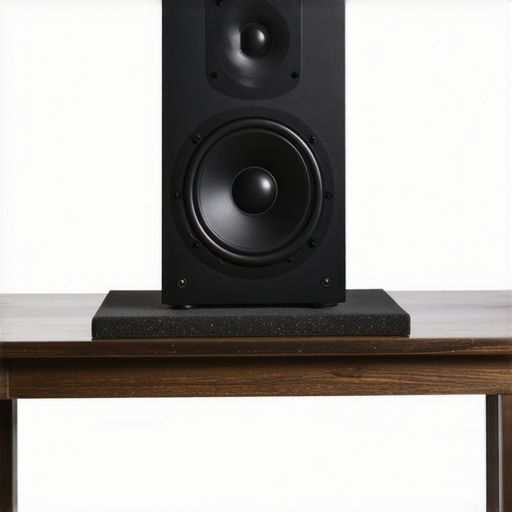
Even when the height is perfect, your desk remains a massive resonance chamber. You must “decouple” the speakers, which is essentially the process of stopping mechanical vibrations from traveling into the wood surface. Think of your desk like a drum skin; if the speaker cabinet vibrates against it, the desk starts playing its own “music” in the form of muddy mid-bass. This is the same reason your subwoofer might be vibrating your furniture and ruining the low-end definition. High-density foam pads or Sorbothane hemispheres are the best tools here. When I eventually swapped my book-stack for actual isolation pads, the bass tightened up instantly. The “smear” vanished, and I could finally hear the distinct texture of a bass guitar string rather than just a generic thud.
Check Your Polarity and Basic Wiring
Before you spend hours fine-tuning the angle, ensure your hardware is actually in sync. If you have been moving gear around, it is incredibly easy to accidentally swap a wire at the terminal. If you are unsure, you can use a 9v battery to check your speaker polarity. If one speaker cone is pushing out while the other pulls in, your bass will cancel out entirely, and no amount of desk isolation will fix that hollow sound. It is a simple five-minute check that saves hours of frustration.
Angle Your Sound for Precise Imaging
Once your speakers are at the right height and decoupled, you need to “toe them in.” This means angling the cabinets inward so they point directly at your head. If they face straight ahead, you are likely hearing too many reflections off the side walls, which is a common reason why your studio monitors sound boxy against a wall. Aim for an equilateral triangle: the distance between the two speakers should equal the distance from each speaker to your nose. In my own setup, I found that even a five-degree adjustment inward brought the singer’s voice from “somewhere on the desk” to “dead center in front of me.” Mastering this positioning is the key to how to find the sweet spot for your speakers in a rectangular room, creating a holographic audio experience that makes the speakers themselves seem to disappear.
But even if your placement is surgical, there is a technical trap many veterans fall into: the cult of “more power.” We often assume that a higher wattage rating on a box equates to a more authoritative sound, but that is a dangerous oversimplification. In my early days, I bought a massive receiver thinking it would solve my clarity issues, only to find it sounded brittle and strained. The reality is that current delivery and transient response matter far more than the number printed on the sticker. You need to learn how to tell if your amplifier has enough headroom for your speakers before you start blaming your drivers for lack of impact.
More Watts Won’t Save a Weak Power Supply
The biggest myth in the audio world is that volume and power are the same thing. They aren’t. Power is about control—specifically, the amplifier’s ability to control the movement of the speaker cone. I’ve heard 50-watt tube amps that sounded three times as “big” as 200-watt cheap Class-D chips because the power supply could actually handle the dynamic swings. If you’re pushing a system to its limit, you might notice why your speakers sound harsh when you play high-res files; it’s often not the file at all, but the amp clipping as it tries to reproduce high-frequency micro-details. According to audio expert Floyd Toole in his research for the Audio Engineering Society, the interaction between the speaker’s impedance and the room is far more decisive for sound quality than the raw power rating of the electronics.
Why do your 8-ohm speakers sometimes act like 4-ohm speakers?
This is a question that separates the hobbyists from the experts. A speaker’s impedance isn’t a flat line; it’s a roller coaster. At certain frequencies, your “8-ohm” speaker might dip down to 3.2 ohms, demanding a massive burst of current from your amp. If your amp isn’t built to handle those dips, the soundstage collapses. This is why some people find why your expensive headphones sound thin on a basic smartphone; the phone has the voltage to get them loud, but none of the current required to keep the bass drivers under control. 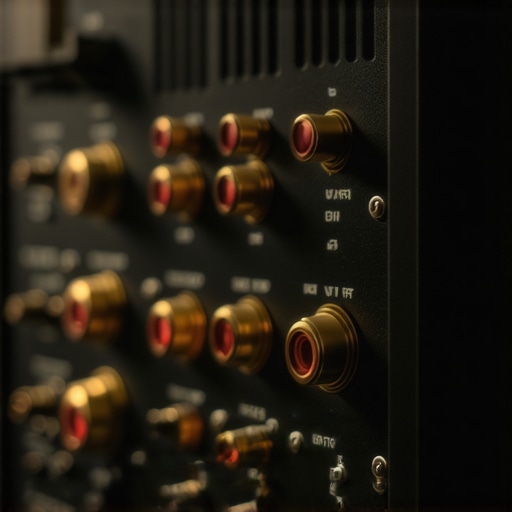
The Shiny Gold Finish That Doesn’t Actually Help
Let’s talk about cables. I’ve seen people spend $500 on “audiophile-grade” HDMI and RCA cables before they even fixed their speaker positioning. Here is the contrarian truth: for most home setups, the material of the connector matters far less than the gauge of the wire. While many brands push premium materials, there are very specific reasons why gold-plated connectors aren’t always better, especially regarding long-term durability and the potential for dissimilar metal corrosion. If you want a real upgrade, stop looking at the plating and start looking at the cross-sectional area of your copper.
One Hidden Performance Killer in Your Home Theater
If you have a high-performance power amp, there is a common mistake that can choke its performance and even create a safety risk. Never use a standard household extension cord to reach your wall outlet. Power amplifiers are high-draw devices, and thin extension cords cause voltage drops during loud musical passages, which effectively castrates your dynamic range. It’s a primary reason why you should avoid using an extension cord for your power amp if you want your system to breathe naturally. Have you ever fallen into this trap of prioritizing shiny accessories over the basic electrical needs of your gear? Let me know in the comments below!
I’ve seen two-thousand-dollar systems crippled by five cents worth of oxidation. It’s a slow, silent killer that most people ignore until their left channel starts crackling or their high-end feels like it’s being played through a wet blanket. If you live in a humid climate, your copper is a ticking time bomb. I remember pulling an old set of cables out of storage and finding the ends looked like they had been dipped in green swamp water. You absolutely have to learn how to clean green oxidization off your copper speaker terminals before the resistance becomes so high that your amp starts clipping just to push through the grime. This isn’t just about aesthetics; it is about maintaining a low-resistance path for every micro-detail in your music.
Stop Your Connections from Rotting Away
Mechanical wear is another beast entirely. If you are a headphone enthusiast, you probably know the heartbreak of seeing your favorite set of cans start to shed black flakes on your ears like bad dandruff. This usually happens because of skin oils reacting with cheap protein leather. Learning why your headphone pads are flaking and how to prevent it can save you sixty dollars a year in replacements. I’ve found that a simple wipe-down with a damp cloth after every long session extends the life of those pads by double. While you are at it, a tiny drop of dry PTFE lubricant on the hinges is the secret for how to stop your high-end headphones from creaking when you move, which is essential for critical listening.
How do I keep my gear running for twenty years?
Long-term reliability is about heat management and seal integrity. For speakers, the rubber or foam ‘surround’ that holds the cone in place is the most vulnerable point. Over time, these can get tacky or brittle. I’ve had success learning how to clean sticky speaker surrounds without damaging the rubber, which prevents them from cracking and losing their elasticity. In the world of amplifiers, heat is the enemy. According to technical papers from Harman International by Dr. Sean Olive, thermal compression and component fatigue are the primary reasons systems degrade over a decade of use. If your gear feels hot, you are shortening its life; it is that simple.
The Paper Test and Other Low-Tech Secrets
You don’t need a thousand-dollar oscilloscope to diagnose a failing speaker. One of my favorite tricks for older cabinets is the simple paper test for finding air leaks in your speaker cabinet. If the seal isn’t airtight, your bass response will be flabby and inconsistent. It takes thirty seconds and costs nothing. When I’m scouting for gear at garage sales, I always use the best way to test a used receiver before you buy it, which involves checking DC offset at the terminals with a cheap multimeter. It’s the only way to know if a vintage find is a masterpiece or a paperweight. 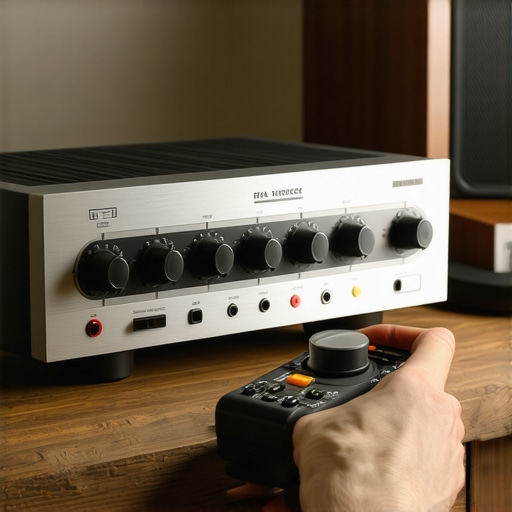
Looking toward the future, I expect the ‘tools’ we use to become increasingly software-driven. We are already seeing AI-powered room correction filters that can compensate for terrible desk placement in real-time. However, software can never fix a physical leak or a corroded wire. My advice? Spend ten minutes this weekend checking your connections. Grab a piece of paper and check your seals. You’ll be surprised how much ‘free’ performance you can claw back just by being proactive with your maintenance.
The Expensive Mistakes I Made So You Don’t Have To
I used to think that buying the most expensive cables would magically fix a lackluster soundstage, but I quickly realized that small physical factors usually outweigh the price tag. For instance, I spent weeks wondering why my high-end imaging felt ‘off’ before realizing why your headphones sound thin when you wear glasses—the tiny break in the cushion seal was the culprit. Another hard lesson? Don’t overcomplicate your signal path for the sake of gear vanity. While pros swear by them, you should truly understand the real performance benefit of using balanced XLR cables before you drop hundreds on new interconnects. Often, the biggest gains come from simply ensuring your current path is clean and unobstructed.
Three Tools That Saved My Vintage Gear
If you want to keep your system humming for decades rather than years, you need a basic restoration kit. First, a simple digital multimeter is non-negotiable; it is the best way to test a used receiver before you buy it and ensures you aren’t dealing with dangerous DC offset. Second, keep a specialized contact cleaner nearby to fight the oxidation that ruins signal flow over time. Finally, I always recommend a laser measurer for precision placement. It makes the process of how to find the sweet spot for your speakers in a rectangular room much faster than using a traditional tape measure, allowing you to get the symmetry exactly right for a holographic center image.
Go Get Your Hands Dirty and Your Music Clean
Audio isn’t just about the specifications printed on a box; it’s about the physical connection you feel when the lights go down and the first note hits. Don’t be afraid to pull your system apart and re-seat every connection once a year. Whether you are maintaining your headphones, amplifiers, or speakers, the effort pays off in immediate transparency. Take the time to tune your space and maintain your hardware, and the music will reward you with a depth and emotional impact you never knew was possible in your own home. Have you ever discovered a massive sound improvement just by moving a piece of furniture or cleaning a single wire? Let me know your experience in the comments below!