
I remember the exact moment my favorite rugged outdoor speaker decided to give up the ghost. It wasn’t the battery dying—that’s expected after a long weekend. It was that sickening ‘wiggle’ when I tried to plug in the Micro-USB cable. One minute I’m the life of the party, and the next, I’m frantically propping my phone against the charging cable at a 45-degree angle just to get a tiny red light to blink. It’s a specialized kind of torture for anyone who loves their gear. We’ve all been there, right? You’ve got a piece of hardware that sounds great, but it’s basically a paperweight because of a fifty-cent piece of plastic and metal that won’t stay put. Most people assume the internal battery is shot or the motherboard is fried, but usually, it’s just a mechanical failure at the point of contact. This happens more often than you’d think, especially if your bluetooth speaker keeps cutting out or failing to hold a charge while you’re cooking.
Put Down the Duct Tape and Grab a Screwdriver
I’ll be the first to admit I’ve made some pretty dumb mistakes in the name of ‘DIY.’ Years ago, I tried to fix a loose port by jamming a piece of a toothpick into the gap to ‘stabilize’ it. All I did was bend the pins and ensure that the speaker never charged again. It was a classic rookie move. I want to save you from that same frustration. We aren’t just going to jerry-rig this thing; we are going to look at why these ports fail and how to actually secure them so they stay put. It’s a very similar mindset to the one you need when you repair a loose speaker terminal on a home amp—it’s all about solid contact and removing the stress from the joint. According to the repair advocates at iFixit, Micro-USB and USB-C ports on portable electronics are among the most frequent points of failure because they are often only held on by tiny surface-mount solder points that weren’t designed for the leverage of a heavy cable.
Is Your Speaker Actually Broken Beyond Repair?
I hear this all the time: ‘Is it even worth the risk of opening the casing?’ I get the skepticism. These things are often glued shut, and there’s a real fear you’ll make it worse or cause your portable speaker to distort if you don’t seal it back up correctly. But here’s the reality: if it won’t charge, it’s already broken. You have nothing to lose and a perfectly good $150 speaker to gain. Today, we’re going to walk through the process of how to fix the loose charging port on your bluetooth speaker step-by-step. Have you ever found yourself taping a charging cable to a table just to get it to work for ten minutes? Tell me your most desperate charging hack in the comments—I need to know I’m not the only one who’s suffered through this!
Cracking the Shell Without Ruining the Aesthetics
Getting inside is the first hurdle. Most modern speakers are held together by hidden screws under rubber feet or clips that feel like they’ll snap if you apply the wrong pressure. I once spent forty minutes trying to pry open a rugged outdoor speaker, only to realize the screws were hiding behind the brand logo sticker. Use a plastic spudger or an old credit card; metal screwdrivers will gouge the plastic and leave it looking like it survived a dog attack. If your speaker feels like it is fused shut, you might need to learn how to remove the back of a sealed speaker cabinet safely. A hair dryer on low heat can soften the adhesive enough to let you in without a fight.
Spot the Hairline Fracture on the Circuit Board
Once you are inside, look for the PCB (the green board). The charging port is that tiny silver house soldered onto it. Take a wooden toothpick and gently—very gently—nudge the port. If you see the silver legs lift even a fraction of a millimeter off the board, you have found the break. This mechanical failure is often why your bluetooth speaker keeps cutting out or refusing to charge. It is the same logic you would apply when you repair a loose speaker terminal on an old receiver: solid contact is everything. If the port is wiggling, the electrical bridge is down. 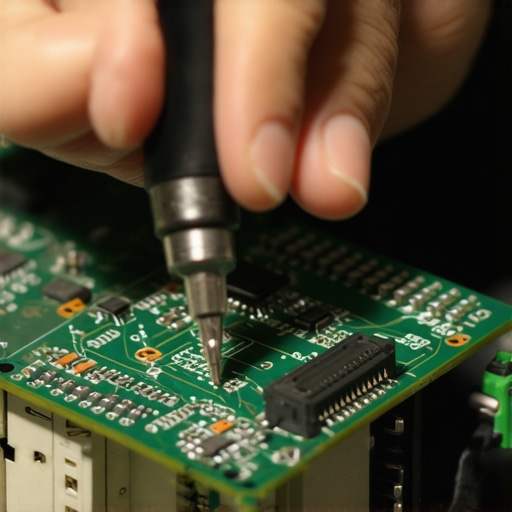
Heat It Up and Re-Anchor the Pins
You will need a soldering iron with a needle-thin tip. The goal is not to add a huge glob of solder—that is how you short out the board and turn your speaker into a brick. You want to ‘reflow’ the existing solder. Touch the tip of the iron to the joint where the pin meets the board for about two seconds until the silver liquifies and resets. I remember the first time I tried this on a pair of high-end units; I was so nervous I almost bridged two pins together, which would have been a disaster for the battery. If your hands are shaky, brace your wrists on the table and keep the tip clean. This is much like managing the internal components to fix one headphone side being louder than the other; it is all about precision over power.
Add a Structural Brace for Extra Durability
Soldering fixes the electrical path, but it does not solve the ‘leverage’ problem. Every time you plug in your cable, you are putting stress on those tiny joints. To stop this from happening again, use a tiny dab of non-conductive epoxy (not superglue!) around the sides of the metal port housing to bond it more securely to the PCB. This is a common trick used when enthusiasts build a car audio box or secure heavy components—adding structural support saves the electrical joints from doing all the heavy lifting. While you are in there, check if any other parts are loose to stop your portable speaker from vibrating off the shelf once you turn the volume back up.
Clean the Port Before You Close Up
Before you snap the case back together, use a can of compressed air or a tiny brush to clear out any pocket lint. Debris in the port can cause a ‘false loose’ feeling where the cable does not seat properly. It is the same routine you would follow if you needed to clean your earbuds after they fell in the dirt. Plug the cable in once while the case is still open just to ensure the charging light stays steady without you having to prop the cable up at a weird angle. If it stays red, you have officially saved your gear from the landfill.
The Gold-Plated Myth That Drains Your Wallet
You’ve likely seen the marketing: ‘Gold-plated for superior connectivity!’ People often think that if they use these high-end cables or connectors, their loose port issues will magically vanish. In reality, it is mostly a marketing distraction. While gold resists corrosion, it won’t do a thing for a port that is physically ripping off the board. In fact, you have to ask is gold-plated hardware really worth the extra cash when the real problem is a lack of mechanical strain relief? In my experience, focusing on the metal’s purity is putting the cart before the horse. You are much better off spending that extra money on a better-quality cable with a reinforced neck than on why gold-plated connectors aren’t always better for the actual structural integrity of your gear.
Avoid the Superglue Trap
One massive mistake I see constantly—the ‘Oops’ factor of DIY audio—is the ‘Superglue Hail Mary.’ When that port starts wiggling, the instinct is to flood the area with CA glue. Stop right there. Superglue is incredibly thin and loves to travel via capillary action. It will seep right into the internal pins of the port, insulating the contacts and making it impossible to charge. Plus, once it is cured, it is a nightmare to remove if you ever need to learn how to fix the loose charging port on your bluetooth speaker properly. If you want to reinforce a joint, use a tiny bit of electronics-grade silicone or a two-part epoxy that stays exactly where you put it. 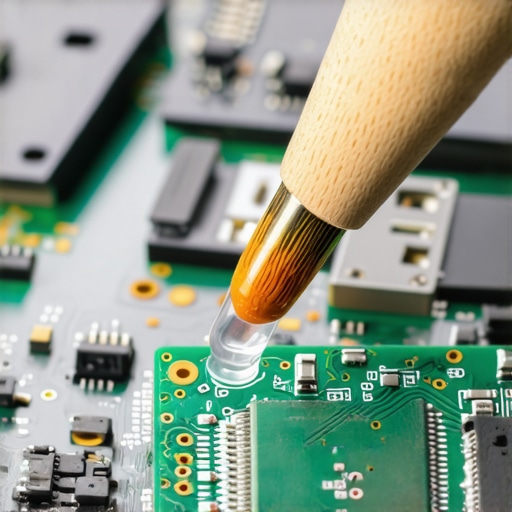
Why does your soldered connection fail after just a week?
If you have successfully reflowed the solder but the port still feels wonky, you are likely dealing with a pad lifting off the board. According to the NASA-STD-8739.3 standard for soldering—the gold standard for high-reliability electronics—the biggest enemy of a reliable joint is the lack of ‘strain relief.’ If the cable is pulling on the solder joints instead of a structural housing, the joint will fail every single time. This is exactly why your bluetooth speaker keeps cutting out even after you thought you fixed it. You need to ensure the metal housing of the port is anchored to the board’s ground plane, not just the data pins. This lack of heat management and structural stability is also why your amplifier gets hot enough to burn your hand when connections are inefficient. Have you ever fallen into the trap of over-repairing something only to break it further? Let me know in the comments—I have plenty more ‘what not to do’ stories to share!
Why a Cheap Soldering Iron is Your Worst Enemy
If you’re serious about keeping your speakers alive, stop using that $5 wood-burning iron from the bargain bin. I learned this the hard way when I tried to repair a high-end portable unit and ended up lifting the copper traces right off the board because the heat was inconsistent. Now, I swear by a temperature-controlled station like the Hakko FX-888D. It allows you to dial in the exact melting point for lead-free solder without nuking the surrounding components. When you are looking at how to fix the loose charging port on your bluetooth speaker, having a tip that can actually hold a steady 350°C is the difference between a professional fix and a melted mess. Don’t forget a spool of 60/40 rosin core solder; it flows significantly better than the lead-free stuff that comes with most entry-level kits.
The Magic Liquid That Saves Old Receivers
Before you start tearing everything apart, you need to have a can of DeoxIT D5 in your drawer. I’ve seen this stuff bring ‘dead’ amplifiers back to life in seconds. According to technical documentation from Caig Laboratories, the formula is specifically designed to dissolve oxides and sulfides that build up on metal surfaces. If you have a vintage amp that crackles every time you adjust the volume, it is usually just oxidation. It is the easy way to fix a scratchy volume slider on your radio without needing to desolder a single thing. Just a tiny spray into the potentiometer, a few dozen turns of the knob, and the signal path is clear again. It works just as well for cleaning those stubborn pins on a charging port that refuses to recognize a cable.
How can I make my home audio setup last for the next decade?
Maintenance isn’t just about the internal circuits; it’s about the physical environment and the software driving the hardware. First, keep your gear away from direct sunlight and moisture. UV rays are the primary reason why you eventually need to learn how to replace the foam pads on your favorite headphones, as the material dries out and flakes. Second, never ignore the digital side. I’ve seen countless people return perfectly good hardware when the fix was just a download away. Understanding why your soundbar needs a firmware update to fix audio drops can save you hours of troubleshooting physical cables that aren’t actually broken. Even your power management matters; if you ever notice why your wireless earbuds charge to 90 and then stop, it is often a software-based battery health feature designed to prevent swelling over time.
Don’t Ignore the Digital Brain in Your Soundbar
We are moving toward a future where our audio gear is more computer than speaker. I predict that in the next few years, ‘Software-Defined Repair’ will become the norm, where internal diagnostic sensors will alert your phone the moment a charging port begins to show physical fatigue or a capacitor starts to drift out of spec. Until then, we have to rely on our own eyes and ears. My best advice? Once a month, do a ‘cable sweep.’ Unplug and replug every connection in your setup to break up micro-corrosion and check for frayed ends. I want you to try this right now: go to your primary speaker, unplug the charging cable, and inspect the inside of the port with a flashlight. If you see even a tiny bit of lint, clear it out with a non-conductive plastic toothpick. You might just prevent a failure before it even starts.
Hard-Won Truths from My Workbench
After years of tinkering with everything from vintage receivers to modern portables, I have realized that most ‘catastrophic’ failures are actually just small mechanical stresses that snowballed. If I had simply stopped using my speaker while it was actively charging, that port never would have wiggled in the first place. Also, never underestimate the power of a clean workspace; one stray bead of solder can cause a short that makes your amplifier make a popping sound when you turn it on, potentially damaging the delicate internal logic. Finally, patience is your absolute best tool. If you find yourself getting frustrated with a tiny screw or a stubborn clip, walk away for ten minutes before you melt or snap something that cannot be replaced. Knowing why your amplifier gets hot enough to burn your hand is often about recognizing these small, inefficient connections before they fail completely.
The Toolbox Every Audio Nerd Actually Needs
I do not recommend products lightly, but a few specific items have paid for themselves ten times over in my shop. The iFixit Pro Tech Toolkit is my go-to for opening those stubborn ‘sealed’ cases that manufacturers design to be disposable. For electrical cleaning, nothing in the world beats DeoxIT D5—it is truly the only reliable way to fix the crackling noise when you turn your amp volume without doing a full, expensive teardown. If you are looking for high-quality components on a shoestring budget, reading about the 5 dollar thrift store find that fixed my muddy guitar amp will change the way you look at used gear sections forever. I trust these tools because they focus on precision rather than just brute force.
Save Your Gear and Your Wallet
Taking the leap to open your own electronics is a true rite of passage for any serious audio enthusiast. You move from being a mere consumer to a caretaker of the gear you love. Whether you are learning how to replace the foam pads on your favorite headphones or finally mastering how to fix the loose charging port on your bluetooth speaker, you are gaining a practical skill that keeps quality hardware out of the landfill and more money in your pocket for your next upgrade. Don’t be afraid to get your hands dirty; the reward of hearing that first clear, crisp note after a successful repair is worth every bit of effort. What is the most ‘hopeless’ piece of tech you have ever managed to bring back from the dead? Let me know in the comments below!