
I stood there, staring at the jagged tear in the cone of my prized 1970s floorstanders, feeling like I’d just watched a slow-motion car crash. It was a stupid move—I was moving a lamp, the base slipped, and punch—right through the paper. That sickening thwack was followed by a buzz so annoying it made my teeth ache. I honestly thought about dragging them to the curb. I’ve seen enough vintage speakers losing their punch over time, but a physical hole feels so much more terminal. But before you give up on your gear, let me tell you about the five-cent solution sitting in your kitchen cabinet right now.
The Day My Favorite Woofers Almost Met the Curb
We’ve all been there. Whether it is a cat using your subwoofer as a scratching post or a helpful toddler with a pencil, a damaged cone feels like the end of the world. Early in my hobbyist days, I made the classic rookie mistake: I tried to patch a tear with heavy-duty duct tape. Don’t do that. It was a total disaster. The tape was too heavy, it stiffened the cone unevenly, and it made the speaker sound like it was playing through a wet wool blanket. It is one thing to learn how to revive old speakers with new foam, but a paper tear requires a much more delicate touch. That is when an old-timer at a local repair shop laughed at my tape job and handed me a pack of unbleached coffee filters.
Today, I’m going to show you exactly how to use those filters to create a patch that is light, strong, and virtually invisible to the ear. We are going to stop that rattle and get your system back to its former glory without spending fifty dollars on a professional reconing kit that is usually overkill for a small tear. It is the same principle as structural reinforcement, just on a miniature, acoustic scale. If you have ever felt that sinking feeling when your gear breaks, you know why I am so passionate about these simple saves.
Can a Kitchen Staple Actually Save Your Audio Quality?
I know what you are thinking. It sounds like one of those viral life hacks that works for five minutes and then fails. You might be worried that paper from a filter is too flimsy or that it will change the way the driver moves. But here is the science: coffee filters are made of long-fiber paper that is incredibly strong for its weight. When saturated with the right adhesive, it bonds to the original speaker paper to create a composite that mimics the original material’s properties perfectly. According to Acoustics Today, maintaining the mass-to-stiffness ratio is the absolute secret to speaker repair; adding too much weight ruins the transient response. This method keeps things light and agile. Have you ever looked at a tear and wondered if your speaker is actually blown or just rattling? Often, it is just the physical vibration of those torn edges rubbing together. This fix silences that friction for good. Have you ever tried a quick fix on your audio gear that ended up backfiring like my tape experiment did?
The Five-Step Surgery for a Broken Cone
Prep the Surface and Stop the Bleeding
Before you even touch a bottle of glue, you have to stabilize the tear. If the edges are frayed or overlapping awkwardly, they will create a secondary vibration that no patch can fix. I use a soft-bristled paintbrush or a makeup brush to gently whisk away dust. You would be surprised how much grit hides in those fibers. If you have noticed why your car speakers rattle even at low volume, it is often because loose particles are dancing against the cone. The same logic applies here. Use a pair of tweezers to align the edges of the tear so they sit flush. If the paper is missing a small chunk, do not panic; the filter will act as the bridge.
Tailor Your Patch for Maximum Response
Take your coffee filter and cut a piece that is roughly half an inch larger than the tear on all sides. You want a feathered edge, not a sharp, straight cut. I usually hand-tear the edges of the filter piece rather than using scissors. This helps the patch blend into the original cone material without creating a hard ridge that could cause a new stress point. Think of it like a skin graft; you want it to integrate, not just sit on top. I learned this the hard way on a pair of vintage bookshelf speakers. I cut a perfect square with scissors, and the speaker actually developed a new crack right along the edge of the patch because the transition was too abrupt. Now, I always go for that ragged, organic edge.
The Secret Sauce is Diluted PVA Glue
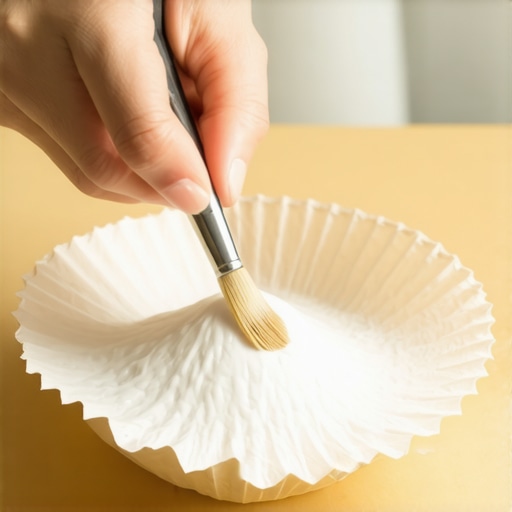
Standard white school glue is your best friend, but you cannot use it straight out of the bottle. It is too thick and heavy. I mix a 50/50 solution of glue and water. This allows the mixture to soak into the fibers of the coffee filter and the original cone, creating a single, unified structure once it dries. It is the same way the simple paper test for finding air leaks identifies gaps; we are looking for a perfect seal. Use a small brush to apply a thin layer of the mixture to the back of the cone—if you can reach it—or the front if you cannot. Place the filter piece over the tear and gently brush more glue over it until the filter becomes translucent. This is where the magic happens; the filter basically disappears into the cone paper.
Avoid the Temptation to Crank the Volume
Patience is the hardest part of any audio repair. You need to let that patch dry for at least 24 hours. If you fire it up too soon, the vibrations will shift the patch while the glue is still tacky, and you will have to start over. I once rushed a repair on some units I was prepping for a house party, and by the end of the night, the patch had slid an inch down the cone. While you wait, check your other components. Maybe it is time to see how to tell if your speakers capacitor is starting to fail or consider why your bookshelf speakers sound better when you move them off the desk. A little downtime is the perfect excuse for a full system audit. Letting the glue cure completely ensures the mass of the cone remains balanced, preserving that crisp transient response you bought the speakers for in the first place.
Stop Worrying About Perfectly Round Patches
The truth is, many ‘audiophile’ purists will tell you that once a cone is breached, the speaker’s ‘soul’ is gone and you need a full recone. I call nonsense on that. In my experience, a well-executed paper patch is often more acoustically transparent than the natural aging process itself. We obsess over a tiny tear while ignoring the fact that vintage speakers are losing their punch over time due to magnet flux degradation and spider fatigue. A patch made of long-fiber paper like a coffee filter actually mimics the original pulp construction better than the stiff plastic or rubber patches found in some ‘professional’ kits. The key isn’t making it look pretty; it’s making it move naturally.
The Super Glue Trap That Ruins Transient Response
One massive mistake I see hobbyists make—and I fell for this once too—is using Cyanoacrylate (super glue). It’s tempting because it bonds instantly, but it is a total disaster for audio. Super glue dries into a brittle, glass-like state. As the cone oscillates thousands of times per second, that rigid spot refuses to flex, leading to delamination or a nasty high-frequency peak. This is often why your speakers sound harsh when you play high-res files; the driver can no longer track the waveform smoothly. Stick to PVA glue. It remains slightly hemispherical and flexible, allowing the patch to move with the music rather than fighting against it.

Will a DIY Patch Throw Off Your Speaker’s Tonal Balance?
This is the most common advanced concern I get: does the added weight of the glue and paper change the resonant frequency (Fs)? Technically, yes, but the scale matters. According to research published by the Audio Engineering Society (AES), small changes in moving mass have a negligible effect on the overall frequency response if they remain within a specific percentage of the total cone weight. A coffee filter patch adds roughly 0.1 to 0.3 grams. For an 8-inch woofer, that is less than a 1% change—far less than the manufacturing tolerances of most factory drivers. You’ll get more variation from the truth about speaker break-in periods or temperature shifts than you will from this fix.
Before you commit to a full replacement, consider that even high-end gear has its quirks. Whether you are wondering how to tell if your speakers capacitor is starting to fail or trying to figure out the truth about using a car battery for your home stereo, the goal is always the same: keeping the music playing without overcomplicating the solution. Have you ever fallen into the trap of over-engineering a simple repair? Let me know in the comments.
Once that glue is drying, it is the perfect time to look at the rest of your signal chain. A physical repair like a cone patch is a victory, but it is often just the first step in a broader restoration project. If you are hearing crackles when you adjust the gain, it’s a sign that internal components are oxidizing. I’ve seen people spend hundreds on new drivers when all they really needed to do was fix a scratchy volume knob on an old amp. This kind of systematic maintenance is what separates a setup that lasts forty years from one that ends up in a landfill.
Don’t Let Corroded Pots Muffle Your Hard Work
Most of the gremlins people experience in vintage gear come from a simple lack of use. Metal contacts inside your amplifier’s potentiometers develop a layer of oxidation over time, which introduces resistance and noise. I personally keep a can of DeoxIT D5 on my bench at all times. It is not just about cleaning; it’s about chemical de-oxidation. If you fix a scratchy volume dial with electrical contact cleaner, you aren’t just getting rid of the noise; you’re actually restoring the signal path to its original low-impedance state. It’s like clearing a clogged artery in your audio system, allowing the transients to hit with the speed they were designed to have.
#IMAGE_PLACE_HOLDER_D#
How do I maintain my audio gear over the long haul?
Long-term health requires more than just occasional cleaning. You need to be proactive about heat and electrical integrity. I always keep an eye on thermal output—if you’ve ever wondered why your vintage amp gets hot even when you aren’t playing music, it’s usually a sign that the DC bias needs adjustment. Beyond heat, keep an ear out for the click. While the reason your expensive receiver makes a clicking sound when it starts is usually just the protection relay engaging, persistent clicking or hum can point to deeper issues like leaking electrolytic caps. Every six months, I recommend a full pull-and-check: unplug everything, wipe down the RCA connectors with isopropyl alcohol, and re-seat your speaker wires to prevent oxygen-free copper from turning into a green, non-conductive mess.
The Tool That Saved My Favorite Silver-Face Receiver
My most-used tool isn’t a fancy soldering station; it’s a simple, reliable digital multimeter. It’s essential for checking for DC offset at the speaker terminals, which can slowly cook your newly repaired voice coils. According to technical documentation from Rod Elliott of Elliott Sound Products, even a small amount of DC leakage can cause the voice coil to sit off-center in the magnetic gap, leading to premature wear and distortion. Using a multimeter also helps you get rid of ground loop hum in your audio setup by identifying which component is floating or improperly grounded. I expect the world of high-end audio to lean more heavily into self-correcting hardware in the future, where amplifiers use impedance sensing to adjust their output curve in real-time, but for now, we have to be the monitors. The best thing you can do today is learn how to tell if your speakers capacitor is starting to fail before it takes the rest of the crossover with it. My challenge to you: grab a can of contact cleaner this weekend and revitalize one piece of gear you’ve been ignoring.
What I Learned After Patching Fifty Different Woofers
Over the years, I’ve realized that the fear of ‘ruining’ a speaker often keeps people from hearing its full potential. My first hard-learned lesson was that perfection is the enemy of progress; a slightly visible patch that restores structural integrity is infinitely better than a speaker sitting silent in a landfill. I also learned that the truth about speaker break-in periods applies even to repairs. Once that PVA glue fully cures, the patch needs a few hours of moderate play to settle into its new physical state. Trust your ears over your eyes—if the frequency sweep is clean, the repair is a success, regardless of how it looks behind the grille.
Another lightbulb moment for me was realizing how often we misdiagnose physical damage. Sometimes we blame a tear for a sound issue when, in reality, the driver is just fighting the cabinet. Before you dive into surgery, learn how to tell if your speakers are out of phase in 30 seconds to ensure your wiring isn’t the real culprit behind that thin, hollow sound. Structural repair is a superpower in this hobby, but only when paired with solid diagnostic skills.
The Diagnostic Gear I Can’t Live Without
If you are serious about keeping vintage gear alive, there are three resources I swear by. First, Elliott Sound Products is the gold standard for technical audio truth; it’s where I learned the physics of cone mass. Second, a reliable digital multimeter is non-negotiable for checking voice coil continuity before you waste time patching paper. Finally, I always recommend mastering how to test your headphones for a blown driver at home, as the same signal-testing principles apply to your floorstanders and bookshelf units. These tools take the guesswork out of the ‘is it worth fixing’ equation.
Keeping the Music Alive for Another Decade
There is a unique satisfaction that comes from hearing a speaker sing again after you’ve personally mended its wounds. You don’t need a degree in electrical engineering or a hundred-dollar repair kit to get professional results; you just need a bit of patience and a five-cent coffee filter. Remember that the trick to making cheap bookshelf speakers sound expensive usually starts with the care and maintenance you provide, not the brand name on the dust cap. Go ahead, grab that glue, and save your sound. Have you ever accidentally poked a hole in a speaker cone, or are you dealing with a ‘gift’ from a pet? Let me know your repair stories in the comments below!