
I was sitting in my living room at 11 PM, ready to finally hear that new 180g vinyl pressing I’d been eyeing for months. I dropped the needle, and before the first note even hit, there it was. That low, soul-crushing 60Hz buzz. It wasn’t the music. It was that ‘mmmmnnnn’ sound that makes you want to throw your entire receiver out the window. It didn’t matter how high-end my gear was; the hum didn’t care about price tags. It was persistent, annoying, and it felt like my speakers were mocking me.
Stop the Buzz from Ruining Your Quiet Nights
If you are hearing a constant low-frequency drone that doesn’t change when you turn the volume up or down, you are likely dealing with a ground loop. It is one of the most frustrating gremlins in the audio world because it’s often invisible. Today, I am going to show you exactly how to kill that noise once and for all. We’re going to look at everything from your wall outlets to your interconnects. I’ve spent years chasing these ghosts, and I’ve learned that you don’t need a degree in electrical engineering to get a silent background. Sometimes, the solution is the 5 dollar fix for humming speakers that most people overlook while they’re busy buying expensive cables.
Do I really need to buy expensive gear to fix this?
Most people assume they need a brand-new power conditioner or a fancy isolated transformer to solve noise issues. Early in my journey, I made the massive mistake of spending nearly $300 on ‘audiophile-grade’ power strips, thinking they’d act like a magic wand. Spoiler alert: they didn’t do a thing. The hum stayed exactly where it was because I didn’t understand the physics of what was happening. According to research from the Audio Engineering Society, ground loops occur because of a voltage difference between two points that should both be at zero volts—creating a loop that your equipment mistakenly interprets as an audio signal. It’s a physical setup issue, not a ‘cheap equipment’ issue. Have you ever felt like your system was possessed by a hum you just couldn’t shake?
Your First Steps Toward Audio Silence
Before you start tearing your hair out or assuming you have a blown speaker that is just rattling, we need to isolate the components. I’ve seen people replace perfectly good amplifiers because they thought the internal shielding was gone, when in reality, it was just their cable box causing a loop through the HDMI. We’ll also touch on how these issues differ in various environments; for example, if you’re a car audio enthusiast, you might be dealing with a similar but distinct engine hum that requires proper grounding. The goal is to strip your system down to its simplest form and build it back up until the culprit reveals itself. It takes a bit of patience, but the moment that hum vanishes and you’re left with nothing but ‘black’ silence between tracks? That is worth every second of the hunt.
Strip Your System Down to the Studs
To find the source of that soul-crushing buzz, you have to play detective. The most common mistake is trying to fix the whole system at once. Instead, you need to strip everything back to the absolute bare essentials. Unplug every single RCA, HDMI, and optical cable until only your speakers and your amplifier remain connected. If the hum is still there, you know the culprit is either the amp itself or the electrical outlet it is plugged into. If the silence is finally deafening, you begin the ‘police lineup.’ Plug one component back in at a time—your DAC, then your turntable, then your streamer. I remember a grueling Saturday where I spent four hours re-soldering connections on a vintage amp, only to realize the hum only appeared when I plugged in my cable box. The second that coaxial cable touched the receiver, the drone returned. It wasn’t the high-end gear at fault; it was a simple voltage difference coming from the street line.
Identify the Hidden Culprit in Your Setup
Once you find which device triggers the noise, you need to understand why it is happening. Ground loops act like a circular race track where electricity gets stuck in a loop instead of flowing safely to the ground. This often happens when devices are plugged into different outlets that have slightly different ground potentials. For instance, if you have a powered subwoofer that is vibrating your furniture but also emitting a low-frequency growl, it might be because it is plugged into a wall socket across the room from your main receiver. Try moving all your audio power plugs to a single, high-quality power strip. This ensures every piece of gear ‘sees’ the exact same path to ground.
Separate Your Power from Your Signal
Cables are essentially antennas. If you have your sensitive audio interconnects bundled up with your thick power cords, you are begging for electromagnetic interference to bleed into your music. This is a common issue with desktop setups where space is tight. It is one of the reasons your bookshelf speakers sound better when you move them off the desk; you’re not just improving the soundstage, you’re physically distancing the drivers and crossovers from the ‘noisy’ electronics of your computer. 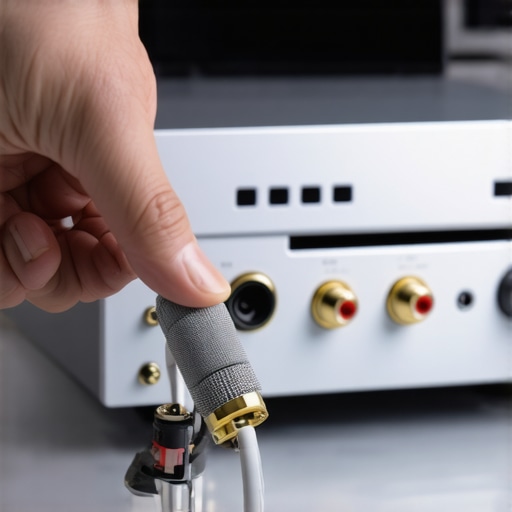
Check Your Phase and Signal Integrity
While you are hunting down hum, don’t ignore the way your speakers are actually wired. Sometimes what we perceive as a noisy or ‘thin’ background is actually a phase issue. You can tell if your speakers are out of phase in 30 seconds by checking the polarity of your wires; if one speaker is pushing while the other pulls, it creates a vacuum in the low end that makes electrical hum much more prominent to the ear. Similarly, if you are using a modern home theater setup, keep an eye on your digital connections. If you have to fix the audio delay on your soundbar, it might be due to a complex HDMI handshake that is also introducing a ground loop through the metal chassis of your TV.
Avoid Common Power Pitfalls
If the hum persists even after you’ve consolidated your plugs, check for ‘noisy’ appliances. I once lived in an old apartment where my speakers would buzz only when the neighbor’s refrigerator compressor kicked on. This happens when the electrical noise travels back through the shared house wiring. If you suspect your gear is struggling with dirty power, check if your receiver’s protection mode keeps triggering at high volume. This can be a sign that the power coming from your wall is unstable or that a ground fault is putting undue stress on the internal circuitry. Sometimes, the simplest fix is just a ‘cheater plug’ or an isolation transformer, but always try the cable management and outlet consolidation steps first before spending a dime.
The Dangerous Shortcut Everyone Takes
The most common advice you will find on old-school audio forums is to use a ‘cheater plug’—that little gray adapter that turns a three-prong power cord into a two-prong one. While it effectively breaks the ground loop and kills the 60Hz hum, it is a massive safety risk. You are essentially removing the safety path for electricity. If your amplifier’s power supply fails, the metal chassis could become electrified, and you become the easiest path to ground. Instead of taking this risk, address the signal path first. I have seen many users find relief simply by realizing why their receiver’s protection mode keeps triggering, which is often a better indicator of electrical stress than a simple buzz.
Why Your High-End Gear Sounds Identical to Budget Tech
Here is a hard truth most salesmen will not tell you: if your room acoustics are a mess or your source material is poor, your high-end DAC sounds exactly like your laptop’s headphone jack. People spend thousands on ‘clean’ power and high-resolution converters, but they ignore the noise floor of their own environment. A study by the Audio Engineering Society (AES) has shown that in double-blind tests, many listeners cannot distinguish between high-end and consumer-grade converters once levels are matched, precisely because common-mode noise in the wiring masks the subtle benefits of the better gear. You are not paying for better sound as much as you are paying for the potential for better sound, provided every other variable is perfect.

Why does my system sound worse after I ‘upgraded’ the cables?
It sounds counterintuitive, but ‘audiophile’ cables can sometimes introduce more noise than they solve. If a cable is poorly shielded or lacks proper rejection for its length, it acts as an antenna for the EMI floating around your house. This is especially true in crowded setups where fixing the audio delay on your soundbar involves routing multiple HDMI and power cables through the same tight space. I once spent a fortune on silver-plated interconnects only to find they picked up more RFI from my router than my ten-dollar basic ones. Furthermore, never underestimate physical interference; for instance, your headphones sound thin when you wear glasses because the temple arms break the acoustic seal, causing a massive drop in sub-bass—not a fault of the amplifier or the cable quality.
The Nuance of Room Measurement
Before you go down the rabbit hole of power conditioners, take a baseline. I always recommend that you use your phone to measure your room’s frequency response. This will tell you if that ‘hum’ you are hearing is actually an electrical ground loop or a standing wave at 60Hz caused by your speaker placement. Chasing electrical ghosts when you have an acoustic problem is the fastest way to empty your wallet. Have you ever fallen into the trap of buying gear to fix a problem that was actually just a setup issue? Let me know in the comments.
The most common mistake I see people make once they finally get their system quiet is assuming the job is finished. High-fidelity audio is like owning a classic car; you can’t just set it and forget it. If you have got a vintage receiver, that scratchy noise when you turn the knob isn’t just ‘character’—it is oxidation. I personally swear by DeoxIT D5. It is the gold standard for a reason. Learning how to fix a scratchy volume dial with electrical contact cleaner will save you a hundred dollars in shop fees and keep your signal path pristine. While you are at it, peek at the internal components. As Nelson Pass, the legendary founder of Pass Labs, often notes in his technical papers, heat is the enemy of longevity, especially in high-bias circuits. This is exactly why your vintage amp gets hot even when you aren’t playing music; those components are under constant thermal stress. If you see a capacitor that looks slightly bulged or has a crusty residue at the base, you need to know how to tell if your speakers capacitor is starting to fail before it takes out your precious tweeters.
Give Your Gear a Second Life Before the Capacitors Die
It is not just the electronics that need love; your speakers are physically aging every day. The rubber or foam surrounds that hold the cone in place will eventually dry out or rot, which explains why your vintage speakers are losing their punch over time. I make it a habit to inspect my drivers every six months. You can actually extend the life of these parts if you know how to clean sticky speaker surrounds without damaging the rubber. It is a terrifying process the first time you do it, but keeping that material supple ensures the woofer can move freely without cracking. If you ignore this, you’ll eventually hear the voice coil scraping against the magnet, and by then, the damage is done. 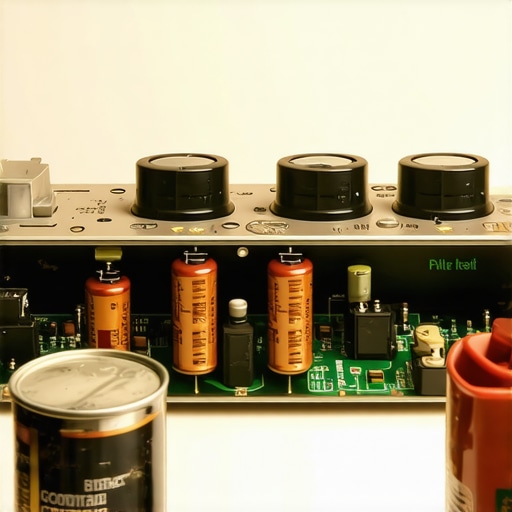
How do I stop my vintage gear from sounding dull over time?
The secret is ‘mechanical hygiene.’ Beyond cleaning the pots and checking the caps, look at your physical connections. I use a fine-grit sandpaper or a dedicated silver cleaning cloth on my speaker terminals once a year. This removes the microscopic layer of oxidation that adds resistance to the signal. You also need to address the physical stability of the speakers. If you feel like your soundstage is drifting, consider that the reason your speaker stands need to be filled with sand is to provide the mass necessary to stop cabinet micro-vibrations. This isn’t snake oil; it’s physics. A speaker that moves even a fraction of a millimeter while trying to push air is a speaker that is blurring your transients.
The Digital Crystal Ball for Home Audio
Looking ahead, the trend is moving away from the massive ‘stack’ of gear toward intelligent, active systems. I predict that within the next decade, the passive crossover will be a niche relic for enthusiasts. We are seeing a massive shift toward DSP (Digital Signal Processing) being integrated directly into the speaker cabinets. This allows for real-time correction of room acoustics and driver behavior that no amount of expensive cabling could ever achieve. While I love my vintage tubes, the future of audio is in software-defined hardware that can adapt to your living room on the fly. Don’t be afraid of this change—it’s going to make incredible sound accessible to people who don’t have the space for a dedicated listening room. For your homework this weekend, I want you to try one advanced tip: move your speakers just three inches further from the wall and re-run your room measurement. You will be shocked at how much clarity you’ve been leaving on the table.
What I Learned After 500 Hours of Chasing Silence
The biggest takeaway from my years as an audiophile is that throwing money at a noise problem is almost always the wrong move. I once thought that buying a beefier amplifier would solve my clarity issues, but quickly realized why your bookshelf speakers need more power than you think—it is about headroom and control, not just volume. If your system has an underlying electrical issue, more power just makes the buzz louder. I also learned that not every noise is electrical; sometimes, understanding why your bluetooth speaker sounds distorted at 80 volume helps you realize that digital clipping and physical driver limits are just as common as a pesky ground loop. My most ‘lightbulb’ moment was realizing that a system is only as quiet as its weakest connection. Often, it is a single poorly shielded wire or a wireless component acting up, like learning how to fix a wireless subwoofer that keeps losing its pairing to keep your low-end seamless and noise-free.
Tools That Saved My Sound (and My Sanity)
You do not need a laboratory full of equipment to keep your audio pristine, but a few specific tools are non-negotiable for me. First, never underestimate the power of mechanical isolation; the reason your speaker stands need to be filled with sand is grounded in physics, as it stops cabinet vibrations from bleeding into the floor and muddying your sound. Second, for electrical maintenance, I keep a can of contact cleaner nearby to ensure signal paths remain clear. Finally, if you are still hearing that low drone, the the 5 dollar fix for humming speakers is the most reliable tool in my kit—it’s an RCA ground loop isolator that physically breaks the electrical path without ruining your frequency response. I trust these methods because they rely on simple science rather than marketing hype.
Take the First Step Toward a Quiet Background
The journey to high-fidelity sound is a marathon, not a sprint. It can be incredibly frustrating to deal with a persistent ground loop, but once you hear that first track emerge from total silence, you will never want to go back. Take your time, isolate each component, and do not be afraid to get your hands a little dirty with some cable management. You’ve worked hard for your gear, and you deserve to hear every nuance of your music exactly as the artist intended. Have you ever spent a whole weekend chasing a ground loop only to find it was a single cheap cable or a neighbor’s appliance? Let me know your audio horror stories in the comments.