
There I was, halfway through a classic rock marathon, feeling the floorboards shake under my vintage towers, when the Click of Death happened. Not a fuse blowing, but that sharp, mechanical snick that tells you your receiver has just entered protection mode. It’s like a bouncer tossing you out of your own club right when the party gets good. I used to think my gear was cursed, or worse, that I’d fried a transformer. But over the years, I’ve learned that this annoying safety feature is actually your best friend in disguise, even if it has a terrible way of showing its affection.
Your Amp is Screaming for Help
Most of us just want to feel the music, but your receiver is doing complex math every second to make that happen. When it cuts out, it’s usually because it can’t keep up with the demand or it’s detected a fatal flaw in the signal chain. Early in my audio journey, I made the classic mistake of thinking more volume just meant more power. I didn’t realize that amplifier headroom isn’t an infinite resource. If you push a budget amp too hard, it starts clipping, which sends a distorted square wave to your speakers and generates massive heat. I once spent three hours troubleshooting a shutdown issue only to realize I was trying to wire a 4-ohm speaker to an 8-ohm receiver without checking the settings. It’s a humbling experience, but it’s how we learn.
Is this safety feature just a sign of cheap hardware?
Actually, it is quite the opposite. High-end receivers from reputable manufacturers often have more sensitive protection circuits because the internal components are more valuable to protect. According to technical guides from Audioholics, mismatched impedance and thermal overload are the primary triggers for modern solid-state protection circuits. It doesn’t mean your gear is junk; it means your gear is smart enough to save its own life. We also have to consider the physical connections. If you haven’t checked the gauge of wire you’re using, you might be creating unnecessary resistance that forces the amp to work twice as hard. Today, we’re going to figure out exactly why your system is tapping out so you can get back to the high-decibel life without the fear of a sudden blackout. Have you ever had your receiver quit right at the climax of a movie or your favorite song? Drop a comment and tell me how you reacted.
The Invisible Heat That Kills Your Sound
Heat is the number one enemy of any electronic component. Even if you aren’t pushing the volume to the max, a lack of ventilation can cause a thermal shutdown. I’ve seen folks stack their gaming consoles and Blu-ray players directly on top of their amp, effectively choking the cooling vents. This is especially true for older gear; for instance, there is a specific reason why your vintage amp gets hot even when the music isn’t playing. When you crank it up, that heat spikes, and the protection circuit steps in to prevent a fire. It’s a blunt tool, but an effective one.
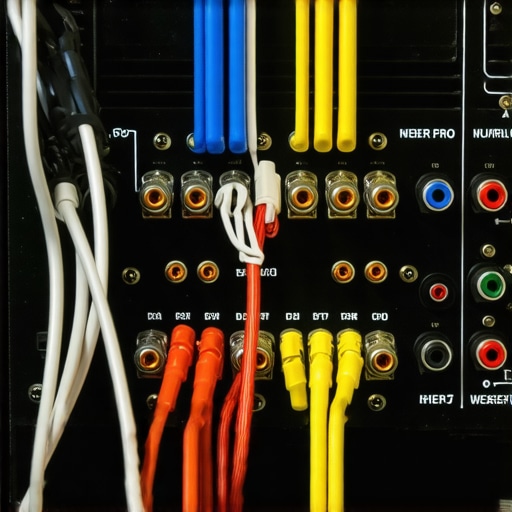
The first thing I do when that relay clicks is reach for the flashlight. In my experience, nine times out of ten, the culprit isn’t a dead component but a single, microscopic strand of copper wire playing the villain. I remember spending a whole Saturday tearing apart a home theater system only to find that one hair-thin wire from the left channel was touching the metal chassis of the receiver. It was enough to trigger a short circuit. Before you panic about repair bills, you need to perform what I call the ‘Great Wire Audit.’ Unplug every speaker and see if the receiver stays on. If it does, your problem is in the cables. While you are at it, check the ends of your cables; you should clean green oxidization off your copper speaker terminals to ensure you aren’t creating resistance that leads to excess heat.
Look for the Stray Strand Short-Circuiting Your Joy
Short circuits are the most common reason for a sudden shutdown. Think of your speaker wire as a two-lane highway. If a car (the current) crosses the median into the opposing lane, everything crashes. Even a tiny bit of fraying at the binding posts can cause this. This is why I always suggest using banana plugs or spades instead of bare wire. If you find yourself in a situation where the unit won’t even power up after a storm, you might need to learn how to fix a receiver that wont turn on after a power surge before diving into the wiring. A surge can trick the protection circuit into staying ‘locked’ to protect the internal processor.
Matching the Load Without Breaking the Amp
Imagine asking a marathon runner to carry a 200-pound backpack. They might start the race, but they’ll collapse before the first mile. That is exactly what happens when you pair 4-ohm speakers with a receiver only rated for 8 ohms. The amplifier tries to push more current than its power supply can handle. To avoid this, you must match your car subs impedance to your amplifiers output properly, a principle that applies just as strictly to your living room setup. If your receiver has an impedance selector switch, make sure it matches your speakers’ rating. I once saw a friend fry a beautiful vintage Marantz because he thought ‘lower ohms meant more power.’ In reality, it just meant more stress. You also need to realize the difference between peak and rms power explained simply; your amp can handle short bursts of loud music, but it can’t live at its ‘peak’ limit forever without the protection circuit stepping in to prevent a meltdown.
Resetting After the Safety Click
Once you’ve cleared the wires and checked the impedance, your receiver might still be stuck in its ‘safe mode.’ Most modern units require a specific button combination to reset the internal logic. Usually, it involves holding the power button and the ‘Tuning’ or ‘Source’ buttons simultaneously. If you’ve addressed the heat and the wiring, and it still clicks off, you might be looking at a failing internal part. Before giving up, I always check for a blown fuse or a bulging capacitor. It is a good idea to know how to tell if your speakers capacitor is starting to fail because similar components inside your receiver can go bad over time, causing the protection circuit to misread the voltage and shut everything down prematurely.
There is a pervasive myth in the audiophile community that you only need to worry about the protection circuit when the volume knob is past noon. In reality, I’ve seen more receivers fail at low volumes because of “difficult” speakers than during loud house parties. It all comes down to the impedance curve. Even if your speaker is labeled “8 ohms,” it doesn’t stay there across the entire frequency range. According to technical analysis by Audioholics, these impedance dips can plummet to 2 ohms or lower during complex bass passages. This demands a massive current surge that a budget power supply simply cannot provide, causing the safety relay to trip even if you think you’re being “quiet.” It’s not just about how loud you play; it’s about how much current your speakers are demanding from the rails at any given millisecond.
One major trap I see seasoned enthusiasts fall into is ignoring the environment in favor of aesthetics. You might think your setup looks sleek tucked away, but if you have a high-current amp inside a wooden cabinet with no active airflow, you are essentially slow-cooking your transistors. This leads to what I call the “Summer Shutdown.” If you are a car audio enthusiast, you likely already know how to fix a car amplifier that keeps shutting off in summer, but home users often forget that stagnant air in a living room is just as deadly. Another subtle nuance occurs with high-resolution audio. Many users wonder why your speakers sound harsh when you play high-res files, and often it’s because the amplifier is struggling to reproduce ultrasonic noise or high-frequency oscillation it wasn’t built to handle. This oscillation can overheat the output stage without you ever hearing a single note of distortion until the “click” happens.
Why does my expensive receiver click even before I start the music?
If you hear that familiar mechanical snap the moment you press the power button, don’t panic immediately. Sometimes the reason your expensive receiver makes a clicking sound when it starts is simply a soft-start circuit or a necessary self-diagnostic check. However, if it clicks and then shuts off immediately without displaying an error code, you’re likely dealing with a DC offset issue. This happens when the amplifier’s internal components leak direct current into the speaker outputs. It’s a silent killer that can melt your voice coils in seconds, and that protection circuit is the only hero standing between your gear and a total loss. Have you ever fallen into this trap where you keep trying to turn it back on, hoping it will “fix itself”? Let me know in the comments, because I’ve definitely made the mistake of ignoring the warning signs and smelling burnt silicon five minutes later.
Finally, always ensure you have the right power buffer. You need to know how to tell if your amplifier has enough headroom for your speakers. If you’re constantly living on the edge of the protection circuit’s trigger point, you’re not just risking a shutdown—you’re listening to compressed, lifeless audio. Real expertise isn’t just about buying the biggest amp; it’s about understanding the delicate dance between your power supply and your speaker’s thirst for current.
The Toolkit That Keeps My Living Room From Catching Fire
Once you realize that protection mode is a symptom and not the disease, you need the right tools to perform a proper diagnosis. I don’t go anywhere without my digital multimeter and a can of DeoxIT D5. If you are hearing static when you turn a knob, you need to know how to fix a scratchy volume dial with electrical contact cleaner before that carbon buildup causes a resistance spike that trips your amp. I’ve seen enthusiasts spend thousands on new gear when all they needed was five dollars’ worth of solvent and ten minutes of their time. For those of us using portable rigs or mobile DACs, the maintenance is even simpler: you must clean dust out of your headphone jack without damaging pins to ensure a solid electrical connection. A loose jack causes arcing, and arcing leads to—you guessed it—the protection circuit shutting your party down.
How do I keep my home theater running like new for a decade?
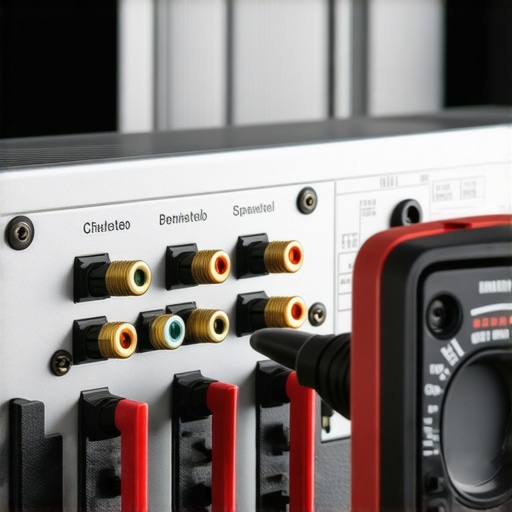
Consistency is more important than expensive upgrades. Every six months, I pull my towers away from the wall to check for ‘creep.’ This is where cables slowly sag or pull tight due to gravity, putting stress on the terminals. While you are back there, check the health of your components. It is vital to how to tell if your speakers capacitor is starting to fail because a leaking cap changes the crossover frequency and can create a load the amp wasn’t designed to see. According to the Service Manual for the Pioneer SX series, even a minor drift in the DC offset (the small amount of direct current present at the speaker terminals) can trigger safety relays prematurely. If you’re feeling brave, using a multimeter to check the millivolts at your speaker outputs can tell you if your amp needs a professional bias adjustment before it fails permanently.
Maintenance isn’t just about the electronics; it’s about the aesthetics too. There’s nothing more depressing than a high-end system that looks like it was rescued from a dumpster. I’ve found that you can easily restore a sun-faded speaker grille to look new again with specialized fabric dye or even just a careful cleaning. It keeps the wife-approval factor high and preserves the resale value. Looking ahead, I predict we are moving toward an era of ‘Software-Defined Audio.’ We are already seeing high-end brands implement cloud-based diagnostics where your receiver sends an error log to the manufacturer before you even notice a problem. This means ‘protection mode’ will eventually transition from a mechanical click to a push notification on your phone suggesting a specific wire to check.
The Proactive Approach to Audio Longevity
If you want to scale your system, you have to think about the infrastructure. Don’t just add more speakers; add more air. I’ve started installing small, USB-powered ‘muffin fans’ on top of my heaviest-hitting amps. These pull the hot air out of the chassis and can drop internal temperatures by 20 degrees, effectively doubling the lifespan of the electrolytic capacitors inside. This is a pro-level tip that prevents the ‘thermal runaway’ often discussed in Audio Engineering Society (AES) papers. If you are a headphone user, you aren’t exempt from this care. You should check the tension of your headbands; I often share why your headphones feel tight and the safe way to stretch them so you don’t snap the plastic frame or ruin the driver seal. My challenge to you this week: grab a flashlight and a microfiber cloth, and do a full sweep of your cable management. Unplug one speaker, check the wire for fraying, and plug it back in tight. You might just find the ‘ghost in the machine’ before it finds your protection circuit.
The Harsh Truths I Learned the Hard Way
Over the years, I’ve realized that the mechanical click of your gear is a mercy, not a curse. One big lightbulb moment for me was discovering that even when the volume is low, your gear can still be under immense stress due to impedance dips. I once ignored a faint scent of hot dust during a listening session, and let me tell you, you really want to know how to fix a car subwoofer that smells like it is burning before that same electrical stress melts your home receiver. Another revelation was that many enthusiasts underestimate their equipment; often, why your bookshelf speakers need more power than you think comes down to the same current demands that trip protection circuits. Lastly, never assume the receiver is the failure point until you’ve tested every single cable. I’ve seen 90% of ‘broken’ amps magically fixed with a pair of wire cutters and fresh ends.
Tools That Keep My Gear From the Repair Shop
I don’t leave my system’s health to chance anymore. My first recommendation isn’t a new amp, but a solid foundation for your speakers to prevent mechanical feedback. I learned that the reason your speaker stands need to be filled with sand is as much about stability as it is about protecting the internal crossover components from vibration. For diagnostics, I highly recommend learning how to use your phone to measure your rooms frequency response. This helps you identify if certain frequencies are being boosted naturally by your room, which might be forcing your amp to work harder than necessary. Finally, keep a high-quality electrical contact cleaner in your drawer; it is the simplest way to maintain a clean signal path.
Take Control of Your Soundstage
Entering receiver protection mode doesn’t mean your audio journey is over; it just means you’ve reached a boundary that your equipment is smart enough to respect. Don’t be afraid to pull those wires, check your airflow, and rethink your speaker placement to reduce the load on your power supply. When you treat your system like the high-precision instrument it is, the music sounds richer and the gear lasts for decades. You’ve got the knowledge now, so go ahead and enjoy your favorite tracks with the confidence of a pro. What was the weirdest culprit you found when troubleshooting your system’s sudden shutdown? Let me know in the comments below!