
I still remember the acrid smell of ozone wafting from my favorite Marantz receiver back in 2014. It was a Saturday afternoon, and I had just found a pair of high-end component car speakers in the garage. I figured, ‘Hey, a speaker is a speaker, right?’ I stripped the wires, twisted them onto the terminals, and cranked up some Hendrix. Five minutes later, the music died, the lights on the display flickered, and a puff of smoke signaled the end of my receiver’s life. I had made the classic rookie mistake of ignoring impedance. Most home receivers are designed to handle an 8-ohm load, while car speakers are almost always 4-ohm. When you connect a 4-ohm load to an amp expecting 8 ohms, you are asking it to double its current output, which is the real reason your amp is getting hot to the touch and eventually failing. Today, I am going to show you exactly how to bridge that gap without needing a fire extinguisher.
Stop Before You Fry Your Home Theater Amp
I have spent years tinkering with DIY audio, and if there is one thing I have learned, it is that you cannot cheat physics. My early failure taught me that while car speakers often offer incredible detail for the price, they are power-hungry beasts in a home environment. You cannot just plug and play. You need to understand how to match your car subs impedance to your amplifiers output, or in this case, how to trick your receiver into thinking it is seeing a much easier load.
Will this actually ruin my expensive equipment?
It is the question I get asked every time I help a neighbor set up their garage system. The short answer is: yes, if you do it wrong. According to the technical experts at Audioholics, running a 4-ohm load on a budget 8-ohm receiver can cause the output transistors to exceed their thermal limits almost instantly. You might get away with it at low volumes, but the moment the bass hits, your receiver’s protection circuit will kick in—if you are lucky. If you are unlucky, you will be shopping for a new motherboard. Have you ever seen your receiver go into ‘Protect Mode’ and wondered what you did wrong? Let me know about your close calls in the comments!
The Simple Math That Keeps Your Living Room Safe
To make this work, we have to talk about wiring speakers in series. When I first started, I did not even know how to use a 9v battery to check your speaker polarity, let alone how to calculate total impedance. But here is the secret: if you take two 4-ohm car speakers and wire them in a specific series loop, they become an 8-ohm load that your receiver will love. It is like turning two small, fast-moving streams into one steady river that your amplifier can easily manage. We are not just looking for sound; we are looking for stability. We want to avoid why cheap speaker wire causes signal loss or, worse, a short circuit that kills the whole vibe. In the next section, I will walk you through the specific series wiring diagram that saved my current setup.To get these 4-ohm drivers working safely, you need to master series wiring. In a standard parallel setup—where you just cram all the wires into the same terminal—the resistance drops. That is how I killed my Marantz. But in series, you are creating a single path for the electricity to follow. Think of it like a toll road; the more gates you put in a row, the more you slow down the traffic. By connecting the positive terminal of your receiver to the positive of speaker A, then the negative of speaker A to the positive of speaker B, and finally the negative of speaker B back to the receiver, you have successfully combined two 4-ohm loads into a steady 8-ohm load. This keeps your amp cool and your house from smelling like burnt electronics. 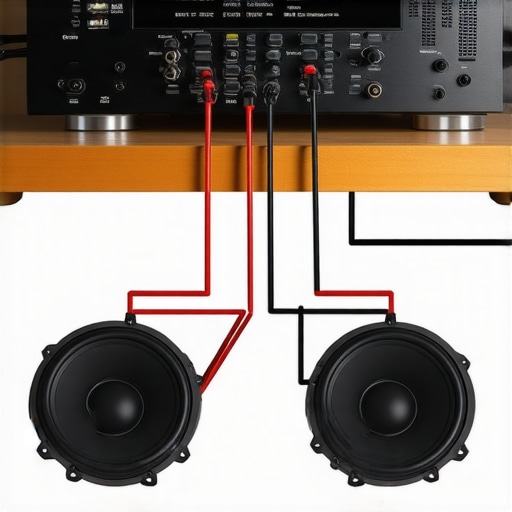
Wire Your Speakers in a Chain to Double the Resistance
I remember sitting at my kitchen table with a tangled mess of copper wire and a pair of 6x9s I had pulled from an old Honda. I was so nervous about another blowout that I used masking tape to label every single lead. When I finally hit the power switch, the receiver stayed cool, and the sound was crisp. This series loop is the golden rule for car-to-home conversions. If you are using a component set with separate woofers and tweeters, you must ensure you are using the included passive crossovers. Without them, you are sending full-range signals to a tiny silk dome that cannot handle it. This is exactly how to spot a blown tweeter before it ruins your crossover or your entire evening of listening.
Why Your DIY Enclosure Needs to Be Airtight
Car speakers are typically designed for ‘infinite baffle’ applications, meaning they use the large, leaky volume of a car door to breathe. In a living room, they will sound thin and hollow if you do not put them in a box. I once tried to mount a pair of 6.5-inch coaxials into some old cardboard shoe boxes just to see if it worked. It sounded like a tin can telephone because of the air leaks. I quickly learned that the simple paper test for finding air leaks in your speaker cabinet is non-negotiable. If air is escaping around the frame, you lose all your low-end punch. If you find a physical tear in the material while mounting them, don’t panic; you can learn how to fix a small rip in a speaker surround with glue to restore the seal. Remember that why your car door panels buzz with every bass hit is usually due to loose mounting, and the same applies to your home-built wooden enclosures.
Don’t Let Peak Power Numbers Fool Your Ears
When you look at the back of a car speaker, you might see ‘300 Watts Max’ printed in bold letters. Ignore it. That number is marketing fluff. For a stable home setup, you need to focus on the RMS rating. Understanding the difference between peak and rms power explained simply will save you from overdriving your home receiver into clipping. A home amp rated at 50 watts per channel is usually more than enough to push car speakers to their limits because of their high sensitivity. If you push the volume knob too far trying to hit that ‘peak’ number, you’ll introduce distortion that can melt voice coils faster than you can say ‘warranty.’ Keep your levels sensible, and those car speakers will provide years of high-fidelity sound in your den.
Once you have the wiring sorted, you might be tempted to start browsing for expensive audiophile accessories to ‘perfect’ the sound. This is where most people get taken for a ride. There is a persistent myth in the audio world that you need exotic metals to get clean sound. In reality, you should ask yourself is gold plated hardware really worth the extra cash before you drop fifty bucks on fancy terminals. Most of the time, the answer is a resounding no. The bottleneck in a car-to-home conversion is almost always the enclosure and the crossover, not the chemical makeup of your binding posts. If your sound is crackling, it is more likely dust in your hardware than a lack of gold. I always keep a can of spray handy and knowing how to fix a scratchy volume dial with electrical contact cleaner will do more for your audio quality than any boutique cable ever could.
Stop Chasing Shiny Cables and Focus on Signal Cleanliness
The real ‘expert’ move is understanding gain staging and thermal limits. A common trap is thinking that because a speaker is loud, it is performing well. In fact, many DIYers ignore the concept of headroom. If you don’t know how to tell if your amplifier has enough headroom for your speakers, you are likely pushing your home receiver into a zone where it generates ‘clip’ harmonics. These high-frequency square waves are what actually melt the voice coils in those car tweeters you just installed. It is not the volume that kills them; it is the distorted signal. 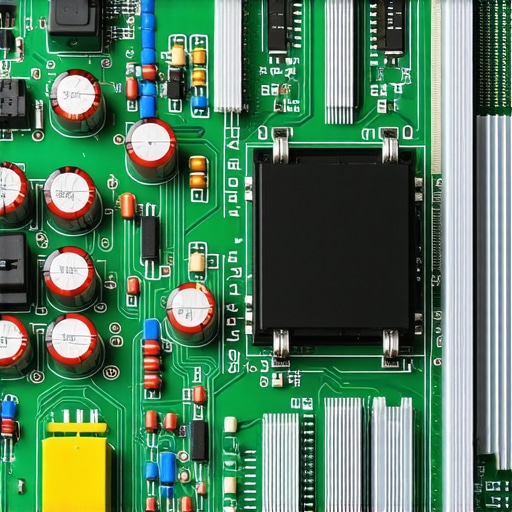
Can car speakers actually resolve the detail in high-resolution audio files?
This is a sophisticated question I get from people moving from high-end headphones to DIY room setups. Many believe that ‘Hi-Res’ audio requires a specialized DAC to sound good. However, a famous double-blind study published in the Journal of the Audio Engineering Society (JAES) suggests that most listeners cannot reliably distinguish between high-res and standard 16-bit/44.1kHz audio under normal conditions. If you find that why your speakers sound harsh when you play high-res files is a recurring issue, the problem is likely your speaker’s frequency response curve, not the file itself. Car speakers are often tuned with a ‘V-shape’ EQ to overcome road noise, which can sound fatiguing in a quiet living room. Before you buy an external converter, realize why your high-end dac sounds exactly like your laptops headphone jack in many blind tests. Have you ever fallen into this trap of buying gear to fix a problem that was actually in the speakers themselves? Let me know in the comments!
Once you have successfully integrated those car speakers into your home setup, the battle isn’t over; the focus shifts to longevity. I have seen many brilliant DIY projects fail within six months simply because the owner ignored the environment. In the car, everything is designed to handle humidity and vibration, but in the house, stagnant air and dust become your primary enemies. If you notice your connections getting dull, you need to learn how to clean green oxidization off your copper speaker terminals before the resistance climbs high enough to choke your signal. I keep a dedicated kit under my desk with fine-grit sandpaper and DeoxIT, because a clean contact is the difference between a crisp high-hat and a muffled mess.
Stop the Green Gunk Before It Eats Your Terminals
Maintenance is more than just dusting; it is about chemical stability. Over time, the copper leads on your DIY cables will react with the oxygen in your room. This is why many people wonder why your vintage speakers are losing their punch over time. It is rarely the magnets failing; it is usually the capacitors in the crossover aging or the terminals oxidizing. I personally check my wiring every six months. If you are using raw wire without banana plugs, clip the ends and strip fresh copper once a year. It is a ten-minute job that resets your system to factory performance levels.
Give Your Amp Some Breathing Room
Heat is the number one killer of home receivers running low-impedance car speakers. As noted by audio engineering veteran Rod Elliott of Elliott Sound Products, thermal stress is the primary cause of semiconductor failure in power amplifiers. If your cabinet is tight, you are essentially baking your transistors. If you have experienced how to fix a car amplifier that keeps shutting off in summer, you know the frustration. Use open-back racks or install a silent 120mm USB fan to pull air across the heat sinks. This is especially vital if you have gone the extra mile and figured out the reason your speaker stands need to be filled with sand to eliminate micro-vibrations—mass is great for sound, but it can also trap heat if you aren’t careful.
How can I keep my DIY system sounding fresh for a decade?
The secret is preventative protection. Invest in a high-quality surge protector, not just a cheap power strip. Knowing how to fix a receiver that wont turn on after a power surge is a skill you hope to never use, but a good MOV-based protector can prevent the motherboard from frying in the first place. I also recommend a monthly ‘stress test.’ Play a frequency sweep from 20Hz to 20kHz at a moderate volume. This helps you identify if a mounting screw has loosened or if a surround is starting to fail. If you hear a rattle, it might just be the grill, so check out the easiest way to fix a rattling speaker grill for good before you start tearing the driver apart.
The Future of the DIY Audio Scene
Looking ahead, the DIY world is moving toward integrated DSP (Digital Signal Processing). In the next few years, I predict we will see more car-to-home hobbyists using software like Room EQ Wizard (REW) to digitally flatten the aggressive ‘car-door response’ of these speakers. We are moving away from passive crossovers and toward active, multi-amped systems that can make a fifty-dollar car woofer sound like a thousand-dollar studio monitor. My challenge to you: Grab a cheap calibrated microphone and run a frequency response test on your current setup. Once you see the peaks and valleys on your screen, you’ll never look at ‘flat’ sound the same way again.
Hard Truths About My Most Expensive Wiring Mistakes
Looking back at that puff of smoke from my Marantz, I realize I wasn’t just unlucky; I was uninformed. The biggest lesson I’ve learned is that car speakers require a different kind of respect than home theater towers. First, never assume a speaker can handle the power just because the box says 500 Watts; always check the difference between peak and rms power explained simply to avoid melting your components. Second, car gear is designed for the high-vibration environment of a trunk, but your home receiver is a sensitive instrument. If you find the real reason your amp is getting hot to the touch is because you tried to bypass the series wiring, shut it down immediately. Finally, sound quality is about control, not volume. If you want more punch without risking a fire, learn how to properly bridge a car amplifier for more power before you ever touch a screwdriver.
The Toolkit Every DIY Audio Nut Needs
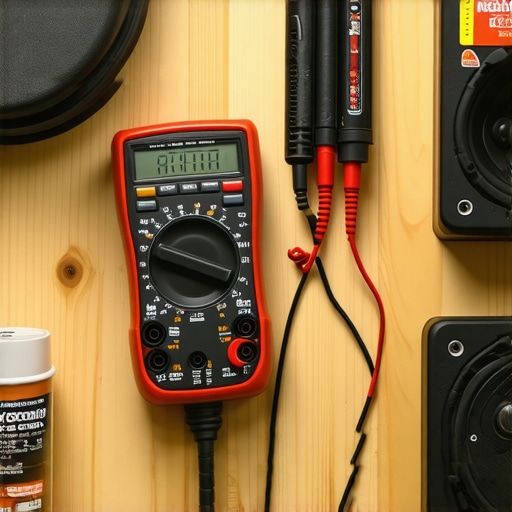
Building your own system is addictive, but you need the right gear to move beyond guesswork. I swear by a few specific items: a digital multimeter for checking ohms, a can of contact cleaner—because knowing how to fix a scratchy volume dial with electrical contact cleaner is a lifesaver—and a quality soldering iron for permanent connections. For those who want to push their car speakers to their true potential, look into a MiniDSP for room correction. It is the trick to making vintage speakers sound modern again and works wonders for flattening those aggressive car-audio frequency curves. I also suggest keeping a bottle of wood glue and some clamps on hand for sealing those DIY enclosures airtight.
Ready to Hear Your Garage Find Sing?
The journey of repurposing car speakers for your home isn’t just about saving money—it’s about the pure satisfaction of building something that sounds incredible with your own two hands. Don’t be afraid to experiment, but always keep physics in mind. Use how to use a 9v battery to check your speaker polarity as your first step in every build to ensure your phase is correct from the start. Your home audio setup is a work in progress, and every speaker you save from the scrap heap is a victory for your ears and your wallet. Have you ever accidentally sparked a small fire or seen ‘Protect Mode’ while testing your DIY speakers? Let me know your closest calls in the comments below!