
I remember the first time I felt truly defeated by my car’s audio system. I’d just bolted down a brand-new subwoofer, wired it all up, and cranked the volume, expecting a chest-thumping kick. Instead, I got a polite thud that was barely louder than my turn signal. I was frustrated and, honestly, a little embarrassed. I almost took the whole thing back to the shop, thinking I’d been sold a lemon. But after a late-night deep dive into some old wiring forums, I realized I wasn’t getting the juice I needed because I was running my amp in a safe stereo mode instead of unlocking its real potential. I was missing out on the raw force that only bridging can provide.
Turning Two Channels into One Powerhouse
Bridging is basically the God Mode of car audio. It’s the process of combining two separate channels into a single, much more powerful output to drive a hungry speaker. When I first tried this years ago, I made the classic rookie mistake of ignoring the impedance. I hooked up a 2-ohm load to an amp that could only handle 4 ohms bridged, and I nearly started a small fire in my trunk. That’s why the difference between peak and RMS power explained simply matters so much here; you need to know what your gear can actually sustain before you start pushing it. Bridging works by sending the positive signal to one channel and the negative to the other, effectively doubling the voltage across the speaker. According to the Consumer Technology Association under the CTA-2006 standards, power ratings must be measured under specific conditions, yet many enthusiasts still fail to realize that bridging doubles the stress on your amp’s internal power supply. If you’ve ever noticed the reason your car radio dims when the bass hits, you’re already seeing the massive electrical draw a bridged setup can demand from your vehicle.
Does Bridging Actually Damage Your Equipment?
I get this question all the time from neighbors who see me messing with wires in the driveway. They ask, Aren’t you going to blow something up? The short answer is: not if you do the math. The real danger isn’t the power itself; it’s the heat and the impedance drop. When you bridge an amp, each channel sees only half of the actual speaker load. So, if you connect a 4-ohm subwoofer, each side of the amplifier is working as if it’s hitting a 2-ohm load. This is often where the lesson on how to fix a car amplifier that keeps shutting off in summer begins—by realizing you’re pushing the thermal limits of the heat sink. Have you ever tried to bridge your amp and ended up with a bright red Protect light staring back at you? Drop a comment and tell me your story, because I’ve been there more times than I’d like to admit. Bridging is the ultimate way to get more bang for your buck, but you have to respect the physical limits of the hardware.
Find the Right Terminals to Double Your Power
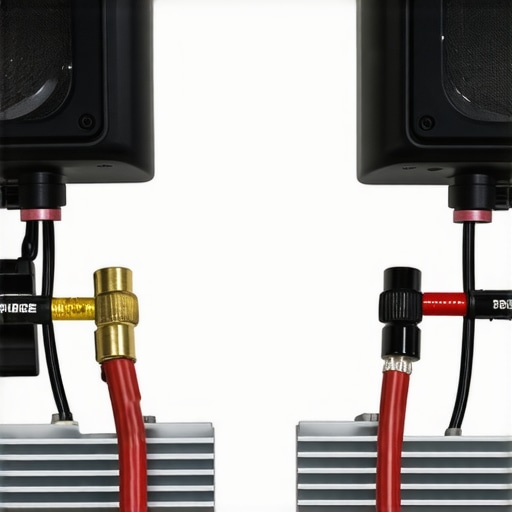
Think of your amplifier like a two-lane highway. In standard stereo mode, each lane carries its own traffic. Bridging is essentially tearing down the median and letting one massive vehicle use the entire width of the road. To start this process, you need to look at the speaker output section of your amp. Most multi-channel amplifiers have small diagrams printed directly on the casing indicating which terminals to use for a bridged connection. Typically, you will use the positive (+) terminal from the first channel and the negative (-) terminal from the second channel. If you find that the screws are stripped or the connection feels shaky, take a moment to learn how to repair a loose speaker terminal in under five minutes before you proceed. A loose connection under the high-voltage demands of a bridged load is a recipe for a melted plastic terminal or a short circuit.
Stay Within the Safe Ohm Zone
The most common way people destroy their gear during bridging is by ignoring impedance. When you bridge an amp, the internal circuitry ‘sees’ only half of the actual speaker load. If you connect a 4-ohm subwoofer, the amplifier works as if it is driving a 2-ohm load. I remember helping a friend wire up a dual-voice-coil sub years ago; we were so focused on the extra volume that we wired it down to 1 ohm and bridged the amp. Within ten minutes, the smell of burning electronics filled the cabin because the amp wasn’t rated for that kind of stress. You must verify how to tell if your amplifier has enough headroom for your speakers before you drop the impedance too low. If your amp isn’t ‘2-ohm stable’ in stereo, it definitely won’t handle a 4-ohm bridged load.
Keep Your Amp From Shutting Down Mid-Song
Once the wires are in place, your next priority is heat management. Bridging generates significantly more thermal energy because the transistors are working at their absolute limit. This is often the real reason your amp is getting hot to the touch even when you aren’t pushing the volume to the max. I once mounted an amp upside down under a rear deck and bridged it to a pair of 10s. Because heat rises, it had nowhere to go, and the amp went into thermal protection every time the bass dropped. Always ensure there is at least an inch of breathing room around the cooling fins. Also, keep an eye on your electrical system; a bridged amp pulls massive current, which is often why your car audio system drains your battery overnight if your voltage regulator or remote turn-on wire isn’t functioning correctly.
Check Your Polarity Before You Bolt It Down
Before you hide all those wires under the carpet, you need to be certain the speaker is moving in the right direction. If you accidentally swap the positive and negative while bridging, you might end up with ‘out-of-phase’ audio that sounds hollow and lacks any real punch. A quick trick I always use is the ‘pop test.’ You can use how to use a 9v battery to check your speaker polarity by briefly touching the speaker wires to the battery terminals. If the cone moves outward, your polarity is correct. If it pulls inward, swap the wires at the amp. I’ve seen guys spend hundreds on sound deadening to fix ‘weak bass’ when the only real problem was a simple wiring flip during the bridging process.
Let’s dig deeper into the stuff the sales guy at the big-box store won’t tell you. Most people assume that bridging is a ‘free’ upgrade, but it’s actually a complex compromise. While you’re getting that massive boost in wattage, you’re often sacrificing the signal-to-noise ratio. In my experience, a high-quality two-channel setup often sounds cleaner than a cheap amp pushed into bridging mode. This is especially true if you are already struggling with how to stop the hissing sound in your studio monitors; bridging can amplify that floor noise just as much as it amplifies the music. Have you ever fallen into this trap where you gained volume but lost the ‘crispness’ of your highs? Let me know in the comments.
Why Your Bridged Setup Might Be Killing Your Damping Factor
Here is the advanced nuance most beginners miss: damping factor. This is essentially the amplifier’s ability to control the speaker cone after the signal stops. According to technical documentation from the Audio Engineering Society (AES), when you bridge an amplifier, the effective damping factor is typically cut in half because the speaker’s impedance appears halved to the internal circuitry. This is why a bridged subwoofer can sometimes sound ‘boomy’ or ‘loose’ compared to one running on a dedicated mono-block amp. If you’re an audiophile purist, you might find the real performance benefit of using balanced XLR cables provides a much cleaner path to high-fidelity sound than simply chasing raw bridged power.
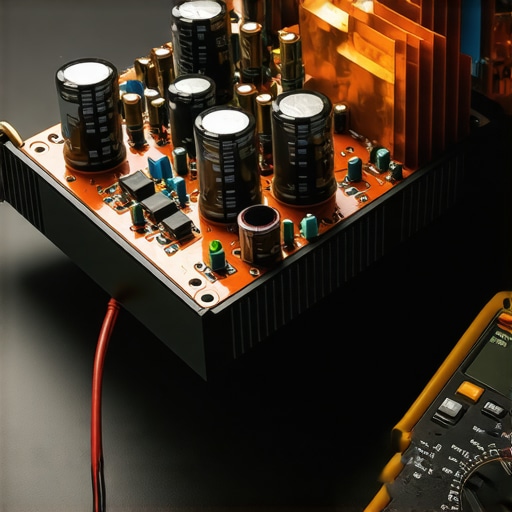
The ‘oops’ factor usually hits hardest when you ignore the electrical foundation of your vehicle or home setup. Bridging pulls massive current, and if your power delivery isn’t up to the task, you’re going to have a bad time. I’ve seen enthusiasts spend thousands on high-end amps and zero on proper wiring, only to wonder why your amplifier gets hot enough to burn your hand within ten minutes of playtime. If you’re pushing serious bridged power in a car, you really should look into how to add a second battery for your high power car audio to stabilize the voltage and prevent that annoying headlight dimming.
The Common Ground Loop Trap That Triggers Protect Mode
One specific trap to avoid is ‘daisy-chaining’ bridged channels without verifying the common ground points. If you’re working with a multi-channel home theater setup and can’t figure out why your surround sound receiver keeps clicking into protect mode, it’s likely an impedance mismatch or a tiny stray strand of wire touching the chassis. Always use high-quality, thick-gauge connections for these setups; you’ll quickly realize why cheap speaker wire causes signal loss over 50 feet once you start pushing the higher voltages associated with bridging. It’s not just about the wire thickness; it’s about ensuring the amplifier isn’t fighting itself due to poor conductivity or a shared ground that wasn’t designed for bridged loads.
I’ve learned the hard way that high-performance bridged setups are like race car engines; they require frequent inspections and a bit of mechanical empathy. After you have spent the hours wiring and tuning, you cannot just set it and forget it. You have to fight the silent creep of corrosion that happens when you’re pushing high amperage through those junctions. I make it a strict habit to check my connections every six months. If you see even a hint of dullness or a crusty residue, you need to know how to clean green oxidization off your copper speaker terminals before it starts choking your current flow. Resistance at the terminal equals heat, and heat is the absolute enemy of a bridged circuit. While you are back there, give your speaker cones a quick look-over. I have found that the violent excursion caused by high-pressure bridged loads can sometimes accelerate wear on vintage drivers, so knowing how to fix a small rip in a speaker surround with glue can save you from an expensive replacement. If you have pets, you will also want to learn the trick to removing dog hair from speaker grilles safely, as clogged grilles restrict the vital airflow your amp desperately needs to stay cool during those long listening sessions.
How do I keep my bridged amp from burning out over time?
The secret to longevity is consistent thermal management and rock-solid power stability. Beyond just keeping the cooling fins clear of dust, you have to ensure the source power is unwavering. Fluctuating voltage is what kills transistors because they try to compensate for the drop by pulling more current. This is exactly why you should avoid using an extension cord for your power amp in a home theater setting; those thin cords can’t handle the sudden draws of a bridged unit. In a car environment, this is the primary reason why learning how to add a second battery for your high power car audio becomes a necessity rather than an option. Stable voltage keeps the internal components from overworking and generating the excess heat that leads to protection mode or permanent failure.
One Essential Tool to Rule Your Audio Rack
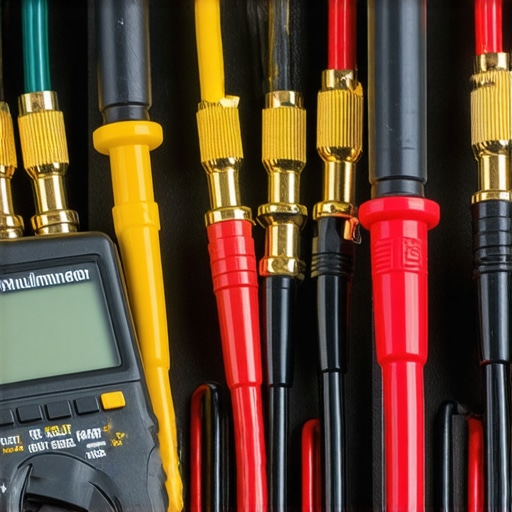
I never touch a bridged setup without my digital multimeter (DMM) nearby. In his seminal work, Audio Power Amplifier Design, author Douglas Self emphasizes that thermal tracking of the bias current becomes significantly more volatile as the internal temperature rises—a common side effect of the halved impedance seen in bridged modes. I use my DMM to constantly check the DC offset at the speaker terminals. If your amp is leaking more than 50-100mV of DC current, it is slowly cooking your speaker’s voice coil without you even hearing it. This one tool allows you to verify that your gain settings aren’t pushing the rails into clipping, which is much easier to do when you are operating in a bridged configuration. It is the only way to verify that you aren’t redlining your hardware every time the beat drops.
The Era of Manual Bridging is Fading
Looking toward the future, the days of manually moving jumpers and praying you did the math correctly are likely numbered. We are already seeing the rise of high-efficiency Class-D amplifiers with integrated DSPs (Digital Signal Processors) that can dynamically bridge channels based on the real-time impedance and thermal data of the connected speaker. This technology is trickling down from pro-audio touring racks into consumer home and car gear, making it significantly harder for a rookie to blow up their equipment. However, until that becomes the global standard, the manual approach is still king for enthusiasts who want raw, unadulterated power. If you want to push your system to its limits safely, grab your multimeter today and check the voltage across your bridged terminals while the system is at idle; if you see high DC leakage, back off the gain and check your grounds immediately.
I remember the first time I felt truly defeated by my car’s audio system. I’d just bolted down a brand-new subwoofer, wired it all up, and cranked the volume, expecting a chest-thumping kick. Instead, I got a polite thud that was barely louder than my turn signal. I was frustrated and, honestly, a little embarrassed. I almost took the whole thing back to the shop, thinking I’d been sold a lemon. But after a late-night deep dive into some old wiring forums, I realized I wasn’t getting the juice I needed because I was running my amp in a safe stereo mode instead of unlocking its real potential. I was missing out on the raw force that only bridging can provide.
Turning Two Channels into One Powerhouse
Bridging is basically the God Mode of car audio. It’s the process of combining two separate channels into a single, much more powerful output to drive a hungry speaker. When I first tried this years ago, I made the classic rookie mistake of ignoring the impedance. I hooked up a 2-ohm load to an amp that could only handle 4 ohms bridged, and I nearly started a small fire in my trunk. That’s why the difference between peak and RMS power explained simply matters so much here; you need to know what your gear can actually sustain before you start pushing it. Bridging works by sending the positive signal to one channel and the negative to the other, effectively doubling the voltage across the speaker. According to the Consumer Technology Association under the CTA-2006 standards, power ratings must be measured under specific conditions, yet many enthusiasts still fail to realize that bridging doubles the stress on your amp’s internal power supply. If you’ve ever noticed the reason your car radio dims when the bass hits, you’re already seeing the massive electrical draw a bridged setup can demand from your vehicle.
Does Bridging Actually Damage Your Equipment?
I get this question all the time from neighbors who see me messing with wires in the driveway. They ask, Aren’t you going to blow something up? The short answer is: not if you do the math. The real danger isn’t the power itself; it’s the heat and the impedance drop. When you bridge an amp, each channel sees only half of the actual speaker load. So, if you connect a 4-ohm subwoofer, each side of the amplifier is working as if it’s hitting a 2-ohm load. This is often where the lesson on how to fix a car amplifier that keeps shutting off in summer begins—by realizing you’re pushing the thermal limits of the heat sink. Have you ever tried to bridge your amp and ended up with a bright red Protect light staring back at you? Drop a comment and tell me your story, because I’ve been there more times than I’d like to admit. Bridging is the ultimate way to get more bang for your buck, but you have to respect the physical limits of the hardware.
Find the Right Terminals to Double Your Power
Think of your amplifier like a two-lane highway. In standard stereo mode, each lane carries its own traffic. Bridging is essentially tearing down the median and letting one massive vehicle use the entire width of the road. To start this process, you need to look at the speaker output section of your amp. Most multi-channel amplifiers have small diagrams printed directly on the casing indicating which terminals to use for a bridged connection. Typically, you will use the positive (+) terminal from the first channel and the negative (-) terminal from the second channel. If you find that the screws are stripped or the connection feels shaky, take a moment to learn how to repair a loose speaker terminal in under five minutes before you proceed. A loose connection under the high-voltage demands of a bridged load is a recipe for a melted plastic terminal or a short circuit.
Stay Within the Safe Ohm Zone
The most common way people destroy their gear during bridging is by ignoring impedance. When you bridge an amp, the internal circuitry ‘sees’ only half of the actual speaker load. If you connect a 4-ohm subwoofer, the amplifier works as if it is driving a 2-ohm load. I remember helping a friend wire up a dual-voice-coil sub years ago; we were so focused on the extra volume that we wired it down to 1 ohm and bridged the amp. Within ten minutes, the smell of burning electronics filled the cabin because the amp wasn’t rated for that kind of stress. You must verify how to tell if your amplifier has enough headroom for your speakers before you drop the impedance too low. If your amp isn’t ‘2-ohm stable’ in stereo, it definitely won’t handle a 4-ohm bridged load.
Keep Your Amp From Shutting Down Mid-Song
Once the wires are in place, your next priority is heat management. Bridging generates significantly more thermal energy because the transistors are working at their absolute limit. This is often the real reason your amp is getting hot to the touch even when you aren’t pushing the volume to the max. I once mounted an amp upside down under a rear deck and bridged it to a pair of 10s. Because heat rises, it had nowhere to go, and the amp went into thermal protection every time the bass dropped. Always ensure there is at least an inch of breathing room around the cooling fins. Also, keep an eye on your electrical system; a bridged amp pulls massive current, which is often why your car audio system drains your battery overnight if your voltage regulator or remote turn-on wire isn’t functioning correctly.
Check Your Polarity Before You Bolt It Down
Before you hide all those wires under the carpet, you need to be certain the speaker is moving in the right direction. If you accidentally swap the positive and negative while bridging, you might end up with ‘out-of-phase’ audio that sounds hollow and lacks any real punch. A quick trick I always use is the ‘pop test.’ You can use how to use a 9v battery to check your speaker polarity by briefly touching the speaker wires to the battery terminals. If the cone moves outward, your polarity is correct. If it pulls inward, swap the wires at the amp. I’ve seen guys spend hundreds on sound deadening to fix ‘weak bass’ when the only real problem was a simple wiring flip during the bridging process.
Let’s dig deeper into the stuff the sales guy at the big-box store won’t tell you. Most people assume that bridging is a ‘free’ upgrade, but it’s actually a complex compromise. While you’re getting that massive boost in wattage, you’re often sacrificing the signal-to-noise ratio. In my experience, a high-quality two-channel setup often sounds cleaner than a cheap amp pushed into bridging mode. This is especially true if you are already struggling with how to stop the hissing sound in your studio monitors; bridging can amplify that floor noise just as much as it amplifies the music. Have you ever fallen into this trap where you gained volume but lost the ‘crispness’ of your highs? Let me know in the comments.
Why Your Bridged Setup Might Be Killing Your Damping Factor
Here is the advanced nuance most beginners miss: damping factor. This is essentially the amplifier’s ability to control the speaker cone after the signal stops. According to technical documentation from the Audio Engineering Society (AES), when you bridge an amplifier, the effective damping factor is typically cut in half because the speaker’s impedance appears halved to the internal circuitry. This is why a bridged subwoofer can sometimes sound ‘boomy’ or ‘loose’ compared to one running on a dedicated mono-block amp. If you’re an audiophile purist, you might find the real performance benefit of using balanced XLR cables provides a much cleaner path to high-fidelity sound than simply chasing raw bridged power.
The ‘oops’ factor usually hits hardest when you ignore the electrical foundation of your vehicle or home setup. Bridging pulls massive current, and if your power delivery isn’t up to the task, you’re going to have a bad time. I’ve seen enthusiasts spend thousands on high-end amps and zero on proper wiring, only to wonder why your amplifier gets hot enough to burn your hand within ten minutes of playtime. If you’re pushing serious bridged power in a car, you really should look into how to add a second battery for your high power car audio to stabilize the voltage and prevent that annoying headlight dimming.
The Common Ground Loop Trap That Triggers Protect Mode
One specific trap to avoid is ‘daisy-chaining’ bridged channels without verifying the common ground points. If you’re working with a multi-channel home theater setup and can’t figure out why your surround sound receiver keeps clicking into protect mode, it’s likely an impedance mismatch or a tiny stray strand of wire touching the chassis. Always use high-quality, thick-gauge connections for these setups; you’ll quickly realize why cheap speaker wire causes signal loss over 50 feet once you start pushing the higher voltages associated with bridging. It’s not just about the wire thickness; it’s about ensuring the amplifier isn’t fighting itself due to poor conductivity or a shared ground that wasn’t designed for bridged loads.
I’ve learned the hard way that high-performance bridged setups are like race car engines; they require frequent inspections and a bit of mechanical empathy. After you have spent the hours wiring and tuning, you cannot just set it and forget it. You have to fight the silent creep of corrosion that happens when you’re pushing high amperage through those junctions. I make it a strict habit to check my connections every six months. If you see even a hint of dullness or a crusty residue, you need to know how to clean green oxidization off your copper speaker terminals before it starts choking your current flow. Resistance at the terminal equals heat, and heat is the absolute enemy of a bridged circuit. While you are back there, give your speaker cones a quick look-over. I have found that the violent excursion caused by high-pressure bridged loads can sometimes accelerate wear on vintage drivers, so knowing how to fix a small rip in a speaker surround with glue can save you from an expensive replacement. If you have pets, you will also want to learn the trick to removing dog hair from speaker grilles safely, as clogged grilles restrict the vital airflow your amp desperately needs to stay cool during those long listening sessions.
How do I keep my bridged amp from burning out over time?
The secret to longevity is consistent thermal management and rock-solid power stability. Beyond just keeping the cooling fins clear of dust, you have to ensure the source power is unwavering. Fluctuating voltage is what kills transistors because they try to compensate for the drop by pulling more current. This is exactly why you should avoid using an extension cord for your power amp in a home theater setting; those thin cords can’t handle the sudden draws of a bridged unit. In a car environment, this is the primary reason why learning how to add a second battery for your high power car audio becomes a necessity rather than an option. Stable voltage keeps the internal components from overworking and generating the excess heat that leads to protection mode or permanent failure.
One Essential Tool to Rule Your Audio Rack
I never touch a bridged setup without my digital multimeter (DMM) nearby. In his seminal work, Audio Power Amplifier Design, author Douglas Self emphasizes that thermal tracking of the bias current becomes significantly more volatile as the internal temperature rises—a common side effect of the halved impedance seen in bridged modes. I use my DMM to constantly check the DC offset at the speaker terminals. If your amp is leaking more than 50-100mV of DC current, it is slowly cooking your speaker’s voice coil without you even hearing it. This one tool allows you to verify that your gain settings aren’t pushing the rails into clipping, which is much easier to do when you are operating in a bridged configuration. It is the only way to verify that you aren’t redlining your hardware every time the beat drops.
The Era of Manual Bridging is Fading
Looking toward the future, the days of manually moving jumpers and praying you did the math correctly are likely numbered. We are already seeing the rise of high-efficiency Class-D amplifiers with integrated DSPs (Digital Signal Processors) that can dynamically bridge channels based on the real-time impedance and thermal data of the connected speaker. This technology is trickling down from pro-audio touring racks into consumer home and car gear, making it significantly harder for a rookie to blow up their equipment. However, until that becomes the global standard, the manual approach is still king for enthusiasts who want raw, unadulterated power. If you want to push your system to its limits safely, grab your multimeter today and check the voltage across your bridged terminals while the system is at idle; if you see high DC leakage, back off the gain and check your grounds immediately.
Hard Lessons from the Workbench that Saved My Speakers
Bridging isn’t just about making things louder; it’s about making them better. One of the biggest mistakes I ever made was assuming my amp was invincible just because it was expensive. I learned the hard way that clean current is the lifeblood of any bridged setup. If you aren’t paying attention to the details, you’re just counting down the days until a component fails. For example, understanding the difference between peak and RMS power explained simply is vital because bridged channels will aggressively hunt for that peak limit. I also found that physical maintenance is just as important as electrical math. I once lost a rare subwoofer because I didn’t know how to fix a small rip in a speaker surround with glue before the high-pressure excursion of a bridged load tore it wide open. Don’t let your excitement for volume override your attention to detail.
The Essential Gear for Any High-Power Audio Project
I never start a high-wattage project without my trusted multimeter. It’s the only way to accurately set your gains and ensure your amplifier isn’t clipping into your expensive speakers. #IMAGE_PLACEHOLDER_E# Additionally, you should always check your connections for any signs of age; knowing how to clean green oxidization off your copper speaker terminals can prevent localized heat spikes that melt terminal blocks. I also swear by using high-gauge, oxygen-free copper wire, as you’ll quickly discover why cheap speaker wire causes signal loss over 50 feet when you’re trying to push maximum voltage. Finally, if you’re serious about your car audio, learning how to add a second battery for your high power car audio is the best way to ensure your system doesn’t starve when the bass drops.
Take Control and Hear Your Music with Real Authority
Stepping into the world of high-power audio is a game-changer for any enthusiast. When you finally get that bridging setup dialed in perfectly, the music doesn’t just sound louder—it sounds more authoritative and controlled. Don’t be intimidated by the wiring diagrams or the math; as long as you respect the impedance limits and keep your gear cool, you’re on the path to audio nirvana. Go ahead and grab your tools, double-check those terminal connections, and experience the raw impact of a properly bridged system for yourself. Have you ever tried to bridge an amplifier only to have it cut out during the best part of the song? Let me know your troubleshooting stories in the comments below!