
I remember the day I finally unboxed my first serious set of floorstanding speakers. I’d saved for months, and I wanted them to look perfect in my living room, tucked neatly against the back wall to keep the floor space clear. But when I hit play on my favorite bass-heavy track, it didn’t sound powerful—it sounded like a muddy, vibrating mess. It was a classic rookie move that almost made me return the gear. We’ve all been there, trying to balance interior design with high-fidelity audio, but the physics of sound doesn’t care about your floor plan. Today, I’m going to show you exactly why that rear-facing hole in your speaker is the most sensitive part of your setup and how a simple shove in the right direction can fix your audio woes. Have you ever wondered why your expensive setup sounds like it’s trapped in a cardboard box?
Stop Choking Your Sound with the Back Wall
Most modern speakers feature a port—that circular hole in the back designed to let the cabinet move air. When you shove that port directly against a drywall or a bookshelf, you’re essentially putting a pillow over your speaker’s mouth. I made the mistake early on of thinking that more bass was always better, regardless of how I got it. In reality, being too close to a wall creates a phenomenon called boundary gain. According to research from the Audio Engineering Society, placing a speaker near a wall can artificially boost low frequencies by up to 6dB, which might sound like a deal, but it actually muddies the clarity of the mid-range and destroys the timing of the notes. It’s similar to why your bookshelf speakers sound better when you move them off the desk; isolation and air clearance are your best friends for clean audio. If you’ve spent hours trying to find the sweet spot for your speakers in a rectangular room, you know that even two inches can be the difference between a thud and a heartbeat.
Is a few inches of space really going to change anything?
I get the skepticism. Your living room isn’t a recording studio, and you don’t want your speakers sitting in the middle of the carpet. But the physics of a rear port requires a specific amount of clearance to let the air pressure dissipate evenly. When that air hits the wall immediately, it reflects back into the port, causing turbulence and making the woofer work harder than it should. This leads to that one-note bass where every kick drum sounds the same. It’s a frustrating hurdle, but once you hear the difference, you won’t go back. Have you ever tried moving your gear just a foot away from the wall to see if the boominess disappears? Let me know if you’ve felt that same frustration when your upgrade didn’t sound as crisp as it did in the store.
Find the Sweet Spot Without a Degree in Physics
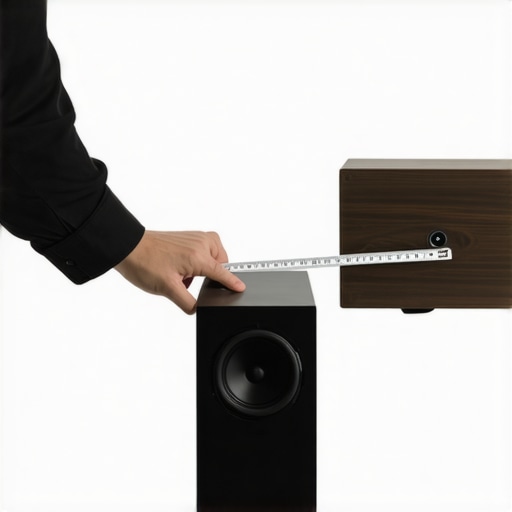
The first thing you need to do is grab a tape measure. I used to eyeball it, thinking my ‘inner compass’ for audio was enough, but I was usually off by several inches. The goal is to give that rear port enough room to breathe so the air velocity doesn’t create back-pressure. Start by pulling your speakers at least 12 inches away from the rear wall. If you have the space, try 24 inches. This isn’t just about the wall behind them; you also need to consider the distance from the side walls. When I was setting up a pair of towers in my first tiny apartment, I realized that why your floorstanding speakers sound unbalanced in an l-shaped room often comes down to one speaker being closer to a boundary than the other, creating a lopsided soundstage that no amount of balance-knob fiddling can fix.
Grab a Tape Measure and Start at Twelve Inches
Measurement is your baseline. Once you have that 12-to-24-inch gap, play a track with a consistent, walking bassline. Listen for ‘bloat’—that’s when certain notes sound louder and fuzzier than others. If the bass feels disconnected from the rest of the music, keep moving the speakers forward in two-inch increments. You are looking for the point where the bass feels tight and ‘snappy.’ If you’re using bookshelf models, the reason your speaker stands need to be filled with sand is that it stops the stand itself from ringing, which can mask the clarity you’re trying to gain by moving the speakers away from the wall. I remember spending a whole Saturday moving my stands back and forth until the kick drum finally sounded like a mallet hitting skin rather than a wet towel hitting a floor.
Angle Your Sound for Better Focus
Once the distance from the wall is set, you need to address ‘toe-in’—the angle at which the speakers point toward your ears. If your speakers are currently parallel to the back wall, you might be losing that razor-sharp center image. Slowly angle them inward until they are pointing just behind your head. This technique is especially vital if you are trying to figure out how to get better stereo separation in a very narrow room where side-wall reflections are your biggest enemy. By angling them, you reduce the amount of sound bouncing off the side walls and hitting your ears at the wrong time. If you still feel the room vibrating too much, it might not be the speakers at all; check out how to fix a subwoofer that is vibrating your furniture to ensure your low-end energy isn’t just rattling your coffee table.
When Space Is Limited Use the Foam Plug Trick
Sometimes, the room simply won’t let you pull the speakers out. Maybe there’s a doorway or a spouse who isn’t keen on speakers sitting in the middle of the walking path. In this case, many manufacturers include foam bungs or plugs. Inserting these into the rear port effectively turns your ported speaker into a sealed cabinet. It will reduce the total amount of bass, but it will also eliminate that ‘boomy’ resonance caused by being too close to the drywall. I’ve used rolled-up socks in a pinch when I forgot my foam plugs during a move, and while it’s not pretty, it works. It’s a compromise, but it’s far better than living with a muddy mess that ruins the timing of your favorite records.
Stop chasing the peak wattage lie
The biggest mistake I see in the audio community is the obsession with ‘Max Power’ ratings. We’ve all seen the flashy stickers claiming 1000 watts of output on a system that fits in a shoebox. It’s a marketing trap designed to distract you from the actual performance metrics. In my experience, focusing on ‘Peak’ power rather than ‘RMS’ is the fastest way to fry your gear. If you want to build a system that lasts, you need to stop falling for the inflated numbers on the packaging and look at the continuous power delivery. A high-quality 50-watt amplifier will almost always outperform a cheap ‘500-watt’ unit because it has the current delivery to control the speaker’s movement properly. This is often the hidden reason why your bookshelf speakers need more power than you think; small drivers with low sensitivity require significant current to handle the dynamic swings of a symphonic recording or a heavy bass drop.
Does your amplifier have enough breathing room for loud peaks?
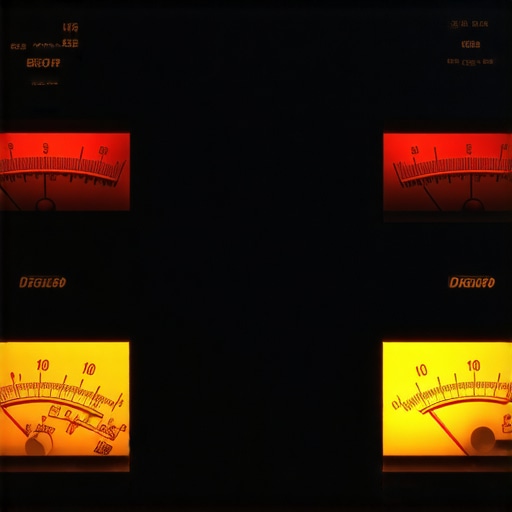
Beyond the raw numbers, the ‘Oops’ factor that catches even seasoned audiophiles is a lack of dynamic headroom. When your amplifier runs out of power during a loud passage, it ‘clips’ the signal, turning those smooth sound waves into harsh, flat-topped squares. This doesn’t just sound bad—it creates high-frequency energy that can melt the delicate voice coils of your speakers. You need to ensure your gear isn’t gasping for air by matching your amp’s output to your speaker’s impedance and sensitivity. If you’ve ever noticed a sharp, metallic sound during an explosion in a movie, you might be hearing the early signs of heat damage to your tweeters. Research published by the Audio Engineering Society highlights that non-linear distortion in underpowered amplifiers is far more damaging to listener satisfaction than a slightly higher noise floor.
The inconvenient truth about high-resolution files
Everyone says that switching to 24-bit/192kHz audio is a magic bullet for better sound, but I’ve found that it’s often the last thing you should worry about. If your speakers are placed incorrectly or your room is full of hard, reflective surfaces, that high-res file is just going to highlight your room’s flaws. In fact, without a treated room, your high-end DAC will sound exactly like your laptop’s headphone jack because the subtle details are being swallowed by ‘flutter echoes’ and standing waves. Don’t waste money on gold-plated accessories or ultra-high-sample rates until you’ve mastered the basics of placement and power matching. Even the performance benefit of using balanced XLR cables is negligible if your cable run is only six feet long and away from power interference. Focus on the physics first, then the format. Have you ever fallen into the trap of buying more gear instead of fixing your room layout? Let me know in the comments below.
Keep Your Gear from Turning into Junk
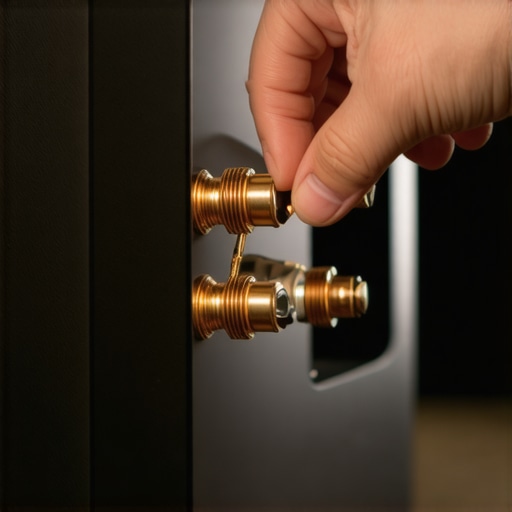
Once you’ve spent the time getting your speakers in the perfect spot and matching them with the right amplifier, the battle isn’t over. High-end audio gear is surprisingly robust, but it’s also prone to a slow, creeping degradation that most people don’t notice until it’s too late. I remember helping a friend move his ‘vintage’ setup last year, and when I pulled the cables, the copper was a dull, murky green. That’s a signal killer. Learning how to clean green oxidization off your copper speaker terminals is one of those maintenance tasks that takes ten minutes but can instantly restore the sparkle to your high-frequency response. I personally swear by a precision application of DeoxIT D-Series; according to technical data sheets from CAIG Laboratories, even a microscopic layer of oxidation can increase contact resistance enough to introduce measurable noise and signal loss in high-sensitivity systems.
How do I keep my sound system running like new for years?
Consistency is key. Beyond the metal bits, you have to look at the ‘soft’ parts of your system. If you notice your bass feeling a bit flabby or your drivers looking dull, you should check for dust buildup on the cones. More importantly, learning how to clean sticky speaker surrounds without damaging the rubber can prevent the dry-rot that kills 90% of old speakers. If you ever hear a physical noise while turning your knob, don’t ignore it. It’s usually just dust in the potentiometer, and knowing how to fix a scratchy volume dial with electrical contact cleaner will save you a $200 repair bill at a local shop. I try to do a full ‘audio audit’ every six months, checking every connection and ensuring no cables have been pinched by the furniture.
Why an Old Phone is My Secret Audio Weapon
When it comes to scaling your system without breaking the bank, I always tell people to look in their junk drawer. I’ve found that one of the best upgrades for a desktop setup is actually a piece of ‘trash.’ There is a massive benefit to learning how to use an old phone as a dedicated high-res music player. By wiping an old Android or iPhone and using it solely for streaming via a wired connection, you eliminate the electrical interference from your primary phone’s cellular and Wi-Fi activity. Plus, you won’t have your music interrupted by annoying text notifications or calls. It’s the ultimate budget-friendly streamer that often outperforms the built-in Bluetooth on many entry-level receivers.
Ditch the Extension Cords if You Value Your Bass
As you grow your system and add more power-hungry components, you’ll likely run out of wall outlets. This is where most people make a fatal error for their soundstage. You should avoid using an extension cord for your power amp whenever possible. High-power amplifiers require quick bursts of current to handle low-frequency transients—those big drum hits that make your chest thump. A thin, generic extension cord acts like a bottleneck, restricting that current and making your bass sound thin and compressed. If you must use a strip, invest in a dedicated power conditioner that doesn’t limit amperage. This is the same reason why your bookshelf speakers need more power than you think; they aren’t just drawing a flat line of energy, they are constantly demanding more to maintain control over the driver. My prediction? As home audio moves toward more efficient Class D amplification, we’ll see systems become less sensitive to power quality, but for now, the old-school rules of current delivery still reign supreme. This weekend, I want you to try this: Unplug your amp from that cheap power strip, plug it directly into the wall, and listen to the difference in the kick drum—you’ll be shocked.
Hard Truths I Learned After Years of Chasing the Perfect Sound
If there’s one thing I’ve learned after years of swapping components, it’s that the most expensive system in the world can still sound like garbage if it isn’t treated with respect. My biggest ‘lightbulb moment’ happened when I realized that my room was essentially a giant instrument that I hadn’t tuned yet. It wasn’t about the DAC or the cables; it was about the air and the physics of the space. I also discovered that maintenance isn’t optional for serious listeners. When you clean green oxidization off your copper speaker terminals, you aren’t just being tidy—you’re preserving the signal path from degradation that happens so slowly you might not even notice. Another harsh reality was realizing why your bookshelf speakers need more power than you think; it’s rarely about volume and almost always about the amplifier’s ability to grip and control the driver’s movement. Finally, never let a technical glitch convince you to buy new gear prematurely; often, knowing how to fix a scratchy volume dial with electrical contact cleaner is all you need to make a ‘broken’ vintage amp feel brand new again.
My Go-To Resources for a Professional Sounding Living Room
I don’t believe in magic elixirs, but I do believe in the right tools for the job. For measurement, I always point people toward Room EQ Wizard (REW). It’s a free, powerful software that takes the guesswork out of room acoustics. For hardware preservation, I never let my toolkit run out of DeoxIT D-Series from CAIG Laboratories, which is the gold standard for electronics. If you have older gear, you need to be careful with chemicals, so I recommend learning how to clean sticky speaker surrounds without damaging the rubber using mild, alcohol-free solutions. For those on a budget looking to upgrade their source, how to use an old phone as a dedicated high-res music player is a game-changer that bypasses the noisy internals of a standard PC. I also frequently visit the Audio Science Review forums for objective data that cuts through the marketing fluff of the high-end industry.
Your Journey to Better Audio Starts with a Single Step
At the end of the day, your audio setup should serve the music, not the other way around. Don’t get so caught up in the measurements and the placement that you forget to actually sit down and enjoy your favorite records. High-fidelity sound is a journey, and every small adjustment—from pulling your speakers off the wall to ensuring your stands are stable—gets you one step closer to that ‘performer in the room’ feeling. You don’t need a massive budget to have a massive soundstage; you just need a little patience and a willingness to experiment with the gear you already own. Go ahead, move those speakers a few inches tonight and see what happens. Have you ever noticed a sudden improvement in your sound just by moving a piece of furniture or adjusting your speaker placement? Let me know below.