
I spent three hours yesterday chasing a phantom ‘farting’ sound from my left bookshelf speaker. It was driving me insane. I’d adjusted the EQ, checked the cables, and even considered if my cat had finally done something unforgivable to the woofer. The bass was there, but it felt hollow—like it was gasping for air rather than pushing it. Have you ever felt that sinking realization that your gear just isn’t performing like it used to, but you can’t quite put your finger on why? Drop a comment below and let me know the weirdest sound your setup has ever made—I bet I can top it. Today, I’m going to save you the headache I had by showing you how a simple kitchen staple can diagnose your cabinet issues in seconds.
Stop Blaming Your Amp for Flabby Bass
Most of us think that if the low end sounds muddy, we just need more power or a better DAC. I made that exact mistake early on, throwing money at new cables when the real culprit was a tiny gap in the cabinet seal. When air escapes from places it shouldn’t, your speaker loses its ‘spring.’ It becomes inefficient and sloppy. I’ve even seen people lose punch in their vintage speakers and assume the drivers were dead, when it was just the old glue failing.
Does a tiny pinhole leak really matter?
You might think I’m being a bit obsessive. I mean, it’s just a tiny bit of air, right? Wrong. According to studies by the Audio Engineering Society, air leaks in a sealed or ported enclosure can significantly degrade the system’s damping factor, causing the woofer to overshoot and creating that dreaded ‘chuffing’ noise. I once spent a whole weekend thinking I had a blown driver or a rattle, only to find out the terminal cup on the back was slightly loose. Small leaks act like a whistle, adding high-frequency noise to your low-frequency notes, which is why your speakers might sound like they are under a blanket.
The Kitchen Solution You Never Knew You Needed
The beauty of the simple paper test isn’t just that it’s cheap; it’s that it works better than your ears ever could. Your ears can tell you something is wrong, but they are terrible at pinpointing a leak the size of a needle. I used to try and feel for air with my hand, but our skin isn’t sensitive enough to catch high-velocity micro-leaks. That’s where the paper towel comes in. Before you go trying to fix a vibrating subwoofer by stuffing it with pillows, you need to find out where the structural integrity is failing. I’ve seen people give up on great vintage gear because they thought the wood was warped beyond repair, when in reality, they just needed a fresh gasket and five minutes of detective work. Grab a roll from the kitchen, and let’s get to work.
Why Thin Toilet Paper Is Your Best Diagnostic Tool
To start, you need a high-quality single-ply piece of toilet paper or a very thin facial tissue. Don’t use the heavy-duty quilted stuff; we need something that reacts to the slightest puff of air. Think of this like a smoke detector for your soundstage. Before you start tearing things apart, ensure your speakers are physically stable; often, why your bookshelf speakers sound better when you move them off the desk is simply because the desk itself is vibrating and masking the cabinet’s own issues. You want the speaker on a solid stand or even on the floor for this test. While you’re at it, double-check your wiring; it’s a good time to make sure you aren’t chasing a leak when you’ve actually wired things out of phase in 30 seconds, which can cancel out your bass just as effectively as a hole in the wood.
Crank the Bass and Watch the Paper
You need a sustained low-frequency tone to create enough internal pressure to force air through any cracks. I usually pull up a 40Hz or 50Hz sine wave on YouTube or a signal generator app. Turn the volume up until you can see the woofer physically moving—just be careful not to push it into clipping. Now, slowly run the edge of your paper along every single seam of the cabinet. We’re looking for the paper to ‘dance’ or flutter. If you have a ported design, ignore the port for now; we are hunting for unintentional leaks. 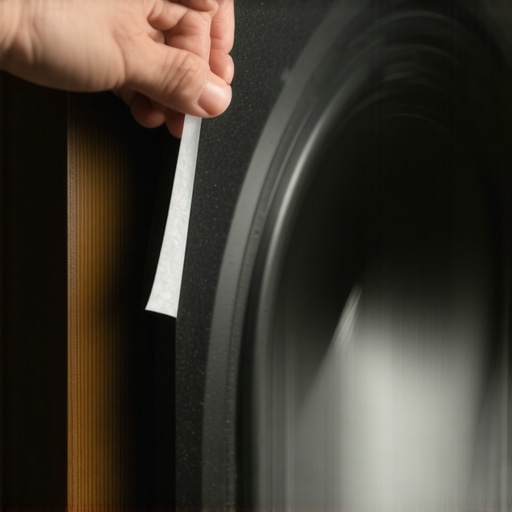 If the paper starts vibrating violently near a screw or a joint, you’ve found your phantom. I’ve found that even if the cabinet is tight, sometimes why your bookshelf speakers need more power than you think is because a leak is forcing the amp to work twice as hard to maintain the same SPL.
Look Beyond the Obvious Seams
The most common leak points aren’t the corners—they are the components we screw into the wood. Check the perimeter of the woofer frame and the terminal cup on the back. These often use cheap foam gaskets that dry out and crumble over thirty years. If the paper flutters here, the seal has perished. It’s also worth checking if the internal pressure is causing electronic components to rattle. Sometimes a rattle sounds like a leak, but it might actually be a sign that the speaker’s capacitor is starting to fail and physically vibrating against the crossover board. If your cabinets are floorstanders and the bass feels thin even after sealing, remember that your speaker stands need to be filled with sand or lead shot to properly dampen the energy that the sealed cabinet is now trying to contain.
The Day a 2-Cent Fix Saved My Favorite Bookshelf Speakers
I remember a pair of vintage KEFs I picked up at a garage sale. They sounded like they were underwater. I was convinced the wood had delaminated or the crossovers were shot. I spent an hour performing the paper test and found that air was whistling out of the plastic binding post housing like a teakettle. The previous owner had over-tightened the nuts and cracked the plastic. A tiny bead of clear silicone and a new rubber washer—literally a two-cent fix—brought the low end back to life. It was a stark reminder that in the world of high-fidelity audio, the smallest physical compromise can ruin the most expensive engineering. If you’ve been searching for that ‘punch’ and can’t find it, stop looking at your amp and start looking at your gaskets.I’ve seen it a thousand times: an enthusiast buys a $2,000 amplifier because they think it will ‘open up’ the soundstage, but they’re still using the same old speakers with dried-out surrounds. It’s the ultimate audiophile trap. We’re taught to follow the signal path—source, DAC, amp, then speakers—and we assume the beginning of the chain is where the magic happens. But in reality, your room and your speakers’ physical integrity account for about 80% of what you actually hear. If you’ve ever wondered why your high-end DAC sounds exactly like your laptop’s headphone jack, it’s usually because the mechanical bottlenecks are so severe that the DAC’s precision is simply lost in the noise. Have you ever fallen into this trap? Let me know in the comments.
Why do my high-end headphones still sound flat?
If you’re a headphone enthusiast, you’ve probably obsessed over ‘burn-in’ or cable materials. Here’s the cold truth: the physical seal of the pad against your head matters more than almost any electronic upgrade. A study by Dr. Sean Olive at Harman International showed that even small variations in headphone fit—like why your headphones sound thin when you wear glasses—can cause a massive 20dB drop in bass response. That’s a hardware ‘leak’ that no $500 cable can fix. We chase these 1% improvements in electronic specs while ignoring 20% losses in physical acoustics.
The Impedance Trap That Ruins High-End Setups
People often ignore the math of their gear. They buy a ‘hungry’ set of speakers and pair it with an amp that technically has the wattage, but lacks the current delivery to handle low-frequency swings. This is where the secret to choosing the right ohm rating for your amp becomes your most valuable tool. If your amp isn’t stable at low impedances, it will clip during dynamic peaks, making your music sound harsh and compressed. Instead of looking at the hardware, people often blame the source material, wondering why your speakers sound harsh when you play high-res files. It’s rarely the file quality; it’s usually your amp gasping for air because it can’t handle the speaker’s impedance dips. 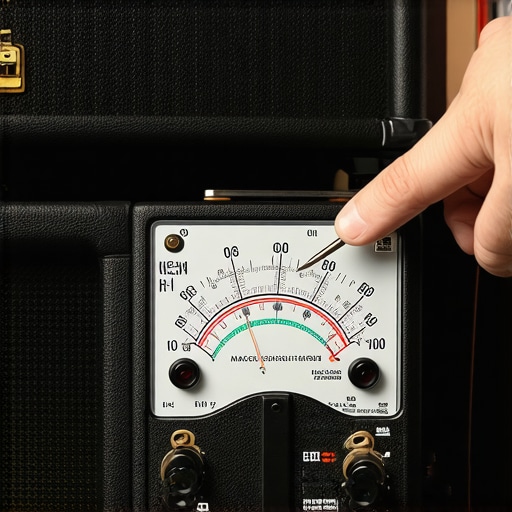
Stop Buying New Gear When You Can Repair the Old
Before you assume your vintage gear is ‘too old’ and needs a total replacement, check the simple mechanical parts. I’ve saved dozens of receivers by learning how to fix a scratchy volume dial with electrical contact cleaner. It’s an easy win that most ‘experts’ at the store will tell you requires a $400 repair bill or a brand-new purchase. They want you to buy the newest model, but that vintage iron often has enough headroom for your speakers to outperform modern mid-range units. Don’t let a little dust or a bad gasket convince you to abandon high-quality engineering.
Chemical Warfare Against Crackling Dials
Maintenance isn’t just about blowing the dust off your cabinet; it is about keeping the signal path as clean as the day it left the factory. I keep a can of DeoxIT D5 on my bench at all times because it is the only way I’ve found to successfully fix a scratchy volume dial with electrical contact cleaner without leaving a gummy residue behind. This isn’t just a tip for home gear either; knowing how to fix a scratchy volume fader on a professional mixer can save a gig from disaster. As detailed in the technical documentation from CAIG Laboratories, removing oxidation from copper and silver-plated contacts without damaging the base metal is critical for maintaining signal integrity over decades. If you hear a pop when you turn a knob, you aren’t hearing a ‘vintage charm’—you’re hearing a physical barrier to your music. 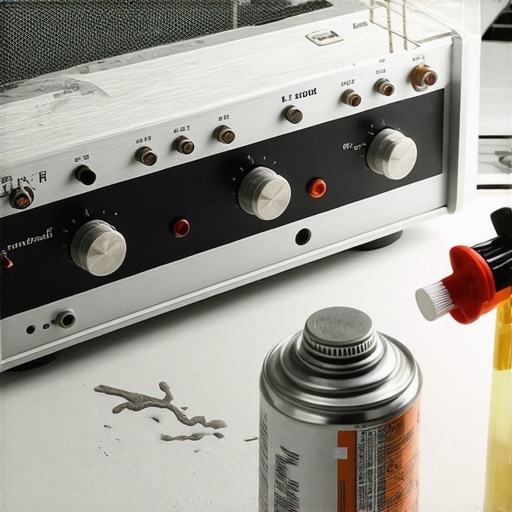
Turn Your Smartphone Into a Professional Grade Lab
We live in an era where the most powerful diagnostic tool in your house is already in your pocket. I no longer guess where my bass is disappearing to; I learn how to use your phone to measure your rooms frequency response using RTA (Real Time Analyzer) apps. By playing pink noise and walking around the room, you can see the literal peaks and valleys of your sound. This data is what allows me to find the sweet spot for your speakers in a rectangular room with mathematical precision rather than just trial and error. I predict that in the next few years, this kind of ‘room-matching’ software will be built into every entry-level amplifier, but for now, doing it manually is how you separate the amateurs from the true enthusiasts.
How do I maintain my vintage audio collection over time?
Long-term health for your gear requires a proactive schedule. Every six months, I do a ’round-robin’ check. This includes checking for physical degradation like surround rot or learning how to spot a blown tweeter before it ruins your crossover. High-frequency drivers are fragile, and a failing voice coil can sometimes draw enough irregular current to take out expensive internal components.
Stop Ignoring the Rubber and Fabric
The aesthetic and physical components are just as vital for the ‘vibe’ of your setup. If your gear has been sitting in the sun, you should look into how to restore a sun-faded speaker grille to look new again. But more importantly, pay attention to the mechanical parts. I’ve had to learn how to clean sticky speaker surrounds without damaging the rubber because the wrong chemical—like isopropyl alcohol—can actually dissolve the specialized coatings used to keep the driver flexible. Keeping these surrounds supple ensures the ‘spring’ we talked about earlier stays consistent for another twenty years. Go grab your phone right now and run a basic frequency sweep using an RTA app; you might be surprised how much your room is actually lying to you.
The Lessons My Wallet Learned the Hard Way
After decades of tinkering, I’ve realized that the air inside your cabinet is just as important as the signal in your wires. I used to think I needed a $5,000 system to hear real depth, but most of that ‘depth’ was being lost through tiny mechanical failures. Don’t fall for the trap of thinking high-end gear is immune to physics; even vintage speakers losing their punch are usually just suffering from seals that have dried out over time. I also learned that in mobile setups, you should stop your cars rear deck from rattling with heavy bass before assuming your woofer is the problem. Finally, remember that your ears are easily fooled by volume, but a simple piece of paper never lies about a leak.
Everything You Need to Be Your Own Hi-Fi Tech
You don’t need an engineering degree to fix 90% of common home audio issues. Beyond the toilet paper test, here are the tools I trust for a professional-grade diagnosis. First, a reliable RTA app; being able to use your phone to measure your rooms frequency response is the fastest way to confirm your repairs are actually improving the output. Second, I always keep a bottle of DeoxIT nearby to fix a scratchy volume dial with electrical contact cleaner—this is essential for maintaining signal purity throughout the chain. Lastly, a simple high-lumen flashlight and a tube of non-hardening silicone sealant are your best friends for spotting and filling gaps.
The Bass You Deserve Is Already There
Audio is a journey of removing mechanical barriers. When you seal that last leak, you aren’t just ‘fixing’ a box; you are finally hearing the music the way it was recorded. Whether you are trying to get better bass from a sealed subwoofer box or just trying to bring a pair of old bookshelf speakers back to life, the physical integrity of the enclosure is your foundation. Stop chasing the next ‘magic’ upgrade and start trusting your hands-on diagnostics. Have you ever found a massive air leak in a piece of gear you thought was perfect? Let me know in the comments below!