
I remember sitting in my old sedan, grinning because I’d finally saved up enough for a proper 12-inch subwoofer. I threw on a track with a heavy kick, and instead of feeling the music in my chest, I heard a violent, plastic ‘clack-clack-clack’ coming from right behind my head. It was humiliating. I felt like I was driving a loose bag of bolts rather than a performance audio machine. If you’ve ever felt that sting of disappointment when your high-end gear sounds cheap because of a few loose pieces of trim, you’re in the right place. Today, I’m going to show you how to silence that rear deck once and for all without spending a fortune on a professional shop.
Stop Letting Your Rear Deck Ruin the Vibe
Most people think they need a bigger box or better speakers to fix bad sound. But usually, the problem is just physics. The rear deck is essentially a giant, unbraced sheet of metal and plastic sitting directly in the line of fire for your sub’s sound waves. It is the exact same reason why your car door panels buzz with every bass hit—most manufacturers simply don’t build standard cars to handle 500 watts of low-end fury. When those panels vibrate at a different frequency than your music, they cancel out your bass and replace it with mechanical noise.
Is Sound Deadening Actually Worth the Hassle?
You might be thinking, ‘Can’t I just turn down the bass?’ Sure, but you didn’t buy a subwoofer to play it at volume two. A common mistake I made early on was trying to ‘outpower’ the rattle. I thought if I just bought a more expensive amplifier, the sheer force of the sound would drown out the vibration. Spoiler alert: it didn’t. It just made the deck rattle harder. It’s just as frustrating as the reason your car radio dims when the bass hits. According to technical papers from the Society of Automotive Engineers (SAE), structural resonance in a vehicle can consume a significant portion of your acoustic energy, effectively stealing the ‘punch’ you paid for.
The Day I Almost Glued My Trunk Shut
I’ll be honest with you: my first attempt at fixing this was a total disaster. I used way too much expanding spray foam, and I ended up clogging the rear seatbelt retractors. Don’t be like 19-year-old me. You don’t need a chemical mess; you need strategic mass loading and friction reduction. Even if you have already figured out how to add more bass to your factory car speakers for free, the rear deck remains the ultimate gatekeeper of clarity. Think of your car like a speaker cabinet. If the cabinet is loose and flimsy, the speaker sounds thin. Have you ever felt like your rear window was about to vibrate out of its frame during a heavy bass drop? Tell me about your worst rattles in the comments, because I’ve heard them all, and I promise we can fix it. Let’s get into the actual tools and the ‘neighborly’ secrets to a dead-silent car interior.
Strip It Down to the Bare Metal
You can’t treat a wound through a jacket, and you can’t stop a rattle through a plastic cover. Your first move is to remove the rear deck panel entirely. This usually involves popping out a few plastic clips and maybe unscrewing the child-seat anchors. I remember the first time I did this on my old coupe; I was terrified I’d snap the plastic, but a set of cheap nylon pry tools is a lifesaver here. Once that cover is off, you’ll see the culprit: a thin, resonant sheet of steel with huge holes in it. This is also a great time to check your wiring, similar to how to use a 9v battery to check your speaker polarity, to ensure everything is firing in phase before you seal it back up.
Add Serious Mass to That Flimsy Steel
The main reason for that annoying ‘buzz’ is that the metal itself is vibrating like a bell. You need to change its resonant frequency by adding mass. This is where Butyl-based sound deadening sheets come in. Think of it like putting your hand on a ringing cymbal—the weight stops the vibration instantly. 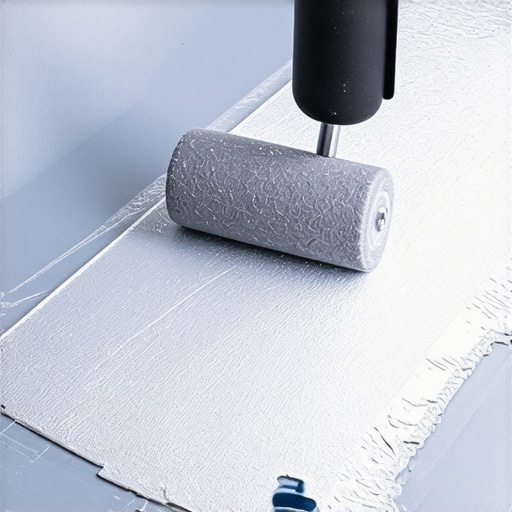 When I worked on a friend’s hatchback, we only covered about 25% of the surface area, focusing on the flat, wide sections of the metal, and the difference was night and day. It is the same logic as why your car door vibration is ruining your mid-bass performance; if the mounting surface moves, the sound quality dies. You don’t need to cover every square inch; just hit the ‘drums’—those big, flat areas that flex when you push on them.
Kill the Friction with a Soft Layer
Even if the metal is silent, the plastic deck cover will still rub against the steel and the rear window. This ‘plastic-on-glass’ or ‘plastic-on-metal’ contact creates high-pitched squeaks. The fix is a layer of 1/8-inch closed-cell foam (CCF) or even some basic weatherstripping. I once used thick felt from a craft store in a pinch, and it worked surprisingly well until the humidity got to it—stick to automotive-grade foam if you can. You want to create a ‘sandwich’ where the foam acts as a gasket between the hard surfaces. This prevents the mechanical transfer of energy, ensuring that the best way to position your subwoofer for clearer lows isn’t wasted on vibrating your trim.
Don’t Overlook the Small Stuff
While you have everything apart, look at the third brake light and the speaker grilles. These are notorious for rattling because they are often just clipped in loosely. I use a tiny dab of silicone or some thin foam tape around the edges of the light housing. If your grilles are the source of the noise, you can follow the easiest way to fix a rattling speaker grill for good to secure them without making them look ugly. Also, check the trunk torsion bars—those long metal rods that help the trunk pop open. They often vibrate against each other. A simple zip-tie with a piece of rubber hose between them will kill that rattle instantly. It’s these small details that separate a ‘loud’ car from a high-fidelity mobile listening room.Once you have silenced the mechanical noises in your car, you start to notice the electronic ones. It is the same in a home setup. Most people believe that buying a high-wattage amplifier is about playing music at ear-bleeding levels, but that is a total myth. In reality, extra power is for the quiet moments between the loud ones—it is about headroom.
Power Ratings Are Mostly Marketing Fluff
The biggest lie in the audio industry is the ‘Peak Power’ sticker on the box. I have seen soundbars claiming 500 watts that struggle to fill a bedroom. If you really want to understand your gear, you need to look at RMS (Root Mean Square) values. Challenging the common belief that more watts equals more volume, I have found that a high-quality 50-watt amp with a massive power transformer will outperform a ‘1000-watt’ budget receiver every single day. This is exactly why your bookshelf speakers need more power than you think—it is not about the volume knob; it is about the ability to handle sudden musical peaks without distorting.
The Hidden Trap of Underpowering Your Speakers
Here is the ‘oops’ factor that ruins most setups: underpowering your speakers is actually more dangerous than overpowering them. When an amplifier runs out of juice, it clips the signal, turning smooth sound waves into ‘square’ waves. This generates massive amounts of heat that can fry a tweeter in seconds. A study published by the Audio Engineering Society (AES) on ‘The Perception of Audio Quality’ highlights that listeners often confuse ‘loudness’ with ‘distortion’—meaning a clean, high-headroom system often feels quieter than a cheap, clipping one even when it is actually pushing more decibels. If you notice the real reason your amp is getting hot to the touch is because it is struggling to keep up, you are at risk of permanent equipment failure. 
How do I know if my amplifier actually has enough headroom for my speakers?
You can usually tell by the ‘punch’ of the low end. If the bass sounds muddy or ‘soft’ at higher volumes, your amp is likely gasping for air. Learning how to tell if your amplifier has enough headroom for your speakers is the difference between a system that sounds ‘okay’ and one that sounds ‘alive.’
Don’t Waste Money on Fancy Jewelry for Your Cables
Another common myth is that you need gold-plated everything to get good sound. While gold resists corrosion, it is actually a worse conductor than copper or silver. Unless you live in a high-humidity environment, you are better off spending that money on thicker gauge wire or better speaker placement. This is the same logic behind why gold-plated connectors aren’t always better for your signal chain. For those looking for a real upgrade, focusing on the real performance benefit of using balanced XLR cables will yield far more audible results than buying a ‘luxury’ HDMI cord. Have you ever fallen into the trap of buying gear based on the ‘Max Power’ sticker? Let me know in the comments.One thing that still drives me crazy is finding a beautiful set of vintage towers, only to open them up and find the copper wire has turned a sickly shade of swamp green. Oxidation is a slow, silent thief of high-frequency detail. It doesn’t matter if you have the best amp in the world; if your connections are corroded, you’re listening through a filter of resistance. Learning how to clean green oxidization off your copper speaker terminals is the single most effective ‘free’ upgrade you can give an older system. I personally use a can of DeoxIT D5 on every single connection once a year—it’s like giving your speakers a shot of espresso.
Don’t Let Green Gunk Kill Your Clarity
While you are back there checking the wires, take a good look at the speaker cones themselves. If you have older gear with rubber surrounds, they can become gummy or brittle over time. I’ve seen people ruin perfectly good drivers by using harsh household chemicals on them. You need to know how to clean sticky speaker surrounds without damaging the rubber to prevent them from cracking. According to the official service manuals from McIntosh Laboratory, keeping electrical contacts and mechanical surrounds clean is actually more vital for maintaining signal integrity over decades than the initial price tag of the cables. 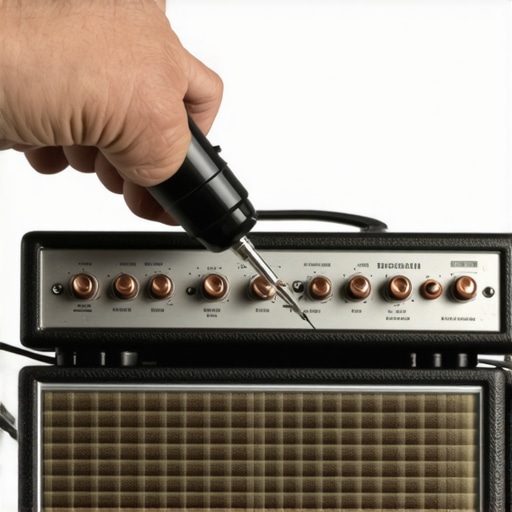
How do I keep my home audio gear sounding brand new for a decade?
The secret is heat management and physical protection. Beyond just cleaning, you have to watch out for small mechanical failures. If you spot a tiny tear in the foam or rubber, don’t panic. You can often save the driver if you catch it early and learn how to fix a small rip in a speaker surround with glue before it spreads. Also, keep your amplifiers in well-ventilated areas. Heat is the number one killer of capacitors, and a cooked capacitor leads to that annoying 60Hz hum that ruins your late-night listening sessions.
Bring Your Vintage Finds into the 21st Century
I am a huge advocate for ‘recycling’ high-end vintage gear. I recently found a 1980s silver-face receiver that sounded incredible but lacked any modern connectivity. Instead of buying a cheap new receiver, I looked into how to add an optical input to your old home stereo using a high-quality DAC. This is the trick to making vintage speakers sound modern again—you keep the warm, analog amplification but feed it a clean, high-resolution digital signal.
What the Future Holds for Our Sound Systems
Looking ahead, I predict we are going to see a massive shift toward AI-integrated room correction even in budget-tier gear. We are already seeing soundbars that can map a room’s acoustics in seconds, but soon, this will be standard for every amplifier. The goal is to eliminate the ‘room’ from the equation entirely, making even a tiny apartment sound like a mastered studio. Before you go out and buy that new AI-powered rig, try one thing for me: use the ‘9V battery pop’ to check your phase. It is a classic move, and understanding how to use a 9v battery to check your speaker polarity can reveal if your speakers have been working against each other this whole time. Take five minutes this weekend to check your main speaker wires; if they look dull, trim them back and start fresh. Your ears will thank you.
What Decades of Blown Tweeters Taught Me
I’ve learned the hard way that a high price tag doesn’t guarantee a high-quality experience if the foundation is shaky. One of the most vital shifts in my thinking was realizing that a clean signal is always better than a loud one. Many beginners get caught up in flashy boxes, but they often ignore the difference between peak and rms power explained simply, leading them to push their gear past the breaking point. Another lesson? Never trust your ears alone when setting up a new system—always verify your wiring and mounting before you bolt everything down for the final time. I also realized that most ‘unfixable’ problems are usually just maintenance issues, like when I finally discovered why your car audio system drains your battery overnight after weeks of troubleshooting.
My Essential Toolkit for Pure Audio
If you want to move beyond basic listening, you need a few specialized items that I personally never start a project without. First, a can of high-quality contact cleaner is non-negotiable; it’s the only way to effectively clean green oxidization off your copper speaker terminals and keep the signal path pure. Second, I always keep a set of nylon pry tools nearby to avoid scratching my car’s interior when hunting for rattles. Finally, I highly recommend spending some weekends finding legitimate high-end gear at local thrift stores. You would be shocked at how many people discard high-current amplifiers just because they don’t have Bluetooth built-in. #IMAGE_PLACEHOLDER_E#
Your Journey to Acoustic Perfection
Audio is a journey of small, iterative improvements that eventually lead to a ‘holy grail’ moment where the speakers seemingly disappear and only the music remains. Whether you are optimizing your car doors or your home theater, the goal is the same: to remove the physical distractions of vibration and the electrical distractions of distortion. Don’t be afraid to take things apart and experiment with your speakers and amplifiers. The more you tinker, the more you understand how sound actually behaves in your space. What was the most annoying rattle or electronic hum you ever had to track down in your setup? Let me know in the comments below!