
I was mid-set at a high-stakes wedding reception, the kind where the mother of the bride looks like she’s ready to sue if a single beat is missed. I reached for the master fader to bring in the couple’s entrance song, and as I slid it up, my heart sank. Instead of a smooth swell of music, the speakers let out a violent, sandpaper-like crackle that made everyone in the front row flinch. It was humiliating. That scratchy, unpredictable noise is the bane of every DJ and sound engineer, but here is the good news: you do not need to scrap your board. I have spent years reviving old analog gear, and today I am going to show you exactly how to make those sliders feel buttery smooth again without needing a degree in electrical engineering or a $200 repair bill.
Stop the Crackle Before It Ruins Your Next Gig
The problem usually isn’t that your mixer is broken beyond repair. Most of the time, it is just thirsty for a bit of maintenance or suffering from a buildup of microscopic debris. Much like [how to clean dust out of your headphone jack without damaging pins](https://premiumsounddeals.com/how-to-clean-dust-out-of-your-headphone-jack-without-damaging-pins), your mixer’s faders are open to the elements. Dust, skin cells, and even airborne grease from nearby kitchens create a layer of oxidation on the internal carbon tracks. When the wiper moves across those tracks, it loses contact, resulting in that dreaded static. According to technical documentation from Allen & Heath, keeping these internal contact points free of oxidation is the single most important thing you can do to extend the life of an analog console. Have you ever felt that sudden panic when a channel cuts out right as the bass drops? It is a gut-wrenching feeling, but it is often just a sign that your gear needs a little TLC.
Is my expensive mixer actually dying for good?
I get it. When you hear that noise, you start looking up the price of a new Pioneer or Yamaha board. You might even start worrying about deeper issues, similar to [how to tell if your speakers capacitor is starting to fail](https://premiumsounddeals.com/how-to-tell-if-your-speakers-capacitor-is-starting-to-fail). But hold on. Early in my career, I made the massive mistake of thinking a “lubricant” meant anything oily. I once sprayed standard garage-grade WD-40 into a vintage Mackie board. It was a disaster. It turned the dust into a thick, conductive sludge that eventually shorted out the channel and left a permanent smell of a mechanic shop. You have to use the right tools. We are going to focus on [how to fix a scratchy volume dial with electrical contact cleaner](https://premiumsounddeals.com/how-to-fix-a-scratchy-volume-dial-with-electrical-contact-cleaner), which is a completely different beast than what you find in a garage. If you follow the right steps, you can save your gear and your reputation in about fifteen minutes.Kill the power immediately. It sounds obvious, but when you are in a rush to fix a channel between sets, you might be tempted to spray while the board is live. Don’t. You’re dealing with a liquid, even if it evaporates fast. If it bridges a connection on the PCB before it dries, you aren’t just fixing a scratchy fader; you’re buying a new motherboard. It is a similar logic to the real performance benefit of using balanced xlr cables—you want a clean, uninterrupted signal path, not a short-circuit nightmare. Pull the plug and give the capacitors a minute to discharge so you are working on a completely cold circuit.
Spray Less and Move More to Clear the Grime
The choice of cleaner is everything. You need something that evaporates quickly and doesn’t leave a conductive residue. I remember a gig in a basement dive bar in Brooklyn where I tried to use a generic ‘all-purpose’ cleaner on a friend’s fader. The humidity was so high the dust had practically turned into concrete. The generic spray made it worse, creating a sticky paste that cut the signal entirely during the headliner’s intro. Now, I only use dedicated electronic contact cleaners. Take your can and attach the thin straw to aim for the internal travel path of the fader, not just the surface. Give it one quick, targeted burst. This isn’t like spray-painting a fence; less is more. 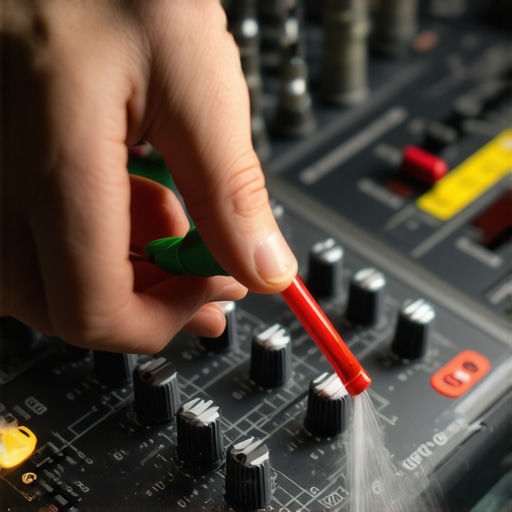 Immediately after the spray, move the fader from top to bottom repeatedly and rapidly. You need to do this at least 40 or 50 times. You are physically scraping the loosened oxidation off the tracks. If you just spray and let it sit, the gunk dries right back onto the contact point. This precision is as vital as the trick to making vintage speakers sound modern again by refreshing old, tired components.
Restore the Glide with the Right Lubricant
Sometimes, cleaning removes the ‘feel’ of the fader along with the dirt. Professional mixers use a specific dampening grease to give the sliders that expensive, weighted resistance. If yours now feels like a loose, rattling toy, you’ve likely stripped the factory grease away. You’ll need a follow-up spray designed for conductive plastics that includes a lubricant. If you don’t, the metal wiper will eventually grind the carbon track into dust. This balance of friction is crucial in audio; it’s the same reason why your headphones feel heavy on your head and how to adjust them comes down to finding that perfect physical tension. Proper lubrication ensures your fingers get the tactile feedback they need for precise level changes during a live mix.
Check for Deeper Issues if the Noise Stays
Finally, if the noise persists after a deep clean, you might be looking at a physically cracked track or a failing component nearby. It pays to be observant, just as you would be when learning how to clean green oxidization off your copper speaker terminals to prevent signal dropouts. If the fader is clean but the sound is still ‘thin’ or ‘crackly’ when you aren’t even touching it, the problem might be an aging capacitor or a cold solder joint. However, in my experience, a thorough ‘spray and slide’ routine fixes the issue 9 times out of 10, saving you from having to tear the entire console apart for a full replacement.
Stop Drowning Your Board in Solvent
Most people assume that if a little contact cleaner is good, a whole can must be better. I have seen countless DJs treat their vintage Soundcraft or Mackie boards like they are degreasing a rusted car engine, spraying enough solvent to soak the entire circuit board. This is a massive mistake. High-quality faders rely on a delicate layer of specialized dampening grease to provide that smooth, ‘expensive’ resistance. When you over-spray, you aren’t just removing dust; you are stripping the factory lubricant, leaving the metal wiper to grind directly against the fragile carbon track. This creates a ‘dry’ fader that feels like sandpaper and actually wears out ten times faster. Much like understanding how to tell if your amplifier has enough headroom for your speakers, maintaining a mixer is about technical balance rather than brute force. Over-cleaning is the quickest way to turn a professional console into a piece of jittery junk. 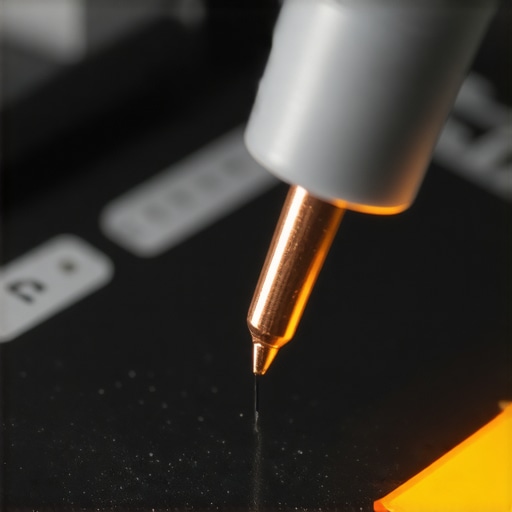
The Compressed Air Mistake You Are Probably Making
Another common trap is reaching for a can of compressed air to ‘blow out’ the gunk before spraying. In theory, it sounds logical, but in practice, you are often just driving microscopic debris deeper into the fader housing or, worse, introducing moisture. Canned air can produce a chilling effect that causes condensation on the internal components. If you then spray a cleaner on top of that moisture, you are essentially creating a sticky sludge that will trap new dust the moment you walk into a club. It is a similar level of hardware nuance to why your expensive headphones sound thin on a basic smartphone; if the physical environment isn’t optimized, the components simply cannot perform. Instead of blowing air into the slot, use a vacuum with a soft brush attachment to pull debris out before you ever introduce a liquid cleaner.
Why Does the Crackle Come Back Two Weeks Later?
This is the question that drives most engineers crazy. You clean the board, it sounds great for one gig, and then the static returns with a vengeance. The reason is usually ‘flash oxidation.’ According to a technical report from CAIG Laboratories, the industry leader in contact chemistry, cleaning a surface without applying a subsequent protective lubricant leaves the bare metal or carbon vulnerable to accelerated atmospheric oxidation. The solvent cleans the track, but it leaves it ‘naked.’ To fix this for good, you must use a two-step process: a fast-evaporating cleaner followed by a specialized fader lubricant like DeoxIT Fader F-Series. If you skip the second step, you are just inviting the oxygen to ruin your gear again. This kind of deep-dive troubleshooting is just as vital as identifying how to tell if your speakers capacitor is starting to fail when you notice a drop in audio clarity. Taking the time to understand the chemistry behind your gear saves you from the cycle of endless, temporary fixes. Have you ever accidentally ‘cleaned’ a fader to death by using the wrong spray? Let me know in the comments below, and let’s keep that gear running smoothly.I have seen $10,000 consoles turned into glorified paperweights simply because the owner did not want to spend $20 on a custom dust cover. It sounds boring, but the best tool in my arsenal is not a fancy spray—it is a simple piece of heavy-duty fabric. If you are serious about scaling your studio or your live rig, you have to treat dust like the enemy it is. For those who are already dealing with a board that feels crunchy, the next step is precision. I personally use a needle-point applicator for my F-Series lubricant because it allows me to hit the contact points without flooding the rest of the fader housing. This isn’t just about the mixer either; much like learning how to clean green oxidization off your copper speaker terminals, you want to maintain every point of contact in your signal chain. If you neglect these small details, you will eventually find that why your vintage speakers are losing their punch over time is not a mystery—it is just physics.
How do I keep my gear running for another twenty years?
Long-term health is all about consistency. I set a reminder on my phone to do a dry sweep of all my faders every two weeks. I move them up and down rapidly while the board is off to keep any microscopic dust from settling and bonding to the carbon tracks. This simple habit has saved me from having to repeat the how to fix a scratchy volume dial with electrical contact cleaner process nearly as often as I used to. 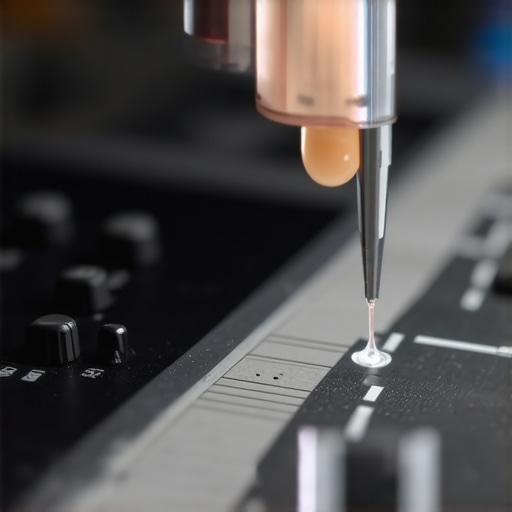 Also, be mindful of the materials around you. For example, if you are also managing speaker maintenance, knowing how to clean sticky speaker surrounds without damaging the rubber is part of that same holistic care routine. According to the official technical maintenance guide from Penny & Giles, using an improper solvent without subsequent lubrication can increase mechanical friction by up to 400%, leading to permanent track scarring within months.
The End of Moving Parts is Coming
If you are frustrated with the limitations of analog sliders, you might be interested in where the industry is headed. We are starting to see more high-end controllers and mixers using Hall Effect sensors. Instead of a physical wiper scraping against a carbon track, these use magnets to measure position. There is no contact, which means there is nothing to wear out and no way for dust to create noise. It is a massive leap forward, similar to the jump from vinyl to digital. Until those become the standard for every budget, however, we are stuck with the tools we have. My challenge to you: Go grab a microfiber cloth and a dust cover today—do not let another speck of dust settle into those tracks.
The Mistakes That Cost Me My Favorite Mixing Board
Over the years, I’ve realized that maintenance isn’t just about fixing what is broken; it is about preventing the inevitable wear that comes with analog hardware. First, never assume that a fader “feels” better just because it is easier to slide. If you’ve stripped the internal grease, you’re just accelerating the damage. Second, consistency beats intensity every time. Doing a quick dry-sweep of your faders once a week is far more effective than trying to “rescue” a board that has been sitting in a smoky basement for a decade. It’s the same logic as how to tell if your amplifier has enough headroom for your speakers—understanding the limits of your gear prevents you from pushing it to a point of failure. Finally, always remember that heat and humidity are just as dangerous as dust. They turn loose particles into a conductive paste that can cause permanent signal bleed.
My Go-To Maintenance Kit for Clear Sound
If you want to do this right, you need the proper toolkit. I always keep a can of DeoxIT F-Series Fader F5 on my workbench; unlike standard contact cleaners, it is specifically formulated for the conductive plastics used in faders. I also highly recommend investing in a set of anti-static brushes to clear the top slots before you ever open the chassis. #IMAGE_PLACEHOLDER_E# For more general audio health, I often refer back to guides like how to fix a scratchy volume dial with electrical contact cleaner because the principles of contact points apply across almost all your hardware. If your faders are clean but the audio still feels off, you might need to investigate why your vintage speakers are losing their punch over time, as component aging happens elsewhere too. Lastly, a simple needle-point oiler is invaluable for applying just a tiny drop of lubricant exactly where it needs to go.
Don’t Let a Little Dust End Your Set
Cleaning your mixer might feel like a chore, but it is the difference between a professional performance and a technical disaster. You’ve worked too hard on your music to let a five-cent speck of dust ruin your reputation. Take the time today to give your gear the attention it deserves, and it will reward you with years of reliable, crystal-clear service. Mastering how to clean scratchy mixer faders is a skill every engineer should master early on. Have you ever had a fader fail right in the middle of a live recording or a performance? Let me know your horror stories in the comments below!