
I was sitting in my favorite leather chair, a cold drink in hand, ready to dive into a pristine 1977 press of Rumours. I dropped the needle, leaned back, and… wait. Why was Stevie Nicks singing from the left bookshelf speaker instead of the center? I shifted my head. I checked my wires. I even swapped my speakers. Still, the left side was noticeably louder. It’s a maddening feeling, like one of your eyes is slightly out of focus. That ‘ghosting’ or channel imbalance is the heartbreak of vintage audio ownership, but I promise you, it is usually a fixable quirk rather than a death sentence for your gear. Today, we are going to get that center image back where it belongs by hunting down the gremlins hiding in your signal path.
Stop Blaming Your Speakers and Look at the Knobs
The first time I encountered this, I made a classic rookie mistake: I assumed my right speaker was dying. I spent hours troubleshooting drivers when the problem was actually an inch away from my fingertips on the amplifier faceplate. Before you panic and start thinking about how to revive old speakers with new foam surrounds, we need to talk about the ‘Balance’ and ‘Volume’ potentiometers. In vintage gear, these are mechanical parts, and mechanical parts hate two things: dust and time. When oxygen and moisture get inside those silver cans, they create oxidation that acts like a wall for electrical signals. If one side of your stereo image feels thin or quiet, the chances are high that a dirty contact is the culprit. Have you ever noticed your music crackling when you turn the volume up? That is your amp screaming for a cleaning.
Is my vintage gear just dying of old age?
It is a fair question to be skeptical. After all, these machines are decades old. However, according to restoration data from professional audiophile forums, carbon-track potentiometers can lose significant resistive accuracy over 40 years simply due to wear and oxidation, not total failure. While it is true that you should eventually learn how to tell if your speaker capacitors are starting to leak, most channel imbalances are solved with a can of contact cleaner and some elbow grease. You would be shocked how often a $10 can of DeoxIT can outperform a $500 repair bill. If you have ever felt like your amp was ‘leaning’ to one side, you aren’t crazy—your amplifier is just struggling to breathe through decades of household dust. [image_placeholder_1]
The Five-Minute Diagnostic to Rule Out Cable Gremlins
Before we start popping the hood and spraying chemicals, we have to rule out the ‘dumb’ stuff. I once tore apart a beautiful Marantz receiver only to realize my RCA cables were just loose. Start by swapping your input cables. If you swap the left and right inputs and the imbalance moves to the other speaker, your amplifier is actually fine—the problem is your turntable or CD player. If the imbalance stays on the same side, the issue is definitely inside the amp or in the speaker wires. While you are back there, make sure you aren’t dealing with a ground loop or hum that might be masking the true volume of one channel. Have you ever spent an hour fixing a problem only to realize a cable wasn’t plugged in all the way? Tell me I’m not the only one who has done that! Once we know the amp is the source of the lopsided sound, we can move on to the real surgery: how to fix a scratchy volume knob on an old amp to ensure both channels are getting the same amount of love.
Get the Gunk Out of Your Volume Pots
Think of a potentiometer—those knobs you love to turn—like a garden hose with a bit of sand stuck in the nozzle. The water still comes out, but it’s restricted, weak, and erratic. In a vintage amplifier, that ‘sand’ is actually a mix of oxidized metal and decades of household debris. When I first started collecting, I picked up a beautiful Sansui AU-717 that sounded like the right channel was playing from another room. I was convinced the output transistors were fried. In reality, the ‘Balance’ knob just had a microscopic layer of film preventing a clean connection. To fix this, you need to open the case and find the ‘silver cans’ behind the faceplate. Use a high-quality contact cleaner—not WD-40, which leaves a sticky residue—and spray it directly into the small access ports of the potentiometers. Once sprayed, rotate that knob back and forth at least 50 times. This mechanical friction, combined with the solvent, scrubs the contact surface clean. If you are dealing with more than just a knob, you might need to learn how to fix a scratchy volume fader on a professional mixer or amp to ensure the signal path is truly wide open. 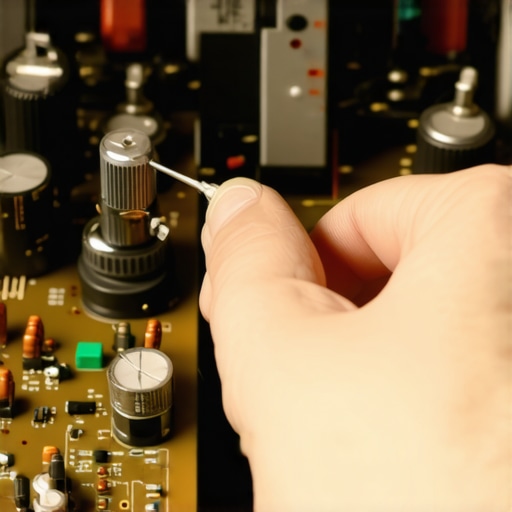
Stop Fighting Against Your Own Speakers
Sometimes the imbalance isn’t electrical; it’s acoustic or purely accidental wiring. If you have recently moved your gear, double-check your polarity. If you accidentally wired one speaker ‘backwards’ (positive to negative), the soundwaves will literally cancel each other out in the middle of the room. This creates a ‘hole’ in the center image that makes one speaker feel louder than the other. You can learn how to tell if your speakers are out of phase in 30 seconds by using a simple 9V battery test. Additionally, consider the room. If your left speaker is in a corner and your right speaker is in an open doorway, the corner speaker will always sound louder due to ‘boundary reinforcement.’ Before you blame the internal circuitry, swap the physical locations of the speakers. If the ‘quiet’ side follows the speaker, the issue might be a failing crossover or a driver problem rather than the amp itself.
The Invisible Barrier of Failing Protection Relays
If your cleaning session didn’t work, we have to look at the gatekeeper: the protection relay. This is the little plastic box inside your amp that ‘clicks’ a few seconds after you power it on. Its job is to protect your speakers from DC voltage, but over 40 years, the internal copper contacts can become pitted or carbonized. I once spent three days hunting a phantom volume drop on a Pioneer receiver, only to find that the relay contacts were so dirty they were adding 50 ohms of resistance to just the left channel. While you have the hood open, use a multimeter to check the resistance across the speaker terminals while the amp is on (and no music is playing). If you see a high or fluctuating reading, that relay needs to be replaced or carefully burnished. This is also a good time to check for other age-related issues, such as how to tell if your speaker capacitors are starting to leak, as failing power caps can cause uneven voltage delivery to the left and right power stages.
Is One Side Working Harder than the Other?
Another common culprit for lopsided sound is ‘Bias Drift.’ Amplifiers need a specific amount of idle current to stay ready to play music. If the bias on the left channel has drifted higher than the right, it might sound punchier or louder—but it will also run much hotter. If you notice an imbalance and feel that one side of the heatsink is significantly warmer, you are likely dealing with this internal calibration issue. Understanding why your vintage amp gets hot even when you aren’t playing music is crucial here; if the bias is too high, you risk a total meltdown. Most vintage service manuals provide ‘test points’ where you can use a multimeter to bring both channels back into perfect alignment, ensuring they share the workload equally.I was sitting in my favorite leather chair, a cold drink in hand, ready to dive into a pristine 1977 press of Rumours. I dropped the needle, leaned back, and… wait. Why was Stevie Nicks singing from the left bookshelf speaker instead of the center? I shifted my head. I checked my wires. I even swapped my speakers. Still, the left side was noticeably louder. It’s a maddening feeling, like one of your eyes is slightly out of focus. That ‘ghosting’ or channel imbalance is the heartbreak of vintage audio ownership, but I promise you, it is usually a fixable quirk rather than a death sentence for your gear. Today, we are going to get that center image back where it belongs by hunting down the gremlins hiding in your signal path.
Stop Blaming Your Speakers and Look at the Knobs
The first time I encountered this, I made a classic rookie mistake: I assumed my right speaker was dying. I spent hours troubleshooting drivers when the problem was actually an inch away from my fingertips on the amplifier faceplate. Before you panic and start thinking about how to revive old speakers with new foam surrounds, we need to talk about the ‘Balance’ and ‘Volume’ potentiometers. In vintage gear, these are mechanical parts, and mechanical parts hate two things: dust and time. When oxygen and moisture get inside those silver cans, they create oxidation that acts like a wall for electrical signals. If one side of your stereo image feels thin or quiet, the chances are high that a dirty contact is the culprit. Have you ever noticed your music crackling when you turn the volume up? That is your amp screaming for a cleaning.
Is my vintage gear just dying of old age?
It is a fair question to be skeptical. After all, these machines are decades old. However, according to restoration data from professional audiophile forums, carbon-track potentiometers can lose significant resistive accuracy over 40 years simply due to wear and oxidation, not total failure. While it is true that you should eventually learn how to tell if your speaker capacitors are starting to leak, most channel imbalances are solved with a can of contact cleaner and some elbow grease. You would be shocked how often a $10 can of DeoxIT can outperform a $500 repair bill. If you have ever felt like your amp was ‘leaning’ to one side, you aren’t crazy—your amplifier is just struggling to breathe through decades of household dust. [image_placeholder_1]
The Five-Minute Diagnostic to Rule Out Cable Gremlins
Before we start popping the hood and spraying chemicals, we have to rule out the ‘dumb’ stuff. I once tore apart a beautiful Marantz receiver only to realize my RCA cables were just loose. Start by swapping your input cables. If you swap the left and right inputs and the imbalance moves to the other speaker, your amplifier is actually fine—the problem is your turntable or CD player. If the imbalance stays on the same side, the issue is definitely inside the amp or in the speaker wires. While you are back there, make sure you aren’t dealing with a ground loop or hum that might be masking the true volume of one channel. Have you ever spent an hour fixing a problem only to realize a cable wasn’t plugged in all the way? Tell me I’m not the only one who has done that! Once we know the amp is the source of the lopsided sound, we can move on to the real surgery: how to fix a scratchy volume knob on an old amp to ensure both channels are getting the same amount of love.
Get the Gunk Out of Your Volume Pots
Think of a potentiometer—those knobs you love to turn—like a garden hose with a bit of sand stuck in the nozzle. The water still comes out, but it’s restricted, weak, and erratic. In a vintage amplifier, that ‘sand’ is actually a mix of oxidized metal and decades of household debris. When I first started collecting, I picked up a beautiful Sansui AU-717 that sounded like the right channel was playing from another room. I was convinced the output transistors were fried. In reality, the ‘Balance’ knob just had a microscopic layer of film preventing a clean connection. To fix this, you need to open the case and find the ‘silver cans’ behind the faceplate. Use a high-quality contact cleaner—not WD-40, which leaves a sticky residue—and spray it directly into the small access ports of the potentiometers. Once sprayed, rotate that knob back and forth at least 50 times. This mechanical friction, combined with the solvent, scrubs the contact surface clean. If you are dealing with more than just a knob, you might need to learn how to fix a scratchy volume fader on a professional mixer or amp to ensure the signal path is truly wide open.
Stop Fighting Against Your Own Speakers
Sometimes the imbalance isn’t electrical; it’s acoustic or purely accidental wiring. If you have recently moved your gear, double-check your polarity. If you accidentally wired one speaker ‘backwards’ (positive to negative), the soundwaves will literally cancel each other out in the middle of the room. This creates a ‘hole’ in the center image that makes one speaker feel louder than the other. You can learn how to tell if your speakers are out of phase in 30 seconds by using a simple 9V battery test. Additionally, consider the room. If your left speaker is in a corner and your right speaker is in an open doorway, the corner speaker will always sound louder due to ‘boundary reinforcement.’ Before you blame the internal circuitry, swap the physical locations of the speakers. If the ‘quiet’ side follows the speaker, the issue might be a failing crossover or a driver problem rather than the amp itself.
The Invisible Barrier of Failing Protection Relays
If your cleaning session didn’t work, we have to look at the gatekeeper: the protection relay. This is the little plastic box inside your amp that ‘clicks’ a few seconds after you power it on. Its job is to protect your speakers from DC voltage, but over 40 years, the internal copper contacts can become pitted or carbonized. I once spent three days hunting a phantom volume drop on a Pioneer receiver, only to find that the relay contacts were so dirty they were adding 50 ohms of resistance to just the left channel. While you have the hood open, use a multimeter to check the resistance across the speaker terminals while the amp is on (and no music is playing). If you see a high or fluctuating reading, that relay needs to be replaced or carefully burnished. This is also a good time to check for other age-related issues, such as how to tell if your speaker capacitors are starting to leak, as failing power caps can cause uneven voltage delivery to the left and right power stages.
Is One Side Working Harder than the Other?
Another common culprit for lopsided sound is ‘Bias Drift.’ Amplifiers need a specific amount of idle current to stay ready to play music. If the bias on the left channel has drifted higher than the right, it might sound punchier or louder—but it will also run much hotter. If you notice an imbalance and feel that one side of the heatsink is significantly warmer, you are likely dealing with this internal calibration issue. Understanding why your vintage amp gets hot even when you aren’t playing music is crucial here; if the bias is too high, you risk a total meltdown. Most vintage service manuals provide ‘test points’ where you can use a multimeter to bring both channels back into perfect alignment, ensuring they share the workload equally. Most ‘experts’ in the vintage community will tell you that if your soundstage is lopsided, you just need to let your gear ‘settle in’ with a long burn-in period. While there is a grain of science behind the truth about speaker break-in periods, it is almost never the actual solution for a 3dB volume difference. In my experience, people over-engineer the fix. They assume hardware failure and start performing surgery when the issue is actually the environment. If you’ve ever felt one speaker was ‘shouting’ while the other ‘whispers,’ don’t fall into the common trap of adding more gear to fix it. I have seen enthusiasts try to connect four speakers to a two-channel amplifier safely just to bridge that sonic gap. This is a dangerous mistake; you aren’t fixing the imbalance, you’re creating a complex impedance load that can fry your output transistors.
Your Walls are Lying to Your Ears
If the internal electronics check out, the next culprit is ‘The First Reflection.’ Many people place their gear where it looks good, not where it sounds good. If your left speaker is tucked into a corner while the right is in an open space, the left speaker will benefit from boundary gain, making it sound noticeably louder. This is why why your floorstanding speakers need more breathing room from the wall is the first lesson any serious listener should learn. If the room is too reflective, it creates a smeared image that no amount of cleaning can fix. Sometimes, the most high-tech solution isn’t a new capacitor, but a simple piece of furniture. You would be surprised why you should use a rug to fix a bright sounding room and restore that phantom center image. 
How Do Lateral Reflections Trick Your Ears into Hearing a Channel Imbalance?
This is where the real psychoacoustics come in. According to research published by the Audio Engineering Society (AES), specifically the work of Dr. Floyd Toole on ‘The Precedence Effect,’ our brain locks onto the very first sound it hears to determine location. If a side wall is too close to one speaker, the reflected sound arrives milliseconds after the direct sound. Your brain fuses these together, perceiving that channel as louder and closer. It is a total illusion. To combat this, I recommend the mirror trick: have a friend slide a mirror along the side walls while you sit in your listening chair. Wherever you see the speaker’s reflection is where you need acoustic absorption. Have you ever fallen into this trap and blamed your gear for a room problem? Let me know in the comments!
Stop Guessing and Start Measuring with a Multimeter
If you are tired of wondering if your ears are playing tricks on you, it is time to invest in a Digital Multimeter (DMM). I personally never touch the internals of an amp without my Fluke 115 on the bench. Why? Because you can’t see electrical resistance. A DMM allows you to verify if one of your outputs is pushing more DC voltage than the other, which is a common cause of that ‘shifting’ center image. You can even use the tool to learn how to use a multimeter to find a short in your speaker wires before you risk blowing an expensive fuse. In my experience, most channel imbalances are simply a matter of different resistance values across aging components; once you see the numbers on the screen, the mystery disappears. 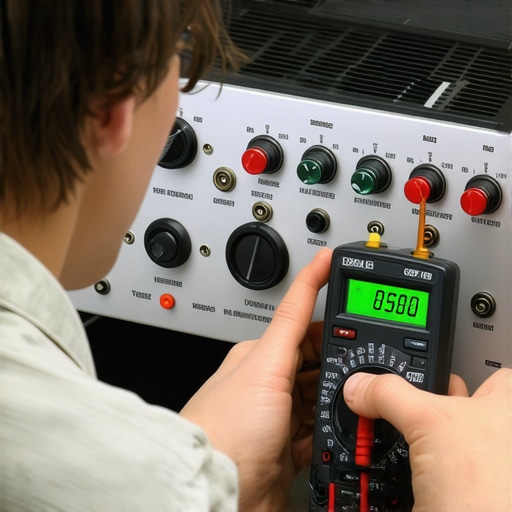
How do I keep my vintage amp running for another forty years?
Long-term maintenance is less about constant repairs and more about thermal management. Heat is the enemy of every electrolytic capacitor in your system. I make it a habit to check the bias current every two years. According to the technical documentation provided by Caig Laboratories, their DeoxIT D-Series solvent is specifically engineered to improve conductivity by dissolving oxides without harming sensitive plastics—a critical distinction that cheap hardware store cleaners often ignore. If you neglect these cleaning cycles, your signal path will eventually choke, leading to issues where why your receivers protection mode keeps triggering at high volume becomes a weekly occurrence. By keeping the pots clean and the airflow unrestricted, you ensure the internal chemistry of your gear doesn’t degrade.
Keep Your Signal Path Pristine Without Damaging the Finish
While we often focus on the big knobs, the rear IO panel is where the real signal degradation happens. Oxygen is a silent killer for copper and silver. If your connections are dull or green, you’re losing detail and gain in that channel. I suggest learning how to clean gold-plated connectors without ruining the finish to prevent micro-pitting. This applies to your mobile gear too; if your favorite cans sound off-balance, you might just need to know how to clean your headphone ear pads without ruining the leather or check the 3.5mm jack for pocket lint. These small maintenance tasks prevent the ‘mechanical resistance’ that leads to a lopsided soundstage.
The Future of Vintage Sound is Digital Correction
I suspect the next big leap in our hobby isn’t in better speakers, but in AI-integrated DSP (Digital Signal Processing) that can compensate for component aging in real-time. We are already seeing this in modern setups, but soon we will have plug-and-play modules that ‘listen’ to your vintage amp and adjust the output to perfectly match the original factory specs. Until then, you can use your smartphone to get a head start. You should definitely try learning how to use your phone to measure your rooms frequency response. It’s the easiest way to see if your imbalance is a hardware failure or just a room acoustic issue. My advanced tip for today: Grab a multimeter and measure the resistance of your left and right speaker cables; if they aren’t identical within 0.2 ohms, swap them for a fresh pair and listen to that center image snap back into place.
What Decades of Troubleshooting Taught Me About Lopsided Audio
I have spent countless late nights with a soldering iron in one hand and a service manual in the other, and if there is one thing I have learned, it is that vintage gear is incredibly resilient. Most ‘failures’ are actually just a cry for basic maintenance. Here are a few things I wish I had known when I first started: First, never underestimate the power of mechanical cleaning; about 80% of the channel imbalances I have fixed were solved without replacing a single electronic component. Second, your listening room is as much a part of the signal path as the wires are. Before you tear into a receiver, make sure you know why your center channel should never be placed on the floor or near reflective surfaces that skew the volume. Finally, always verify the easy stuff first. It is much easier to check if a speaker wire is frayed than it is to rebuild a power stage. Learning how to tell if your speaker is actually blown or just rattling can save you from buying parts you don’t actually need.
The Essential Toolkit for Every Vintage Gear Savior
If you want to move beyond guessing and start fixing, you need a few reliable allies on your workbench. I never start a restoration without a high-quality Digital Multimeter to check for DC offset and resistance across the signal path. For cleaning, Caig DeoxIT D5 is the gold standard for a reason—it doesn’t just clean; it preserves the metal. I also highly recommend tracking down the original factory service manual for your specific model; sites like HiFi Engine are invaluable resources for this. If you are dealing with deeper issues like why your vintage receiver makes a loud hum with no music playing, these manuals provide the specific test points you need to find the leak. Lastly, keep a cheap set of ‘test speakers’ nearby so you don’t risk your high-end gear while you are poking around the internals. Knowing the secret to choosing the right ohm rating for your amp during these tests will keep your output transistors safe from accidental shorts. [image_placeholder_E]
Start Restoring Your Stereo Image Today
There is a unique kind of satisfaction that comes from hearing a lopsided soundstage suddenly snap back into a perfect, holographic center image. Vintage audio ownership is a journey of stewardship, and by taking these steps, you are ensuring that these beautiful machines continue to sing for another generation. Don’t be intimidated by the complexity under the hood; most of these issues are just the natural result of time and can be reversed with a bit of patience and care. It is time to stop adjusting your balance knob and start fixing the source of the problem. Have you ever spent hours troubleshooting a volume issue only to find it was a simple cable or room placement problem? Let me know your craziest ‘fix’ story in the comments below!