
I remember the day I finally finished my “dream” media console. I’d spent three weekends sanding, staining, and obsessing over every joint to get that ultra-clean, minimalist look—the kind where you don’t see a single wire or bulky black box. So, I did what seemed like a genius move at the time: I tucked my powerful 12-inch subwoofer deep inside the bottom-right cabinet, shut the door, and sat back with my favorite action movie. The first explosion didn’t just shake the room; it made my beautiful cabinet sound like it was having a localized earthquake. My expensive woodwork started rattling so loudly I could barely hear the dialogue. It was a visceral, heartbreaking lesson in acoustics. If you’ve been tempted to hide your gear to save your living room’s “vibe,” I’m here to tell you that you’re accidentally strangling your sound. Today, I’m going to explain why your subwoofer needs to breathe and how you can achieve great bass without making your home look like a concert hall stage.
Why Your Furniture is Your Subwoofer’s Worst Enemy
When you shove a subwoofer into a cabinet, you aren’t just hiding it from sight; you are changing the physics of how it operates. Subwoofers produce long, powerful sound waves that need space to interact with your room. Inside a wooden box, those waves bounce around like trapped pinballs. This creates a phenomenon called “cabinet gain,” which isn’t as good as it sounds. It usually results in “one-note bass”—that boomy, muddy mess that makes every kick drum sound exactly the same. I made the mistake of thinking I could just turn the volume down to compensate, but that just left me with thin, lifeless audio. Even if you’ve mastered positioning your subwoofer in the right corner, putting a door in front of it ruins everything. The vibrations can also wreak havoc on your other gear. Imagine your turntable needle jumping or your vintage receiver humming because the entire shelf is vibrating at 40Hz.
Is hiding the sub actually worth the muffled sound?
Most of us want a room that looks like it belongs in a design catalog, but the trade-off here is steep. According to acoustic experts at SVS, placing a subwoofer in a confined space can lead to mechanical failure due to heat buildup and excessive port noise. It’s not just about the sound quality; it’s about the health of your equipment. Have you ever tried to hide your gear only to realize it sounded ten times better once you pulled it out? Let me know in the comments if you’ve faced this “style vs. sound” struggle. If you are desperate for space, there are ways to hide a massive subwoofer without boxing it in, like using breathable acoustic fabric or strategic placement behind a sofa. But a wooden cabinet with a solid door? That’s a sound-killing trap every single time.
Break the Sound Out of the Box
To get clean bass from a hidden enclosure, you have to think about air movement first and aesthetics second. Subwoofers are essentially air pumps; if you block the air, you kill the performance. If you are committed to the hidden look, you must modify the environment to accommodate the physics of sound. I once spent an entire Saturday helping a friend retro-fit a heavy mahogany sideboard for his home theater. We didn’t just shove the sub inside; we actually removed the back panel entirely and replaced the front wooden door with a custom-built frame wrapped in acoustically transparent cloth. The difference was night and day. Before the mod, the cabinet rattled like a loose muffler. After, the bass was tight, punchy, and seemingly came from nowhere. This is the gold standard for how to hide a massive subwoofer without sacrificing your ears.
Swap Out Solid Panels for Acoustic Mesh
The biggest mistake is leaving a solid wood door in front of the driver. You want the sound waves to pass through the furniture, not bounce off it. High-quality speaker mesh or even certain types of cane webbing can provide the necessary ‘breathability’ while still hiding the black box of the subwoofer. If you can blow air through the fabric with your mouth and feel it on the other side, it’s probably safe for your sub. Remember that even floorstanding speakers need more breathing room from the wall, so giving your sub a ‘window’ of fabric is the bare minimum for decent audio quality. 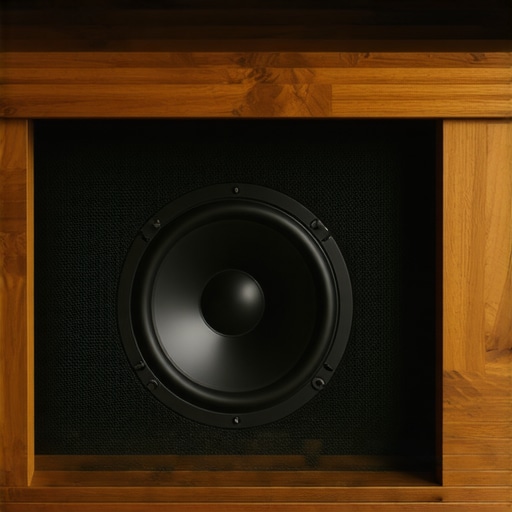
Kill the Vibration at the Source
When a sub sits directly on the floor of a wooden cabinet, it turns the entire piece of furniture into a giant, vibrating tuning fork. This is where mechanical noise—the rattling and buzzing—comes from. Use isolation feet made of Sorbothane or high-density foam to decouple the sub from the cabinet floor. This ensures the energy goes into the air as sound, not into the wood as a headache-inducing vibration. If you still hear a metallic buzz, you might need to fix a rattling metal speaker grill or tighten the hinges on your cabinet doors. I’ve found that adhesive felt pads on the inside of the door frames can also act as a ‘silencer’ for the wood-on-wood contact points.
Dial in the Perfect Crossover and Phase
Once the physical setup is handled, you have to tune the electronics to compensate for the enclosure. Inside a cabinet, bass can become ‘boomy’ at specific frequencies. Start by setting the best crossover frequency for small satellite home theater speakers, usually around 80Hz, to prevent the sub from trying to handle sounds that are too directional. Most importantly, you must match your subwoofer phase with your main speakers. Because the sub is tucked away—potentially at a different distance than your main speakers—the sound waves might reach your ears at slightly different times, causing them to cancel each other out. Flipping the phase switch or adjusting the dial until the bass sounds loudest and fullest at your seating position is the easiest way to ‘unlock’ the sub from its wooden cage.Most home theater enthusiasts believe the path to earth-shaking bass is a single, massive 15-inch driver sitting in the corner. Let’s dig deeper, because in my experience, that is exactly how you end up with ‘hot spots’ where the bass is deafening and ‘dead zones’ where it completely disappears. The nuance that experts rarely share with beginners is that the room itself is your biggest obstacle, not the size of your gear. When you place a single sub, you are at the mercy of standing waves—frequencies that bounce off walls and cancel each other out. This is why why two small subwoofers are better than one massive driver in almost every real-world living room. By using two sources of bass, you effectively ‘smooth out’ the response, ensuring that everyone on the couch gets the same punchy experience regardless of where they are sitting. Have you ever fallen into the ‘bigger is always better’ trap? Let me know in the comments.
Why are two small subs actually better than one monster?
It comes down to room modes. According to Dr. Floyd Toole, a renowned expert in acoustics and former President of the Audio Engineering Society, placing multiple subwoofers at mid-wall points or opposite corners can significantly reduce the variance in frequency response across a room. Instead of one sub struggling to fill a void, two subs work in tandem to cancel out the peaks and dips that make a single-sub system sound ‘boomy’ in some seats and ‘thin’ in others. If you are worried about the technical side of the setup, learning how to wire two subwoofers to a single mono amp is surprisingly straightforward and offers a much higher ROI for your ears than simply buying a more expensive single unit. 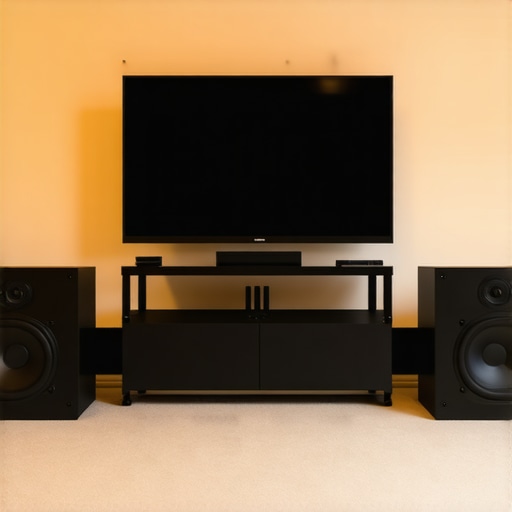
Avoid the Trap of Excessive Gain
One of the most dangerous mistakes I see people make is trying to ‘fix’ a hidden or poorly placed subwoofer by cranking the gain on the back of the unit. This is a fast track to clipping and thermal failure. If you hear why your receiver clicks when you change the volume or notice the sub’s built-in amp getting too hot to touch, you are pushing the system beyond its physical limits to compensate for bad acoustics. Many users also get bogged down in the truth about speaker break-in periods, waiting for the sound to ‘open up’ when the real issue is simply that the sub is fighting the room. Before you blame the hardware, use a simple tool to check your connections. I always recommend learning how to use a multimeter to find a short in your speaker wires, especially if you’ve recently moved furniture or retro-fitted a cabinet. A tiny stray strand of copper can cause enough resistance to make your sub sound weak or, worse, trigger the protection mode on your expensive receiver. Precision always beats raw power in a home environment.Once you’ve got your subwoofers placed and your phase aligned, the real work begins: keeping it all running at peak performance. I keep a dedicated “audio survival kit” in my desk drawer because maintenance is the only thing standing between a legendary system and a pile of expensive scrap metal. It isn’t just about fancy cables; it’s about diagnostic tools. For instance, I use a digital multimeter religiously. If a channel suddenly sounds “off,” I’m instantly checking how to use a multimeter to find a short in your speaker wires before I start ripping apart the drywall. Another lifesaver is a can of DeoxIT D5. If you have an old amp, you need to learn how to fix a scratchy fader on a vintage audio mixer or receiver to prevent that jarring static every time you adjust the volume. According to the technical bulletins from Caig Laboratories, even a microscopic layer of oxidation can increase contact resistance by several ohms, effectively strangling your signal-to-noise ratio and killing your dynamic range.
How can I maintain my audio gear over the long haul?
The biggest silent killers of high-end audio are heat, dust, and humidity. I’ve seen beautiful drivers ruined because the owner didn’t know how to clean your speaker cones without ruining the paper, allowing heavy dust to settle into the voice coil gaps. Every six months, I perform a “tighten and wipe” session. I check the speaker terminals because vibrations over time can loosen even the best banana plugs. If you’re running vintage gear, you also need to keep an eye on the “soft parts.” Learning how to revive old speakers with new foam surrounds is a weekend project that can save you from buying a $2,000 replacement pair later. You should also peek inside the vents of your amplifier occasionally; learning how to tell if your speaker capacitors are starting to leak can prevent a catastrophic failure that takes your speakers down with the power supply. 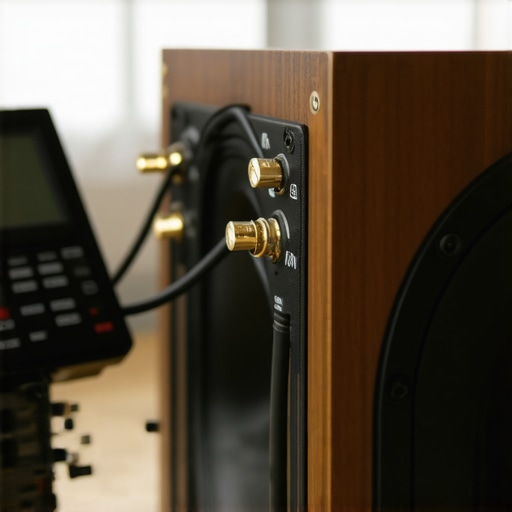
Stop Ignoring the End-of-Side Distortion
Maintenance isn’t just for the electronics; it’s for the media and the physical interface of your system too. If you’re a vinyl head, you’ve likely noticed the reason your vinyl records sound distorted at the end of the side usually comes down to subtle alignment shifts and stylus wear. I use a protractor once a month to ensure my cartridge hasn’t shifted even a millimeter. Looking ahead, I predict we are moving toward a world where AI-driven self-diagnostics will be built into every Class-D amp. Imagine your receiver sending you a push notification that a specific capacitor is reaching its thermal limit or that your room’s humidity is high enough to affect the paper cones. Until then, we’re the ones who have to do the legwork. I also highly recommend investing in a calibrated microphone like the MiniDSP UMIK-1. Using free software like Room EQ Wizard allows you to see exactly where your room is fighting you. My challenge for you this week: grab a multimeter and check the resistance at your speaker terminals—you might be surprised how much signal you’re losing to a single loose connection.
Secrets I Discovered While Building My Invisible Home Theater
After years of tinkering with cabinetry and sub-placements, I’ve realized that the biggest hurdle isn’t the equipment; it’s our own ego. We often crave the sleek look of a minimalist Pinterest board, but the physics of sound doesn’t care about our aesthetic choices. I learned the hard way that mechanical isolation is the difference between a high-end experience and a rattling mess. If you find your setup vibrating too much, you should check how to fix a loose speaker terminal on your cabinet before the whole thing shakes itself apart. Also, don’t buy into the ‘instant’ performance trap. Just like your main drivers, remember why your new speakers sound better after 20 hours of use—subwoofers need time to stretch their heavy surrounds before they really start to sing.
The Toolkit I Use to Keep My Bass Tight
To keep my system at its peak without cluttering the room, I rely on a few specific tools that every home theater enthusiast should own. First, a calibrated microphone like the UMIK-1 is non-negotiable for anyone serious about dual subs; it lets you see the acoustic reality of your room. Second, I always keep high-density foam isolation pads on hand to decouple the sub from the floor or the cabinet shelf. Third, if your room still feels ‘wild’ or overly echoey after your sub is placed, you should learn how to use a rug to stop your speakers from sounding harsh—it’s truly the most cost-effective acoustic treatment you’ll ever buy. I trust these methods because they focus on fixing the room’s environment, not just throwing more money at hardware.
Bring the Cinema Experience into Your Living Room
You don’t have to choose between a beautiful living space and earth-shaking bass. By modifying your furniture with acoustic mesh and focusing on room modes over raw wattage, you can achieve a professional-grade result that remains completely invisible to the naked eye. The goal isn’t just to hear the bass, but to feel it in a way that’s clean, precise, and fully immersive. Now that you know how to hide a massive subwoofer properly, it’s time to pull that sub out of its solid wooden cage and let the air move freely. Have you ever noticed a specific rattle in your room that you just can’t seem to find? Let me know in the comments below!