
I was nineteen, sitting in a humid garage with a handful of 12-gauge wire and a dream of making the neighbors’ windows rattle. I had two beautiful 10-inch woofers and a shiny new mono amplifier. I figured, ‘Hey, two speakers, one amp—just connect the dots, right?’ Wrong. Within ten minutes, the heat sink on that amp was hot enough to fry an egg, and I smelled that unmistakable, heart-sinking scent of melting plastic. I had no idea back then that wiring multiple drivers is more about understanding electrical resistance than just making connections. I was lucky I didn’t start a fire in my trunk. That afternoon cost me a week’s wages and a lot of pride, but it taught me a lesson I’ll never forget: you have to respect the load you’re putting on your gear.
Getting More Bass Without Frying Your Gear
If you’ve ended up here, you’re likely in that exact same spot. You’ve got the hardware, but the wiring diagram on the back of the box looks like a mess of cryptic lines. Maybe you’re wondering why two small subwoofers are better than one massive driver anyway—the answer usually comes down to more surface area and better air displacement. But to get those benefits, you have to get the power right. Today, I’m going to walk you through the logic of series versus parallel wiring so you can finally get that deep, room-filling low end without your amp going into ‘protection mode.’ I’ll help you avoid the common mistakes people make when positioning their subwoofer or rushing the install. I learned the hard way early on that you can’t just wing it; choosing the right ohm rating is the difference between a system that thumps for years and one that dies in a week.
Will This Setup Actually Blow My Amp?
It’s the question that keeps most DIYers up at night, and honestly, it should. The short answer? Yes, if you don’t pay attention to the math. According to technical data from CEA-2006 standards, pushing an amplifier below its rated minimum impedance—which is usually 2 ohms for most modern mono blocks—causes excessive current draw and extreme heat. Have you ever felt your amp get scorching hot after just a few minutes of heavy bass? That’s your equipment screaming for help. A mono amp is designed to output power into a single channel, but that doesn’t mean it’s limited to one speaker. It just means we have to be smart about how we present the ‘load.’ If you’ve ever tried to bridge a two-channel amp, you know how finicky these units can be about resistance. Before we grab the wire strippers and dive into the diagrams, tell me: have you ever actually seen or smelled an amp smoke from a bad wiring job? It’s a rite of passage I’d prefer you skip.
Lowering the Resistance for Maximum Volume
Parallel wiring is like opening more lanes on a freeway. When you connect the positive terminals of both subs to the single positive terminal of the amp, and do the same for the negatives, the ‘electrical traffic’ flows with much less resistance. This is how you get the most out of a high-current mono block. If you have two 4-ohm subwoofers wired in parallel, your amplifier ‘sees’ a 2-ohm load. This effectively doubles the current flow compared to a single driver. It is the most common way to connect four speakers to a two-channel amplifier safely or to push a mono amp to its limit. But be warned: if your amp isn’t rated for 2 ohms, this is the quickest way to trigger a thermal shutdown.
Why Parallel Connections Can Be Dangerous
I remember helping a friend wire up three 4-ohm drivers in his trunk. We thought we were being geniuses by going parallel for maximum output. The math worked out to a 1.33-ohm load. We fired it up, and for thirty seconds, it was the loudest thing in the neighborhood. Then, the music died. We didn’t just trip a fuse; we actually melted the internal solder on his output transistors. This is why you must know how to stop your car amp from overheating in the summer—or any season—by matching the load to the spec sheet. If your amp says ‘2-ohm stable,’ do not go lower.
Stay in the Safe Zone with Series Wiring
When you need to keep your resistance high because your amp is a bit older or more sensitive, series wiring is your best friend. Think of this as a single-file line at a security checkpoint. You connect the amp’s positive to the first sub’s positive, the first sub’s negative to the second sub’s positive, and the second sub’s negative back to the amp. In this configuration, the ohms add up. Two 4-ohm subs become an 8-ohm load. It significantly reduces the strain on your equipment, though you will sacrifice some raw decibels. It is a vital technique when you are learning the secret to choosing the right ohm rating for your amp to ensure long-term reliability over short-term volume.
Verify Your Math Before You Power Up
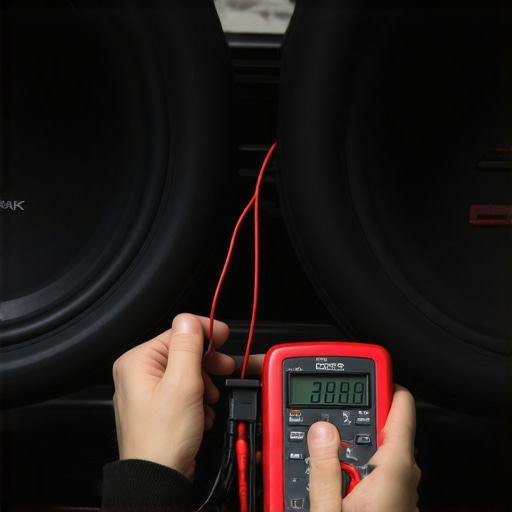
The most important step in this whole process happens before you ever turn the volume knob. You need to verify your work with a digital multimeter. Set the meter to the ‘Ohms’ setting and touch the probes to the speaker wires at the end of the cable that plugs into the amp. If your math said you’d have a 4-ohm load and the meter reads 1.2, you have a short circuit or a wiring error. Knowing how to use a multimeter to find a short in your speaker wires is the only way to be 100% sure you aren’t about to release the ‘magic smoke’ from your electronics. Once you have that solid reading, you can finally bolt everything down and enjoy the bass. If things still sound off, you might want to test your speakers for a blown driver just to rule out any hardware failure from previous attempts.
Now that we’ve covered the basics of wiring, let’s talk about the nuances that distinguish a hobbyist from a pro. Everyone in the car audio scene is obsessed with wattage. They look at the sticker on the box and assume a 1,000-watt amp is inherently better than a 500-watt one. In my experience, this is the biggest lie in the industry. Raw power is meaningless if your amplifier has a poor damping factor or if your speakers have low sensitivity. I’ve heard 300-watt systems that hit harder and cleaner than 1,000-watt budget setups because the owner knew the secret to choosing the right ohm rating to maximize the amp’s control over the woofer cone, not just the volume.
Does Inverting the Phase Actually Improve Bass Response?
Sometimes, after you’ve spent hours perfectly wiring your subs in parallel, they sound… empty. It’s a hollow, thin sound that makes you wonder if you should test if your speaker is actually blown or just rattling. Before you tear the box apart, try flipping the wires on just one terminal or using the phase switch on your amp. If your subwoofers are firing in a way that cancels out the main cabin speakers, you lose all your punch. Learning how to match your subwoofer phase with your main speakers is an advanced move that can instantly double your perceived output without drawing a single extra amp of current from your battery.
Here is the ‘oops’ factor that ruins more systems than anything else: the underpowering myth. Many beginners buy a massive, expensive subwoofer and pair it with a cheap, weak amplifier, thinking they are being ‘safe.’ This is a recipe for disaster. When an underpowered amp is pushed to its limit to keep up, it begins to ‘clip,’ sending a flat-topped square wave to your speakers. This generates massive amounts of heat in the voice coil. Research published by the Audio Engineering Society (AES) confirms that non-linear distortion from clipping is far more likely to cause thermal failure than a clean signal from a high-powered amp. It’s why you see so many people wondering why their car amp is overheating during long summer drives; they are pushing a small amp into a distortion zone just to get a decent decibel level.
Don’t be afraid of the ‘break-in’ period either, but don’t overthink it. While some swear by specific test tones, the truth about speaker break-in periods is that normal listening at moderate volumes is usually enough to loosen the spider and surround. If you notice a slight channel imbalance on a vintage stereo amplifier or your new setup, always check your ground points first. A poor ground is the silent killer of dynamics. Have you ever fallen into this trap of thinking a smaller amp was safer, only to smell that dreaded burning coil? Let me know in the comments.
I’ve spent thousands on equipment over the years, and I can tell you that the difference between a system that lasts and one that ends up in a landfill is often just a $10 can of contact cleaner. If you’ve ever noticed a crackling sound when you turn the dial, you need to learn how to fix a scratchy volume knob on an old amp before you assume the whole unit is toast. I’ve seen people throw away incredible Marantz and Pioneer units because of a little oxidation that could have been fixed in five minutes. It isn’t just about the knobs, either. Over time, environmental factors like humidity and dust can create high-resistance bridges where you don’t want them.
How do I keep this system alive for a decade?
Regular maintenance is the boring part of audio, but it’s what protects your investment. Once every six months, I pull my rack out and how to clean gold-plated connectors without ruining the finish using a high-quality electronic cleaner like DeoxIT D5. It keeps the signal path clear and prevents that nasty signal drop-off. If you’re running a car setup, this is even more critical. Vibration can loosen your power cables, leading to arcing and heat. If you don’t stay on top of it, you’ll eventually be searching for how to stop your car amp from overheating in the summer because your loose ground wire is causing massive resistance. 
Ditch the Guesswork with Real Tools
You cannot tune a high-end system by ear alone; your brain is too good at tricking you into thinking ‘louder is better.’ I always keep a digital multimeter and a calibrated microphone in my kit. Knowing how to use a multimeter to find a short in your speaker wires has saved me from blowing up at least three different amplifiers during complex installs. If you hear a hum that won’t go away, don’t just ignore it. Use the 5 fix for humming speakers and ground loops to isolate the problem. Dr. Floyd Toole, a legend in the field of psychoacoustics, emphasizes in his book Sound Reproduction that even the best gear cannot overcome the destructive effects of poor setup and neglected maintenance.
The Future of Smart Amplification
Looking ahead, I think we are moving away from the era of manual ‘gain matching’ and into a world where DSP (Digital Signal Processing) does the heavy lifting. We’re already seeing amplifiers with built-in impedance monitoring that adjust power delivery in real-time to prevent clipping. It’s going to make our lives easier, but it will never replace the need for a solid physical foundation. Even the smartest amp in the world can’t fix a scratchy fader on a vintage audio mixer or a poorly terminated cable. Before you go any further, I want you to try this: grab a multimeter and check the resting resistance at your amp’s terminals right now. If it’s significantly different from what your speakers are rated for, you’ve got a problem waiting to happen.
Hard Truths from My Years of Blown Fuses
If there is one thing a decade of tinkering has taught me, it is that your amplifier is only as good as the current it can actually draw. Many people focus on the ‘max’ wattage, but they ignore the health of their speakers. I’ve seen beautiful vintage sets ruined by neglect, but you can always learn how to revive old speakers with new foam surrounds to bring that punch back. Another lightbulb moment for me was realizing that heat is the ultimate enemy. If you aren’t careful, you might find that your car audio system drains the battery while the engine is off because of a small wiring oversight in the remote turn-on lead. Finally, never underestimate the enclosure itself; I always use the simple paper towel trick for finding speaker air leaks to ensure every ounce of pressure is pushing the air, not leaking out of a bad seal.
The Toolkit I Use for Every Clean Install
You don’t need a professional shop to get professional results, but you do need the right mindset. I never start a project without a few specific items. Beyond the multimeter, I always look for ways to optimize the physical environment. If you’re working in a vehicle, you’ll definitely want to know how to stop your car’s rear deck from rattling when the sub hits, or your expensive bass will just sound like a tin can full of marbles. If you’re looking for that raw output, take the time to learn how to bridge your car amp for more bass power safely. These are the tools and techniques that separate the noise-makers from the true audiophiles.
#IMAGE_PLACEHOLDER_E#
Build the Setup Your Ears Deserve
Audio is a journey, not a destination. You will make mistakes, and you might even pop a fuse or two, but that is how you learn the physics of sound. The goal is to create an experience that makes you want to take the long way home just to hear one more track. By respecting the ohm load and keeping your connections clean, you are protecting your investment and ensuring years of high-fidelity enjoyment. Don’t be afraid to experiment with your amplifiers and speakers until the stage sounds exactly right to you. Have you ever had a wiring ‘disaster’ that turned into a great learning experience? Let me know your stories in the comments below!