
I remember the smell of my first mistake vividly—a mix of melting plastic and sheer disappointment. I was nineteen, hunched over my trunk with a flashlight, trying to squeeze ‘just a little more’ out of a two-channel amp that was already working hard. I had the wires in my hand, a misguided sense of confidence, and absolutely no idea that I was seconds away from a very expensive lesson in electrical resistance. I flipped the switch, the subwoofer let out one glorious, window-rattling thump, and then… nothing but a thin wisp of smoke. I’d successfully bridged the amp, but I’d also successfully bypassed my common sense. Today, I want to make sure you get that extra power without the heart-stopping smell of a fried circuit board.
The Day I Almost Turned My Trunk into a Toaster
Bridging an amplifier feels like a cheat code for your car or home audio system. You take two separate channels, join their forces, and suddenly your single subwoofer is getting a massive boost in wattage. It’s intoxicating. But back when I started, I didn’t realize that doubling the power also meant I was doubling the stress on the internal components. I made the classic rookie error of ignoring the impedance load. I simply didn’t understand the secret to choosing the right ohm rating for your amp, and my poor equipment paid the price. I thought all speakers were created equal, and that my amp would just ‘figure it out.’ It didn’t. It protested by blowing every fuse it had. [image_placeholder_1]
If you don’t take the time to map out your wiring correctly, you’ll find yourself staring at a dead unit wondering why your receivers protection mode keeps triggering at high volume. The goal is to move from a standard stereo setup to a mono powerhouse without crossing the line into a thermal meltdown. According to engineering standards from the Audio Engineering Society (AES), bridging effectively doubles the voltage across the load, which theoretically quadruples power output, but it also forces each channel to see half the actual impedance of the speaker. This is why things get hot, fast. Learning how to stop your car amp from overheating in the summer becomes a survival skill once you start pushing your gear this hard.
Is Bridging Your Amp Actually Worth the Extra Heat?
I get asked this all the time by neighbors who see me tweaking my setup. Is it actually worth the risk? If you’re looking for more headroom and a cleaner, more impactful low end, then yes, absolutely. But it requires a disciplined approach. You have to be mindful of the signs of distress. If you ever notice how to fix a car subwoofer that smells like it is burning, you’ve likely already gone too far. We aren’t just connecting wires here; we are managing a delicate balance of current and resistance. My goal today is to walk you through the physical connections and the ‘sanity checks’ you need to perform before you ever hit that power button. Have you ever seen that dreaded red ‘Protect’ light flicker just as the bass drops? It’s a heart-sinking feeling, but we are going to make sure that never happens to you again.
Find Your Bridging Terminals on the First Try
Bridging isn’t just about sticking wires wherever they fit; it is a specific reconfiguration of how the amplifier handles its load. Think of your amplifier like a two-lane highway where each lane normally carries its own traffic. When you bridge it, you are merging those two lanes into one high-velocity express route for your subwoofer. Most multi-channel amps are designed for this, and they usually mark the specific terminals with a small bracket or the word ‘Bridge’ printed right on the chassis. You will typically use the positive (+) terminal from one channel and the negative (-) terminal from the opposite channel. If your amp does not have these markings, do not guess. Pull up the manual or check how to bridge your car amp for more bass power to confirm it is even capable of mono operation. I once tried to ‘force’ a bridge on an old home theater receiver that was not built for it, and the internal fuses popped before the music even started.
Connect Your Wires Like a Pro
Once you have identified the correct positive and negative points, the physical connection is straightforward but demands precision. Strip back just enough insulation so the wire fits snugly in the terminal—too much exposed copper is a short circuit waiting to happen. If you are working in a tight space like a trunk, you might be tempted to rush the cable management. Do not. Knowing the easiest way to hide power wires in your trunk is not just about aesthetics; it is about keeping those heavy-gauge cables from rubbing against sharp metal edges and grounding out. 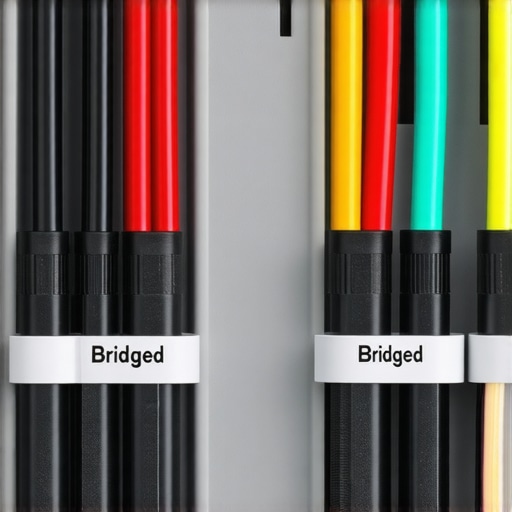 After you have tightened the screws, give the wires a firm tug. If they wiggle, they are not secure. A loose connection creates resistance, and resistance creates heat—the enemy of every amplifier ever made.
Why Your Ohm Rating Can Make or Break the Setup
This is where most people, including my nineteen-year-old self, get into trouble. When you bridge an amp, the ‘load’ it sees is effectively halved. If you connect a 4-ohm subwoofer to a bridged amp, each channel inside the amp ‘thinks’ it is driving a 2-ohm load. If your amp is not ‘2-ohm stable,’ it will overheat and shut down. I remember a humid July afternoon where I pushed my setup for three minutes straight, feeling like a king, until the music cut and a smell like burning rubber filled the cabin. I had used a 2-ohm sub on a bridge that could only handle 4 ohms. If you hear a strange noise before the cut-out, you need to know how to tell if your speaker is actually blown or just rattling. High-current situations like bridging demand that you match the speaker impedance to the amp capabilities perfectly. Also, ensure your power source is up to the task; many people wonder the truth about using a car battery for your home stereo when they try to pull this kind of wattage indoors. Bridging is a power-hungry move, so verify your alternator and battery can actually supply the extra juice without dipping the voltage.
The Secret to a Clean Signal
After the wires are in and the math is checked, you have to deal with the settings. A bridged amp is often a mono amp, meaning you need to set your crossovers correctly. If you send high-frequency vocals to a subwoofer that is now getting double the power, you are going to hear distortion, or worse, damage the voice coil. I always set my low-pass filter (LPF) to around 80Hz as a starting point. This ensures the sub only handles the deep thumps it was born for. While you are back there, take a second to ensure your grounding point is solid. I have seen more bridged amps fail due to a bad ground than almost anything else. If you are hearing a whine that speeds up when you rev the engine, you will need to troubleshoot the real reason your cars alternator makes your speakers whine immediately. Bridging amplifies everything—the power, the bass, and unfortunately, any noise in your system.
Why Doubling Your Watts Might Be Ruining Your Sound
People often tell you that doubling the wattage is the holy grail of audio. The common logic says more power equals more ‘oomph,’ but here is the dirty secret most salesmen won’t tell you: bridging usually doubles your total harmonic distortion (THD). While you are getting that massive surge in volume, you are often sacrificing the surgical precision of the original signal. I have seen enthusiasts spend thousands on premium components only to realize that why your high-end dac sounds exactly like your laptops headphone jack if the amplification stage is just brute-forcing the output without refinement. In my experience, a well-driven 50-watt system with high damping factors will almost always sound tighter and more ‘musical’ than a 200-watt bridged monster that can’t stop the speaker cone from wobbling. 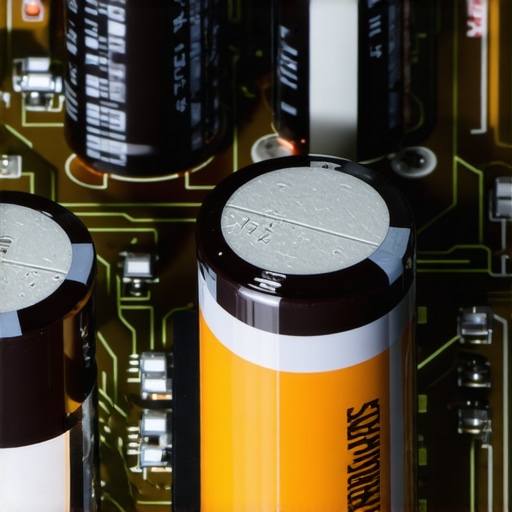
Should You Bridge Your Amp if You Care About Sound Quality?
This is the question that separates the casual listeners from the true audiophiles. When you bridge an amp, the ‘damping factor’—which is the amplifier’s ability to control the speaker’s motion—is effectively cut in half. Famous audio critic Julian Hirsch often noted in his technical reviews for Stereo Review that while bridging provides raw gain, it often results in ‘loose’ or ‘muddy’ bass because the amp loses its grip on the driver. If you find your low end sounds more like a dull thud than a crisp kick, you need to know how to match your subwoofer phase with your main speakers. Often, the ‘lack of power’ people feel is actually a phase cancellation issue, not a wattage deficit. Bridging to fix a phase problem is like trying to fix a leaky faucet by turning up the water pressure—it just makes the mess bigger.
The biggest ‘trap’ I see advanced DIYers fall into is the grounding oversight. When you are pulling double the current through a bridged circuit, any weakness in your ground will manifest as a nasty buzz. You have to be proactive and learn how to get rid of ground loop hum in your audio setup before you start chasing higher power figures. Another nuance is the ‘break-in’ myth; while you might be tempted to blast your new bridged setup immediately, the truth about speaker break-in periods is that the mechanical suspension needs time to settle before it can safely handle those increased voltage swings without bottoming out. Have you ever fallen into the trap of chasing raw watts only to realize your system sounded better before the ‘upgrade’? Let me know in the comments below, and let’s troubleshoot those fried circuits together.
The Two Tools That Saved My Savings Account
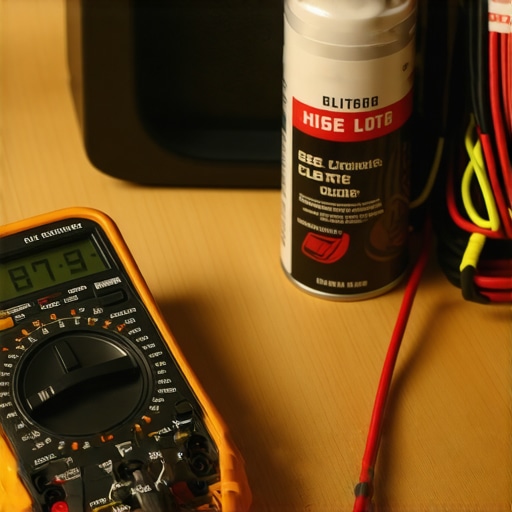
The tools I trust are the ones that keep me from having to buy new gear every two years. If you’re serious about high-current setups, you need a decent digital multimeter. I use mine to verify that my ground is truly solid—under 0.5 ohms of resistance between the amp and the chassis. If you skip this, you’re just waiting for a disaster. When you’re dealing with high-output bridged systems, a bad ground doesn’t just cause noise; it causes heat. I always make sure to how to properly ground a car amplifier to eliminate engine hum because that hum is usually the first sign of a much bigger electrical problem. Another ‘must-have’ in my bag is a can of Caig DeoxIT D5. Over time, oxygen and moisture create a microscopic layer of oxidation on your terminals and knobs. If you start hearing static when you adjust your levels, you need to know how to fix a scratchy volume dial with electrical contact cleaner before you assume the whole unit is junk. In my experience, ninety percent of ‘broken’ vintage amps are just dirty.
How can I keep my audio gear running for decades?
Maintenance isn’t just about cleaning; it’s about heat management and component health. I perform a ‘touch test’ on my heat sinks every month during a heavy session. If I can’t keep my hand on the amp for more than three seconds, I know I’ve got an airflow issue or an impedance mismatch. I also look for visual cues. Electrolytic capacitors are the ticking time bombs of the audio world. If you see the top of a capacitor bulging slightly or leaking a bit of crusty residue, it’s a sign of impending failure. Knowing how to tell if your speakers capacitor is starting to fail can save your tweeters from a sudden DC spike that would otherwise fry them instantly. For vintage enthusiasts, part of the ritual is checking the surrounds. Foam rots, it’s just a fact of life, but you can how to revive old speakers with new foam surrounds for a fraction of the cost of new drivers. I follow the IEC 60268-5 standard for long-term power testing, which reminds us that a speaker’s ‘rated’ power is often its thermal limit, not its mechanical limit—staying at 70% of that rating is the sweet spot for longevity.
The Future of High-Power Audio is Smarter, Not Bigger
As we look toward the future, the way we handle power is shifting. We are moving away from the heavy, heat-spewing Class A/B behemoths I grew up with and into the world of high-efficiency Class D and sophisticated Digital Signal Processing (DSP). These systems can monitor impedance in real-time and adjust the output to prevent the very meltdowns I described earlier. It is a game-changer for those of us who like to push limits. If you’re thinking about expanding your current setup, maybe adding a second pair of drivers to your existing amp, you have to be careful. You should learn how to connect four speakers to a two-channel amplifier safely so you don’t drop the resistance too low and trigger that dreaded protection mode again. I predict that within the next five years, ‘dumb’ amplifiers will be a thing of the past; every unit will be smart enough to protect itself from its owner’s worst impulses through integrated AI-driven current monitoring. My advice? Get comfortable with a multimeter now. It’s the single best investment you can make for your audio hobby. Go ahead and measure your actual speaker impedance today—you might be surprised how far it deviates from the number printed on the box, and that knowledge is power.
What No Manual Tells You About Bridged Power
Over the years, I’ve realized that bridging isn’t just about the numbers on a spec sheet; it’s about the ‘unspoken’ reality of your signal chain. First, remember that bridging effectively doubles your noise floor. If your amplifier has a slight background hiss, bridging it will make that hiss twice as noticeable. You should learn how to get rid of the annoying hiss in your budget car amp before you commit to a high-power mono setup. Second, physical placement is non-negotiable. A bridged amp generates significantly more heat because it’s working at its absolute limit. If you tuck it under a seat with no airflow, it will fail. Finally, always verify your wiring polarity. It is incredibly easy to get wires crossed when you’re looking at four terminals for a single speaker. Use my quick guide on how to tell if your speakers are out of phase in 30 seconds to ensure your bass isn’t canceling itself out before you even get started.
The Audio Tech Bag I Never Leave Home Without
I don’t rely on luck; I rely on a few specific tools that have kept my setups running for decades. A high-quality digital multimeter is my primary defense against blown fuses. I use it to check the actual DC resistance of my subwoofers before they ever touch the amp. I also keep a can of contact cleaner handy at all times. It is the easiest way to how to fix a scratchy volume knob on an old amp, which is often the culprit behind uneven output in a bridged configuration. For car installs, I always keep a pack of heat-shrink tubing and high-quality crimps; electrical tape is a temporary fix that leads to permanent headaches. I also recommend keeping a copy of the Loudspeaker Design Cookbook by Vance Dickason on your shelf—it’s the ‘bible’ for understanding how enclosures and power interact.
Go Build Your Wall of Sound
Bridging your amp is a rite of passage for any serious audio enthusiast. It represents that moment when you decide to take control of your system’s potential rather than just settling for factory defaults. By respecting the electrical limits of your gear and focusing on clean signal paths, you can achieve a level of impact and clarity that most people never experience. Don’t be afraid to experiment, but do it with the discipline of a pro. Once you’ve felt the physical hit of a properly bridged amp pushing a high-excursion subwoofer, there is no going back to standard stereo. Have you ever accidentally ‘let the smoke out’ of an amp while trying to get more power? Let me know your biggest audio disaster in the comments below!