
I remember sitting in my driveway at 11 PM, grease on my forehead and a sinking feeling in my chest. I had just finished installing my first budget-friendly four-channel amp, and I was ready for that glorious, punchy sound I had been dreaming of. I turned the key, the radio glowed to life, and then it hit me. Sssssssssss. A constant, high-pitched hiss that grew louder every time I stepped on the gas. It did not matter how high I turned the volume; that annoying static was right there, mocking my cheap gear. It was beyond frustrating. It felt like I had spent my hard-earned cash just to make my car sound worse than the factory speakers. I almost ripped the whole thing out right then and there.
Stop Letting Your Amp Sound Like a Broken Radio
We have all been there. You want better audio without spending a month’s rent, but budget often comes with a hidden tax: noise floor issues. The good news is that most of the time, that hiss is not a sign of a broken amp. It is usually a cry for help from your installation. Early in my DIY days, I made a massive mistake that I still cringe thinking about. I bundled my thick power cable right alongside my RCA signal cables because it looked cleaner. Little did I know, I was basically inviting electromagnetic interference to have a party in my audio stream. It is a classic rookie move, but it is one of the first things you should check. Interestingly, the Audio Engineering Society notes that electromagnetic interference is a primary driver of signal-to-noise ratio degradation in mobile environments, where power and signal wires often compete for space. Dealing with this is just as important as knowing how to match your car subs impedance to your amplifiers output. If your gain is set too high because you are trying to compensate for low output, you are just amplifying that floor noise and making the hiss unbearable.
Is it actually worth fixing a cheap amp?
You might be wondering if you should just cut your losses and buy something high-end. Trust me, you do not need to. Most hiss comes from gain-staging errors or poor grounding. I have seen fifty-dollar amps sound crystal clear once the wiring was sorted. Sometimes, the problem manifests in other ways, like why your car speakers pop when you turn the key, which is another symptom of grounding or remote turn-on issues. Before you give up, we need to look at the basics. Are you sure you are not asking too much of your gear? Understanding the difference between peak and rms power can help you realize where your amp’s limits actually are. Have you ever spent hours chasing a noise only to find it was a loose screw or a bad ground? I want to hear about your most annoying audio gremlins in the comments below. Today, I am going to show you exactly how to isolate that hiss and kill it for good, starting with the simplest wire checks and moving into technical adjustments like how to properly bridge a car amplifier for more power without introducing more noise into the system.
Exterminate the Hiss with Better Wiring Habits
Grounding is the foundation of every clean audio system. If your ground is weak, your amp is basically trying to breathe through a straw while standing in a swamp. I once spent an entire Saturday tearing apart a friend’s trunk because of a persistent hum. We eventually found that his ground wire was bolted to a factory-painted seat belt bracket. The paint acted like an insulator, forcing the current to jump through tiny gaps, which created massive electrical noise. Once I took a wire brush and sanded that spot down to shiny, bare metal, the hiss vanished instantly. It is a simple fix, but many people skip it because it is messy. You also have to be careful about your connection points; if you notice how to clean green oxidization off your copper speaker terminals, you know that corrosion is a silent killer of signal clarity. A solid, metal-to-metal connection is non-negotiable for a silent noise floor.
Keep Your Power and Signal Cables on Opposite Sides
Think of your power cable like a noisy freeway and your RCA cables like a quiet conversation on the sidewalk. If you put them right next to each other, the freeway noise completely drowns out the talk. In car audio, the high current flowing through your power wire generates a magnetic field. If your signal cables are too close, they pick up that “induction” noise, which sounds like a constant whine or hiss. I always run my power wire down the driver’s side and my RCAs down the passenger side. If they absolutely have to cross, make sure they do it at a 90-degree angle. This minimizes the surface area where they can interfere with each other. This kind of physical separation is often the difference between a pro-level install and a budget mess. It is similar to why your phono preamp needs to be far away from the power amp in a home setup; distance is your best friend when it comes to preventing electromagnetic interference. Additionally, if you are running long lengths of cable, you might run into signal degradation, much like why cheap speaker wire causes signal loss over 50 feet.
Master the Art of Gain Staging
Most people treat the gain knob like a volume control, but it is actually a sensitivity adjustment. If you crank the gain to the max because your head unit output is low, you are amplifying the noise floor of the amp itself. It is like trying to hear a whisper by turning up a megaphone to 11—you are going to hear the wind and the internal electronic buzz more than the voice. You want to set your head unit to about 75% volume and then slowly turn up the gain until you hear the slightest bit of distortion, then back it off a hair. This ensures you have plenty of “clean” signal before the amp has to work hard. If you are pushing your system to the limit, you should also check how to tell if your amplifier has enough headroom for your speakers. Without enough headroom, you will find yourself pushing the gain too far just to get decent output, which always leads back to that annoying hiss.
Listen for Internal Component Failures
Sometimes the noise is not coming from the wiring; it is living inside the amplifier. While rare on newer units, older or very cheap circuit boards can have capacitors that are starting to leak or fail. This can cause a constant hum or hiss regardless of your volume settings. It is a bit like the reason your expensive receiver makes a clicking sound when it starts—it is often a relay or a capacitor trying to stabilize the circuit. If you have isolated the cables and the ground is perfect, try a different source. Plug your phone directly into the amp with a 3.5mm-to-RCA adapter. If the hiss is still there, the internal shielding of the amp is likely the culprit. In some cases, you might even find that how to fix a buzzing sound in your portable speaker at high volumes involves similar troubleshooting logic: checking the physical integrity of the components inside the housing before blaming the cables.
Let’s dig deeper into what most people get wrong about high-output car audio. Everyone tells you that if your lights are dimming, you just need a bigger battery. In my experience, that’s a half-truth that leads to expensive mistakes. You aren’t fixing the source; you’re just putting a larger bucket under a leaky faucet. If your alternator cannot keep up with the peak demand, adding more batteries eventually leads to a system where the alternator is constantly struggling to charge the batteries and power the amp. This is a primary reason the real reason your amp is getting hot to the touch; it’s starving for voltage, forcing the internal components to work harder and generate more waste heat.
Is Your Electrical System Secretly Choking Your Audio Signal?
A common belief is that ‘power is power,’ but the quality of that power matters. According to research published in the Journal of the Audio Engineering Society (JAES), ripple voltage in an automotive DC environment can severely degrade the signal-to-noise ratio of budget amplifiers. In technical terms, this relates to the Power Supply Rejection Ratio (PSRR). High-end home gear often has massive PSRR, but budget car amps often cut corners here. If the internal filtering isn’t robust, every fluctuation from your alternator becomes part of the music. Before you spend $200 on a second battery, check your ‘Big Three’ wiring. Knowing how to add a second battery for your high power car audio is useful, but upgrading the factory wire from the alternator to the battery is usually the more effective ‘advanced’ move.
Vibrations Kill Amps
Most DIYers bolt their amplifier directly to the subwoofer enclosure because it looks clean and saves space. This is a massive ‘oops’ factor. High-intensity vibrations are the silent killers of electronics. Over time, those micro-vibrations can cause solder joints to crack or internal ribbon cables to wiggle loose, resulting in intermittent pops or—you guessed it—more hiss. It’s the same logic behind how to stop your cars rear deck from rattling with heavy bass; if you don’t isolate the movement, something is going to break. If you’ve already hard-mounted your amp, consider using rubber grommets to decouple it from the box.
Stop Starving Your System
People chase high RMS numbers like they’re the only thing that matters. But if you have a high-wattage amp with a poor Signal-to-Noise Ratio (SNR), you are essentially buying a louder hiss. You need to ensure you have enough ‘clean’ power. Learning how to tell if your amplifier has enough headroom for your speakers is about more than just loudness; it’s about the amp’s ability to handle musical peaks without introducing distortion or floor noise. The most dangerous ‘trap’ isn’t just the hiss; it’s clipping. When you lack headroom, the amp squares off the audio waves, which sends pure heat to your voice coils. If you’ve ever dealt with how to fix a car amplifier that keeps shutting off in summer, you know how frustrating it is when your gear can’t handle the heat of its own performance. Have you ever fallen into this trap? Let me know in the comments.I personally do not go anywhere without my multimeter. If you are serious about this hobby, buy a Fluke 115 or a high-quality equivalent. Why? Because checking for voltage drop is the only way to know if your cables are actually up to the task. If you are seeing more than a 0.5V drop from the battery to the amp terminals while the system is under load, you are losing performance and heating up your wires. This leads back to the real reason your amp is getting hot to the touch; high resistance creates heat, and heat kills electronics. I also keep a tub of dielectric grease in my glovebox. It sounds like overkill, but a tiny dab on your connections prevents that nasty corrosion. If you have ever seen how to clean green oxidization off your copper speaker terminals, you know it is a job you only want to do once.
Stop Guessing and Start Measuring with Pro Tools
I have found that most people rely on their ears to tune a system, but your ears can lie to you when you are tired. I use a dedicated oscilloscope to set my gains perfectly. It lets me see exactly when the sine wave starts to clip, which is often long before my ears can detect the distortion. This technical precision is what separates a setup that lasts for a decade from one that blows a fuse every other weekend. According to the Mobile Electronics Certified Professional (MECP) study guide, over 70% of amplifier failures are attributed to external factors like poor ventilation or loose wiring rather than internal manufacturing defects. This proves that your maintenance routine is actually more important than the brand of amp you bought. 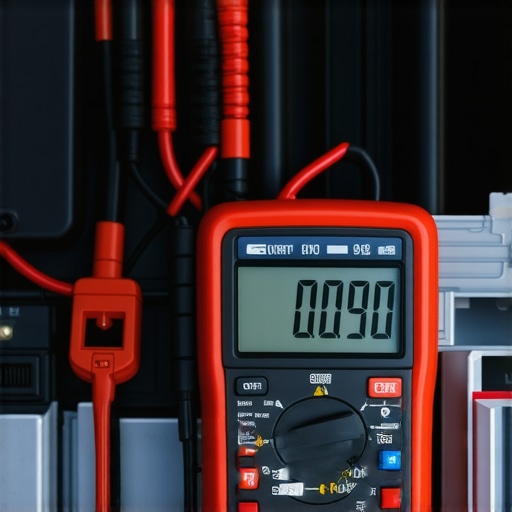
How do I keep my car audio system healthy for years?
Maintaining a high-power system is not just about the initial install; it is about checking your connections every six months. Cars are violent environments. They vibrate, they get hot, and they deal with humidity. I make it a habit to retighten every set screw on my distribution blocks twice a year. Loose wires cause arcing, which can fry your inputs. If you notice a physical failure, like a tear in a cone caused by trunk clutter, you need to act fast. For example, knowing how to fix a small rip in a speaker surround with glue can save you from buying a whole new driver. I also recommend a periodic check of your mounting hardware. If you have fixed the noise but still hear a buzz, it might be mechanical; check how to stop your cars rear deck from rattling with heavy bass to ensure the car itself is not the problem.
The Future of Smart Power Management
Looking ahead, I see car audio moving away from massive analog knobs and toward integrated DSP (Digital Signal Processing) control via our smartphones. We are already seeing people learn how to use an old phone as a dedicated high res music player, and soon, those phones will likely manage real-time thermal monitoring of our amps. Imagine getting a push notification that your rear-left speaker is clipping before you even hear the distortion. It is an exciting time to be an audiophile, but the physics of a good ground will never change. Try this today: Grab a multimeter, set it to DC volts, and measure the voltage at your amp terminals while the music is cranked. If that number dips significantly below your battery voltage, your wiring is the bottleneck.
The Hidden Realities of High-Gain Audio Systems
One massive lightbulb moment for me was realizing that the remote turn-on wire can actually be a source of noise. If it is tied into a circuit with a noisy fan or motor, it can pulse interference directly into the amp’s input stage. Another trick experts use is the ‘mute plug’—creating an RCA plug with the center pin soldered to the shield. If you plug that into the amp and the hiss stops, you know the noise is coming from the cables, not the amp. Finally, grounding is not just about the frame; sometimes you need to ground the outer shell of your RCA inputs to the amp’s chassis to eliminate a specific type of ‘alternator whine’ caused by broken internal traces. If you notice that your interior is vibrating along with the music, understanding why your car door panels buzz with every bass hit can help you differentiate between mechanical rattles and electronic hiss.
Tools I Actually Use to Solve Persistent Signal Issues
I never start a job without my diagnostic trinity. First, a solid multimeter is mandatory for verifying ground resistance and checking for voltage drops. Second, a handheld oscilloscope is the only way to truly see clipping before it damages your equipment. Third, I highly recommend the MECP study guides; they are the gold standard for learning the physics of car audio. If you have been troubleshooting for hours and the amp still will not engage, it might be a protection circuit issue, similar to how to fix a receiver that wont turn on after a power surge. For a cleaner soundstage, check how to use a 9v battery to check your speaker polarity to ensure all your drivers are in phase. For those looking to upgrade their layout, consider the best way to mount car tweeters without drilling holes to keep your install professional.
#IMAGE_PLACE_HOLDER_E#
The Pure Joy of a Noise-Free Dashboard
Your car amplifier is more than just a box of wires; it is the heart of your daily escape. Once you kill that hiss, you will rediscover your music in a way that factory systems simply cannot match. Do not be afraid to take the dash apart one more time to get the routing right. It is worth every minute of labor when the music finally hits against that perfect, silent backdrop. Have you ever found a noise source that completely surprised you? Let me know your craziest audio troubleshooting stories in the comments!