
I’ll never forget the night I finally sat down with a glass of bourbon to enjoy my freshly pressed 180g vinyl. I dropped the needle, the music swelled, and then—pop. My left channel went silent. I spent ten minutes checking my receiver before I crawled behind the speaker and realized the binding post was spinning like a top. It felt like my gear was giving up on me. We’ve all been there, staring at a wobbly piece of plastic or metal on the back of a cabinet that should be solid as a rock. If your speaker terminals are loose, you aren’t just losing sound; you’re risking a catastrophic short. Today, I’m going to show you exactly how to tighten those terminals back up and ensure they never budge again, even when the bass is rattling the floorboards. [image_placeholder_1]
Stop That Wiggle Before You Blow a Fuse
I learned the hard way that ignoring a loose connection is a recipe for disaster. Years ago, I thought I could just wedge a toothpick in there to keep the terminal from spinning. It worked for an hour until the positive and negative wires touched, and I saw a literal spark fly out of my favorite vintage Marantz. It was a heart-stopping moment that taught me one thing: mechanical stability is electrical stability. Dealing with a loose terminal is just as crucial as knowing how to use a multimeter to find a short in your speaker wires before you power everything back on. If that terminal is spinning, the internal leads are twisting, and eventually, they will snap or touch. It is as frustrating as trying to fix a scratchy volume knob on an old amp while you are right in the middle of a listening session.
Can a Loose Terminal Actually Kill Your Amp?
You might think I’m being dramatic, but the risk is real. When a terminal is loose, the contact resistance increases, which can cause heat buildup. More importantly, if the internal wire snaps and touches the cabinet’s metal plate or the opposite terminal, your amplifier sees a zero-ohm load. According to standard electrical safety guidelines for home audio, most modern amplifiers have protection circuits, but vintage gear will simply fry its output transistors in milliseconds. This isn’t just about ‘clean sound’—it’s about protecting your investment. Have you ever noticed your speakers cutting out right when the volume gets turned up or when you walk across the floor?
Getting Your Connection Solid Again
The good news is that this is a ten-minute fix that requires almost no specialized tools. Most people assume they need to replace the whole plate, but usually, it’s just a hex nut that has vibrated loose over years of heavy use. It’s a mechanical failure, similar to the simple way to fix a rattling metal speaker grill; if it moves, it makes noise, and eventually, it breaks. We need to get inside the cabinet to do this right. You can’t just tighten it from the outside without risking twisting the internal wiring into a knot. Think of it like how to fix a loose charging port on a rugged portable speaker—you have to address the root of the connection, not just the surface. Let’s look at the gear you need to stop the spin for good.You cannot simply grab a pair of pliers and crank on the plastic nut from the exterior of the speaker. That is the fastest way to snap the internal lead wire right off the crossover. I learned this the hard way with a pair of budget finds while experimenting with how we made a 20 dollar thrift store speaker sound like a pro monitor. I thought I was being efficient by just ‘snugging’ it from the front, but all I did was twist the internal terminal until the wire popped like a guitar string. To do this right, you have to get behind the terminal plate.
Open the Cabinet Before You Crank the Wrench
The only way to secure a spinning binding post is to gain access to the back of the terminal plate. Most modern speakers have a plastic cup held in by four or more Phillips head screws. Remove those and gently pull the cup toward you. If the wires are too short to pull the plate out, you might have to remove the woofer and reach in from the front of the cabinet. It is a bit like surgery, but it is the only way to hold the front of the post steady while you apply torque to the nut on the back. 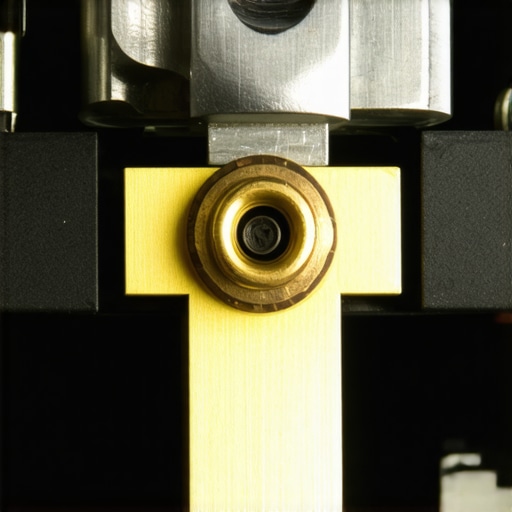
Use a Nut Driver Instead of Pliers
Once you have the plate in your hand, you will see the hex nut holding the binding post to the plastic housing. Avoid using pliers here; they tend to slip and chew up the soft brass or gold-plated hardware. If you have ever had to clean gold-plated connectors without ruining the finish, you know how easily that thin layer of gold can be scratched away. Instead, use a proper socket or a nut driver. Tighten the nut until it is firm against the plastic. Do not over-tighten, as plastic terminal cups are prone to cracking if you apply too much pressure.
Inspect the Damage You Cannot See
While the cabinet is open, take thirty seconds to look for other issues that cause audio degradation. It is the perfect opportunity to tell if your speaker capacitors are starting to leak or if the internal dampening material has shifted. If the wire did get twisted when the post was spinning, the copper strands might be frayed. A bad connection inside the cabinet is a primary reason why you might eventually need to fix channel imbalance on a vintage stereo amplifier, as the resistance on one side will be significantly higher than the other.
Stop the Vibration with a Simple Lock Washer
To ensure this post never wiggles again, add a small star washer or a tiny drop of blue (removable) thread locker to the bolt threads before the final tightening. This is a low-cost reliability boost, much like the 20 dollar upgrade that makes an old turntable sound like new. It provides the necessary friction to fight against the constant low-frequency vibrations that naturally want to back that nut off. Once you have secured the hardware, screw the terminal plate back into the wood. Give the post a firm wiggle from the outside; it should feel like an immovable part of the speaker cabinet.While tightening that terminal is a great first step, I see so many enthusiasts fix one mechanical issue only to fall for the ‘break-in’ trap. We’ve all read the forum posts claiming you need 200 hours of pink noise before your tweeters ‘open up.’ In reality, the truth about speaker break-in periods is mostly about your ears getting used to the frequency response, not the hardware magically changing its physical properties. According to Dr. Floyd Toole, a pioneer in psychoacoustics and former VP at Harman International, the room itself has a far greater impact on the final sound than almost any ‘audiophile-grade’ tweak you can buy at a boutique shop.
The Expensive Cable Lie That Everyone Still Believes
Most people think they need to drop a week’s paycheck on silver-plated interconnects once they fix their hardware. Please, stop wasting money on expensive optical cables or overpriced speaker wire. A 14-gauge copper wire from a reputable spool will sound identical to a $500 branded cable in 99% of home environments. The ‘trap’ here isn’t the wire; it’s the environment. You can have the tightest terminals in the world, but if your speakers are sitting on a tile floor with bare walls, it’s going to sound like a tin can.
Can Your Furniture Actually Destroy Your Stereo Image?
Yes, and it’s likely happening right now. Reflection points are the silent killers of high-fidelity audio. If you have a coffee table between you and the speakers, you’re hearing the primary sound wave plus a reflected one a few milliseconds later. This creates ‘comb filtering,’ which makes even the most expensive system sound thin and harsh. This is why you should use a rug to fix a bright sounding room before you ever consider upgrading your amp. 
The Mistake of Overpowering a Small Space
Another nuance that separates the pros from the amateurs is matching the gear to the volume of the room. I’ve seen people try to hide a massive subwoofer in a small living room, only to find the bass sounds ‘slow’ or ‘boomy.’ This isn’t a fault of the sub; it’s physics. Small rooms have high-pressure zones that make massive drivers behave unpredictably. Sometimes, why two small subwoofers are better than one massive driver becomes obvious once you realize that multiple sources smooth out those nasty room modes. Have you ever fallen into this trap of buying bigger gear to solve a room problem? Let me know in the comments below.If you want your setup to last another thirty years, you need to stop buying generic electronics cleaner from the hardware store. I keep a can of DeoxIT D5 on my workbench at all times. Why? Because unlike cheap sprays that just wash away dust, D5 actually dissolves oxidation on a molecular level. It is the secret weapon to fix a scratchy volume knob on an old amp before the static becomes unbearable. According to technical documentation from CAIG Laboratories, their formula provides a 1-2% increase in conductivity by removing the non-conductive layers that form on metal surfaces over time. It is a tiny gain, but in a signal path, it is the difference between a muffled performance and total transparency.
How do I maintain my audio gear over the long haul?
Maintaining gear isn’t about deep cleaning once a year; it is about consistent micro-habits. For instance, I check my headphone cushions every few months because sweat and oils are acidic. If you miss the 7 signs your headphone pads need replacing today, you will end up with a degraded seal that kills your bass response. Similarly, don’t let dust settle on your drivers. You should know how to clean your speaker cones without ruining the paper because a heavy layer of grime actually adds mass to the cone, subtly changing the tuning. If the surrounds look dry, you can revive a vintage speaker cone with simple rubber treatment to keep them supple and prevent cracking. 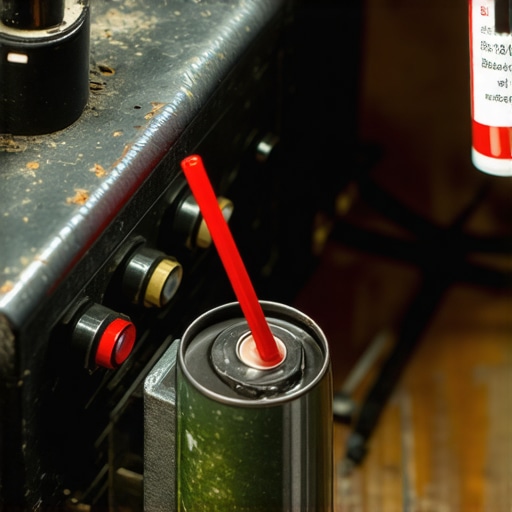
The Future of Listening Lives in the Algorithm
I suspect the next decade won’t be about better hardware, but better software integration. We are already seeing computational audio take over the headphone space, and soon, your receiver won’t just have basic EQ; it will use AI to map your room’s dimensions in real-time. Even if you have a massive physical collection, the best way to organize a massive digital music library will involve smart-tagging that understands the acoustic profile of your files. This extends to optical media too, though you might occasionally need to learn how to clean a laser lens on a skipping vintage cd player to keep those physical discs spinning. Grab a can of contact cleaner and a soft brush this weekend—spend twenty minutes cleaning your RCA jacks and tell me you don’t hear a blacker background in your favorite tracks.[image_placeholder_final]
Three Ways Tiny Vibrations Steal Your Audio Quality
One thing I’ve realized after decades in this hobby is that we often chase ‘magical’ solutions while ignoring basic physics. If you don’t secure those terminals, you’re fighting a losing battle against signal degradation. I’ve seen systems that cost more than a mid-sized sedan sound like mud because the owner didn’t know the trick to making cheap bookshelf speakers sound expensive involves basic mechanical maintenance. Also, don’t confuse a solid connection with ‘breaking in’—while some people swear why your new speakers sound better after 20 hours of use is due to the drivers, a huge part is just the heat-cycling of the connections settling into place. Finally, always buy your gear from people who care for it; I’ve found the trick to buying high-end audio at estate sales is looking for equipment that doesn’t have wobbly inputs or neglected terminals.
Tools I Use to Keep My Gear Forever Young
I never start a repair without a high-quality 1/4-inch nut driver set to avoid stripping those delicate brass nuts. I also recommend keeping a small tube of blue thread locker—never red—to handle those high-vibration spots where screws love to back out. For those who want to dive deeper into the ‘why’ behind the sound, Robert Harley’s ‘The Complete Guide to High-End Audio’ is my go-to bible for troubleshooting. And if you’re ever in doubt about your wiring, always keep a basic multimeter handy to ensure you haven’t created a bridge between the posts.
Bring the Magic Back to Your Music Room
Don’t let a spinning binding post keep you from the music you love. These little fixes are what turn a ‘good’ system into a legacy setup that stays in the family for decades. You have the tools and the knowledge now, so go ahead and get that connection rock-solid. Once you eliminate that wiggle, you can finally sit back, relax, and let the music take over without worrying about a sudden short or a dropped channel. Have you ever discovered a loose connection that was secretly ruining your sound? Let me know in the comments below.