
I sat there in the dark, staring at my expensive Sennheisers, feeling like I had just ruined a masterpiece. I had just swapped out the stock velour for some ‘premium’ leather pads I’d seen recommended on a shady forum thread. Instead of the ‘punchier bass’ I was promised, I got a muddy, claustrophobic mess that sounded like I was listening to music through a thick wool blanket. It was my first lesson in the brutal reality of headphone acoustics: the material touching your face matters just as much as the drivers inside the cups. Today, I am going to help you navigate this choice so you do not end up with a drawer full of useless accessories like I did. We will break down exactly how these materials manipulate frequency response and which one fits your specific listening habits.
Why Your Pad Choice is Secretly Ruining Your Music
Most of us think of ear pads as just pillows for our ears. We want comfort, sure, but we rarely consider that these rings of foam and fabric are essentially the ‘room’ our speakers live in. When I first started out, I made the amateur mistake of thinking that more expensive material always equaled better sound. I quickly learned that why leather pads sound different than velour ones comes down to a simple law of physics: isolation versus breathability. Leather and protein-leather create an airtight chamber that traps air and boosts low-end frequencies. Velour is porous; it lets air escape, which usually results in a wider, more airy soundstage. If you have ever wondered why your high-end headphones sound tiny, it might not be the power source—it could be a complete lack of a proper acoustic seal.
Is a simple pad swap actually worth the hype?
You might be skeptical that a bit of fabric can change your audio experience, but the impact is measurable. According to research from the Audio Engineering Society, even minor changes in the acoustic impedance of ear cushions can drastically shift frequency response by several decibels in the mid-range and bass. It is the most cost-effective way to tune your gear. Have you ever swapped your pads only to realize the original ones actually sounded better? Or maybe you found a combination that turned a cheap pair into a giant-killer? Let me know, because finding the trick to making 50 dollar headphones feel like 300 dollar monitors often starts with this exact experiment.
Don’t Wait Until the Foam Flattens
I used to wear my pads until they were literally disintegrating and sticking to my temples. This is a huge mistake. As the foam inside the pad compresses over time, the distance between the driver and your ear canal shrinks. This ruins the soundstage and can make even the best headphones sound harsh or muddy. Knowing the 7 signs your headphone pads need replacing is vital for maintaining that ‘out of the box’ magic. Whether you are chasing that deep sub-bass or a wide orchestral feel, your choice between these two materials will be the deciding factor.
Pick Your Material Based on the Bass You Want
Think of leather pads like a sealed speaker enclosure. Because they don’t let air escape, they force every vibration from the driver directly into your ear canal. This builds air pressure, which we perceive as ‘slam’ or deep sub-bass. I remember trying to fix a pair of $50 cans that sounded like tin cans. By swapping the thin stock foam for thick sheepskin leather, I found the trick to making 50 dollar headphones feel like 300 dollar monitors—it was all about that airtight seal. On the flip side, velour is like a room with heavy acoustic curtains. It allows air to pass through the fabric, which prevents bass frequencies from building up and ‘blooming.’ This creates a wider ‘soundstage,’ making it feel like the band is playing in a room around you rather than inside your skull. If you find your audio feels cramped or ‘in-your-head,’ switching to a porous material is the fastest fix. However, if you want the best of both worlds, hybrid pads—leather on the outside to trap bass and velour on the face for comfort—are the secret weapon for many audiophiles.
The Delicate Art of Removing Old Pads
I once learned the hard way that brute force is your worst enemy in the world of audio DIY. I was working on a pair of vintage AKGs and pulled so hard on the pad that I snapped the internal plastic mounting ring. It was a $40 mistake that could have been avoided with a simple guitar pick or a plastic pry tool. Most pads either stretch over a thin lip on the cup or click into place with small, fragile tabs. Before you yank, feel around the inner rim for any resistance. If they’re stuck, a tiny bit of heat from a hairdryer on its lowest setting can soften the old adhesive or stiff plastic just enough to let them pop free. While you have the pads off, you’ll likely see a layer of dust or debris. It is the perfect time to learn the best way to clean earwax out of mesh earbuds and headphone drivers, as any obstruction on the driver cover will muffle your high-end frequencies and ruin the detail you’re paying for.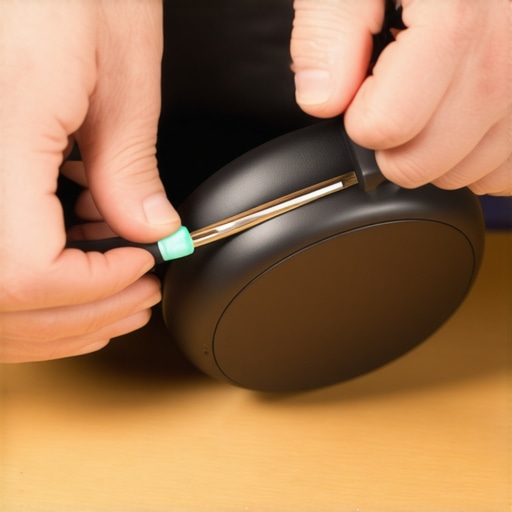
Check the Seal Before You Commit
Once the new pads are on, you need to verify the acoustic integrity immediately. A common issue with aftermarket pads is a ‘leak’ where the pad doesn’t sit perfectly flush against the headphone cup. If you hear a faint whistling sound or if the bass seems to disappear when you turn your head, you have an air gap. I usually run a frequency sweep from 20Hz up to 200Hz; if the tone wavers or drops in volume as you lightly press the cups against your head, the seal is inconsistent. Also, be aware that significantly thicker pads will increase the clamp force on your jaw. You may need to learn how to stretch a tight headphone headband without snapping it to regain your comfort without sacrificing that precious acoustic seal.
Verify the Sound with High Quality Sources
Don’t judge your new pads using a low-bitrate YouTube stream or a phone with a weak internal chip. You need to know if the changes are helping or hurting the driver’s natural tuning. Sometimes a pad swap makes the headphones harder to drive because the increased distance between the ear and driver requires more voltage to achieve the same volume level. If your volume is maxed out and it still feels limp or lacks ‘punch,’ it is time to see how to tell if your headphones need an external amp. I’ve seen people spend hundreds on premium pads only to realize their source was the bottleneck all along. Always check the stitching on your new pads too; if you bought them from an unverified third-party seller, you should know how to identify a fake pair of premium headphones or accessories, as cheap knock-offs often use low-grade foam that collapses and changes your sound signature within weeks.
Let’s dig deeper into the psychology of the ‘upgrade.’ Most hobbyists fall into the trap of spending $200 on a custom silver-plated cable before they even consider the state of their ear pads. I will tell you right now: the real difference between gold and silver plated connectors is effectively zero for your frequency response. It is a vanity purchase. If you really want to change the sound, you have to change the acoustics, not the wire. I have seen guys agonize over the difference between cheap and expensive DACs that actually matters, only to listen through pads that have the structural integrity of a pancake.
Does ‘Burn-In’ actually change the driver or just the foam?
This is one of the most heated debates in the audiophile world. While some manufacturers swear by a 100-hour break-in period, research and measurements from acoustic experts suggest that while drivers do technically settle, the most measurable change actually comes from the ear pads. As you wear them, the foam loses its initial stiffness and begins to conform to the shape of your skull. This creates a more consistent seal, which drastically improves bass extension and shifts the resonant frequency of the ear cup chamber. If you think your gear sounds better after two weeks, you are likely hearing the pads ‘breaking in’ to your face. It is the same reason why your new speakers sound better after 20 hours of use; mechanical parts need to find their ‘seated’ position before they perform as intended.
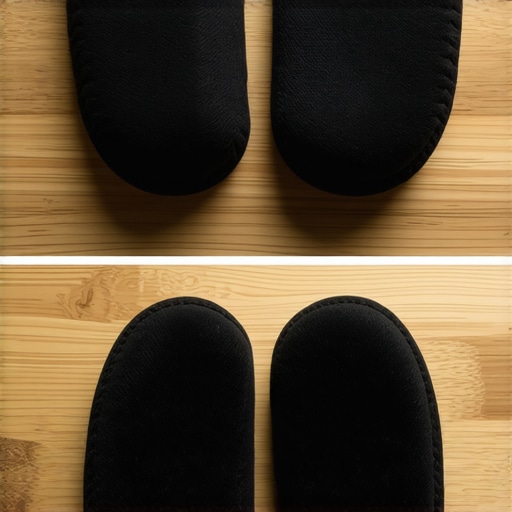
One massive ‘oops’ factor I see constantly is the ‘Discount Marketplace Trap.’ You see a pair of ‘Genuine Sheepskin’ pads for $15 and think you have scored a bargain. You haven’t. These knock-offs often use low-density open-cell foam that does not provide the necessary acoustic resistance. You end up with a headphone that sounds hollow because the air is leaking through the foam itself, regardless of the outer material. Before you waste your money, you need to know how to identify a fake pair of premium headphones or accessories. Cheap foam also creates heat issues, which can cause moisture buildup near the driver—a death sentence for high-end electronics.
Another nuance people miss is the ‘Impedance Shift.’ When you move the driver further from your ear with thicker pads, you change the volume at which you perceive the music. Sometimes this extra distance makes a headphone feel underpowered because the sound pressure level (SPL) drops at the ear drum. If you find yourself cranking the volume to 90% just to get the same impact you had before, you should probably look into how to tell if your headphones need an external amp. A thicker pad might solve your comfort issues but create a power bottleneck you were not prepared for. Have you ever fallen into the trap of buying ‘upgrade’ parts that actually made your system sound worse? Let me know in the comments.
One thing nobody tells you when you start buying high-end audio gear is that you are now a part-time technician. If you think you can just buy a pair of planar magnetics or a vintage receiver and never touch them again, you are in for a heartbreak. I learned this when my favorite tube amp started smelling like a burnt marshmallow. It turns out, I was ignoring the buildup of dust in the vents, which led to a thermal runaway. Beyond just the pads we discussed, your entire chain needs a regular ‘health check’ to stay at peak performance. This is especially true if you have scaled up to a larger system where the best way to label your messy home theater cables becomes a matter of sanity rather than just organization.
How do I maintain my high-end audio gear over time?
Maintenance isn’t just about cleaning; it is about prevention. For headphones, I personally use a small ‘dry box’ with silica gel packets. Moisture from your skin and breath is the silent killer of driver membranes, especially in humid climates. For your home theater or stereo setup, you need to be checking your physical connections every six months. I have seen enthusiasts spend thousands on upgrades only to realize their issue was simply that they needed to know how to fix a loose speaker terminal on your cabinet or that their wires had oxidized. If you are running older equipment, you should definitely keep an eye on your power supply. Learning how to tell if your amps capacitors are failing can save you from a catastrophic failure that takes your speakers down with it. It is much cheaper to replace a ten-dollar cap now than a five-hundred-dollar woofer later.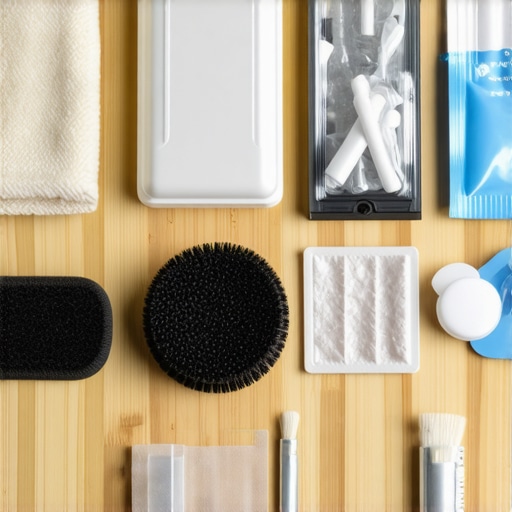
Your Tools are Just as Important as Your Gear
I keep a very specific toolkit in my desk drawer: a non-conductive plastic pry tool (for those stubborn pad clips), a high-quality microfiber cloth, and a bottle of DeoxIT D5. If you have ever wondered why your old receiver pops when you switch inputs, it is usually just oxidation on the internal contacts. A quick spray of DeoxIT into the potentiometers is like magic. As noted in the technical white papers by Dekoni Audio, the density of the memory foam and the cleanliness of the acoustic mesh act as a secondary filter for high-frequency peaks; if that mesh is clogged with skin oils, your frequency response will be objectively worse. If you are dealing with modern portable gear, you also have to worry about physical wear and tear on ports. I have helped countless friends avoid buying new gear by teaching them how to fix a loose charging port on your favorite bluetooth speaker using a simple needle and some isopropyl alcohol.
The Future is Adaptive and Personalized
I predict that within the next five years, we won’t be swapping pads to change the sound; we will be using ‘smart’ headphones that detect pad wear and compression in real-time. We are already seeing the beginnings of this with computational audio in TWS earbuds, but the high-end market is next. Imagine a DSP profile that automatically adjusts its EQ to compensate for the fact that your velour pads are 20% flatter than they were last year. Until that tech becomes mainstream, however, we have to rely on our ears and our maintenance habits. If your gear sounds ‘off,’ don’t immediately assume you need a new DAC. Check the seal, clean the contacts, and make sure your components aren’t suffocating. If you notice your equipment acting strangely, such as why your receiver clicks when you change the volume, it might just be the relays doing their job, but it is always better to be certain. My advanced tip for you today: grab a mirror and look at how your headphones sit on your head; if there is even a 2mm gap behind your ear, you are losing 5dB of sub-bass. Fix that seal today and see what you have been missing.
The Hidden Truth Behind the ‘New Headphone’ Feeling
The biggest realization I had after years of tinkering is that your gear is a living ecosystem. I used to think that once I bought a pair of high-end cans, the work was done. I was wrong. The material of your pads dictates the air pressure, and the air pressure dictates the soul of the music. If you are still using the same flat, greasy pads you had three years ago, you aren’t hearing your headphones anymore; you’re hearing the decay of foam. I’ve also learned that obsessing over small details like the easy way to test if your speakers are out of phase or checking your pad seal can yield more significant gains than a $1,000 cable ever will. Don’t be afraid to break the ‘stock’ rules—your ears are the only judge that matters.
#IMAGE_PLACEHOLDER_E#
My Essential Toolkit for Lasting Audio Quality
If you want your gear to last as long as mine, you need more than just a case. I swear by a few specific items. First, DeoxIT D5 is non-negotiable for anyone with a vintage setup; it is how I fixed why your old receiver pops when you switch inputs in under five minutes. Second, keep a pack of silica gel desiccant in your headphone case to fight the humidity that ruins driver membranes. Lastly, I always recommend looking at third-party measurement charts; they provide the only objective data on how different materials actually shift the sound. If you are transitioning from casual listening to a serious hobby, knowing why your gaming headset is bad for listening to music is the first step toward appreciating true high-fidelity audio.
Claim Your Perfect Audio Experience
There is a unique joy in restoring a pair of headphones to their former glory or finding a pad combination that unlocks a new layer of detail in your favorite album. Audio gear isn’t just about the specs on a box; it’s about the maintenance and the personal touches you add over time. Whether you’re figuring out how to tell if your headphones need an external amp or just giving them a deep clean, every minute you spend on maintenance pays off in pure musicality. Don’t let your equipment stagnate. Take ten minutes today to check your seals, wipe down your drivers, and ensure you’re getting the best possible performance from your setup. Replacing your headphone pads is more than a comfort fix—it is the ultimate tuning tool. Have you ever tried a pad swap that completely changed your mind about a pair of headphones? Let me know in the comments below!