
I still remember the crushing disappointment of unboxing my first pair of budget studio headphones. I had saved up just enough for a basic set, thinking they would transform my music, but instead, they sounded like I was listening through a wet woolen blanket. I felt cheated. For years, I believed the lie that you had to drop half a month’s rent to get that crisp, analytical sound found in high-end monitors. I even made the classic rookie mistake of buying counterfeit high-end earbuds online thinking I was getting a steal, only to realize that price tags don’t always equal performance. But then I had a lightbulb moment while tinkering with some software: the hardware is only half the battle. You can actually bridge that $250 gap with nothing more than a little patience and the right digital tools.
Stop Chasing Price Tags and Start Tuning
The truth is that many $50 headphones use drivers that are surprisingly capable, but they are tuned for the masses—which usually means bloated bass and recessed vocals. When you buy $300 monitors, you are paying for a flat frequency response. My goal today is to show you how to force your cheap gear to behave like professional equipment. We are going to look at equalization, pad swaps, and source quality to breathe new life into your setup. It is very similar to how people find that their bluetooth speaker sounds better on a wooden table; it is all about the environment and the signal. If you have ever felt like your laptop speakers sound tinny, you already know the frustration of bad audio. Let’s fix that for your headphones once and for all. Have you ever felt like your current headphones are holding your ears hostage?
Is This Just Snake Oil for Cheap Gear?
I get it—you’re skeptical. How can software make plastic feel like premium leather and magnesium? While we can’t change the physical build quality, we can absolutely correct the sound signature. According to research by Dr. Sean Olive at Harman International, most listeners actually prefer a specific sound target (the Harman Curve), and many budget headphones can be EQ’d to match this target with incredible accuracy. I used to think EQ was cheating, or that it would distort the sound, but that was before I learned how to use it properly without clipping the signal. It’s a lot like learning when your headphone pads need replacing; sometimes a small physical or digital change makes a massive audible difference. We aren’t just boosting the volume; we are correcting the flaws that the manufacturer left behind to save a buck.
Force Your Drivers to Behave with Parametric EQ
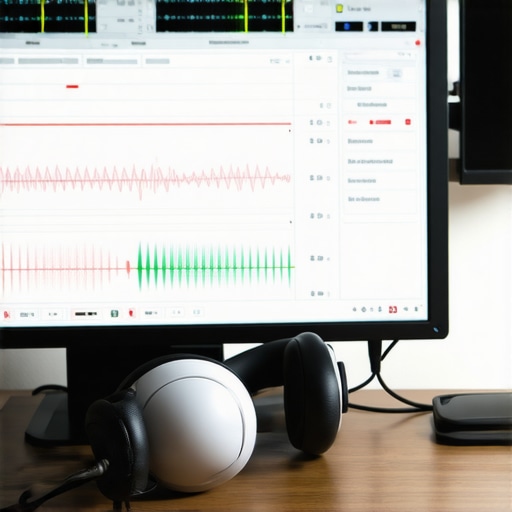
The most powerful tool in your arsenal is Parametric Equalization. Unlike the basic ‘Bass and Treble’ knobs on a vintage receiver, a parametric EQ lets you target surgical frequencies. I remember sitting in my dorm room with a pair of cheap Superlux headphones that sounded like a swarm of angry bees. I downloaded EqualizerAPO and a Peace GUI, and for three hours, I manually adjusted the gain at 4kHz to stop the piercing ‘shh’ sounds. It was a messy trial and error, but it taught me that the trick to making cheap bookshelf speakers sound expensive also applies to what you strap to your head. You are essentially re-writing the acoustic profile of the hardware to match high-end standards.
Kill the Mud with AutoEQ Profiles
You do not have to be an acoustic engineer to get professional results. The community has already done the heavy lifting for you through the AutoEQ project. This database contains thousands of measurements that ‘flatten’ your specific headphone model to the Harman Target. When I first applied an AutoEQ profile to a pair of $30 monitors, the transformation was night and day—suddenly, the vocals were not hiding behind the bass. It is the same principle as how we made a 20 dollar thrift store speaker sound like a pro monitor by adjusting for its physical flaws. It feels like someone finally cleaned the lenses on your glasses, allowing you to hear layers in the music you never knew existed.
Better Pads Create a Better Room for Your Ears
If EQ is the ‘brain,’ then the ear pads are the ‘room.’ Think of your headphone pads like the acoustic treatment in a home theater. Just as why you should use a rug to fix a bright sounding room, switching from shallow, sweaty pleather pads to deep, perforated velour can widen the soundstage and tame internal reflections. I once swapped the stock pads on an old set of AKGs for angled sheepskin ones. The bass became tighter, and the imaging—the ability to tell exactly where the drummer is—sharpened up significantly. Be careful, though; changing pads can sometimes make things sound tinny after a workout if they do not create an airtight seal against your skull.
Don’t Bottle-Neck Your Progress with a Bad Source
You can have perfectly tuned drivers, but if you are feeding them a low-bitrate stream from a noisy laptop jack, you are wasting your time. Electrical interference inside a computer creates a subtle ‘hiss’ that masks micro-details. To fix this without buying a $500 stack, you can learn how to use your phone as a high-end audio source by using a simple USB-C dongle DAC. This separates the audio conversion from the noisy internals of your machine. Also, remember that why your new speakers sound better after 20 hours of use applies here too; give your brain time to adjust to the new, flatter sound signature before you decide you hate the change. It takes time for the ears to stop craving the ‘fake’ bloated bass of cheaper gear.
It is a common misconception that a ‘flat’ response is the holy grail of audio. Beginners often chase this blindly, but seasoned pros know that a purely flat frequency response in a typical living room often sounds thin and lifeless. This is exactly why your studio monitors sound flat and how to add some life back into the mix. According to the foundational research of Dr. Floyd Toole in his book Sound Reproduction, a loudspeaker that measures flat in an anechoic chamber should actually exhibit a steady downward tilt when placed in a domestic environment to sound ‘natural’ to the human ear. If you try to ‘fix’ this natural slope by boosting the treble back to a flat line, you will end up with a piercing, fatiguing experience that ruins the musicality of your favorite tracks.
Why a Perfectly Flat Response Often Sounds Terrible
The nuance many miss is that your room is essentially an extension of your speaker’s cabinet. When you place a speaker near a boundary, the low frequencies are reinforced, which is why your floorstanding speakers sound boomy in the corner. The ‘trap’ here is using digital EQ to aggressively cut those peaks without understanding phase shift. If you over-correct a room-induced null, you are essentially asking your amplifier to work ten times harder to fill a hole that physics won’t allow it to fill. This leads to digital clipping and can even heat up your voice coils to dangerous levels. Instead of digital-only fixes, focus on the physical layout first.
How Much Power Do You Actually Need?
Another area where enthusiasts often stumble is the ‘more is better’ power myth. People assume that a 200-watt amplifier will inherently sound better than a 50-watt one at the same volume. In reality, it is all about current delivery and the noise floor. A high-wattage amp with a poor power supply can introduce an audible hiss, whereas a high-quality lower-power amp provides the ‘black’ background that lets micro-details shine. If you are experimenting with older gear, you might need to know how to bridge a two-channel amp without blowing a fuse, but be warned: bridging can sometimes sacrifice the very detail you are looking for by increasing the total harmonic distortion. It is a tool for volume, not necessarily for fidelity.
The Hidden Cost of Over-Correcting Your EQ
The biggest mistake I see advanced hobbyists make is ‘fixing’ things that aren’t broken. They spend thousands on power conditioners while they stop wasting money on expensive optical cables—which is a good move—but then they ignore a massive ground loop that is muddying their entire soundstage. Learning how to get rid of ground loop hum in your audio setup will do more for your transparency than any boutique capacitor upgrade ever could. We often look for the ‘magic’ upgrade when the solution is usually found in basic electrical hygiene and careful speaker positioning. Have you ever fallen into this trap of chasing specs instead of sound? Let me know in the comments below.
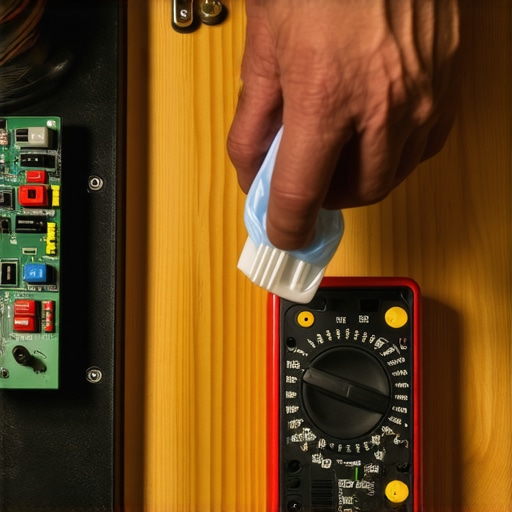
Keeping the magic alive isn’t just about the initial setup; it is about the long game. I have seen beautiful systems die because someone ignored a little dust or a slightly scratchy dial. My go-to tool—the one that lives in my top drawer—is a can of DeoxIT D5. It might sound like a small thing, but when you fix a scratchy volume knob on an old amp, that spray is the difference between a pristine signal and a crackling mess that ruins your experience. This kind of care is vital for anyone who loves the hunt, especially if you have mastered the trick to buying high-end audio at estate sales.
How do I maintain my home audio system over time?
It usually comes down to heat and hygiene. Amplifiers are basically space heaters that happen to play music. As legendary amp designer Nelson Pass often notes in his technical papers for First Watt, heat is the primary enemy of electrolytic capacitors. If you let your gear suffocate in a tight cabinet without ventilation, you will eventually find yourself wondering how to tell if your speaker capacitors are starting to leak. I make it a habit to use a simple multimeter once a year to check for DC offset at the terminals. It is the best way to use a multimeter to find a short in your speaker wires before they cause a catastrophic failure.
The DIY Surgery for Better Sound
If you are working with older finds, do not be afraid of a little manual labor. I have rescued dozens of pairs of cabinets just by knowing how to revive old speakers with new foam surrounds. It takes an afternoon and about twenty dollars, but it brings back the low-end punch that time literally rotted away. And please, for the love of all things holy, watch your cables. A messy nest of wires isn’t just an eyesore; it is an antenna for interference. I have spent many weekends figuring out how to hide audio cables in a room with concrete walls just to keep the noise floor as low as possible.
Where Personal Audio is Heading Next
Looking ahead, I believe we are moving toward a world where the hardware remains robust, but the software evolves. We will soon see AI-first receivers that do not just EQ your room once, but constantly monitor the acoustic signature in real-time. This technology will likely help you match your subwoofer phase with your main speakers automatically as you move furniture or as the number of guests in the room changes. We are seeing the death of ‘set it and forget it’ audio in favor of living, breathing digital correction.
Simple Cleaning Over Expensive Upgrades
Before you drop another dime on an upgrade, try cleaning your existing signal path. Oxidation is a silent thief of detail. Learning how to clean gold-plated connectors without ruining the finish can restore a level of clarity that you thought required a brand-new DAC. If you are dealing with vintage mixing gear, you can also fix a scratchy fader on a vintage audio mixer with the same basic supplies. My challenge for you this weekend: Pick one piece of gear that has been acting up and give it some love. Whether you fix channel imbalance on a vintage stereo amplifier or just re-seat your cables, the results will speak for themselves.
Lessons from a Decade of Chasing Perfect Sound
I’ve spent years chasing the elusive ‘perfect’ soundstage, and if there is one thing I have learned, it is that your ears are far more adaptable than your bank account. One of my biggest lightbulb moments was realizing that the most expensive gear in the world won’t save a bad room or a poorly tuned signal. I once spent a small fortune on a pair of high-end planar magnetics, only to find that my neighbor could hear every note of my late-night jazz sessions; it was a quick lesson in why your open-back headphones leak sound to everyone nearby. The takeaway? Audio is about context. A $50 pair of IEMs tuned to your specific hearing profile will almost always outperform a $500 pair that fights against your biology. Stop looking for the ‘best’ gear and start looking for the gear that works with your environment.
The Tools I Keep in My Audio First-Aid Kit
To truly master the DIY audio game, you need more than just software. You need a physical toolkit that can handle the unexpected quirks of used and budget gear. I never go to a thrift store or an estate sale without a plan for restoration. If you happen to snag a beautiful piece of history that’s been sitting in a basement for decades, you’ll definitely need to know how to get the smell of smoke out of a vintage receiver before it becomes a permanent fixture in your home. My essential toolkit includes:
- EqualizerAPO and Peace GUI: Still the gold standard for free, system-wide Windows EQ.
- A Reliable Multimeter: Essential for checking cable continuity and avoiding shorts.
- DeoxIT D5: The only way to properly clean oxidized pots and switches.
- AutoEQ Database: My first stop for any new headphone purchase to find a baseline Harman correction.
Trust Your Ears Over the Marketing
At the end of the day, your gear exists to serve your music, not the other way around. It is easy to get bogged down in the technical minutiae, like troubleshooting why your soundbar keeps turning itself off randomly, but don’t let these minor hurdles discourage you from the joy of listening. The hobby is about the journey of discovery. Whether you are figuring out how to connect an old turntable to a modern digital soundbar or finally nailing the perfect EQ curve for your budget monitors, every small win brings you closer to the music. You don’t need a golden ear to appreciate quality; you just need the patience to refine what you already own. Which of these tuning tricks are you going to try first on your current setup? Let me know in the comments below.