
I sat on the locker room bench last Tuesday, defeated not by the deadlifts, but by the pathetic, screeching sound coming from my favorite earbuds. Just twenty minutes earlier, they were thumping with the kind of bass that makes you feel like you could lift a car. Now? It was all high-pitched hiss and zero soul. I actually threw a perfectly good pair of buds in the trash years ago because I was convinced I had blown the drivers with a particularly loud heavy metal playlist. It was a costly mistake born of frustration. I am here to tell you that your hardware probably isn’t broken; it is just dealing with a very soggy physics problem that every gym-goer faces eventually.
Stop Blaming Your Gear for That Hollow Sound
If you have ever felt that sudden drop in audio quality the moment you start cooling down, you are definitely not alone. It is that frustrating, thin, inside-a-tin-can sensation that replaces your rich, immersive audio. Today, we are going to dig into exactly why moisture is the mortal enemy of your low-end and how you can restore that punchy sound without reaching for your credit card. The truth is, your ears and your gear are currently at war with your sweat glands, and the sweat is winning. This happens regardless of the price tag on your gear. It is a similar frustration to why your bluetooth speaker sounds muffled when placed against a wall; when the environment changes, the sound follows suit.
Can a Little Sweat Really Kill My Sound Quality?
You might be skeptical. After all, most modern workout buds are rated IPX4 or higher, right? They are marketed as water-resistant. But resistance does not mean the acoustics are immune to a thin layer of salty liquid. When you are pushing your limits, your ear canal becomes a high-humidity tropical microclimate. I have seen countless people assume their drivers are fried when, in reality, the tiny mesh screen is just temporarily clogged with moisture. Much like the real reason your wireless earbuds keep falling out, the problem usually starts with a compromise in the physical fit and the materials involved. The moisture lubricates the silicone tips, breaking the airtight seal that is required to produce bass. Without that seal, the low frequencies simply escape before they hit your eardrum. Furthermore, moisture on the actual driver mesh increases the acoustic mass, which effectively filters out the low frequencies. Research often highlights that even microscopic amounts of liquid on a transducer’s protective layer can significantly alter its frequency response, according to the Audio Engineering Society. I once spent an hour trying to re-pair my phone, thinking it was a software glitch, when I should have just been looking for a dry cloth. Have you ever stood there in the gym, desperately toggling your EQ settings only to realize nothing was helping? Let me know in the comments, because that realization is a special kind of gym-fail. Whether you are dealing with wireless earbuds that won’t stay in during heavy lifting or just that annoying treble-heavy resonance, the fix is usually much simpler than you think.
The Anatomy of a Soggy Speaker
When moisture enters the equation, it acts like a weighted blanket thrown over a kick drum. The diaphragm of your earbud is designed to be incredibly light and responsive so it can vibrate thousands of times per second. Even a microscopic film of sweat adds mass to that diaphragm. In the world of acoustics, more mass equals less treble and a muffled, sluggish response. It is like trying to run a marathon in water-logged boots. When the transducer cannot move freely, the first thing you lose is the punchy, low-end impact that keeps your heart rate up during a set.
Clean Those Tiny Mesh Screens Carefully
The first thing you need to do is address the physical blockage. That tiny metal or fabric mesh at the tip of the earbud is the gatekeeper of sound. When sweat evaporates, it leaves behind salt and oils that create a crust. I once spent twenty minutes scrubbing my buds with a dry toothbrush after a particularly brutal session, and the difference was night and day. If you see any residue, use a soft-bristled brush or a toothpick very gently to flick away debris. While you are at it, check the charging points. Learning how to clean gold-plated connectors without ruining the finish is vital because sweat-induced corrosion can lead to charging failures or intermittent signal drops.
Compressed Air is a Drivers Worst Enemy
You might be tempted to grab a can of air and blast the moisture out. Don’t. Just like why you should never use compressed air to clean a silk dome tweeter, the pressure from those cans can literally de-seat the diaphragm from the motor assembly in a tiny earbud. You are not cleaning it; you are sandblasting the most delicate part of your audio gear. Instead, use the wicking method. Take a corner of a paper towel or a microfiber cloth and touch it to the mesh. Let capillary action pull the moisture out naturally without forcing air into the sensitive internal chamber.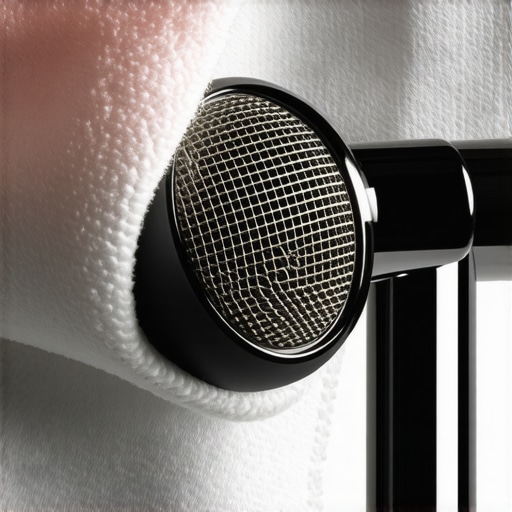
Restore the Seal to Find Your Bass
If the audio still sounds thin, the problem is likely your silicone or foam tips. Moisture makes them slippery, causing them to slide just a fraction of a millimeter out of place. This tiny gap kills the pressure chamber needed for low-end frequencies. Wipe your ear canals and the tips dry. If you use over-ear headphones for lifting, be aware that sweat can also degrade the cushioning. Keep an eye out for 7 signs your headphone pads need replacing today, as a cracked pad is just as bad as a wet ear tip for losing bass.
The Dashboard Mistake I Will Never Make Again
A few years ago, I thought I would be clever and leave my damp buds on my car dashboard in the sun to dry out. When I came back, the sun had baked the adhesive holding the mesh in place, and the internal battery had likely taken a hit from the intense heat. The buds sounded even worse afterward—tinny and rattling. Now, I use a simple silica gel packet. I keep a small airtight container in my gym bag with a couple of those do not eat packets. Tossing your buds in there for an hour after a workout is the safest way to pull moisture from the internal circuitry. It ensures that when you learn how to use your phone as a high-end audio source, you are actually hearing the high-fidelity sound you paid for, not a muffled version of it.While drying out your earbuds is a quick win, there is a much deeper trap that even seasoned audiophiles fall into once they start upgrading their home setup. We often obsess over the spec sheets and DAC chips, but we ignore the single most influential component in the entire chain: the room itself. You can spend five figures on a pair of towers, but if you do not understand how they interact with your drywall and hardwood floors, you are essentially listening to your walls, not your music. In my experience, most people do not need better gear; they need a better environment. This is where the industry marketing often leads us astray, pushing us toward expensive accessories instead of fundamental physics.
Your Living Room is the Biggest Bottleneck
The most common myth I see in high-end audio circles is the ‘magic cable’ theory. I have seen enthusiasts drop hundreds on interconnects while their speakers are shoved haphazardly into corners. If you want to improve your sound, you should stop wasting money on expensive optical cables and start looking at your floor. A hard surface between you and your speakers creates early reflections that smear the stereo image. It is often why your high-end setup feels harsh or fatiguing. Most of the time, you can use a rug to fix a bright sounding room for a fraction of the cost of a new amplifier. Let’s dig deeper into the actual mechanics of sound waves. When a speaker is placed too close to a boundary, the low-end frequencies wrap around the cabinet and bounce off the wall, creating constructive interference that makes everything sound muddy. This is exactly why your floorstanding speakers sound boomy in the corner. 
Why does my expensive system sound different at home than in the store?
The answer lies in the ‘Power Response’ of the speaker and the acoustic treatment of the showroom. Professional listening rooms are designed to minimize standing waves—those annoying points where bass frequencies either cancel each other out or double in volume. According to research by Dr. Floyd Toole, a pioneer in the field of psychoacoustics, the room’s contribution to what we hear can be as high as 50% of the total sound quality. This is the ‘Oops’ factor many buyers overlook: they buy a speaker based on how it sounded in a perfectly treated room, then bring it home to a glass-filled minimalist apartment. If you find your audio lacking life, it might be that your studio monitors sound flat because they are competing with the natural reverb of your space.
Don’t Fall for the Burn-In Fairytale
Another nuance that gets debated endlessly is the ‘break-in’ period. While it is true that mechanical suspensions in a new driver can loosen slightly over the first few hours, the idea that a speaker needs 200 hours of specialized pink noise to sound ‘sweet’ is largely a psychological phenomenon called auditory acclimation. The truth about speaker break-in periods is that your brain is adjusting to the new sound signature much more than the speaker is physically changing. I once spent two weeks ‘burning in’ a set of headphones only to realize I had just gotten used to a peak in the treble I initially hated. Have you ever fallen into this trap of waiting for your gear to ‘unlock’ its potential? Let me know in the comments, because I suspect we’ve all been there, staring at our speakers hoping they’ll suddenly transform. Instead of waiting for the gear to change, focus on the physical setup. Small adjustments, like the best height for your desktop speakers, will always yield a more dramatic and measurable improvement than any fancy snake-oil accessory ever could.
Stop the Crackle Before It Kills Your Vibe
If you have ever reached for the volume and heard a sound like dry leaves being crushed in your speakers, you have encountered the audio enthusiast’s most common ghost: oxidation. We spend so much time worrying about the specs on paper that we forget that mechanical parts age. I remember the first time my vintage silver-face receiver started dropping the left channel; I was ready to list it for parts. But most of the time, the fix is as simple as knowing how to fix a scratchy volume knob on an old amp without overdoing the cleaner. If you are a fan of tactile gear, the same logic applies to your mixing boards. Learning how to fix a scratchy fader on a vintage audio mixer is essentially an afternoon chore that can save you hundreds in professional repair fees. According to the technical documentation from Caig Laboratories, even non-noble metal contacts can develop an insulating film of sulfide and oxide in as little as six months in humid environments, which is why a routine ‘contact workout’ is non-negotiable for my gear.
How do I maintain my audio equipment for the long haul?
Maintenance is not a one-time event; it is a seasonal rhythm. I treat my audio rack like a classic car. Every few months, I check the tension on my speaker wire terminations and ensure there is no buildup of dust in the heat sinks. Heat is the ultimate silent killer of capacitors. This is precisely why you should never place your turntable on top of your receiver; you are effectively putting a lid on an oven. If your equipment cannot breathe, the internal components will dry out and fail prematurely. In the car audio world, this is even more critical. I have seen enthusiasts wonder why your car amp is overheating during long summer drives, only to find they have buried it under a gym bag in a trunk with zero airflow. It is about respecting the thermal limits of your silicon.#IMAGE_PLACE_HOLDER_D#
The Essential Toolkit for Any Serious Listener
You do not need a degree in electrical engineering to keep your system humming, but you do need two specific tools: a high-quality contact cleaner and a reliable multimeter. I personally never swap a set of speakers without doing a quick continuity check. It is the only way to be 100% sure you do not have a hidden break in the jacket. Knowing how to use a multimeter to find a short in your speaker wires has saved me from blowing the output stage of my favorite Class AB amp more than once. If you are dealing with older gear, you should also learn how to tell if your speaker capacitors are starting to leak. A simple visual inspection of the crossover board can reveal bulging or residue that signals an imminent failure. If you catch it early, you are looking at a five-dollar part instead of a five-hundred-dollar replacement.
Where Your Audio Journey Goes From Here
As we look toward the future, I see the industry moving away from ‘dumb’ speakers toward fully integrated, DSP-driven systems that can self-calibrate. We are entering an era where AI will likely monitor the impedance of your drivers in real-time to prevent clipping before it even happens. However, no matter how ‘smart’ your gear gets, it will still be subject to the laws of physics. Dust, heat, and moisture do not care about your firmware version. If you want to keep that crisp, high-fidelity sound, I challenge you to pull your gear out of the rack this weekend, check those gold-plated connectors, and give your volume pots a quick clean. Your ears will thank you for the extra clarity. Grab your multimeter and test your longest cable run today—you might be surprised by the resistance you find.
Hard Truths from a Decade of Blown Drivers and Muddy Mixes
Reflecting on years of troubleshooting, I have realized that audio gear rarely dies a sudden death; it usually fades away due to neglect. One of the biggest surprises was discovering how environmental factors, like humidity, can subtly ruin the experience. I used to think a crackling sound meant a trip to the repair shop, but learning how to fix a scratchy volume knob on an old amp taught me that most issues are just surface-level oxidation. Another revelation was the importance of physical integrity. If your bass feels weak, don’t buy a new sub immediately—check your enclosures. For example, knowing how to stop your cars rear deck from rattling when the sub hits can save you from thinking your driver is bottoming out. Lastly, never underestimate the power of a clean connection; a simple wipe-down is often better than any software EQ tweak.
The Maintenance Kit Every Serious Audiophile Should Carry
You do not need a laboratory to keep your system in top shape, but a few specific tools are non-negotiable. First, a high-quality contact cleaner is your best friend for any vintage or well-loved equipment. I always keep a small bottle on hand, especially when I need to know how to clean gold-plated connectors without ruining the finish. #IMAGE_PLACEHOLDER_E# Second, a digital multimeter is essential for checking continuity and troubleshooting shorts before they fry your amplifier. Third, I highly recommend keeping a set of soft-bristled brushes and a blower—though remember why you should never use compressed air to clean a silk dome tweeter to avoid physical damage. These items have saved me thousands in unnecessary replacements over the years.
Take Control of Your Listening Experience Today
At the end of the day, high-fidelity sound is not just about the price tag on your speakers; it is about the care you put into the signal path. Whether you are wiping sweat off your workout buds or recalibrating your home theater, these small habits define your relationship with music. Don’t be afraid to open up a manual or test a wire yourself. You are the final architect of your soundstage, and with the right maintenance, your gear will serve you for decades. Have you ever found a simple fix that saved a piece of gear you thought was completely dead? Let me know in the comments below!