
I remember sitting on my living room floor years ago, staring at my first real hi-fi setup. I had a gorgeous vintage receiver and a sleek turntable, and because my apartment was the size of a postage stamp, I did what seemed logical: I plopped the record player right on top of the amp. It looked like a professional tower of power. But every time I turned the volume up past a whisper, a low-frequency rumble started shaking the floorboards, and the music turned into a muddy mess. I thought I had a broken needle or maybe needed to get rid of ground loop hum, but the truth was much simpler. I was accidentally suffocating my equipment and vibrating my music to death. Today, I want to help you avoid that same frustration and show you why giving your gear some breathing room is the easiest free upgrade you will ever give your ears.
The Secret Sabotage of Stacking Your Setup
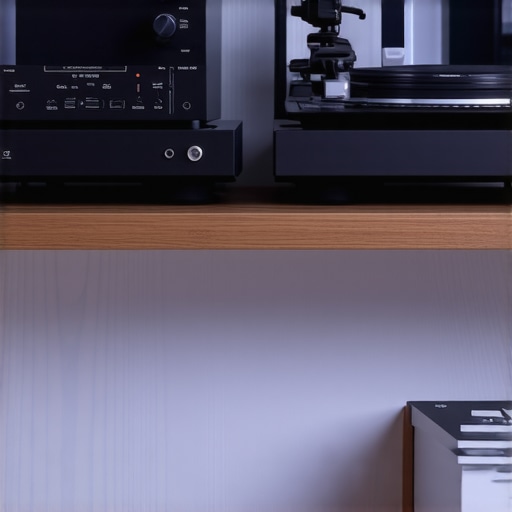
When you stack a turntable on a receiver, you are creating a perfect storm of audio interference. Receivers are essentially small furnaces; they generate a significant amount of heat while processing power. By covering those top vents with a heavy turntable, you’re trapping that heat inside. I actually cooked the capacitors in an old Pioneer unit this way once, and trust me, identifying failing capacitors is not a fun weekend project. Beyond the heat, you have the issue of electromagnetic interference. The massive power transformer inside your receiver is a magnet for noise, and your turntable’s sensitive cartridge is designed to pick up tiny vibrations. When they are inches apart, that electrical field translates into a persistent buzz that ruins the quiet moments of your favorite records. Have you ever noticed a strange noise when no music is playing? It might be because your vintage receiver is making a loud hum due to its proximity to other electronics.
Is This Just Audiophile Snobbery or Real Science?
You might be thinking that your ears aren’t ‘golden’ enough to hear the difference, but this isn’t about snobbery—it’s about physics. According to thermal management principles recognized by the IEEE, the lifespan of electronic components like electrolytic capacitors is significantly shortened when operating temperatures rise even slightly above their rated limit. If your amp can’t breathe, it won’t last. Furthermore, the physical vibrations from the receiver’s internal components can travel directly into the turntable’s platter. This is a common culprit for why your record player skips or sounds distorted when the bass hits. It creates a feedback loop that muddies the soundstage and kills the clarity you paid for. Have you ever felt your receiver getting hot to the touch after just one album side? If so, your setup might be crying for help. In the next section, we’ll look at the best ways to rearrange your gear without needing to buy a massive new entertainment center.
Side-by-Side is the Golden Rule
The most immediate and effective change you can make is to stop the vertical stack. Think of your amplifier like an athlete; it needs to exhale heat to keep performing. When you place a turntable directly on top, you’re essentially putting a lid on its lungs. I learned this the hard way when I finally moved my gear into a wider media console. By placing the turntable a few inches to the left of the receiver, the background hiss I’d grown used to simply vanished. This is because the sensitive magnetic cartridge in your turntable acts like a tiny microphone for electrical noise. When it’s sitting right on top of a massive power transformer, it’s going to sing along with the hum of the electricity. If you are struggling with a persistent buzz, you might need to get rid of ground loop hum, but physical separation is always the best first step.
Lift Your Components to Lower the Noise
Sometimes, because of space constraints, you simply can’t avoid some level of stacking or close proximity. This is where isolation feet become your best friend. These aren’t just fancy rubber pucks; they serve as a decoupling layer that prevents physical vibrations from traveling between devices. I once helped a friend troubleshoot why your record player skips every time he walked near his desk. We didn’t buy a new floor; we just added four dense isolation feet under his amp and four under the turntable. The result was a lower noise floor and a much more stable playback experience. By creating even an extra half-inch of vertical space, you significantly increase the passive airflow over the heat sinks, which prevents the kind of internal damage that leads to wondering how to tell if your speakers capacitor is starting to fail due to heat-induced stress.
Tame the Cable Nest Behind the Rack
Airflow isn’t just about what’s on top; it’s about what’s behind. If the back of your audio rack looks like a plate of copper spaghetti, you are trapping heat and inviting interference. Power cables carry high-voltage AC that can easily bleed into your delicate signal cables. My rule of thumb is to keep power and audio cables at a 90-degree angle if they must cross. I remember spending an entire afternoon zip-tying my car audio cables to avoid noise, only to realize my home setup was just as messy. If your cables are bunched up, they act as a heat blanket for the rear vents. Clean cable management ensures that the hot air leaving the receiver has a clear path out of the cabinet. This simple organization can prevent situations where your vintage amp gets hot even when you aren’t playing music because it’s suffocating in its own exhaust.
The Hand Test for Thermal Stress
If you aren’t sure if your gear is breathing well enough, use the ‘hand test.’ After an hour of listening at moderate volume, place your hand on the top of your receiver. It should feel warm, like a cup of coffee, but never hot enough to make you pull your hand away. If it’s uncomfortably hot, you are killing your components. I once felt the top of a modern home theater receiver and it was so hot I could have fried an egg; it turned out the owner had tucked it into a tiny shelf with only a quarter-inch of clearance. We moved it to the top shelf, and the sound immediately felt ‘snappier’ and less compressed. Electronics operate most efficiently within a specific temperature range. When they overheat, the internal resistance increases, and the power delivery becomes less stable. This doesn’t just affect the lifespan of the gear; it actively degrades the dynamic range of your music.
While keeping your gear cool is the first step, the biggest mistake I see enthusiasts make is thinking that a digital ‘auto-calibration’ microphone can solve every acoustic problem. It’s a common industry myth: just run the software and the room disappears. In reality, relying solely on DSP to fix a ‘bright’ or echoey room is a recipe for a flat, lifeless soundstage. In my experience, physical problems require physical solutions. You could spend ten thousand dollars on amplifiers, but if your floor is bare hardwood, you’re essentially listening to a hall of mirrors. This is exactly why you should use a rug to fix a bright sounding room before you even touch a remote. Dr. Floyd Toole, a pioneer in acoustic research at Harman, has demonstrated through decades of blind testing that the ‘steady-state’ room curve many software solutions aim for can actually degrade the natural timbre of high-quality speakers. Have you ever fallen into this trap? Let me know in the comments.
Can Digital Correction Actually Ruin Your Dynamics?
Over-correcting for ‘nulls’—those spots in your room where bass seems to vanish—is the most dangerous trap for your hardware. If your software detects a dip in the low end and tries to ‘boost’ it by 10dB, it is forcing your amplifier to work ten times harder at that specific frequency. This can lead to clipping or, worse, thermal shutdown. Instead of forcing the software to work miracles, look at your placement. I’ve found that moving a speaker just six inches can do more for the clarity than any EQ slider. This is especially true for rear-ported designs; why your speakers bass port should never be pushed against a wall is simple physics—you’re obstructing the air movement and creating bloated, muddy frequencies that no software can cleanly untangle. 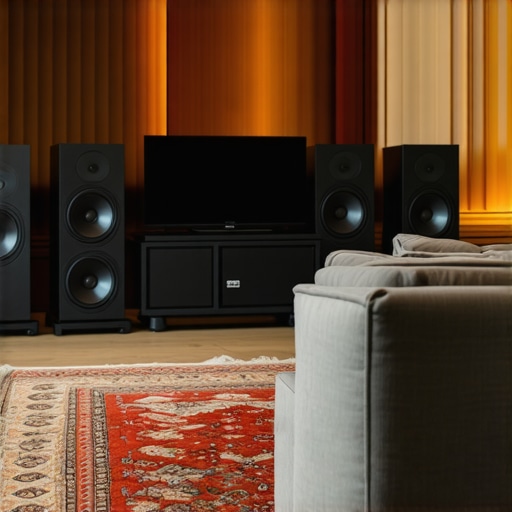
The Phase Mistake That Steals Your Bass
One of the most sophisticated ‘oops’ moments happens when listeners don’t realize their system is fighting itself. If you’ve ever felt like your expensive new towers sound ‘thin’ compared to your old ones, you might have a wiring issue. It is incredibly easy to accidentally swap a positive and negative wire on just one channel. This puts your speakers ‘out of phase,’ meaning one woofer is pushing out while the other is pulling in, effectively canceling out your bass. You can how to tell if your speakers are out of phase in 30 seconds by simply listening to a track with a strong center vocal; if the singer sounds like they are coming from the walls instead of the center, your wiring is the culprit. The same logic applies to your low end; you must how to match your subwoofer phase with your main speakers to ensure that the initial ‘thump’ of a kick drum hits your ears as one cohesive wave. If these waves aren’t aligned, you are throwing away the very impact you paid for.
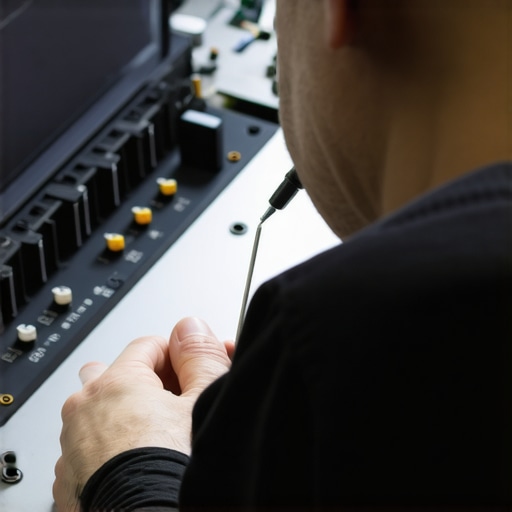
Even if your speaker placement is perfect, time is the ultimate enemy of high-performance electronics. I have seen more systems ruined by a decade of dust and oxidation than by actual mechanical failure. It usually starts with a tiny crackle when you adjust the volume, which most people ignore until the channel cuts out entirely. This is why a can of specialized electrical contact cleaner is the most important tool in my kit. I never let a year go by without learning how to fix a scratchy volume knob on an old amp before the oxidation becomes permanent. It isn’t just about the dials, though; your inputs need love too. Knowing how to clean gold-plated connectors without ruining the finish can actually lower the resistance in your signal path, which is a far more effective upgrade than buying a ‘premium’ power cord.
How do I maintain my high-end audio gear for the long haul?
The secret to longevity is consistency and the right chemicals. According to technical documentation from Caig Laboratories, the creators of DeoxIT, using the wrong solvent can actually strip the protective lubricants from your potentiometers, leading to physical wear on the carbon tracks. I always use a precision needle applicator to ensure I am only hitting the metal contacts and not the surrounding plastics. While you are inside the cabinet, keep an eye out for leaking fluid or bulging tops on your electronics; how to tell if your speaker capacitors are starting to leak is a skill that will save your entire system from a catastrophic short circuit. For your speakers, avoid the temptation to use household cleaners. I’ve seen people destroy delicate parts by accident, and I always warn them: why you should never use compressed air to clean a silk dome tweeter is because the pressure can literally deform the shape of the dome, altering its frequency response forever.
Beyond the internal electronics, your room itself requires a regular ‘tune-up.’ Our ears are remarkably good at adapting to bad sound, which means you might not notice your bass getting flabbier over time. I use my smartphone at least once a quarter to verify my acoustics. It is incredibly easy to learn how to use your phone to measure your rooms frequency response using free RTA apps. This allows you to see if moving a piece of furniture has created a new ‘null’ in your bass or if you need to adjust your subwoofer settings. If you find a leak in a cabinet, don’t panic; you can often use the simple paper towel trick for finding speaker air leaks to pinpoint the exact spot that needs resealing. If your older drivers are starting to look ragged, don’t toss them—I’ve had great success learning how to revive old speakers with new foam surrounds to bring that factory-fresh punch back to life.
The Future of Smart Calibration and Self-Healing Systems
As we look forward, the era of ‘dumb’ speakers is slowly fading. I predict that within the next five years, even mid-range bookshelf speakers will come equipped with internal microphones that perform real-time impedance monitoring. This means the speaker will be able to alert your phone if a voice coil is overheating or if the speaker cone is starting to fail before you even hear the distortion. We are already seeing this in the pro-audio world with self-correcting line arrays. Until that tech hits your living room, the best thing you can do is stay proactive. Don’t wait for a failure to start your maintenance routine. My challenge to you this weekend is to grab your phone, measure your room’s response, and see if your speakers are actually delivering the flat response they promised on the box. You might find that a simple five-minute adjustment to your rug or your subwoofer phase makes a bigger difference than any new piece of gear ever could.
What I Wish I Knew Before I Stifled My First Real Setup
Over the years, I’ve realized that even the most expensive home audio deals won’t save you from a poor physical environment. First, never underestimate the power of ‘nothing.’ Sometimes the best upgrade is simply air. I used to think I needed a $500 power conditioner when all I really needed was to move my amp away from my turntable. Second, trust your hands more than your ears when it comes to longevity; if the top of your receiver feels like a heating pad, you are on a countdown to a repair bill. Finally, don’t let ‘perfection’ stop you from ‘better.’ Even a small adjustment, like learning why your floorstanding speakers need more breathing room from the wall, can be a revelation. If the sound feels thin or ‘wrong’ after a move, always double-check the simple things, like how to tell if your speakers are out of phase in 30 seconds, before you start buying new gear.
The Minimalist Kit That Keeps My System Singing
If you want to keep your gear in top shape without spending a fortune, you only need a few essentials. I always keep a can of specialized cleaner nearby; knowing how to fix a scratchy volume dial with electrical contact cleaner will save you from ever having to toss a ‘broken’ vintage amp. I also swear by a simple, free RTA app on my phone to spot room issues. Lastly, don’t forget the ‘mechanical’ side. People argue about the truth about speaker break-in periods for hours, but a simple set of rubber isolation pucks or a heavy rug will do more for your sound quality on day one than fifty hours of ‘running in’ ever will.
#IMAGE_PLACEHOLDER_E#
Give Your Music the Space It Deserves
At the end of the day, this hobby isn’t about the spec sheets or the price tags—it’s about that moment when the lights go down and the first note hits. By giving your equipment the ventilation it needs and keeping your signal paths clean, you aren’t just protecting an investment; you’re ensuring that the music stays as vivid and emotional as the artist intended. Whether you are hunting for new home audio deals or reviving a thrift-store find, treat your gear with respect, and it will reward you with years of incredible sound. What’s the one ‘free’ tweak that made the biggest difference in your room? Let me know in the comments below!