
Imagine the scene: you’ve finally found that pristine original pressing of your favorite album. You’ve cleaned it, aligned the cartridge, and settled into your favorite chair. The music starts, and it’s pure bliss—until you realize you forgot your drink. You take one step, and bam, the needle jumps three grooves. It’s enough to make you want to go back to Spotify. I’ve been there, and I spent months tip-toeing around my living room like a burglar before I finally figured out that my floor was basically a giant trampoline for my record player. My biggest mistake early on was thinking I could just put more weight on the tonearm to ‘push’ through the skips, which nearly ruined my stylus and my records. Don’t do that. Instead, we’re going to look at why your house is fighting your music and how to win that battle once and for all.
Why Your Floor is Ruining Your Listening Experience
The hard truth is that turntables are essentially high-precision vibration sensors. When you walk, you aren’t just moving your body; you’re sending a low-frequency shockwave through the floorboards. If your turntable is sitting on a lightweight shelf or a wobbly cabinet, it’s going to catch those waves. I made the mistake of thinking a heavy rug would fix everything. It didn’t. In fact, while using a rug to fix a bright sounding room is great for the overall acoustics, it won’t stop a bouncy subfloor from reaching your sensitive stylus. Vibration management is the hidden key to high-fidelity sound. Sometimes, we focus so much on the gear that we forget the surface it sits on. For example, the reason your speaker stands need to be filled with sand is exactly the same reason your turntable needs a solid foundation: mass absorbs energy that would otherwise turn into unwanted movement.
Does this mean I need a thousand-dollar equipment rack?
You might be worried that the only fix is a professional-grade isolation platform that costs more than your car. It’s not. Many enthusiasts think their gear is cheap or broken, but the issue is usually the mechanical coupling between the player and the room. According to research by the Audio Engineering Society (AES), structural vibrations in residential buildings often occur in the 5Hz to 20Hz range—the exact same range where most tonearm and cartridge combinations resonate. This ‘seismic’ interaction is why your music dies when you walk. You don’t need a lab-grade clean room; you just need to learn how to stop your turntable from picking up vibrations from your floor by breaking that mechanical connection. I’ve seen people struggle with this for years, even wondering why your vinyl records sound distorted at the end of the side, only to realize that external vibrations were the culprit all along. Have you ever felt like you had to hold your breath just to finish a side of a record? Tell me about your most frustrating skip in the comments below.
Break the Physical Link Between Your Floor and Your Needle
To stop the skipping, you have to master the art of decoupling. Think of your turntable as a high-sensitivity stethoscope; if you touch the chest piece, you hear a roar. Your floorboards are that chest piece. To fix this, we need to introduce a mechanical break in the circuit. I learned this the hard way after moving into a 1920s apartment with floors that felt like a trampoline. Every time I reached for a coffee, the needle would skate across my favorite jazz record. I tried various pro feet, but the solution was actually much simpler: adding massive weight and isolating it. Just as floorstanding speakers need spikes when used on carpet to remain stable, your turntable needs a dedicated barrier that keeps the floor’s energy from climbing up the legs of your stand.
Use Mass to Soak Up Unwanted Energy
High-frequency vibrations are relatively easy to stop, but those low-frequency thumps from your footsteps require pure mass. A lightweight shelf is basically an amplifier for floor noise. You want to place your turntable on something heavy—think a thick maple butcher block or even a granite slab. The goal is to make the base so heavy that the energy from your floorboards simply doesn’t have the strength to move it. 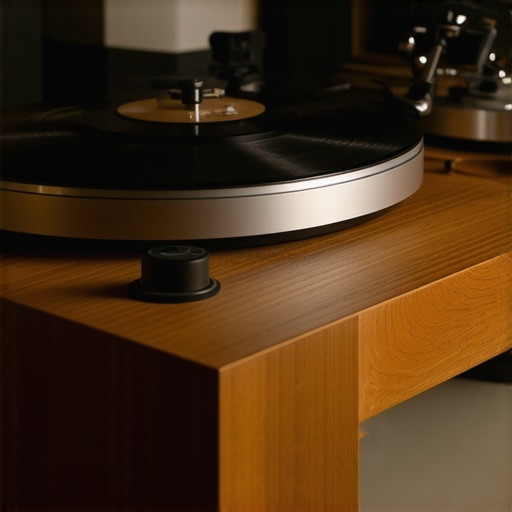 If you’ve ever looked into how to fix a subwoofer that is vibrating your furniture, you know that physical separation is the only real cure. Place four isolation pucks or even halved squash balls under your heavy slab, and then place the turntable on top of that slab. This creates a dampening sandwich that eats the energy before it hits the stylus. I once tried to shortcut this by using thin foam, but it compressed too much; you need materials that can absorb movement without bottoming out.
The Wall Shelf Solution for Bouncy Floorboards
If your floors are exceptionally springy, even a heavy platform might struggle if it’s still connected to the joists. This is where you go off-grid. By mounting a dedicated turntable shelf directly to a load-bearing wall using studs, you bypass the floor entirely. The wall is structurally much stiffer than the wood under your feet. I remember the first time I installed a wall shelf; it was a messy Saturday morning involving a drill and a level, but the result was incredible. I could literally jump next to the setup and the music played on perfectly. This is one of the tricks to making cheap bookshelf speakers sound expensive—getting them off vibrating surfaces—and it works ten times better for a sensitive turntable.
Tiny Details that Kill the Skip
Once you’ve isolated the main unit, don’t forget the wires. If your RCA cables are pulled tight and touching a vibrating cabinet, they can act as a bridge for noise. Keep them loose and floating. Also, ensure your turntable is perfectly level. An unlevel platter causes the tonearm to naturally want to fall toward one side, making it much more likely to jump when a vibration hits. While you’re back there checking connections, it’s a good time to learn how to get rid of ground loop hum in your audio setup, as moving gear around often uncovers wiring issues you didn’t notice before. Vibration management isn’t about one big fix; it’s about removing every possible path the floor has to reach that needle.While we’ve focused on the physical floor, there is a psychological floor we often hit in this hobby: the belief that spending more money automatically creates better sound. This is the biggest lie in high-fidelity audio. In my experience, throwing a $2,000 amplifier at a pair of poorly positioned speakers is like putting a Ferrari engine in a lawnmower. You might have the power, but you’re not going anywhere fast. Most beginners—and quite a few veterans—fall into the trap of ‘component collecting’ instead of ‘system matching.’ For instance, why your high-end DAC sounds exactly like your laptop’s headphone jack is usually because the resolution of the speakers or the quality of the recording is the actual ceiling. Dr. Floyd Toole, a renowned expert in acoustics and former President of the Audio Engineering Society (AES), has shown in numerous studies that the room and the speaker’s off-axis response contribute far more to the perceived quality than the incremental ‘cleanliness’ of a high-end DAC’s chip.
Are You Starving Your Speakers with the Wrong Ohm Rating?
One of the most common technical mistakes I see involves power delivery. Many enthusiasts pair vintage speakers with modern budget receivers and wonder why the sound feels thin or the amp keeps cutting out. It’s all about electrical synergy. Learning the secret to choosing the right ohm rating for your amp is the difference between a system that breathes and one that’s constantly on the edge of thermal failure. If your amp is rated for 8 ohms and you’re pushing 4-ohm speakers hard, you’re essentially asking it to work twice as hard as it was designed to. This mismatch creates distortion that people often misinterpret as ‘warmth’ or ‘character’ until the protection circuit finally kicks in. Have you ever had an amp just quit on you mid-song? Let me know in the comments.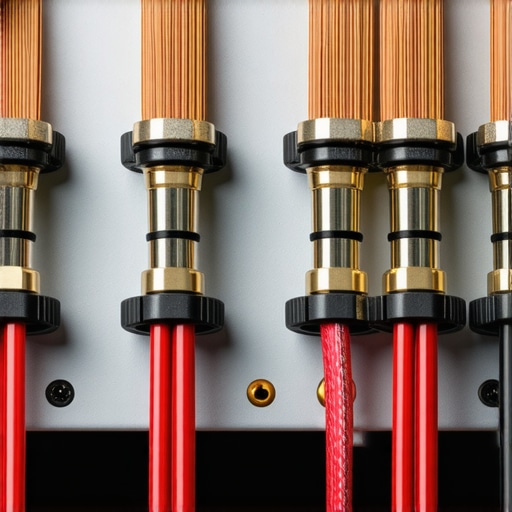
Why Your Cables Might Be Fighting Your Bass
Even if you have the perfect isolation and the right amp, a single reversed wire can ruin the entire soundstage. I spent an entire weekend once wondering why my bass had disappeared after I ‘upgraded’ my cables. I assumed I needed to let the equipment settle in, falling for the marketing hype surrounding the truth about speaker break-in periods. In reality, I had just wired one speaker backwards. It’s an embarrassing mistake, but it happens to the best of us. You should know how to tell if your speakers are out of phase in 30 seconds before you spend a dime on new equipment. When your speakers are out of phase, they literally fight each other, cancelling out frequencies—especially the low end. If you’ve added a sub to fix the problem, you might find yourself needing to learn how to match your subwoofer phase with your main speakers to ensure the whole system is moving air in the same direction. Stop chasing the next ‘deal’ and start auditing the connections you already have. Have you ever fallen into this trap of buying gear to fix a problem that was just a simple wiring error?Once you’ve sorted out the wiring and the phase issues, it’s easy to think your work is done. But here’s the reality: high-end audio gear isn’t a toaster; you can’t just set it and forget it for a decade. I’ve seen incredible systems degrade into noisy, crackling messes because the owner ignored basic maintenance. We often focus on the ‘deal’ but forget the upkeep. For instance, if you’ve noticed why your vintage receivers lights are flickering with the music, you’re seeing the first signs of power supply fatigue. Ignoring these small warnings is how a $500 amplifier turns into a $500 paperweight. I personally keep a ‘kit’ in my listening room: a bottle of DeoxIT D5, a high-quality microfiber cloth, and a digital multimeter. These aren’t just for show; they are the frontline defense against the elements that want to kill your sound.
Stop Babying Your Gear and Start Maintaining It
I learned the importance of preventative care when my favorite integrated amp started making a ‘frying bacon’ sound every time I adjusted the volume. I almost sent it to a repair shop for $200, but then I realized I just needed to learn how to fix a scratchy volume knob on an old amp with some contact cleaner. It took five minutes. Beyond the knobs, you have to watch the capacitors. As detailed in the Nichicon Technical Guide for Aluminum Electrolytic Capacitors, the ‘Arrhenius Law’ applies to your receiver: for every 10 degrees Celsius rise in operating temperature, the life of your capacitors is cut exactly in half. This is why I always preach about airflow. If you’ve stacked your components like pancakes, you’re essentially slow-cooking your electronics. If you’re worried about your older gear, learning how to tell if your speakers capacitor is starting to fail can save your tweeters from a nasty dc-spike later down the line.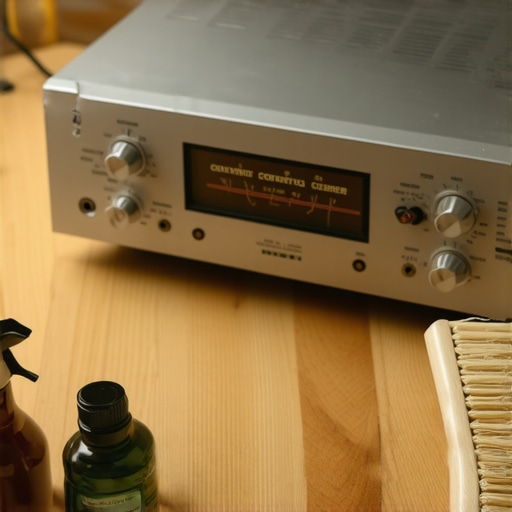
How do I keep my vintage and modern gear from dying early?
Maintenance looks different for everyone, but the basics remain the same. For modern listeners, it’s often about the physical contact points. If you use over-ear cans, knowing why your headphone pads are flaking and how to prevent it is mostly about keeping skin oils away from the synthetic leather. For speakers, it’s about the environment. Dust is a silent killer for potentiometers and cooling fins alike. Every six months, I pull my gear out, hit it with some compressed air, and re-seat every connection. It sounds tedious, but it’s the only way to ensure you don’t wake up one morning to a dead channel.
Why Software is the Next Big Audio Frontier
Looking ahead, the biggest shift in this hobby isn’t going to be better magnets or thicker cables; it’s going to be digital correction. We are moving toward a world where your room’s flaws can be edited out by a processor. I’ve already started using my smartphone to audit my setups. You don’t need a $500 calibrated mic to start; learning how to use your phone to measure your rooms frequency response gives you a baseline of where your peaks and dips are. In the next five years, expect AI-driven DSP to become standard in even budget amplifiers, automatically adjusting the signal to compensate for that bouncy floor or the lack of a rug. The hardware will get smaller and smarter, but the physics of a vibrating needle or a moving cone will always require your manual attention. My advice? Grab a bottle of electrical contact cleaner this weekend and give your dials a thorough cleaning. Your ears (and your wallet) will thank you.
Dealing with a skipping needle is more than just a nuisance; it is a sign that your environment is interfering with your music. Over the years, I have learned that audio fidelity is as much about managing the physical space as it is about the equipment itself. Let’s look at the final pieces of the puzzle to ensure your listening sessions remain uninterrupted and your gear stays in peak condition.
Hard Lessons from My Decades of Chasing Sound
I spent the first five years of this hobby thinking that a more expensive cartridge would solve my tracking issues. It didn’t. Here are the realizations that finally changed everything for me:
- The Room is Your Most Important Component: You can buy the world’s best gear, but if your floors are bouncy, your music will suffer. I discovered that the trick to making cheap bookshelf speakers sound expensive often applies to turntables too—it is all about how they interact with the surfaces around them.
- Price Tag Doesn’t Equal Performance: Some of my best sounding setups were built with DIY isolation platforms made of butcher blocks and tennis balls. Don’t let the high-end marketing convince you that physics requires a second mortgage.
- Small Tweaks Outperform Big Purchases: Learning to level your platter and clean your contacts provides a more noticeable improvement than swapping out a perfectly good cable for a ‘premium’ one.
The Basic Tools That Saved My Setup
I don’t go anywhere without a few essentials that keep my system running smoothly. These are not flashy, but they are the workhorses of any serious audio enthusiast’s toolkit. First, I always keep a can of DeoxIT handy; knowing how to fix a scratchy volume knob on an old amp has saved me hundreds in repair fees. Second, I use my smartphone as a diagnostic tool. You can easily use your phone to measure your rooms frequency response to find where those pesky bass nodes are hiding. #IMAGE_PLACEHOLDER_A# Finally, a simple digital tracking force gauge is worth its weight in gold to ensure your needle isn’t eating your records. I trust these tools because they provide objective data in a hobby that is often filled with subjective opinions.
Now Stop Tinkering and Just Press Play
It is easy to get caught in a loop of constant adjustment, especially when you are trying to figure out how to stop your turntable from picking up vibrations from your floor. But remember: the gear is just the delivery vehicle for the art. Once you have isolated the vibrations, leveled the deck, and cleaned the pots, take a breath and sit back. The goal isn’t to have the most ‘correct’ system; it’s to have the one that makes you want to listen to one more record before bed. High-fidelity audio is a journey, not a destination, so enjoy the ride and the music that comes with it. Have you ever spent hours troubleshooting a skip only to find it was something incredibly simple? Let me know in the comments below.