
I remember the first time I set up a pair of massive floorstanders. I had saved for six months, skipped the fancy lattes, and finally had these beautiful mahogany towers in my possession. I did what most people do: I tucked them neatly into the corners of my living room to keep them out of the way of the vacuum and the dog. I expected a concert hall. Instead, I got a muddy, vibrating mess that made my floorboards rattle and my vocals sound like they were trapped in a rain barrel. It was heartbreaking. I actually thought I had been scammed. Today, we are going to fix that boomy sound. I am going to show you why that corner-loading effect is stealing your clarity and how a few inches of movement can make your mid-range sing. Have you ever felt like your speakers were shouting through a thick pillow the moment you pushed them back against the wall? Tell me about your setup in the comments below.
Stop Cramming Your Towers into the Corner
I made the classic mistake of valuing floor space over soundstage. I did not realize that why your floorstanding speakers need more breathing room from the wall is the most important rule of speaker placement. When you place a speaker near a wall, the low-frequency energy reflects off that surface almost instantly. When you shove it in a corner, it hits two walls and the floor at the same time. This creates a massive spike in bass energy that the speaker was never designed to handle alone. It is why why your subwoofer sounds better in the corner of the room is a thing—subs want that reinforcement, but your main speakers need to be precise.
Is my expensive gear actually a total dud?
It is the most common fear in the hifi world. You spend the money, you wire everything up, but the sound is flabby and overwhelming. You might even start wondering how to tell if your speaker is actually blown or just rattling because the low end is so distorted. Most of the time, it is not the speaker fault at all. It is the room. I spent years chasing the perfect amp, even looking into the 5 fix for humming speakers and ground loops, before I realized that my placement was the real culprit.
The Science Behind the Muffled Mess
The technical term for what you are hearing is boundary gain. When bass waves—which are long and powerful—hit a corner, they get folded back on themselves. According to acoustic studies by the Audio Engineering Society, placing a loudspeaker in a corner can boost the bass response by 12 decibels or more compared to placing it in open space. That sounds like a free upgrade, but it is actually a recipe for disaster. This extra energy masks the delicate frequencies that make music sound real. It is the same reason why your bluetooth speaker sounds muffled when placed against a wall, just on a much larger scale. If you are on carpet, you might also find that why floorstanding speakers need spikes when used on carpet helps decouple that energy from the floor, but it will not fix the corner issue entirely. We need to get these towers out into the room and let them breathe.
Start Pulling Your Towers Into the Room
Think of your speakers like a professional athlete; they need space to move and breathe to perform at their peak. If you have them tucked tightly against the wall, you are effectively asking them to run a marathon in a broom closet. Start by pulling your speakers out at least one foot from the back wall and two feet from the side walls. This simple physical gap allows the rear-firing energy to dissipate rather than instantly bouncing back and smearing the sound of the tweeter. If you find that the volume drops significantly, do not panic. You aren’t losing real bass; you are losing the fake, bloated resonance that was masking your favorite tracks. This is the moment where many people think their gear is weak, but really, you are finally hearing the actual driver for the first time.
I vividly remember wrestling with a pair of towers in my second apartment. The room was tiny, and the bass was so thick I could practically taste the vibration. I spent hours reading about the secret to choosing the right ohm rating for your amp, convinced my amplifier was the problem. Eventually, out of frustration, I dragged the speakers into the middle of the floor. Suddenly, the singer’s voice wasn’t just somewhere in the room—she was standing right in front of me. It was messy and I had cables draped everywhere, but the clarity was worth the temporary chaos.
Grab a Tape Measure and Find Your Symmetry
Precision matters more than the actual distance. If your left speaker is 14 inches from the wall and your right is 16 inches, your soundstage will tilt, making the music feel lopsided. The human brain is incredibly sensitive to these tiny timing differences. Use a tape measure to ensure both towers are perfectly equidistant from your main listening chair. While you are at it, this is the perfect time to verify your wiring. If one side still feels hollow or the bass disappears when you sit in the middle, you need to know how to tell if your speakers are out of phase in 30 seconds. If your wires are crossed, no amount of room placement will save the sound.
How to Test if You Have Gone Too Far
You can actually pull speakers too far out, causing the sound to become thin and weightless. The goal is to find the perfect balance point. Play a track with a steady, driving bassline and a clear central vocal. Move the speakers back toward the wall in two-inch increments until the bass feels impactful but does not start to drone or vibrate the floor excessively. If your room has hardwood floors and the sound still feels sharp or piercing even with good placement, you may need to soften the reflections. You can often why you should use a rug to fix a bright sounding room to soak up those first reflections that the floor is bouncing back at your ears.
If you are running a 2.1 setup, this placement process is even more critical. Your towers should handle the imaging while your sub handles the heavy lifting. Once you find the spot where the towers seem to disappear into the music, you must then learn how to match your subwoofer phase with your main speakers. When the timing of the woofer and the towers aligns, the bass does not sound like it is coming from a box in the corner; it sounds like it is a natural part of the performance itself.
Let’s dig deeper into the electronics side, because once your placement is dialed in, the next common trap is the ‘Power Myth.’ Most enthusiasts are led to believe that a 200-watt amplifier is inherently superior to a 50-watt unit. In reality, unless you are trying to provide sound for a literal warehouse, that extra headroom often goes completely unused. According to the ‘First Watt’ philosophy championed by audio engineer Nelson Pass, the quality of the very first watt of power is the most critical for fidelity. If an amplifier doesn’t sound musical at one watt, 500 watts of that same signal won’t fix the problem. In fact, many high-wattage consumer receivers use noisy switching power supplies, which is often the reason your passive speakers sound quiet with a digital amp or lack the warmth of a high-current Class A design.
Stop Chasing the Highest Wattage Number
It is a contrarian view in the world of big-box retail, but more power rarely equals more detail. I have seen countless audiophiles trade in perfectly good gear for ‘more juice,’ only to realize their new amp has a higher floor of background hiss. You also have to consider the controversial ‘break-in’ period. While mechanical components like the surround do loosen up slightly over time, the ‘break-in’ is often more about your brain acclimating to a new sound signature. I have seen people keep speakers they genuinely disliked for months because they were waiting for a magic transformation. Before you wait 100 hours for a miracle, read up on the truth about speaker break-in periods to see if you are just falling for a placebo.
The Dangerous Trap of Second-Hand Flagships
Buying used is the best way to score high-end audio at estate sales, but it comes with a hidden technical tax. I once bought a flagship 7.1 receiver for pennies on the dollar, only to realize the setup menu was inaccessible because the original remote was missing. This is a common pitfall; why you should never buy a used receiver without the remote is a rule written in the frustration of many. Furthermore, vintage gear carries age-related risks that a simple cleaning won’t fix. If your ‘new’ vintage find sounds grainy or produces a faint hum even when no music is playing, you need to learn how to tell if your speaker capacitors are starting to leak. Old electrolytic caps are like tiny batteries that eventually dry out or burst, potentially taking out your expensive drivers with them.
Why does my high-end system sound thin at low volumes?
This isn’t usually a gear failure; it is a biological one. The human ear follows what is known as the Fletcher-Munson curves, meaning our hearing is significantly less sensitive to bass and treble at lower decibel levels. This is why many vintage receivers have a ‘Loudness’ button to boost those frequencies at low levels. If you find yourself constantly cranking the dial just to get a full sound, you might be pushing your system into a range why your receivers protection mode keeps triggering at high volume. Have you ever fallen into this trap of buying more power to solve a simple clarity issue? Let me know in the comments.
Stop replacing your amp when the volume crackles
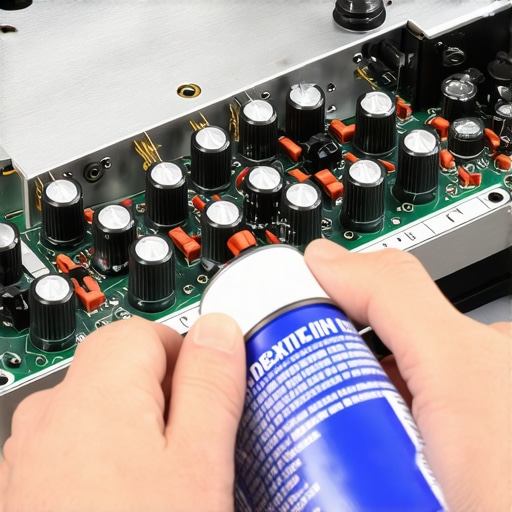
I cannot tell you how many times I have seen someone sell off a legendary Marantz or Sansui receiver because of a simple scratchy knob. They assume the internals are dying, but usually, it is just simple oxidation. I personally swear by DeoxIT D5; it is the industry standard for a reason. If you have a dial that pops or cuts out, you need to learn how to fix a scratchy volume knob on an old amp before you spend a dime on a replacement. While you have the hood open, take a look at the contact points. Learning how to clean gold-plated connectors without ruining the finish is a ten-minute job that can restore high-frequency sparkle you didn’t even know you were missing.
How do I keep my vintage gear alive for another decade?
Heat is the silent killer of all electronics, especially class A and A/B amplifiers. If your stack is crammed into a wooden cabinet with no airflow, you are cooking your components. I always suggest leaving at least three inches of clearance above the heatsinks. You should also be concerned if you notice why your vintage amp gets hot even when you aren’t playing music; this is often a sign that the bias current needs adjustment. If one channel is consistently quieter or warmer than the other, you may need to how to fix channel imbalance on a vintage stereo amplifier to prevent long-term damage to your output transistors.
Tools that actually save you money in the long run
You don’t need a degree in electrical engineering, but a basic $20 digital multimeter is the most important tool in my kit. Instead of guessing why a speaker isn’t working, you can how to use a multimeter to find a short in your speaker wires in seconds. It saves you from the nightmare of blowing a fuse or, worse, frying an output stage because of a stray copper strand. As Dr. Floyd Toole points out in his seminal work ‘Sound Reproduction: The Acoustics and Psychoacoustics of Loudspeakers and Rooms,’ the listener’s preference is deeply tied to how a speaker manages reflections and its off-axis response. This means that once your gear is healthy, the focus must shift to the environment. If you live in a modern apartment, you might feel stuck, but there are ways to how to hide audio cables in a room with concrete walls without drilling, allowing you to move speakers to their optimal acoustic positions without the ‘cable spaghetti’ look ruining your aesthetic.
The future of your listening room
I predict that the next five years will see a massive shift toward DSP (Digital Signal Processing) becoming standard even in budget gear. We are moving away from ‘pure’ analog paths toward systems that can digitally map your room and correct for those nasty corner reflections I mentioned earlier. However, no software can fix a broken driver or a leaking capacitor. Maintenance remains the foundation of great sound. My challenge for you: Spend 20 minutes this weekend pulling your speakers six inches further from the wall and re-leveling them with a tape measure. You might just find the ‘upgrade’ you were about to pay $500 for was already sitting in your room, just waiting for a little bit of breathing space.
The Hard-Earned Truth About High-End Audio Systems
After decades of swapping gear, I have realized that the most expensive cable or the beefiest amp cannot fix a fundamental placement error. One of my biggest lightbulb moments was realizing that symmetry isn’t just for aesthetics; it is the foundation of a believable soundstage. If you have a window on one side and a bookshelf on the other, your imaging will never be perfect, regardless of your gear. Another lesson? Trust your ears over the marketing fluff. If a speaker sounds better to you when it is positioned slightly off-axis, leave it there. Manufacturers design for an ‘average’ room, but your room is a unique acoustic fingerprint.
I also learned that patience is a tool as valuable as any multimeter. We often rush to buy a new component because we are bored or frustrated, but most issues can be solved with a tape measure and a little bit of sweat. Before you go hunting for new deals, remember that the relationship between your speakers and your walls is the most important ‘connection’ in your entire signal chain.
Gear and Knowledge to Keep in Your Back Pocket
If you want to move from a casual listener to someone who truly understands their system, you need a few go-to resources. First, never head out to browse vintage gear without knowing the trick to buying high-end audio at estate sales. It will save you from overpaying for junk. Second, keep a can of contact cleaner nearby. Knowing how to fix a scratchy volume knob on an old amp is a skill that has saved me hundreds of dollars in repair fees over the years.
Finally, I highly recommend investing in a basic multimeter. Being able to how to use a multimeter to find a short in your speaker wires can be the difference between a relaxing Friday night of music and a panicked trip to the electronics store because you think your receiver is fried. These tools empower you to maintain your own equipment rather than being at the mercy of the upgrade cycle.
Stop Tweaking and Start Listening
It is easy to get lost in the technical weeds of decibels, ohms, and boundary gain, but don’t let the pursuit of perfection ruin your love for the music itself. Your floorstanding speakers are there to serve the art, not the other way around. Once you have pulled them away from the corners and dialed in that sweet spot, put the tape measure away. Sit back, dim the lights, and let the artist tell their story. The best system in the world is the one that makes you forget you are listening to a system at all. Have you ever struggled with getting your speakers to stop ‘booming’ in a small room? Let me know your solution in the comments below.