
I remember the Saturday I finally unboxed my first high-end 12-inch subwoofer. I’d spent weeks reading reviews and a good chunk of my savings on it. I carefully placed it right next to my TV stand because, honestly, it looked symmetrical and neat there. I fired up the docking scene from Interstellar, expecting my floorboards to groan with cinematic authority. Instead? Nothing. It sounded like a wet cardboard box. I was devastated. I thought I’d been scammed or that I had a defective unit. I spent hours tweaking the gain and the crossover, but the ‘oomph’ just wasn’t there. Out of pure frustration, I dragged that heavy beast into the back corner of the room, far away from where I thought it ‘should’ be. The change was instant. The bass didn’t just get louder; it got deeper, richer, and finally felt like the theater experience I’d paid for.
Your Room is Stealing Your Bass
It’s a hard pill to swallow, but your room’s layout matters more than the price tag on your gear. When you place a subwoofer in the middle of a wall or out in the open, the sound waves travel in all directions. Some of those waves hit walls and bounce back, often cancelling each other out before they even reach your ears. This is exactly why your portable speaker sounds better when placed in a corner too; you are essentially using the walls as a megaphone. When I first started out, I made the classic mistake of choosing aesthetics over acoustics, assuming a powerful amp could just ‘power through’ a bad room. It can’t. By tucking the sub into a corner, you are engaging in something called ‘corner loading.’ This technique uses the intersection of three boundaries—two walls and the floor—to reinforce the low-frequency energy. [image1] According to legendary acoustic researcher Floyd Toole in his studies on sound reproduction, placing a subwoofer in a corner excites the maximum number of room modes, which actually helps provide the highest possible output for the least amount of effort from your amplifier. We are going to solve that thin, weak sound today by embracing the corner, but we have to do it smartly so we don’t end up with a rattling mess. Have you ever felt like your expensive subwoofer was actually underperforming compared to a cheaper set?
Won’t this just make my bass sound ‘one-note’ and muddy?
This is the biggest fear most of my neighbors have when I tell them to move their gear. They worry that ‘loud’ means ‘bad.’ It is true that if you aren’t careful, you might end up needing to fix a subwoofer that is vibrating your furniture rather than enjoying the music. However, the goal isn’t just to make it boomy; it’s to gain efficiency. If you find the bass is too ‘thick,’ you can always use your phone to measure your rooms frequency response and see exactly where the peaks are. Corner placement gives you a massive head start on volume, allowing you to turn the actual gain knob down on the sub itself, which often results in cleaner, less distorted sound overall. It’s about working with your room instead of fighting it.
Perform the Subwoofer Crawl for Perfect Results
Placing a subwoofer in a corner isn’t just about shoving it as far back as it will go. To find the exact square inch where physics works in your favor, you need to perform the ‘subwoofer crawl.’ This sounds ridiculous, but it works every time. You take your subwoofer and place it exactly where you normally sit—right on the couch. Turn on a bass-heavy track, then get down on your hands and knees and crawl around the perimeter of the room. Listen for where the bass sounds the tightest and most impactful. When you find that spot, that is where the subwoofer actually belongs. I once tried to skip this step in a cramped apartment, only to realize the ‘sweet spot’ was actually three feet to the left of where I thought it looked good. Just like how to find the sweet spot for your speakers in a rectangular room, this method uses your own ears to map out the room’s acoustic nodes. 
Give Your Subwoofer Port Room to Breathe
Once you’ve found the spot, don’t pin the unit directly against the baseboard. If your sub is ‘rear-ported,’ it needs a few inches of clearance to move air. Think of the port like an exhaust pipe on a car; if you plug it or restrict it, the engine can’t breathe. This is exactly why your speakers bass port should never be pushed against a wall. If you have a sealed unit, you have more flexibility, but you can still learn how to get better bass from a sealed subwoofer box by experimenting with the angle of the driver relative to the corner walls. I found that angling the driver at a 45-degree angle into the room often reduces the ‘huffing’ sound that occurs when air gets trapped in a tight corner.
Flip the Phase Switch to Lock the Soundstage
The most common mistake people make after finding the perfect corner is ignoring the phase switch. Bass waves are long and slow. If your main speakers are pushing out while your subwoofer is pulling in, they cancel each other out, leaving you with a hollow, weak sound. I remember helping a friend who had a top-of-the-line setup that sounded like a tinny radio. We spent an hour moving furniture before I realized his sub was 180 degrees out of phase with his towers. You should how to tell if your speakers are out of phase in 30-seconds-2 by listening for the ‘fullness’ of the mid-bass transition. If the kick drum feels like it’s hitting you from two different directions, flip that switch.
Silence the Mechanical Chitter
Corner loading increases pressure, which means anything loose in that corner is going to start talking back to you. Picture frames, vent covers, and even the speaker itself can create unwanted noise. If you hear a high-pitched vibration, it might not be the house—it could be the gear. Taking a moment to learn the easiest way to fix a rattling speaker grill for good can save you from a lot of phantom-noise frustration. When I moved my 15-inch sub into the corner of my office, I spent twenty minutes chasing a buzz only to find it was a loose screw on a nearby lamp. High-output bass is a diagnostic tool for your room’s construction; it will find every loose fitting you forgot to tighten.
Stop Chasing Watts and Start Looking at Headroom
Most people believe that a 200-watt amplifier is inherently twice as good as a 100-watt one. In reality, doubling your power only nets you a 3dB increase in volume—an amount barely perceptible to the human ear. What actually matters is ‘headroom,’ or the reserve power an amplifier keeps in the tank to handle sudden musical transients like a snare hit or a cinematic explosion. If your amp runs out of steam, it doesn’t just stop; it ‘clips.’ This distortion creates a square wave that sends an enormous amount of high-frequency energy directly to your drivers. I once watched a friend cook a pair of expensive ribbon speakers because he thought his 50-watt vintage receiver was ‘plenty’ for a high-volume party. You should definitely learn how to spot a blown tweeter before it ruins your crossover because, by the time you smell the voice coil burning, it is often too late. This lack of headroom is also the primary reason why your receivers protection mode keeps triggering at high volume. 
The Sneaky Trap of Impedance Dips
Here is the ‘oops’ factor that kills many high-end dreams: ignoring the impedance curve. A speaker rated at 8 ohms might actually dip down to 2 or 3 ohms at certain low frequencies. If your amplifier isn’t designed to double its current into those lower loads, the sound will become thin and lifeless exactly when you want it to be powerful. This is the same reason why your vintage amp gets hot even when you arent playing music; some older designs struggle with the complex loads of modern, multi-driver towers. Before you blame your speakers for being ‘bright,’ you need to check how to tell if your amplifier has enough headroom for your speakers. It is about the quality of the current, not just the quantity of the watts. If you are running long cables, you are adding even more resistance to this equation, which is why how to choose the right gauge of wire for long outdoor speaker runs is such a critical step for maintaining signal integrity.
Why Does My High-End DAC Sound Exactly Like My Laptop?
This is the ultimate ‘unpopular opinion’ in audiophile circles. We are often told that a $1,000 digital-to-analog converter is a mandatory upgrade. However, a significant study by the Audio Engineering Society (AES) titled ‘Audibility of a CD-Standard DAC vs. High-Resolution’ suggested that under rigorous double-blind conditions, many listeners cannot distinguish between well-engineered budget chips and boutique hardware. The hard truth is that why your high end dac sounds exactly like your laptops headphone jack usually comes down to the rest of the signal chain. If your speakers are placed poorly or your room is untreated, the minute improvements in ‘jitter’ or ‘clocking’ from a high-end DAC will be completely swallowed by room reflections. Instead of buying a new DAC, your money is almost always better spent on acoustic panels or a better amplifier. Have you ever fallen into the trap of buying an expensive ‘solution’ only to find it didn’t change the sound at all? Let me know in the comments.I’ve seen too many people spend thousands on gear only to let it rot because they didn’t know how to wield a can of contact cleaner. If you’ve ever reached for the volume and heard a sound like someone walking on dry leaves, you aren’t alone. I personally keep a can of DeoxIT D5 in my drawer at all times because it’s the only way to fix a scratchy volume dial with electrical contact cleaner without leaving a greasy residue that attracts more dust. This isn’t just about the noise; it’s about preserving the signal path for the long term.
Stop the Scratchy Noise Before It Ruins Your Evening
Beyond the dials, your equipment’s longevity depends on how you treat the internal components. As we scale up our systems, the complexity of the components increases. If you’re into the vintage scene, you’ve likely noticed that why your vintage amp gets hot even when you arent playing music is often due to the bias settings in older Class A or AB designs. According to Nelson Pass, a titan in the world of amplifier design and the founder of Pass Labs, heat is the primary enemy of semiconductor life. If you aren’t managing that thermal load with proper ventilation, you are essentially baking your internal components and shortening their lifespan by years. 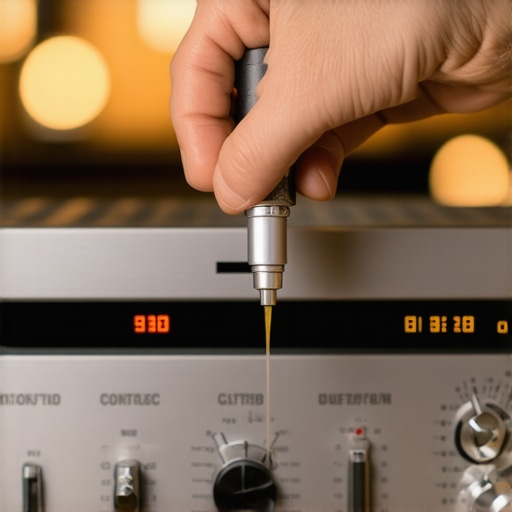 It’s also vital to learn how to tell if your speakers capacitor is starting to fail, as a leaky cap can drastically change the crossover frequency. This leads to a dull or muddy sound that no amount of software EQ can truly fix. I’ve spent countless Sundays with a multimeter in one hand and a service manual in the other, and I can tell you that the most common culprit for ‘lost detail’ is almost always a component that has drifted more than 20% from its original factory spec.
How do I maintain my audio gear for the long haul?
Maintenance isn’t just about the internal circuits; it’s about the physical materials that protect them. For those of us with pets, I’ve found the trick to removing dog hair from speaker grilles safely involves a high-quality lint roller rather than a vacuum, which can actually pull the fabric loose or damage the driver underneath. If your gear has been sitting in a sunny room, you should look into how to restore a sun-faded speaker grille to look new again to keep your living room looking professional. Even your personal gear needs a routine; knowing why your headphone pads are flaking and how to prevent it usually comes down to simple skin oil management—wiping them down with a damp microfiber cloth after a long session can double their lifespan.
A Glimpse into the Future of Smart Maintenance
Looking ahead, I predict we are moving toward a world where ‘maintenance’ is handled by AI-integrated firmware that monitors rail voltage and capacitor health in real-time. We are already seeing early versions of this in high-end pro-audio touring racks, and it won’t be long before your home receiver pings your phone to tell you a specific capacitor is drifting out of spec before it ever affects the sound. It’s an exciting time to be an enthusiast, but for now, the best tool you have is your own ears and a bit of elbow grease. Before you go out and buy a new set of towers, I want you to perform one deep-clean of your current setup. Pull the cables, spray the contacts, and check your crossovers. You might just find that ‘missing’ detail was just a layer of oxidation away. If you’re worried you’ve already pushed things too far, make sure you know how to spot a blown tweeter before it ruins your crossover.
I’ve learned the hard way that a fancy price tag can’t fix a bad room. Sometimes why your surround sound system sounds like its in mono is simply because your front stage isn’t wide enough or your reflections are working against you. It is a frustrating discovery, but one that empowers you to take control of your environment. One of the most significant lightbulb moments for me was realizing that why your bookshelf speakers need more power than you think usually comes down to the sensitivity of the driver; volume doesn’t always equal quality. If you have floorstanders or heavy monitors, the reason your speaker stands need to be filled with sand is to stop micro-vibrations from clouding the mid-range and stealing your detail. Lastly, if your gear is getting older, why your vintage speakers are losing their punch over time is almost always a sign of the foam or internal capacitors drifting from their original specs. #IMAGE_PLACEHOLDER_E#
The Must-Have Toolkit for Every Dedicated Audiophile
I never start a tuning session without my trusty “Sound Toolbag.” First, you need a way to measure your progress—Room EQ Wizard (REW) is the gold standard free software for this, providing visual data for what your ears are hearing. Second, don’t underestimate the power of a simple physical level. Making sure your speakers are perfectly upright and angled correctly is the cheapest upgrade you’ll ever find. Third, I always keep a bottle of 99% isopropyl alcohol and some cotton swabs for cleaning RCA terminals; clean connections are the lifeblood of signal integrity and prevent that dreaded static. Finally, keep a notebook to track your settings, because there is nothing worse than finding the perfect sound and then forgetting which dial you turned to get there.
Building Your Personal Audio Sanctuary One Step at a Time
At the end of the day, all the talk of phase, impedance, and room modes is just a means to an end. The goal is that moment when the lights go down, the music starts, and you forget the equipment even exists. Building the perfect system is a marathon, not a sprint, and every small adjustment brings you closer to that spine-tingling realism. Don’t be afraid to experiment with your home audio deals or your speaker positioning—there are no wrong answers if the result moves you emotionally. Sound is subjective, but physics is constant; use both to your advantage. What’s the one piece of advice you wish you’d heard before you bought your first major amplifier? Share your “oops” moments in the comments below!