
I remember unboxing my first pair of ‘pro’ monitors. I’d saved for months, convinced that these black boxes would magically turn my bedroom demos into radio-ready hits. I plugged them in, hit play, and… nothing. Well, not literally nothing, but the sound was thin, lifeless, and frankly, exhausting. It felt like listening to a concert through a thick woolen blanket. I honestly thought I’d been scammed. I spent the next three hours checking cables and questioning my life choices, only to realize that the speakers weren’t broken—my setup was. If you’ve ever felt that sinking feeling that your expensive gear sounds worse than your car stereo, you aren’t alone. Today, we’re going to stop the frustration and figure out how to make those monitors actually sing.
The Day I Almost Threw My New Gear Out the Window
In those early days, I made the classic mistake of thinking that ‘flat’ meant ‘fun.’ It doesn’t. Studio monitors are designed to be honest, but when that honesty is combined with a bad room, it just sounds sterile. I once spent an entire weekend trying to mix a bass-heavy track, only to find it sounded like a tinny mess everywhere else because I couldn’t hear what my speakers were actually doing. I even wondered if I needed to wait for the speaker break-in period to finish before they’d sound ‘real.’ The truth was simpler: my desk was vibrating, my walls were reflecting every high note, and my ears were lying to me. We often blame the hardware when the culprit is actually the environment. Have you ever set up a new pair of speakers only to feel like they had zero ‘soul’ compared to your old hi-fi set?
Is a Truly Flat Response Actually Worth the Hype?
Skepticism is healthy here. You’ll hear purists argue that you need a perfectly flat response to mix properly, but if that ‘flatness’ makes you hate your music, you won’t want to spend time in the chair. According to research from the Audio Engineering Society, the way we perceive sound is heavily influenced by the first 15 milliseconds of reflections in a room. This means the ‘flat’ sound coming out of your speaker is being mangled by your walls before it even reaches your brain.
Your Room is Eating Your Bass and Killing the Vibe
The most common reason for a lifeless sound isn’t the driver or the amp; it’s the geometry of your workspace. If you have your monitors shoved right against a wall, you’re likely creating a muddy mess of low-end buildup. I learned this the hard way after realizing the best height for your desktop speakers isn’t just about comfort—it’s about avoiding nasty reflections off your desk surface. I used to keep mine way too low, which made everything sound muffled and distant. You might also find that using a rug to fix a bright sounding room is the cheapest ‘upgrade’ you’ll ever make. Before you go out and buy a new interface or more expensive monitors, we need to address the physical space. A few inches of movement can be the difference between a mix that sounds like cardboard and one that feels alive.
Build a Perfect Triangle for Better Imaging
To hear what’s actually happening in your music, you and your speakers need to form an equilateral triangle. If your monitors are three feet apart, your ears should be exactly three feet from each tweeter. I once tried to ‘eyeball’ it in a cramped bedroom, only to find my stereo image leaning heavily to the left. I spent an hour tweaking my panning settings before realizing one speaker was just four inches closer to my head than the other. When you nail this symmetry, the ‘phantom center’—that feeling that the vocals are floating right in front of your nose—suddenly snaps into focus.
Point Those Tweeters at Your Ears
High frequencies are incredibly directional. If your speakers are flat on the desk, they are blasting your elbows with detail while your ears get the leftover reflections. You need to angle them so the tweeters point directly at your ear canals. I’ve seen people spend thousands on high-end gear, yet they leave their speakers sitting low, missing the very clarity they paid for. Getting the best height for your desktop speakers on a small desk isn’t just a suggestion; it’s the primary way to ensure you aren’t losing the ‘air’ in your high-end.
Stop the Desk from Vibrating Your Tone Away
Your desk is a giant wooden drum. When your speakers sit directly on it, they transfer energy into the surface, which then vibrates and creates its own sound. This is why your low-mids often sound like a muddy mess. I remember my first ‘aha’ moment when I finally bought a set of cheap foam isolation pads. Suddenly, the kick drum stopped sounding like a wet cardboard box and started sounding like an instrument. 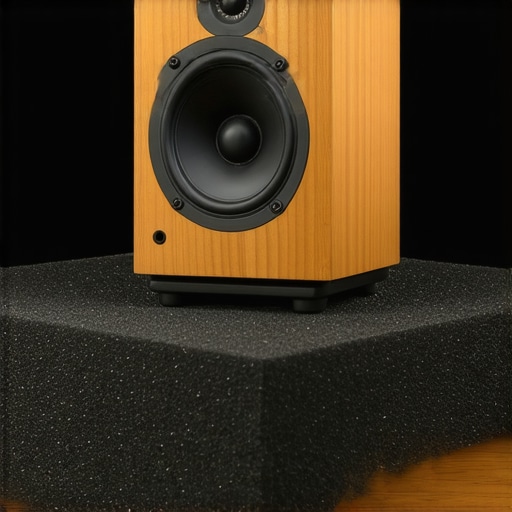 If you can’t afford fancy stands yet, even a stack of heavy books can help, but dedicated decoupling pads are the trick to making cheap bookshelf speakers sound expensive.
Kill the Ground Loop Buzz Before It Starts
Nothing kills the creative vibe faster than a constant 60Hz hum coming through your monitors. This usually happens because of ground loops between your computer and your interface. When I first encountered this, I thought my speakers were blown. I spent a whole night swapping out power strips before I learned how to get rid of ground loop hum in your audio setup by using balanced cables. Using the difference between balanced and unbalanced cables for home studios to your advantage is the most effective way to keep your signal chain clean and professional.
Tame the Bass with Smarter Placement
If your bass sounds boomy or vanishes depending on where you stand in the room, your walls are the culprits. Shoving speakers into a corner forces the low-end to build up unnaturally. This is how you end up with a mix that sounds thin on every other system. I once mixed an entire EP with my speakers against a brick wall; when I played it in my car, the bass was almost non-existent because I had ‘corrected’ for the room’s fake bass boost. If you’re struggling with a lack of impact, learning the secret to getting deep bass from tiny desktop speakers involves pulling them away from the wall to let the ports breathe. If you have a sub, don’t just set it and forget it. You must learn how to match your subwoofer phase with your main speakers to ensure the waves aren’t canceling each other out at the crossover point.Let’s dig deeper into why that expensive gear might still be underperforming. Most people believe that if they buy a 200-watt amplifier, they’ll have all the headroom in the world, but this is one of the most persistent myths in the audio world. In my experience, a high-quality 50-watt class-AB amp often provides much tighter bass control and better transient response than a cheap 200-watt digital unit. This is precisely the reason your passive speakers sound quiet with a digital amp; it isn’t about the raw number on the box, it’s about current delivery into low-impedance loads. If your amp can’t handle the dips in your speaker’s impedance curve, the sound will feel thin and ‘polite’ rather than impactful.
The Dangerous Trap of Digital Room Correction
We live in an era where software can seemingly ‘fix’ our rooms with a click, but here is the ‘oops’ factor many pros won’t tell you: you cannot use EQ to fill a physical null. If your room geometry causes a 15dB dip at 80Hz and you try to boost it digitally, you are forcing your amplifier to work significantly harder for a sound wave that is simply being canceled out by a reflection. This kills your dynamic range and can lead to hardware distortion. As Dr. Floyd Toole points out in his extensive research for the Audio Engineering Society, the human ear is remarkably good at ‘listening through’ a room’s steady-state errors, but it hates the phase shift caused by heavy-handed digital processing. 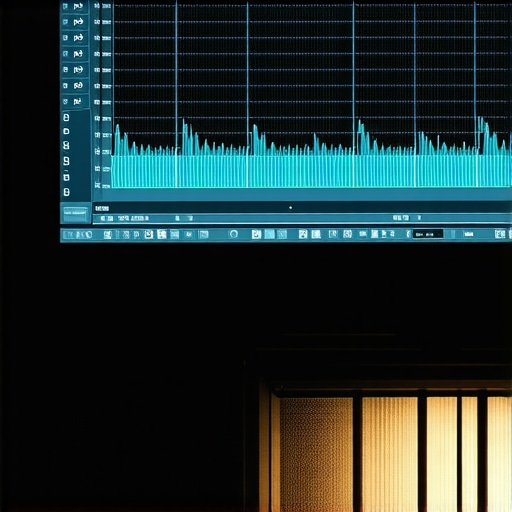
Why Does My Soundstage Feel Off Even After Calibration?
If you’ve run your auto-calibration and the vocals still don’t sit perfectly in the center, you might be dealing with hardware drift or asymmetric reflections that software cannot see. Sometimes, the issue isn’t the digital processor at all. I’ve seen many enthusiasts waste hours on DSP when they really needed to learn how to fix channel imbalance on a vintage stereo amplifier or simply move a piece of furniture. Another nuance people ignore is the crossover point. While 80Hz is the ‘standard’ recommendation, finding the best crossover frequency for small satellite home theater speakers usually requires manual tuning to avoid that ‘disconnected’ feeling where the bass sounds like it’s coming from a different zip code.
The Break-In Myth vs. Mechanical Reality
Finally, let’s address the elephant in the room: break-in. While some audiophiles claim it takes 100 hours of specialized pink noise, the truth about speaker break-in periods is that most mechanical changes happen in the first few minutes as the spider and surround loosen up. If a speaker sounds fundamentally ‘off’ on day one, a week of playing music isn’t going to turn it into a masterpiece. Stop waiting for the gear to ‘evolve’ and start looking at your placement and power chain. Have you ever fallen into this trap of waiting for gear to ‘break in’ or trying to EQ your way out of a bad room? Let me know in the comments.Maintenance is the invisible bridge between a system that lasts five years and one that survives fifty. I learned this the hard way when my favorite vintage receiver started crackling like a campfire every time I touched the volume. I panicked, thinking the transformers were dying, but the reality was far more mundane: a decade of dust had settled into the potentiometers. If you notice that satisfying tactile click is gone, you should learn how to fix a scratchy volume knob on an old amp before the oxidation ruins the signal path entirely. Keeping your gear in top shape isn’t just about aesthetics; it is about preserving the electrical integrity of every connection in your chain.
Stop Letting Dust Kill Your Dynamic Range
Dust is more than an eyesore; it is an insulator that can cause components to overheat and a conductor that can cause shorts in high-humidity environments. I make it a habit to do a deep clean every six months. This includes learning how to clean your speaker cones without ruining the paper or the delicate silk domes. While you are at it, don’t forget the back of the rack. Oxidation on your terminals acts like a high-pass filter you never asked for. I always keep a bottle of DeoxIT handy and follow the specific steps on how to clean gold-plated connectors without ruining the finish to ensure my signal stays pure.
How do I maintain my home audio setup over time?
Consistency is your best friend here. Beyond just dusting, you need to inspect the soft goods. I once ignored a slight stiffness in my headphones, only to have the drivers fail because the seal was gone. If you aren’t sure where to look, check these 7 signs your headphone pads need replacing today. I also suggest checking for physical degradation; specifically, knowing how to tell if your speaker capacitors are starting to leak can save your power transformer from a catastrophic failure. According to Vance Dickason in the Loudspeaker Design Cookbook, the mechanical integrity of a cabinet is paramount, so check your screws and seals regularly, as even a tiny air leak can completely shift the tuning frequency of a ported box.
The Multimeter is Your New Best Friend
If you are serious about this hobby, you need to move beyond just plugging things in. A basic digital multimeter is the most powerful tool in my arsenal. I use it to check cable continuity and to verify that my speakers aren’t presenting a dangerous load to my amp. Learning how to use a multimeter to find a short in your speaker wires has saved me from blowing several expensive fuses over the years. It is about moving from being a consumer to being a steward of your sound. 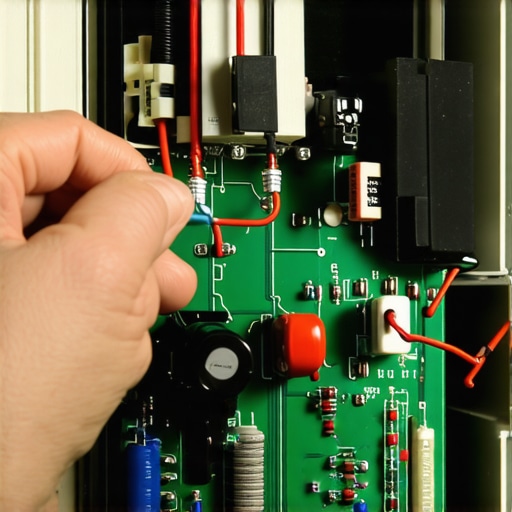 Looking ahead, I suspect we are entering a ‘right to repair’ renaissance where modular components will become the standard for high-end audio, making it easier for us to swap out aging capacitors or DAC chips without tossing the whole unit. I highly encourage you to go grab a multimeter this weekend and test your longest cable runs; you might be surprised to find a high-resistance connection that has been sucking the life out of your transients for months.
The Hard-Earned Lessons That Saved My Mixes
After years of chasing the perfect sound, I’ve realized that the most expensive gear in the world is useless if you don’t respect the laws of physics. One of my biggest lightbulb moments was realizing that why your floorstanding speakers need more breathing room from the wall isn’t just a suggestion—it’s a requirement for clarity. I used to think I could just ‘fix’ a muddy low-end with a plugin, but you can’t EQ your way out of a physical room resonance. Another hard lesson? Don’t trust your ears when you’re tired; ear fatigue is real, and it will lead you to make terrible mixing decisions that sound like garbage the next morning. Finally, I learned that a clean signal path is non-negotiable. If you’re hearing clicks or pops, check your cables before you blame your interface.
My Essential Toolkit for Pristine Playback
I don’t go anywhere without a few specific items that have saved my skin more times than I can count. First is a reliable digital multimeter; it’s the only way to truly know if a cable is failing or if you have a short. I also swear by a bottle of DeoxIT for keeping those gold-plated connectors shiny and conductive. For inspiration, I always recommend checking out The Master Handbook of Acoustics by F. Alton Everest; it completely changed how I look at my workspace. If you’re on a budget, look at how we made a 20 dollar thrift store speaker sound like a pro monitor to see that technique often beats gear. I also keep a kit for physical repairs, because knowing how to revive old speakers with new foam surrounds can save a legendary pair of monitors from the landfill.
#IMAGE_PLACE_HOLDER_E#
Your Audio Journey Is Just Beginning
Setting up your studio monitors isn’t a one-time event; it’s an ongoing relationship with your environment and your music. Don’t be afraid to experiment with moving your desk a few inches or trying out a new rug to dampen those reflections. The goal isn’t to have a laboratory-perfect room, but to have a space where you can trust what you hear and actually enjoy the process of creating. Audio is a craft that rewards patience and attention to detail. Have you ever spent hours troubleshooting a ‘broken’ speaker only to find it was just a loose cable or a dusty knob? Let me know your biggest audio facepalm moment in the comments below!