
I spent three hours re-cabling my entire desk because I thought my new studio monitors were defective. Every time I adjusted my volume or moved my mouse, a tiny, high-pitched whine crawled through the speakers like a mosquito you can’t quite swat. I felt like I had wasted hundreds of dollars on ‘pro’ gear. It turns out, I was just using standard instrument cables where I needed balanced ones. It is a classic rookie mistake that I see people making every single day, and it is usually the reason your audio sounds like it is fighting for its life against background hiss.
Stop Ignoring the Signal Path in Your Setup
Most of us start out by grabbing whatever cables are lying around. We focus on the big-ticket items—the microphones, the interfaces, the shiny soundbars—and forget that the wires connecting them are the literal veins of the system. If those veins are ‘leaky,’ your sound quality bleeds out before it even hits the recorder. When I first started, I didn’t realize that an unbalanced cable is basically a giant antenna waiting to pick up interference from your phone, your lights, or your computer monitor. I spent weeks trying to get rid of ground loop hum in my audio setup before I realized my cables were the primary culprit. According to the engineering standards at Sound on Sound, balanced connections provide significant noise rejection through a process called phase cancellation. That is the difference between a professional recording and something that sounds like it was recorded in a server room.
Do These Professional Cables Actually Make a Difference?
I know what you are thinking. Is this just another way for retailers to squeeze an extra fifty bucks out of you? I used to be the biggest skeptic. I thought ‘balanced’ was just marketing jargon for ‘overpriced.’ But the reality is that the internal architecture is fundamentally different. An unbalanced cable has two wires; a balanced one has three. That third wire is the silent hero that kills the noise. If you have ever wondered how to fix humming speakers, the answer often starts with checking if your gear even supports a balanced signal. Using the wrong wire is like trying to drive a performance car on a muddy dirt road. Have you ever spent a whole afternoon hunting down a mysterious buzz in your speakers, only to find it was a five-dollar cable? Let me know, because I have definitely been there. Now, let’s get into the nitty-gritty of how these signals actually work so you never have to deal with that annoying hiss again.
Phase Cancellation Is Your Secret Weapon Against Noise
To get how this works, imagine you are sending a letter across a dangerous neighborhood. A standard unbalanced cable—the kind you use for a guitar or a cheap RCA setup—sends one copy of the message. If a ‘thief’ (interference from your PC or lights) grabs it, the message is corrupted. A balanced cable sends two copies of the same signal, but it flips the second one upside down, like a mirror image. When they reach your speakers, the gear flips the second signal back over and combines them. Because the noise hit both wires identically, flipping one of them makes the noise cancel itself out. It is basically magic. I remember setting up a temporary studio in an old warehouse with ancient wiring. I could hear the elevator moving through my monitors until I swapped to balanced TRS cables. That tiny change silenced the room instantly. 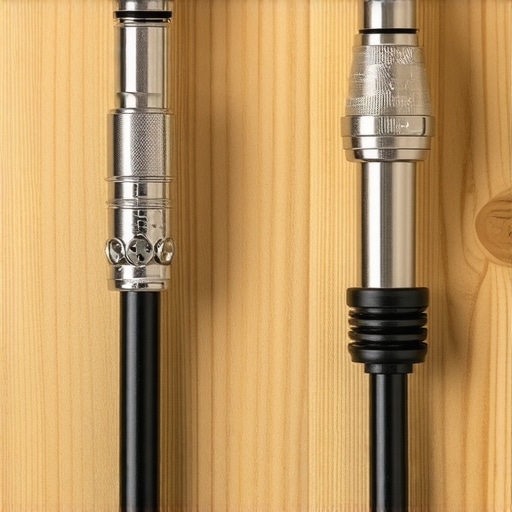
Check Your Connectors for the Three-Pin Signature
Before you go shopping for new wires, you need to know if your gear can actually handle them. Look at your audio interface or your speakers. You are looking for XLR ports (those round ones with three pins) or 1/4-inch TRS jacks. A TRS jack looks like a standard headphone plug but has two black rings on the tip instead of one. If you see only one ring, that is a TS (Tip-Sleeve) cable, and it will not help you with noise. Using a balanced cable in an unbalanced port is a waste of money, much like why your high-end DAC sounds exactly like your laptops headphone jack if you are not feeding it a high-quality source.
Stop Your Gear From Screaming at You
The most common mistake I see is people trying to run long cables—over 10 or 15 feet—using unbalanced lines. That is an open invitation for a buzz. If you are struggling with a persistent whine in a vehicle, you should learn how to get rid of the annoying hiss in your budget car amp, which often involves the same principles of isolation. In my home setup, I once ran a twenty-foot guitar cable across a power strip. The resulting hum was louder than my actual playing. I had to learn the hard way that power cables and audio cables should never run parallel to each other; if they must cross, do it at a 90-degree angle to minimize the electromagnetic ‘bleed.’
Match Your Signal Levels to Avoid Clipping
It is not just about the wire; it is about the strength of the signal. Professional balanced gear usually operates at +4dBu, while consumer gear (like your phone or a cheap turntable) sits at -10dBV. If you plug a high-output pro device into a sensitive consumer input, you will get distortion that sounds like your speakers are dying. This is a similar headache to why your headphones sound quiet on your laptop but loud on your phone—it is all about an impedance or voltage mismatch. If you are pushing your system too hard, you might even find why your receivers protection mode keeps triggering at high volume because the signal is simply too hot for the hardware to handle. I once blew a cheap pair of computer speakers by feeding them a balanced line-level signal they werent built for. Always double-check your gain stages before you hit ‘play’ on a new connection.
I have seen people drop three months’ salary on a pair of floorstanding speakers only to shove them into the corners of a room with hardwood floors and glass walls. It is heartbreaking. The biggest myth in the audiophile world is that better gear can overcome a bad room. It can’t. In fact, the better your gear, the more it reveals the flaws of your environment. I have been in situations where a $500 system in a treated room absolutely crushed a $5,000 system that was poorly placed. If you do not respect the physics of sound waves, you are basically just throwing money into a black hole.
Your Bare Walls are Killing Your High-End Audio Experience
The most common ‘trap’ I see is ignoring the first reflection points. When sound leaves your speakers, it does not just go to your ears; it hits your side walls, ceiling, and floor first. These reflections arrive at your ears a few milliseconds after the direct sound, causing a muddy mess called comb filtering. This is exactly why your bookshelf speakers sound better when you move them off the desk and onto dedicated stands. You are physically decoupling the vibration and reducing those immediate reflections that smear the stereo image. According to research by Dr. Floyd Toole at the Audio Engineering Society, the room and the speaker’s placement within it can account for up to 50% of the overall sound quality you perceive. If you are struggling with a harsh, piercing sound, why you should use a rug to fix a bright sounding room becomes the most important advice you will ever follow. It is a low-tech solution for a high-tech problem.
Why Does My Bass Sound Great in the Hallway But Thin in My Seat?
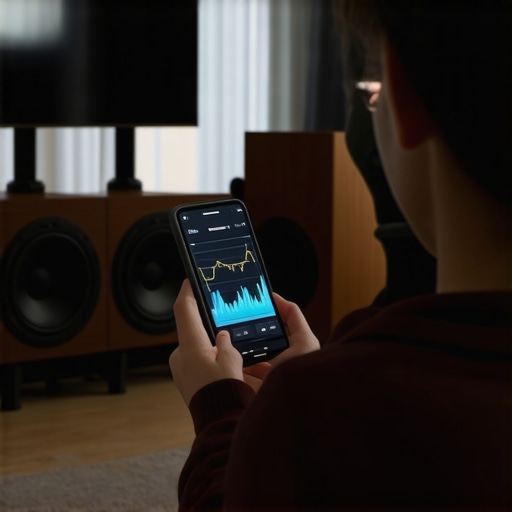
This is the ‘nuance’ that separates the pros from the hobbyists: room modes. Standing waves can create ‘nulls’ where the bass literally disappears at your listening position. I once spent an entire Saturday trying to how to find the sweet spot for your speakers in a rectangular room because I thought my subwoofer was broken. It turned out I was sitting in a massive null. You can use technology to fight this; in fact, I recommend learning how to use your phone to measure your rooms frequency response. It will give you a visual graph of the chaos your room is creating. Another advanced mistake is failing to understand electrical load. If you are mixing and matching vintage and modern gear, you need to know the secret to choosing the right ohm rating for your amp to ensure you aren’t overheating your equipment or clipping the signal. Have you ever spent a fortune on gear only to be disappointed by how it sounds in your specific room? Let me know in the comments, because we have all been there at least once.
Clean Your Dials Before You Buy New Gear
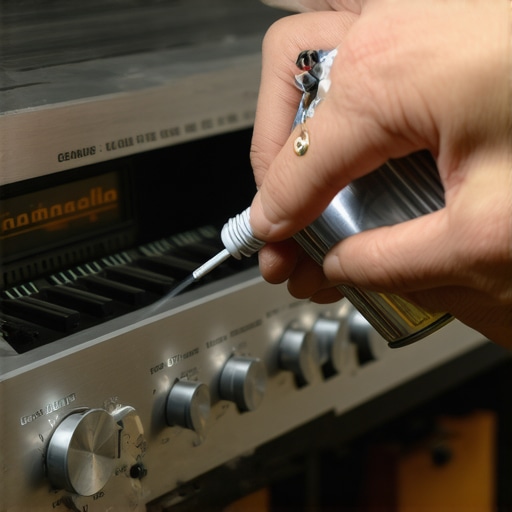
I cannot tell you how many times I have seen people list ‘broken’ vintage receivers on eBay for pennies just because the audio crackles when they turn the volume up. It is rarely a blown circuit; usually, it is just twenty years of dust and oxidation. If you have an old amp that sounds like a fire crackling every time you touch it, you need to learn how to fix a scratchy volume dial with electrical contact cleaner. A ten-dollar can of DeoxIT and five minutes of your time can literally revive a piece of hardware that originally cost a grand. I make it a habit to ‘exercise’ my knobs and switches once a month, even if I am not using them, just to keep the contacts from seizing up. It is the simplest maintenance task that most people completely ignore until the device becomes unusable.
How do I keep my high-end gear from degrading over the years?
Maintenance is not just about the internal electronics; it is about the materials that touch your skin and the air. If you are a headphone enthusiast, you have likely dealt with the dreaded ‘black flakes’ on your neck from deteriorating synthetic leather. Understanding why your headphone pads are flaking and how to prevent it is mostly about moisture management. I keep a dedicated microfiber cloth nearby and wipe down my pads after every long session. Sweat is acidic, and it eats through those materials faster than you think. Similarly, knowing how to clean your headphone ear pads without ruining the leather will extend their life by years. For speakers, the danger is ‘foam rot.’ The surround—the rubbery bit that lets the cone move—eventually dries out and cracks. Instead of buying new drivers, you can actually learn how to revive old speakers with new foam surrounds for a fraction of the cost. It is a rewarding Saturday project that keeps classic gear out of the landfill.
The One Tool That Stops You From Guessing
If you want to move beyond the ‘plug and play’ stage, you need to start measuring. I used to trust my ears for everything, but the human brain is surprisingly easy to trick with psychoacoustics. Now, I use a calibrated measurement microphone and software like Room EQ Wizard (REW). According to the official REW documentation, even a small 1dB peak at a specific frequency can cause listener fatigue over time. By visualizing the data, you can see how to tell if your speakers capacitor is starting to fail by looking at deviations in the frequency response that should not be there. This isn’t just for pros; it is for anyone who wants to stop guessing why their system sounds ‘off.’ Looking forward, I predict we are going to see more ‘auto-calibration’ tools integrated into entry-level gear, but for now, the manual approach is still the gold standard for accuracy. This weekend, I challenge you to download a free SPL meter app and check the balance between your left and right speakers at your main seat. You might be surprised to find your room is pulling the stage to one side. Correcting that one small thing can make your entire library feel brand new again.
Hard Truths I Learned While Chasing Perfect Audio
After years of tinkering, I realized that gear is only half the battle. You can buy the most expensive monitors in the world, but if they are sitting on a hollow desk, they will sound like toys. That is why I always tell people the reason your speaker stands need to be filled with sand; the added mass stops vibrations from coloring the sound. Another lightbulb moment was discovering how to tell if your speakers are out of phase in 30 seconds. I once spent weeks thinking my amp was dying when, in reality, I had just flipped a single wire. It is also worth noting that budget gear can often punch way above its weight class if you know the trick to making cheap bookshelf speakers sound expensive through careful positioning and decoupling.
The Tools That Stay in My Gear Bag
If you want to maintain a professional-grade setup, you need more than just a screwdriver. My ‘holy trinity’ of maintenance includes electrical contact cleaner for how to fix a scratchy volume knob on an old amp, a calibrated measurement mic for room analysis, and a solid understanding of signal flow. When I am building a multi-purpose station, I look back at how to set up a 2-1 system for the ultimate gaming audio to ensure the crossover between the sub and the mains is seamless. I also keep a stash of coffee filters—not for caffeine, but because I know how to fix a speaker cone with a simple coffee filter and some wood glue in an emergency. These tools have saved me thousands of dollars in replacement costs over the last decade.
Stop Overthinking and Start Listening
It is easy to get lost in the weeds of ohms, phase cancellation, and frequency responses, but never forget why you started this journey: the love of music. High-end audio should enhance your experience, not turn it into a stressful chore. Whether you are debating the truth about speaker break-in periods or just trying to get your desktop setup to stop humming, remember that perfection is a moving target. The ‘perfect’ sound is the one that makes you want to keep listening for hours. Have you ever spent a fortune on gear only to find that a simple five-dollar fix was all you really needed? Let me know your biggest ‘facepalm’ audio moment in the comments below!