
I was halfway through a weekend camping trip in the Smokies when my ‘indestructible’ rugged speaker finally gave up the ghost. The sun was setting, the fire was crackling, and just as the beat was about to drop, the music sputtered and died. I reached for my charging cable, plugged it in, and felt that dreaded, mushy wiggle. The port wasn’t gripping the cable; it felt like a loose tooth. No matter how much I propped the speaker up against a rock at a precarious 45-degree angle, the charging LED refused to stay lit. It’s a gut-wrenching feeling when your gear fails in the middle of nowhere, especially when you paid a premium for ‘rugged’ durability. Today, I’m going to show you how to stop the wiggle and actually fix that connection so you don’t have to toss a perfectly good speaker into a landfill.
Rugged Cases Don’t Protect Weak Internal Soldering
We often buy these speakers thinking they can survive a fall from a cliff, and while the rubberized armor might look tough, the micro-USB or USB-C port inside is often held on by tiny, fragile beads of solder. I made the massive mistake early on of trying to ‘clean’ my port with a metal safety pin while the device was still powered on—an absolute disaster that nearly shorted the entire board. If you’ve noticed that your portable speaker is losing its charge faster than usual, don’t immediately blame the battery. Often, the port is simply disconnected enough that it’s only delivering a trickle of power, or none at all. According to data from repair experts at iFixit, mechanical stress on charging ports is one of the top three reasons for small electronic failure. This stress happens every time you trip over a cord or jam the plug in upside down in the dark.
Is a DIY Port Repair Actually Worth the Hassle?
Many people fear that opening a ‘sealed’ rugged speaker will ruin its waterproofing forever. While it’s true you have to be careful with the gaskets, fixing a loose port is almost always better than buying a new unit. If you’ve already noticed the mistake that kills your portable speaker battery life is often just poor charging habits, imagine how much worse it is when the battery can’t even get a consistent flow of juice. Have you ever found yourself propping your speaker up with books or tape just to keep the charging light on? If so, you’re in the right place. We are going to dive into the gut-level reality of resoldering those pins or tensioning the metal casing to get your music back on track.
Open Up the Shell Without Breaking the Seal
First, you need to find the “hidden” entry points. Rugged speakers love to hide screws under rubber gaskets or adhesive-backed feet. Peeling these back feels like defusing a bomb, but it’s necessary. I’ve found that using a plastic spudger—or even a guitar pick—is much better than a screwdriver because it won’t gouge the casing. If you are worried about the sound quality after reassembly, remember that the simple paper test for finding air leaks in your speaker cabinet works just as well for checking the seal on your portable’s housing once you’re done. Just because it is a small device doesn’t mean it isn’t susceptible to the same physics as a large enclosure.
How to Spot a Broken Solder Joint
Once you’re inside, locate the charging port. It looks like a tiny metal tunnel. Give it a very gentle wiggle with a pair of tweezers. If the whole metal housing moves, the structural solder points are snapped. If only the tiny pins at the back move, you’ve got a more delicate job ahead. This is similar to how to tell if your speaker is actually blown or just rattling; you’re looking for physical movement where there should be none. Look for fine cracks in the silver ‘mountain’ of solder surrounding the pins. If it looks like a dry, cracked desert floor, the connection is dead.
The Secret to Resoldering Without Melting the Plastic
This is where my micro-disaster happened. I once tried to fix a cheap Bluetooth speaker using a soldering iron meant for heavy plumbing. I turned the entire USB port into a puddle of black goo in three seconds. Now, I use a fine-tip iron set to about 350°C. You aren’t ‘painting’ with the solder; you’re just touching the tip to the pin and the pad simultaneously for one second, then dabbing a tiny bit of solder wire. It’s like a quick high-five. If you get a ‘cold’ joint (it looks dull instead of shiny), you might end up with a connection that causes a hum, much like the 5 fix for humming speakers and ground loops.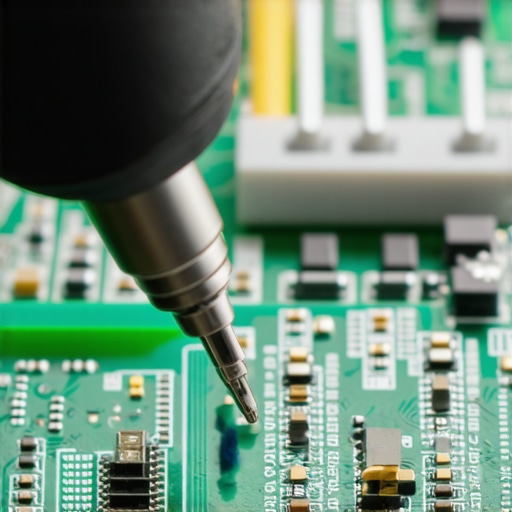
Tighten the Metal Cage for a Snug Fit
Sometimes the solder is perfect, but the port feels loose because the metal ‘mouth’ of the USB port has stretched out over time. Think of it like a pair of old, loose shoes. You can often fix this without any heat at all. Use a pair of needle-nose pliers to very gently squeeze the top and bottom of the metal port casing together. You only need to move it a fraction of a millimeter. This increases the friction on the charging cable so it doesn’t fall out when you’re trying to get stereo sound from a single portable speaker using TWS while the device is vibrating on a hard surface.
Put It All Back Together the Right Way
When you reassemble, check the rubber gaskets for any grit or sand. If they are dry or cracked, a tiny dab of silicone grease will help maintain that IPX rating. Make sure no wires are pinched between the plastic halves as you tighten the screws. A pinched wire can lead to a short, which is a much bigger headache than a loose port. If you’ve ever wondered why your car speakers cut out when you hit a bump, it’s usually the same culprit: a physical connection that can’t handle the vibration of daily use.Let’s dig deeper into why we often fail even after we’ve fixed the physical port. Most people assume that once the connection is solid, the battle is won. They’ll go out and buy a $50 ‘audiophile grade’ gold-plated USB-C cable thinking it will provide a cleaner charge or better data transfer. Here is the contrarian truth: for digital charging and data, those expensive cables are almost entirely a scam. In my experience, a basic, well-shielded cable from a reputable brand performs identically to the high-end versions. This is a common theme in audio; for example, why your high-end dac sounds exactly like your laptops headphone jack often comes down to the fact that beyond a certain point of engineering, the human ear (and the charging circuit) can’t tell the difference. Focus on the cable’s strain relief, not its ‘gold’ plating.
The High-Wattage Trap That Most People Ignore
We live in an age of ‘fast charging,’ but using your 100W MacBook Pro brick on a budget Bluetooth speaker is a recipe for disaster. While USB-C is supposed to ‘negotiate’ power, many cheaper speakers have poorly implemented handshake protocols. I’ve seen logic boards where the protection diode literally fried because it couldn’t handle the initial surge from a high-output PD charger. This is the ‘oops’ factor that leads people to wonder why your portable speaker is losing its charge faster than usual. It isn’t always a bad port; sometimes you’ve simply degraded the battery’s internal resistance by blasting it with too much heat from a fast charger. According to research from Battery University (Cadex Electronics), sustained heat above 30°C (86°F) during a charge cycle can permanently reduce a lithium-ion battery’s capacity by up to 20% in a single year.
Can a Fast Charger Actually Melt My Internal Components?
In short, yes. If the internal voltage regulator is struggling, it generates heat as a byproduct. In a sealed, rugged enclosure, that heat has nowhere to go. I once opened a speaker that had ‘died’ only to find the plastic around the battery had slightly warped. If you’ve ever noticed how to tell if your speakers capacitor is starting to fail, you’ll know that heat is the number one enemy of longevity. Excessive heat causes the electrolyte in capacitors to dry out, leading to that dreaded ‘death hum’ or a device that simply won’t boot even when the port is fixed. 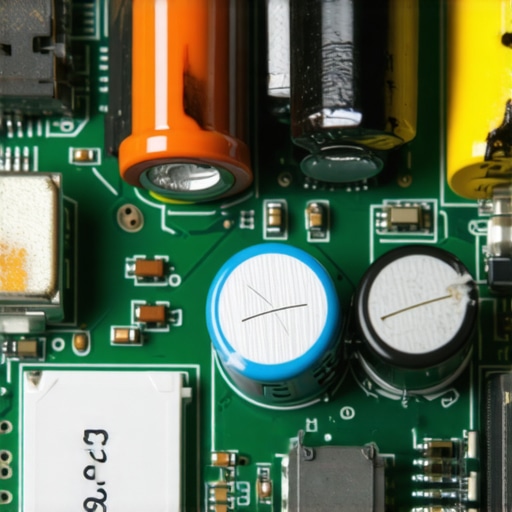
Why You Should Avoid Over-Cleaning Your Ports
I see a lot of advice online suggesting you douse your charging port in isopropyl alcohol or use ‘contact cleaner’ for every minor wiggle. While how to fix a scratchy volume dial with electrical contact cleaner is a legitimate tactic for analog components, it can be risky for charging ports. Some cleaners contain lubricants that actually attract dust and pocket lint, creating a ‘gunk’ that eventually prevents the cable from seating properly. If you must clean it, use a dry, non-conductive plastic toothpick and a can of compressed air. This prevents the accidental shorts that happen when people use metal needles. Have you ever fallen into the trap of using a metal pin to clean your port? Let me know in the comments. Keeping your gear alive isn’t just about the fix; it’s about the habits you form after the repair is done. If you treat your portable speaker like a sensitive piece of home audio, it’ll last through a hundred more camping trips.
To get serious about these repairs, I stopped using that bulky $15 iron from the hardware store. Instead, I switched to the Pinecil, a smart portable soldering iron that fits in a pocket and can be powered by the same USB-C battery pack I use for my speakers. It is a game-changer because the temperature control is precise—crucial when you are dealing with the tiny traces on a Bluetooth board where one wrong move means a permanent short. According to the IPC-A-610 standards (the industry benchmark for electronic assembly), a proper solder fillet should be shiny and concave. If yours looks like a dull, lumpy ball, you have likely used too much solder or not enough heat, which leads to a brittle connection that will snap the next time you plug in your charger.
The Essential Kit for Every Audio Fixer
Beyond a smart iron, you need a set of non-conductive tools. I always keep a variety of nylon spudgers and guitar picks in my kit. These allow you to pry open ‘seamless’ plastic housings without leaving those ugly white stress marks or gouges. If you find that the speaker’s internal components are vibrating after you’ve opened it, you might need to check if you have created a gap in the casing. In those cases, the simple paper test for finding air leaks in your speaker cabinet can help you identify exactly where the seal is compromised. I also recommend a tube of non-corrosive silicone RTV for resealing gaskets; it’s the only way to ensure your ‘rugged’ speaker stays rugged after a surgery.
How do I keep my audio gear alive for the next decade?
Long-term survival is about fighting oxidation and physical fatigue. For your home-based setup, keeping things cool is the primary goal. You should keep an eye on your hardware, as why your vintage amp gets hot even when you arent playing music is often a sign of failing bias resistors or old capacitors. If you have older gear with physical controls, learning how to fix a scratchy volume knob on an old amp with a quick blast of specialized cleaner can prevent the need for a total component replacement later. For portable gear, it is all about the ‘strain relief.’ I started adding a small loop of Velcro to my charging cables to act as a tether; this ensures that if someone trips over the cord, the tension hits the Velcro loop rather than the fragile USB-C port you just spent an hour resoldering.
Future Tech and Modular Audio Designs
I predict we are heading toward a major shift in how portable audio is built. As ‘Right to Repair’ laws gain traction globally, we are likely to see more modular designs where charging ports aren’t soldered directly to the main logic board but sit on a cheap, replaceable sub-board. This would turn a nerve-wracking soldering job into a simple five-minute parts swap. Until then, we have to be the guardians of our own gear. Even the most basic maintenance, like knowing how to clean your headphone ear pads without ruining the leather, can keep a high-end piece of equipment out of the trash for years. And if you ever have a catastrophic failure like a punctured driver while out in the woods, remember that how to fix a speaker cone with a simple coffee filter is a legendary field repair that actually works. Try this right now: Grab a high-quality magnifying glass and inspect your most-used charging cable. If the gold pins look dull or have black carbon buildup, wipe them with a microfiber cloth and a tiny drop of isopropyl alcohol—it’s the easiest way to prevent a port failure before it even starts.
The Hardest Lesson I Learned About Portable Gear Reliability
Over years of repairing outdoor audio, I’ve realized that “rugged” marketing is often just a rubber suit over a fragile skeleton. My biggest takeaway? Most port failures are entirely preventable. First, stop using your speaker as a charging hub for other devices while you’re physically moving it; that dual-stress on the port is a silent killer. Second, never force a cable that feels “crunchy”—that’s usually sand or grit acting as an abrasive against your sensitive solder joints. Finally, remember that even if your laptop speakers sound tinny, there is usually a physical or software fix that is far cheaper than a full replacement. The same logic applies here: a 10-cent solder joint is often the only thing standing between a working device and a landfill.
The Gear That Makes These Micro-Repairs Less Painful
If you are going to be the “fix-it” person in your circle, you need more than just a hardware store screwdriver. I swear by the Pinecil Smart Iron because its temperature control prevents the accidental melting of plastic housings. I also keep a set of nylon spudgers handy; using metal to pry open a plastic speaker is a rookie mistake that leaves permanent gouges. For the finishing touch, non-corrosive silicone RTV is my secret weapon for restoring that crucial waterproofing seal. It is the difference between a speaker that works for a week and one that survives the next monsoon. If you have ever wondered why your headphones sound quiet on your laptop but loud on your phone, you already know that having the right electrical understanding—and the right tools—is more than half the battle.
#IMAGE_PLACEHOLDER_E#
Keep Your Music Playing Long After the Warranty Ends
Repairing your own gear is a quiet form of rebellion against a throwaway culture. When you take the time to fix a loose port or even learn the reason your wireless earbuds sound different after changing the tips, you are becoming a more informed and capable listener. Your portable speaker doesn’t have an inherent expiration date as long as you know how to handle a soldering iron and a pair of tweezers. Do not be afraid to crack the seal and see how these things work—most of the time, the fix is simpler than the manufacturers want you to believe. Have you ever managed to revive a piece of audio gear that everyone else told you to throw away? Let me know your success (or disaster) stories in the comments below!