
I still remember the smell of fresh cedar and electronics when I unboxed my first set of towering floorstanders about a decade ago. I had saved for months, envisioning a concert-hall experience in my cramped apartment. I lugged those heavy cabinets into the room and immediately shoved them right against the back wall to save every precious inch of floor space. When I finally pressed play, my heart sank. It didn’t sound like a concert; it sounded like a muddy, bloated mess, as if the singers were performing from inside a wet cardboard box. That was my first hard lesson in acoustic physics. Today, I’m going to show you exactly why that “convenient” placement is actually killing your soundstage and how a simple 12-inch shuffle can make your system sing like you never imagined.
The Day My Dream Audio Setup Sounded Like a Disaster
When I first started out, I assumed that more power and bigger cabinets automatically meant better quality. I took my brand new towers and wedged them deep into the corners of my living room. I thought I was being clever by hiding the wires and keeping the walkways clear. Instead, the bass became a thick, indistinct hum that swallowed the vocals whole. I eventually learned that why your speakers bass port should never be pushed against a wall is one of the most fundamental rules of Hi-Fi. If you don’t give the air moving out of those ports somewhere to go, it is going to bounce right back off the drywall and create a sonic traffic jam. My biggest mistake was thinking the wall would “help” the bass, but all it did was create a chaotic reflection that ruined the timing of every song I loved.
Is a few inches of space really worth the living room clutter?
You might be thinking that your room is just too small to have speakers “floating” out from the wall. I get it; we all have to live in these rooms, too. But even a six-inch gap can transform a boomy, irritating low-end into something tight and punchy. According to the acoustic research shared by Audioholics, placing a speaker too close to a boundary can increase bass output by up to 6dB through a phenomenon called boundary gain, but this is rarely the “good” kind of bass. It is usually a frequency spike that masks the delicate mid-range details. Have you ever felt like your expensive gear sounds worse than a budget setup you heard at a friend’s house? It is probably not the equipment; it is the lack of breathing room. Once I stopped worrying about the floor plan and focused on how to find the sweet spot for your speakers in a rectangular room, the difference was night and day. I even found that understanding why floorstanding speakers need spikes when used on carpet made a massive impact on keeping the cabinet stable once I finally moved them away from the wall’s vibrating surface. It is time to stop choking your speakers and let them breathe so you can finally hear what you paid for.
Get Those Cabinets Away from the Drywall
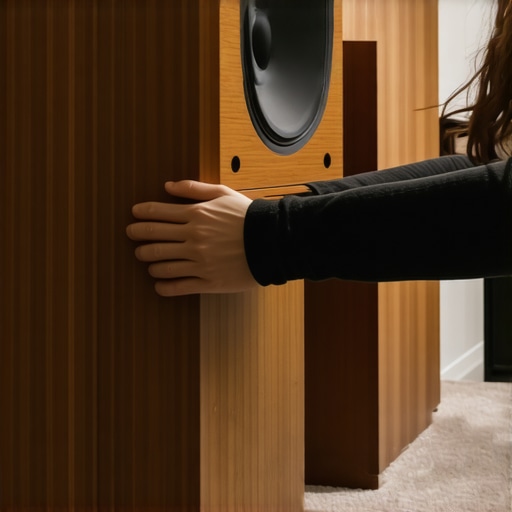
The first thing you need to do is pull your speakers out at least 18 inches from the back wall. Think of it like a conversation; if I am shouting right into your face from two inches away, you cannot understand a word I am saying. Your speakers feel the same way about walls. I remember a humid Saturday afternoon where I spent three hours sliding a heavy 2.1 setup across my hardwood floor. I was skeptical, but once they hit that sweet spot about two feet out, the soundstage did not just grow—it exploded. If you are using smaller units, you will find that why your bookshelf speakers sound better when you move them off the desk is largely because you are decoupling them from a vibrating surface. The same logic applies to your floorstanders. Moving them out allows the sound waves to wrap around the cabinet, creating a three-dimensional image rather than a flat, two-dimensional wall of noise.
Aim Your Sound Directly at the Sweet Spot
Next, we need to talk about toe-in. This is the term for angling your speakers toward your listening chair. Most speakers are designed to sound best on-axis, meaning your ears should be looking right down the throat of the tweeter. When I first set up my home theater, I had the speakers pointing straight ahead because it looked cleaner. The vocals sounded like they were coming from the kitchen. I spent thirty seconds turning each cabinet about 15 degrees inward, and suddenly the singer was standing right in front of me. If your setup still feels off after this, you might need to check if how to tell if your speakers are out-of-phase in 30-seconds-2 is your real issue, as flipped wiring will destroy that center image no matter how you angle them.
Kill the Floor Bounce Before It Kills Your Music
Even if your placement is perfect, the hard floor between you and the speakers is a sonic mirror. High frequencies bounce off wood or tile and hit your ears a millisecond after the direct sound, creating a smear that makes everything sound harsh. I used to think my amp was just bright and annoying. It turns out my floor was the villain. Adding a simple area rug between the speakers and the couch did more for my clarity than a $500 upgrade ever could. This is exactly why you should use a rug to fix a bright sounding room; it absorbs that first reflection point and lets the tweeter detail shine through. If you are finding that why your speakers sound harsh when you play high-res files is a recurring frustration, check your floor before you blame your digital files.
Balance the Bass by Tuning Your Subwoofer
If you are running a subwoofer, do not just hide it behind the couch. You need to align its timing with your main drivers. Misaligned bass sounds slow, like the drummer is playing half a beat behind the rest of the band. I once spent a week wondering why my system felt muddy until I learned how to match your subwoofer phase with your main speakers. It was as simple as flipping a switch on the back of the sub, which instantly locked the low end into the rest of the music. If the bass still feels uneven as you move around the room, remember that why two small subwoofers are better than one massive driver comes down to smoothing out those standing waves that a single unit cannot fix on its own.
Now that we have tackled the physical layout of your room, let’s dig deeper into the hardware itself. There is a common belief in the audiophile world that throwing more money at the digital side of your system—specifically the Digital-to-Analog Converter (DAC)—is the fastest way to audio nirvana. I used to be a firm believer in this, too. I once spent a small fortune on a sleek, brushed-aluminum DAC, convinced it would unveil hidden layers in my favorite jazz records. The reality? For most listeners, why your high-end DAC sounds exactly like your laptop’s headphone jack often comes down to the simple fact that the rest of the chain, like your speakers and room acoustics, is the real bottleneck. Unless you have a pristine listening environment, the microscopic improvements in jitter and noise floor provided by a $2,000 converter are virtually impossible to hear.
Stop Obsessing Over Your DAC Specs
Instead of chasing specs like 32-bit/768kHz, focus on the electrical compatibility of your gear. One of the most common mistakes I see in the secondhand market is people trying to mix and match components that were never meant to play together. For instance, you might find a pair of high-quality car speakers at a yard sale and think they will work perfectly for your home office. However, if you don’t know how to wire a 4-ohm car speaker to an 8-ohm home receiver, you risk overheating your amplifier and causing it to go into protection mode. In my experience, focusing on impedance matching and clean power does significantly more for your sound quality than upgrading a chip that is already performing beyond human hearing limits.

Don’t Buy Used Gear Without This One Essential Item
Here is a trap I fell into early on: buying a high-end, five-year-old AV receiver for pennies on the dollar, only to realize the remote was missing. You might think, “No big deal, I’ll just use the front panel buttons.” Wrong. Many modern and vintage-digital receivers hide their most crucial calibration settings—like crossover points and speaker distance—inside menus that are only accessible via the original remote. This is exactly why you should never buy a used receiver without the remote. Without those settings, your system will never be truly optimized for your space, leaving you with a muddy mess that no amount of expensive cabling can fix. If you are already dealing with a setup that sounds ‘off,’ take a second to learn how to tell if your speaker is actually blown or just rattling, as a loose internal wire or a failing surround is often the culprit rather than the electronics themselves.
Is Speaker Break-In Actually Real?
There is a massive debate online about whether you need to “break in” new speakers for 100 hours before they sound their best. Some experts, including researchers cited by the Audio Engineering Society (AES), suggest that while there is a measurable change in the mechanical compliance of a driver’s suspension (the spider and surround) after the first few minutes of use, the long-term “break-in” is often more about your ears getting used to the new sound signature. Understanding the truth about speaker break-in periods can save you a lot of anxiety; don’t leave your speakers running overnight with white noise—just play your music and enjoy the subtle evolution. Have you ever fallen into the trap of buying a piece of gear that didn’t live up to the hype? Let me know in the comments!
Stop Tossing Your Scratchy Vintage Amps
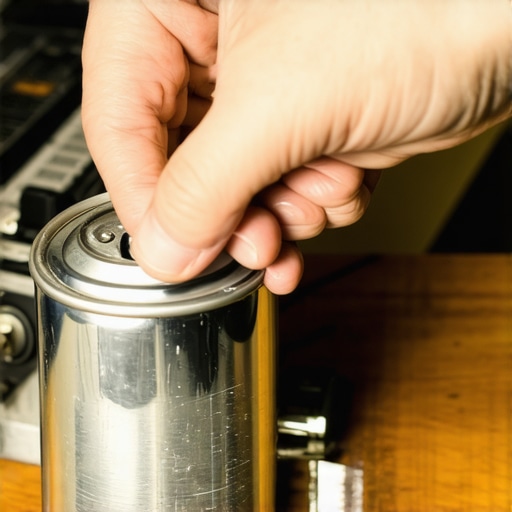
The most heartbreaking thing I see in the audio community is someone giving up on a legendary piece of gear because of a little static. I recently picked up a 1970s Marantz that the owner was ready to scrap because the volume knob sounded like a bag of potato chips being crushed. Most people don’t realize that internal oxidation is the real enemy. Before you assume your electronics are toast, learn how to fix a scratchy volume dial with electrical contact cleaner. I personally keep a can of DeoxIT D5 on my workbench at all times; it is the industry standard for a reason. Five minutes of work saved that Marantz from the landfill and restored its crystal-clear signal path. This isn’t just for the old stuff, either; modern mixers and soundbars can develop the same ‘crackle’ if they live in a humid or dusty environment.
Measure Twice and Listen Once
Once you’ve cleaned the signal path, you need to verify that your room hasn’t changed. Our homes are dynamic environments—new furniture, different curtains, or even moving a bookshelf can alter your acoustics. I’m a huge advocate for using software like REW (Room EQ Wizard) paired with a calibrated microphone, but you don’t need a professional studio setup to get started. You can actually learn how to use your phone to measure your rooms frequency response to identify where your bass is disappearing or where your high-end is getting too sharp. I’ve spent countless hours staring at frequency graphs, and the data rarely lies. If you see a massive dip at 80Hz, no amount of ‘audiophile’ cable is going to fix the physical cancellation happening in your room.
How do I keep my home audio system sounding like new for years?
Maintaining a system is about more than just avoiding dust. It is about understanding the lifespan of the components themselves. For instance, rubber and foam are organic materials that degrade. If you notice a lack of impact in your bass, it’s worth investigating why your vintage speakers are losing their punch-over-time. Often, the ‘surround’—that ring around the woofer—has dried out and cracked. This is a fixable problem, and learning how to revive old speakers with new foam surrounds can save you thousands on replacements. On the electronic side, watch for visual cues. If you have an old receiver, you should know how to tell if your speakers capacitor is starting-to-fail, as a leaking cap can eventually take out your entire power stage. For your daily drivers, like headphones, simple hygiene goes a long way. I make it a habit to learn how to clean your headphone ear pads without ruining the leather every few months to prevent sweat and oils from cracking the material.
The Future of the Listening Room
As we look forward, the trend is moving away from passive ‘perfect’ rooms and toward aggressive Digital Signal Processing (DSP). Legendary acoustic researcher Floyd Toole, in his seminal work Sound Reproduction, emphasizes that while room treatment is vital, the future lies in ‘Active Room Compensation.’ We are already seeing this with systems that use AI to map your room in three dimensions and adjust every driver’s timing in real-time. I predict that within five years, the ‘sweet spot’ will no longer be a fixed point on your couch but a moving target that follows your head via internal sensors. My advanced tip for you today: Don’t wait for the future. Download a free frequency generator app tonight and run a 20Hz to 200Hz sweep. If you hear certain notes getting much louder than others, you’ve just found your room’s standing waves—and now you have the power to fix them.
Hard Truths from a Decade of Audio Triumphs and Failures
The biggest lie in the industry is that you can buy your way out of a bad-sounding room. I have seen $50,000 systems sound worse than a well-placed budget setup because the owner ignored the basics. Always check your cabling first; why your receivers protection mode keeps triggering at high volume is often just a stray strand of wire touching the metal chassis.
Never underestimate physical stability. If you are on a desk or stand, the reason your speaker stands need to be filled with sand is to kill the tiny vibrations that blur your mid-range and ruin imaging. Lastly, if you are moving into the pro-audio or vintage space, knowing how to fix a scratchy volume fader on a professional mixer will save you more money and frustration than any extended warranty ever could.
#IMAGE_PLACEHOLDER_E#
My Essential Audio Optimization Toolkit
I do not leave my sound to chance, and neither should you. My go-to resources include Room EQ Wizard (REW) for pinpointing acoustic nodes, and the works of Dr. Floyd Toole for the scientific foundation of how we perceive sound. For hardware, I always keep DeoxIT for electrical contacts and a high-quality SPL meter app on my phone. If you are transitioning your skills to a desk environment, knowing how to set up a 2.1 system for the ultimate gaming audio is a great way to apply these concepts in a practical, everyday way.
Your Journey to Perfect Sound Starts Now
Building a world-class listening experience is not about having the deepest pockets; it is about having the sharpest ears and a bit of patience. Every time you tweak a speaker’s angle or add a rug to a bare floor, you are honoring the artists who poured their souls into those recordings. Do not get discouraged by technical hurdles or the search for the next big home audio deals. Focus on the music, trust the process, and let your room become the sanctuary it was meant to be.
Have you ever spent hours moving your speakers just a few inches only to realize the sound completely transformed? Let me know your biggest ‘lightbulb moment’ in the comments below!