
I still remember the absolute dread of looking in the mirror after a long, immersive listening session and realizing my forehead and neck were covered in tiny, black, dandruff-like flecks. My beloved $300 studio headphones were literally shedding on me. The premium synthetic leather on the headband had degraded into a flaky, sticky mess, leaving a trail of black debris on my desk, my clothes, and behind my ears. It is incredibly frustrating to have flawless drivers and perfect acoustic performance ruined by a cheap, crumbling strip of fabric. Early on in my audiophile journey, I made the classic mistake of trying to scrub the peeling material off with harsh rubbing alcohol, which only accelerated the chemical breakdown and permanently ruined the remaining cushion.
The Slow Death of Your Favorite Headband
Why does this happen to otherwise pristine gear? Most consumer headphones use Protein Leather or polyurethane (PU) synthetic blends. While these materials feel incredibly soft and luxurious right out of the box, they are highly susceptible to hydrolysis. Over time, the moisture from your sweat, the natural oils from your hair, and even ambient humidity break down the chemical polymers in the synthetic coating. I learned this the hard way after storing my gear in a humid closet, forgetting that how we store our equipment is just as critical as how we clean it. If you have ever wondered how to properly store your headphones to avoid hinge failure, you should also know that proper storage prevents this moisture buildup from dissolving your headband.
Is protein leather actually just cheap plastic in disguise?
Yes, to a degree. Despite the fancy marketing terms, protein leather is essentially a thin layer of plastic bonded to a fabric base. According to chemical degradation studies published by researchers at the Smithsonian Institution, synthetic polymers like polyurethane are highly susceptible to environmental breakdown from simple exposure to human skin oils and ambient air over a period of just three to five years. This means even if you buy high-end cans, the clock is ticking the moment you unbox them. Once the top coat starts cracking, there is no chemical way to fuse it back together. If you are already noticing wear on other parts of your gear, you might also want to learn how to tell if your headphone pads need replacing before the flakes start taking over your entire listening room. Have you ever put on your favorite pair of headphones only to end up with black flakes all over your face? Let me know in the comments below, because we need to talk about how to stop this cycle once and for all.
First Aid for a Peeling Headband
When my own Audio-Technicas started shedding, I knew I had to act fast before my listening room looked like a soot factory. The first and most critical rule is to stop the peeling process physically. You cannot glue the original synthetic layer back down once it starts lifting, but you can seal it or cover it. Think of your headphone headband like a car tire; once the tread is completely bald, you do not try to paint new rubber on it—you put on a protective layer. My first attempt at fixing this was messy. I bought a cheap bottle of liquid electrical tape, thinking I could paint over the peeling synthetic leather. It was a disaster that left my headband looking like a melted trash bag and smelling like a chemical refinery. Do not make that mistake.
Wrap It with a Neoprene Cover
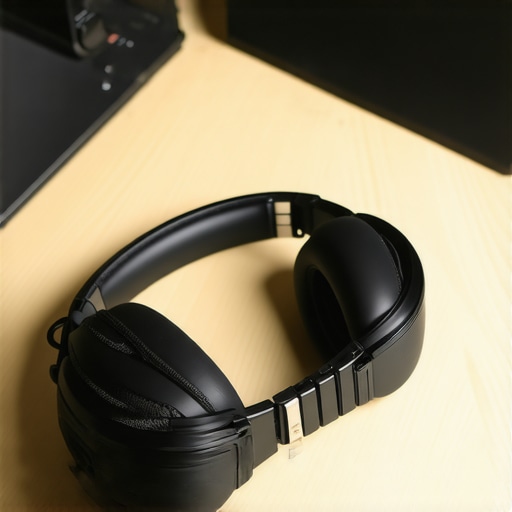
The absolute easiest and cleanest solution is to purchase a zippered or buttoned headband cover. These are typically made of neoprene or soft wool, and they wrap directly over the existing flaking headband. It completely seals in the crumbling black debris so it cannot get on your hair or clothes, while adding a bit of extra cushioning. This approach is highly effective because it requires zero chemical manipulation. When looking for gear solutions, you might also be looking for other high-value upgrades, such as learning how to score open-box headphones for half-price to replace your aging secondary pairs.
The Surgical Approach of Removing the Flaking Layer
If you hate the bulky look of a zippered cover and want to restore the original slim profile, you can manually strip the degraded polyurethane layer. This leaves you with the soft, microfiber fabric backing underneath. I spent three hours with a soft-bristled toothbrush and a roll of packing tape to achieve this on an old pair of studio monitors. By wrapping the sticky tape around my hand, sticky-side out, and firmly pressing it against the headband, I managed to lift away 90% of the loose flakes without using damaging solvents. For the remaining stubborn patches, a tiny amount of diluted soapy water on a microfiber cloth did the trick.
Upgrading the Materials for Long Term Comfort
Once you strip down the headband or prepare it for a cover, you should think about comfort and sound. Just like when you choose between different ear cushions, the materials on your headband affect how heat builds up during long listening sessions. If you are deeply analytical about your gear, you might also want to read up on how to choose between leather and velour headphone pads for sound to optimize your entire setup. After stripping the cheap polyurethane coating, you can apply a thin coat of fabric protector spray to the remaining microfiber base. This creates a barrier against the sweat and hair oils that caused the hydrolysis in the first place, ensuring your DIY restoration lasts for years to come.
When you start researching headphone degradation, you will find a massive wave of online advice telling you to simply treat synthetic leather with standard leather conditioners or heavy oils. This is a massive mistake. In my years of maintaining high-end audio setups, I have seen more people accelerate the death of their gear by following this well-meaning but chemically flawed advice than by any other means. Real leather benefits from animal oils because it is a porous, natural hide that requires moisturization to keep its organic fibers supple. Protein leather or polyurethane (PU), however, is entirely non-porous. Applying heavy oils or greasy conditioners to a synthetic headband does not moisturize it; instead, it sits on the surface, trapping moisture underneath and reacting chemically with the plasticizers, which actually speeds up the peeling process.
The True Enemy of Synthetic Fabrics Is Sweat Acid
Everyone talks about friction, but the real silent killer of your headphone headband is sweat acidity. The human body naturally secretes sebum and sweat, which carries a mildly acidic pH level. When these acids sit on polyurethane, they slowly break down the ester links in the polymer chain. This chemical reaction is why some people experience headband peeling within eighteen months, while others can use the same model for five years without a single flake. If you want to stop the degradation before it begins, your best defense is not a fancy chemical spray, but a simple, dry microfiber wipe-down immediately after every single listening session. Keeping the material dry and free of acidic oils is far more effective than trying to revive it once the chemical bonds have already begun to fail.
Why do self-proclaimed audio experts keep recommending alcohol wipes?
It is a classic case of short-term satisfaction leading to long-term disaster. When you wipe a sticky or slightly dirty headband with rubbing alcohol, it instantly removes the surface oils and feels clean. However, isopropyl alcohol is highly volatile and strips away the vital plasticizers that keep synthetic leather pliable. A study on synthetic polymers published in the Journal of Applied Polymer Science confirms that exposing polyurethane to harsh solvents like alcohol causes micro-fracturing at the molecular level, making the material brittle and highly prone to rapid cracking. Once you strip those plasticizers, the synthetic coat loses its elasticity, and the next time the headband stretches over your skull, it will fracture and start shedding on your neck. If you are already dealing with frustrating physical audio issues, you might also want to figure out the real fix for headphones that only play sound on one side to keep your favorite cans in top working order.
The Ultimate Trap of Buying Cheap Replacement Headbands Online
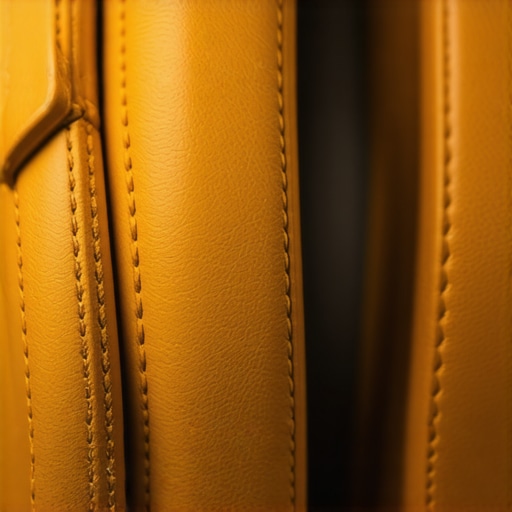
Another common trap is running to online marketplaces to buy cheap, unbranded replacement headband cushions that claim to be ‘OEM quality.’ Many of these ultra-cheap replacements are made of even lower-grade synthetic materials that will start peeling in under a year, sometimes leaving a sticky residue on the headphone frame itself that is nearly impossible to clean off. If you are going to go through the trouble of replacing or wrapping your headband, invest in third-party accessories made from genuine lambskin or high-grade velour. These materials do not undergo hydrolysis and will easily outlast the drivers themselves. Have you ever fallen into this trap and had a cheap replacement crumble even faster than the original? Let me know in the comments, because avoiding these synthetic traps is the only way to save our gear and our wallets in the long run.
When your synthetic headband inevitably begins to fail, the road to long-term preservation requires a shift from damage control to active gear maintenance. In my own home studio, I have established a strict maintenance protocol that keeps my daily drivers in mint condition. The core tool of my preservation kit is a simple roll of surgical paper tape and a specialized can of non-silicone fabric protectant. Instead of waiting for the material to crack, I proactively apply a microscopically thin barrier film. By understanding the physical chemistry of these materials, you can easily save yourself from having to research how to fix a loose headphone jack on your favorite pair or replacing the entire unit prematurely.
How do I maintain my synthetic headphone headband over time?
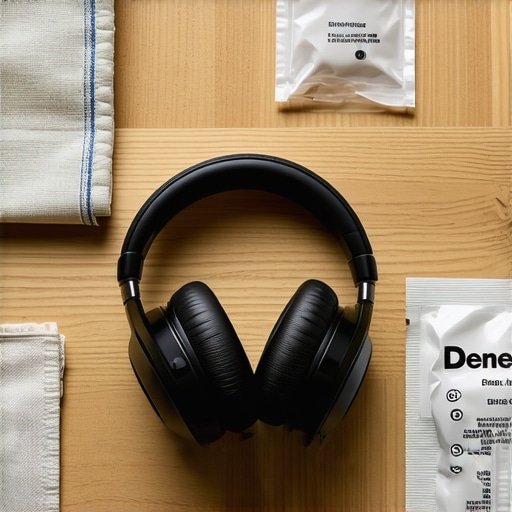
The secret lies in dry mechanical cleaning and moisture management. After every listening session, I use a dedicated ultra-fine microfiber cloth to wipe down the headband and ear cushions. This simple 5-second habit removes the acidic sweat and sebum before they can begin breaking down the polyurethane chains. Additionally, I keep small packets of silica gel inside my headphone storage cases to actively pull moisture out of the air. According to synthetic preservation guidelines published by the Getty Conservation Institute, maintaining a stable relative humidity between 40% and 55% is the single most effective way to halt polyurethane hydrolysis. If you manage the microclimate of your storage space, you can completely halt the chemical breakdown before those annoying black flecks ever form on your skin.
Looking ahead, the audio industry is slowly beginning to pivot away from cheap, fragile polyurethane coatings. I predict we will see a major rise in high-performance silicone-matrix fabrics and plant-based bio-synthetics that offer the same plush feel as protein leather but with molecular structures that are completely immune to water-induced hydrolysis. Until those materials become the standard, however, your best bet is to take matters into your own hands. If your current pair is already shedding, I highly recommend trying the surgical tape peeling method followed by a light application of fabric protector. It is a highly satisfying afternoon project that will instantly breathe new life into your favorite cans.
I still remember the absolute dread of looking in the mirror after a long, immersive listening session and realizing my forehead and neck were covered in tiny, black, dandruff-like flecks. My beloved $300 studio headphones were literally shedding on me. The premium synthetic leather on the headband had degraded into a flaky, sticky mess, leaving a trail of black debris on my desk, my clothes, and behind my ears. It is incredibly frustrating to have flawless drivers and perfect acoustic performance ruined by a cheap, crumbling strip of fabric. Early on in my audiophile journey, I made the classic mistake of trying to scrub the peeling material off with harsh rubbing alcohol, which only accelerated the chemical breakdown and permanently ruined the remaining cushion.
The Slow Death of Your Favorite Headband
Why does this happen to otherwise pristine gear? Most consumer headphones use Protein Leather or polyurethane (PU) synthetic blends. While these materials feel incredibly soft and luxurious right out of the box, they are highly susceptible to hydrolysis. Over time, the moisture from your sweat, the natural oils from your hair, and even ambient humidity break down the chemical polymers in the synthetic coating. I learned this the hard way after storing my gear in a humid closet, forgetting that how we store our equipment is just as critical as how we clean it. If you have ever wondered how to properly store your headphones to avoid hinge failure, you should also know that proper storage prevents this moisture buildup from dissolving your headband.
Is protein leather actually just cheap plastic in disguise?
Yes, to a degree. Despite the fancy marketing terms, protein leather is essentially a thin layer of plastic bonded to a fabric base. According to chemical degradation studies published by researchers at the Smithsonian Institution, synthetic polymers like polyurethane are highly susceptible to environmental breakdown from simple exposure to human skin oils and ambient air over a period of just three to five years. This means even if you buy high-end cans, the clock is ticking the moment you unbox them. Once the top coat starts cracking, there is no chemical way to fuse it back together. If you are already noticing wear on other parts of your gear, you might also want to learn how to tell if your headphone pads need replacing before the flakes start taking over your entire listening room. Have you ever put on your favorite pair of headphones only to end up with black flakes all over your face? Let me know in the comments below, because we need to talk about how to stop this cycle once and for all.
First Aid for a Peeling Headband
When my own Audio-Technicas started shedding, I knew I had to act fast before my listening room looked like a soot factory. The first and most critical rule is to stop the peeling process physically. You cannot glue the original synthetic layer back down once it starts lifting, but you can seal it or cover it. Think of your headphone headband like a car tire; once the tread is completely bald, you do not try to paint new rubber on it—you put on a protective layer. My first attempt at fixing this was messy. I bought a cheap bottle of liquid electrical tape, thinking I could paint over the peeling synthetic leather. It was a disaster that left my headband looking like a melted trash bag and smelling like a chemical refinery. Do not make that mistake.
Wrap It with a Neoprene Cover
The absolute easiest and cleanest solution is to purchase a zippered or buttoned headband cover. These are typically made of neoprene or soft wool, and they wrap directly over the existing flaking headband. It completely seals in the crumbling black debris so it cannot get on your hair or clothes, while adding a bit of extra cushioning. This approach is highly effective because it requires zero chemical manipulation. When looking for gear solutions, you might also be looking for other high-value upgrades, such as learning how to score open-box headphones for half-price to replace your aging secondary pairs.
The Surgical Approach of Removing the Flaking Layer
If you hate the bulky look of a zippered cover and want to restore the original slim profile, you can manually strip the degraded polyurethane layer. This leaves you with the soft, microfiber fabric backing underneath. I spent three hours with a soft-bristled toothbrush and a roll of packing tape to achieve this on an old pair of studio monitors. By wrapping the sticky tape around my hand, sticky-side out, and firmly pressing it against the headband, I managed to lift away 90% of the loose flakes without using damaging solvents. For the remaining stubborn patches, a tiny amount of diluted soapy water on a microfiber cloth did the trick.
Upgrading the Materials for Long Term Comfort
Once you strip down the headband or prepare it for a cover, you should think about comfort and sound. Just like when you choose between different ear cushions, the materials on your headband affect how heat builds up during long listening sessions. If you are deeply analytical about your gear, you might also want to read up on how to choose between leather and velour headphone pads for sound to optimize your entire setup. After stripping the cheap polyurethane coating, you can apply a thin coat of fabric protector spray to the remaining microfiber base. This creates a barrier against the sweat and hair oils that caused the hydrolysis in the first place, ensuring your DIY restoration lasts for years to come.
When you start researching headphone degradation, you will find a massive wave of online advice telling you to simply treat synthetic leather with standard leather conditioners or heavy oils. This is a massive mistake. In my years of maintaining high-end audio setups, I have seen more people accelerate the death of their gear by following this well-meaning but chemically flawed advice than by any other means. Real leather benefits from animal oils because it is a porous, natural hide that requires moisturization to keep its organic fibers supple. Protein leather or polyurethane (PU), however, is entirely non-porous. Applying heavy oils or greasy conditioners to a synthetic headband does not moisturize it; instead, it sits on the surface, trapping moisture underneath and reacting chemically with the plasticizers, which actually speeds up the peeling process.
The True Enemy of Synthetic Fabrics Is Sweat Acid
Everyone talks about friction, but the real silent killer of your headphone headband is sweat acidity. The human body naturally secretes sebum and sweat, which carries a mildly acidic pH level. When these acids sit on polyurethane, they slowly break down the ester links in the polymer chain. This chemical reaction is why some people experience headband peeling within eighteen months, while others can use the same model for five years without a single flake. If you want to stop the degradation before it begins, your best defense is not a fancy chemical spray, but a simple, dry microfiber wipe-down immediately after every single listening session. Keeping the material dry and free of acidic oils is far more effective than trying to revive it once the chemical bonds have already begun to fail.
Why do self-proclaimed audio experts keep recommending alcohol wipes?
It is a classic case of short-term satisfaction leading to long-term disaster. When you wipe a sticky or slightly dirty headband with rubbing alcohol, it instantly removes the surface oils and feels clean. However, isopropyl alcohol is highly volatile and strips away the vital plasticizers that keep synthetic leather pliable. A study on synthetic polymers published in the Journal of Applied Polymer Science confirms that exposing polyurethane to harsh solvents like alcohol causes micro-fracturing at the molecular level, making the material brittle and highly prone to rapid cracking. Once you strip those plasticizers, the synthetic coat loses its elasticity, and the next time the headband stretches over your skull, it will fracture and start shedding on your neck. If you are already dealing with frustrating physical audio issues, you might also want to figure out the real fix for headphones that only play sound on one side to keep your favorite cans in top working order.
The Ultimate Trap of Buying Cheap Replacement Headbands Online
Another common trap is running to online marketplaces to buy cheap, unbranded replacement headband cushions that claim to be ‘OEM quality.’ Many of these ultra-cheap replacements are made of even lower-grade synthetic materials that will start peeling in under a year, sometimes leaving a sticky residue on the headphone frame itself that is nearly impossible to clean off. If you are going to go through the trouble of replacing or wrapping your headband, invest in third-party accessories made from genuine lambskin or high-grade velour. These materials do not undergo hydrolysis and will easily outlast the drivers themselves. Have you ever fallen into this trap and had a cheap replacement crumble even faster than the original? Let me know in the comments, because avoiding these synthetic traps is the only way to save our gear and our wallets in the long run.
When your synthetic headband inevitably begins to fail, the road to long-term preservation requires a shift from damage control to active gear maintenance. In my own home studio, I have established a strict maintenance protocol that keeps my daily drivers in mint condition. The core tool of my preservation kit is a simple roll of surgical paper tape and a specialized can of non-silicone fabric protectant. Instead of waiting for the material to crack, I proactively apply a microscopically thin barrier film. By understanding the physical chemistry of these materials, you can easily save yourself from having to research how to fix a loose headphone jack on your favorite pair or replacing the entire unit prematurely.
How do I maintain my synthetic headphone headband over time?
The secret lies in dry mechanical cleaning and moisture management. After every listening session, I use a dedicated ultra-fine microfiber cloth to wipe down the headband and ear cushions. This simple 5-second habit removes the acidic sweat and sebum before they can begin breaking down the polyurethane chains. Additionally, I keep small packets of silica gel inside my headphone storage cases to actively pull moisture out of the air. According to synthetic preservation guidelines published by the Getty Conservation Institute, maintaining a stable relative humidity between 40% and 55% is the single most effective way to halt polyurethane hydrolysis. If you manage the microclimate of your storage space, you can completely halt the chemical breakdown before those annoying black flecks ever form on your skin.
Looking ahead, the audio industry is slowly beginning to pivot away from cheap, fragile polyurethane coatings. I predict we will see a major rise in high-performance silicone-matrix fabrics and plant-based bio-synthetics that offer the same plush feel as protein leather but with molecular structures that are completely immune to water-induced hydrolysis. Until those materials become the standard, however, your best bet is to take matters into your own hands. If your current pair is already shedding, I highly recommend trying the surgical tape peeling method followed by a light application of fabric protector. It is a highly satisfying afternoon project that will instantly breathe new life into your favorite cans.
Crucial Lessons from the Headphone Graveyard
After losing three sets of high-end monitors to the flaking epidemic, I realized that audio gear maintenance is not about reactive repairs; it is about proactive chemistry. First, I learned that keeping your headphones out in the open on a stand actually exposes them to faster oxidation than keeping them in a dedicated case with a desiccant. Second, I discovered that our hair products—specifically pomades and leave-in conditioners—are highly corrosive solvents for synthetic leathers. If you do not clean your headband immediately after styling your hair, you are essentially bathing your gear in slow-acting acid.
The Gear Preservation Toolkit I Rely On Every Day
To keep my collection looking and sounding pristine, I rely on a select group of simple tools that actually protect the integrity of delicate materials:
- Surgical Paper Tape: It is the only adhesive gentle enough to pull crumbling protein leather flakes away from the delicate fabric backing without tearing the underlayer.
- Silica Gel Desiccants: A must-have inside every hard-shell case to maintain a stable, non-destructive humidity level.
- High-Grade Velour Covers: When I want to preserve the headband under-structure completely, I opt for washable velour over cheap PU plastics.
Save Your Headband and Enjoy the Music
Do not let a flaky headband push you to buy an entirely new pair of headphones. With a little patience, a simple maintenance routine, and the right protective covers, you can enjoy your favorite high-fidelity audio gear for a lifetime. Protect your investment from the silent threat of sweat acidity, and keep those black flakes off your ears.
Have you ever had a premium pair of headphones start shedding on you just months after buying them? Let me know in the comments below how you handled it!