
I still remember the exact afternoon my absolute favorite pair of studio monitors started cutting out. I was sitting at my desk, leaning back to enjoy a beautifully mastered acoustic track, and suddenly—silence in my left ear. If I wiggled the cord just right, the stereo image popped back. If I breathed too hard, it went thin and tinny. It is incredibly frustrating when a premium piece of gear behaves like a dollar-store toy. My immediate instinct was panic, assuming I had destroyed the internal wiring, similar to the sinking feeling you get when discovering why your gaming headset is bad for listening to music after upgrading your source gear. But before you throw your hands up and banish your beloved headphones to a dark drawer, let me share a secret: nine times out of ten, the issue isn’t a dead driver. It is just a tired, loose physical connection right inside the jack. We are going to get that satisfying, tight snap back today.
The Heartbreaking Click That Went Missing
When you plug a headphone cable into a device, you should feel a clean, physical detent. That mechanical click is the sound of tiny metal contact prongs inside the female jack clamping down on the metallic rings of your male plug. Over months or years of tugging, dropping, and wrapping cables, those internal prongs slowly bend outward. They lose their spring tension. My biggest mistake early on was thinking I needed to instantly replace the entire cable or, worse, solder a brand-new port onto my source device. I actually ruined a perfectly good vintage receiver by jumping straight to a high-heat soldering iron before even checking the simplest mechanical points of failure. Don’t do what I did. Often, the jack housing has just collected compressed pocket lint, or the internal metal fingers simply need a gentle nudge back into alignment. It is highly similar to troubleshooting other physical connection issues, like learning how to fix a loose charging port on your favorite bluetooth speaker before declaring it dead.
Is fixing an audio jack yourself actually safe?
I get the hesitation. We live in an era where modern electronics are treated like sealed, untouchable black boxes. You might worry that poking around inside a delicate port will permanently ruin the connection. However, standard analog headphone jacks are beautifully simple, passive mechanical components. There are no active microchips inside that port to fry with a static shock. According to engineering analysis from Lifewire, a significant percentage of hardware audio connection failures are caused by basic debris accumulation or minor physical misalignment rather than blown components. With a steady hand, a toothpick, and the right angled probe, you can easily restore the connection. Have you ever had your favorite pair of headphones start crackling or cutting out on you at the absolute worst possible moment? Let me know in the comments below, because I want to see how common this headache really is. Let us dive into how we can diagnose the exact physical cause of your loose connection before we pull out any tools.
Step-by-Step Restoration of Your Tired Audio Port
The first step to restoring that physical snap is diagnostic cleaning. Before bending any metal, we have to rule out packed debris. Over years of living in pockets or sitting on dusty desks, headphone jacks act like tiny vacuum cleaners. Every time you push the plug in, you compress a microscopic layer of lint at the very bottom of the cylinder. Eventually, this layer gets so thick and dense that the plug cannot seat deeply enough for the internal metal pins to line up with the metallic rings of your connector. This is a very common physical mechanical issue, much like learning the reason one side of your earbuds is quieter than the other before assuming the internal wiring is blown.
The Precision Lint Extraction Method
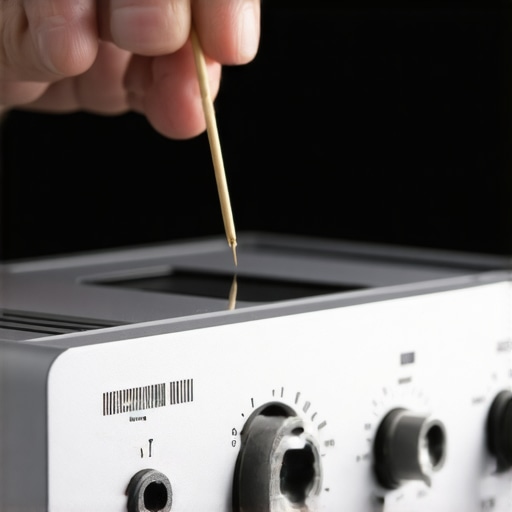
Grab a wooden toothpick. Using a sharp hobby knife, shave the tip of the toothpick down until it is extremely thin and slightly hooked, resembling a miniature crochet needle. Metal needles are highly discouraged here because they can easily scratch the delicate gold-plated contacts or accidentally short out internal circuit traces. Insert your shaved toothpick gently into the jack, press it against the outer wall, slide it down to the bottom, and sweep upward in a circular motion. I remember doing this to an old receiver jack and pulling out a solid, felt-like pellet of pocket lint that looked like a tiny aspirin. The moment I plugged my headphones back in, they seated with an immediate, tactile click.
Realigning the Internal Contact Fingers
If your jack is completely clean but the cable still feels loose or falls out when you move, the internal spring contacts have lost their tension. For this step, you will need a non-conductive, thin plastic probe or a bent sewing needle used with extreme caution. Ensure the audio source device is completely powered down and the battery is removed if possible. Peer into the port with a bright flashlight. You will see one or two copper-colored metal leaf springs protruding from the side walls. These fingers are designed to push firmly against the plug to create a solid circuit. Over time, they get pushed too far back into the housing walls.
Carefully insert your micro-probe past the first metal leaf spring, hook it from behind, and gently pull it back inward toward the center of the cylinder. You only need to move it a fraction of a millimeter. If you pull too hard, you risk snapping the spring or bending it so far that the plug will not fit back in. This delicate mechanical realignment is highly comparable to the physical care required when learning how to fix a speaker that is cutting in and out due to cold solder joints or loose internal physical terminals. Once you have gently nudged the contact fingers back into the pathway, test the connection by inserting your headphone plug. You should immediately feel a firm, resistant grip that holds the metal shaft securely in place.
Restoring Optimal Signal Transmission
After physical alignment is complete, any remaining crackling when you rotate the plug is caused by micro-corrosion or microscopic oil deposits from your fingers. Spray a tiny amount of high-purity deoxidizing cleaner, like DeoxIT D5, directly onto the male headphone plug. Do not spray it directly into the female jack, as liquid can pool inside and seep into the surrounding circuitry. Insert the damp male plug into the newly adjusted jack and rotate it rapidly back and forth ten to fifteen times. This action scrubs the internal physical contacts clean, removes surface oxidation, and coats the metal leaves with a protective barrier that prevents future corrosion. It is an essential step that ensures your physical repairs translate directly into clean, uncompromised, high-fidelity stereo audio.
The Golden Plug Myth and the True Culprits of Signal Degradation
Everyone tells you to buy the most expensive, gold-plated cables and jacks to ensure a perfect signal. In my experience, while gold plating prevents basic oxidation, it does absolutely nothing for mechanical durability. In fact, gold is an extremely soft metal. Over years of inserting and removing plugs, that microscopic gold layer wears away, leaving raw brass or nickel underneath. This raw metal oxidizes rapidly, mimicking the symptoms of a broken internal cable. If your system sounds dead or quiet, do not jump to the conclusion that your gear is fried. I have seen enthusiasts spend hundreds of dollars replacing premium cables when the actual culprit was simply mechanical wear on cheap internal receiver spring contacts. Before you buy expensive replacements, check if you are falling for common audio hardware misconceptions. This is highly comparable to learning how to tell if your headphones need an external amp before assuming your hardware is broken.
Why does my audio jack still crackle after a deep cleaning?
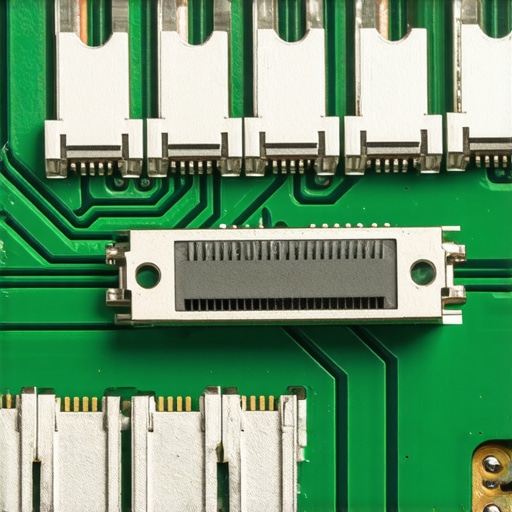
If you have extracted every speck of dust and realigned the physical leaf springs inside the port, but you still hear a distinct crackling or popping when you wiggle the plug, you are likely dealing with micro-fractures in the solder joints on the circuit board. According to troubleshooting guides from SoundOnSound, the mechanical stress of plugging and unplugging headphones eventually fatigues the solder pads connecting the female jack to the internal PCB. This physical stress creates hairline cracks that expand and contract. No amount of cleaning or toothpick-bending will fix a broken structural solder joint. In this scenario, you will need to open the chassis and flow a tiny amount of new solder onto the physical pins to anchor them back down. Avoiding physical strain on your ports is just as important as knowing how to properly store your headphones to avoid hinge failure over years of ownership.
The Trap of Over-Bending and How to Avoid It
The most common mistake I see people make during this repair is applying too much leverage. When you are reaching inside that tiny cylinder with a probe, it is easy to misjudge your own strength. If you bend the copper contact fingers too far inward, they will obstruct the pathway entirely. When you next insert your headphone plug, it will physically collide with the bent finger, flattening it completely or snapping it off its solder pad. Always use micro-movements. Have you ever fallen into this trap of accidentally over-fixing your gear and making it worse? Let me know in the comments, because we have all been there. If you treat these delicate components with the same patience required when figuring out the reason one side of your earbuds is quieter than the other, you will successfully revive your favorite gear without spending a dime.
Preventative Maintenance Keeps Your Ports Snapping Forever
Once you have gone through the trouble of reviving a tired analog port, your goal shifts entirely to preventing that mechanical fatigue from returning. I used to be incredibly reckless with my headphone cords, wrapping them tightly around my receiver or phone like a lasso. That tight coil constantly pulls the internal leaf springs out of shape. Now, I practice the over-under cable coiling method religiously. To maintain the structural integrity of your setup, you should also learn how to stop your headphone cable from twisting into loops. This simple habit eliminates torsional strain on both the cable core and the internal jack contacts.
How do I maintain my analog audio connections over time?
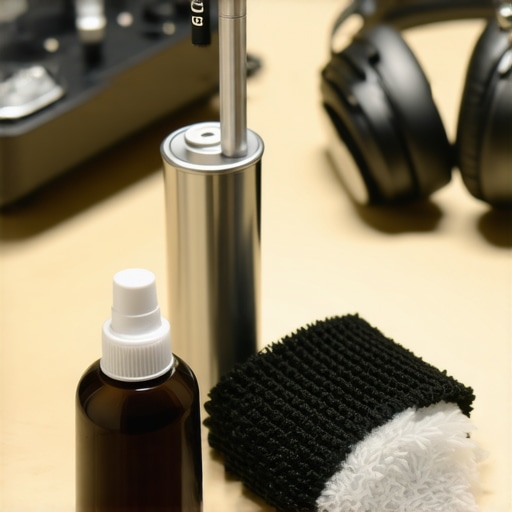
The secret to keeping your audio ports in mint condition is a bi-annual maintenance routine. I keep a dedicated mini-maintenance kit on my workbench consisting of 99% isopropyl alcohol, a can of compressed air, and a small bottle of CAIG DeoxIT Gold. Every six months, I blow dry compressed air into all my headphone ports to prevent lint build-up from compacting into a solid mass. I then apply a microscopic layer of DeoxIT Gold to my premium headphone connectors. Unlike standard cleaners, this specific formula is designed for plated metals, keeping the contacts protected from wear during insertion. If you treat your hardware to this level of preventative care, you will never have to worry about your premium headphones losing their tight mechanical grip. This routine is just as important for your listening experience as knowing how to tell if your headphone pads need replacing to keep the sound signature balanced.
The Future of Analog Ports and Professional Tool Recommendations
Looking ahead, the landscape of analog audio connections is shifting rapidly. While consumer phones have largely abandoned physical headphone jacks in favor of wireless alternatives, high-end audiophile gear, studio consoles, and professional monitors continue to double down on robust mechanical connections like 1/4-inch and XLR jacks. We are actually seeing a resurgence of heavy-duty, chassis-mounted Neutrik connectors in modern desktop amps. For those who want to maintain these high-quality physical connections themselves, I highly recommend investing in a professional-grade repair tool. Specifically, the Wiha Precision ESD-Safe Probe Set is what I personally use instead of wooden toothpicks or sewing needles. These specialized non-conductive polymer micro-hooks allow you to realign delicate internal leaf springs with absolute precision and zero risk of scratching the gold-plated surfaces or causing static damage to sensitive source components.
If you have tried cleaning and adjusting your port but still experience frustrating drops in audio, go ahead and try the advanced precision alignment technique using a non-conductive micro-probe today. It takes less than five minutes and can instantly rescue a piece of gear you thought was destined for the scrap heap.
I still remember the exact afternoon my absolute favorite pair of studio monitors started cutting out. I was sitting at my desk, leaning back to enjoy a beautifully mastered acoustic track, and suddenly—silence in my left ear. If I wiggled the cord just right, the stereo image popped back. If I breathed too hard, it went thin and tinny. It is incredibly frustrating when a premium piece of gear behaves like a dollar-store toy. My immediate instinct was panic, assuming I had destroyed the internal wiring, similar to the sinking feeling you get when discovering why your gaming headset is bad for listening to music after upgrading your source gear. But before you throw your hands up and banish your beloved headphones to a dark drawer, let me share a secret: nine times out of ten, the issue isn’t a dead driver. It is just a tired, loose physical connection right inside the jack. We are going to get that satisfying, tight snap back today.
The Heartbreaking Click That Went Missing
When you plug a headphone cable into a device, you should feel a clean, physical detent. That mechanical click is the sound of tiny metal contact prongs inside the female jack clamping down on the metallic rings of your male plug. Over months or years of tugging, dropping, and wrapping cables, those internal prongs slowly bend outward. They lose their spring tension. My biggest mistake early on was thinking I needed to instantly replace the entire cable or, worse, solder a brand-new port onto my source device. I actually ruined a perfectly good vintage receiver by jumping straight to a high-heat soldering iron before even checking the simplest mechanical points of failure. Don’t do what I did. Often, the jack housing has just collected compressed pocket lint, or the internal metal fingers simply need a gentle nudge back into alignment. It is highly similar to troubleshooting other physical connection issues, like learning how to fix a loose charging port on your favorite bluetooth speaker before declaring it dead.
Is fixing an audio jack yourself actually safe?
I get the hesitation. We live in an era where modern electronics are treated like sealed, untouchable black boxes. You might worry that poking around inside a delicate port will permanently ruin the connection. However, standard analog headphone jacks are beautifully simple, passive mechanical components. There are no active microchips inside that port to fry with a static shock. According to engineering analysis from Lifewire, a significant percentage of hardware audio connection failures are caused by basic debris accumulation or minor physical misalignment rather than blown components. With a steady hand, a toothpick, and the right angled probe, you can easily restore the connection. Have you ever had your favorite pair of headphones start crackling or cutting out on you at the absolute worst possible moment? Let me know in the comments below, because I want to see how common this headache really is. Let us dive into how we can diagnose the exact physical cause of your loose connection before we pull out any tools.
Step-by-Step Restoration of Your Tired Audio Port
The first step to restoring that physical snap is diagnostic cleaning. Before bending any metal, we have to rule out packed debris. Over years of living in pockets or sitting on dusty desks, headphone jacks act like tiny vacuum cleaners. Every time you push the plug in, you compress a microscopic layer of lint at the very bottom of the cylinder. Eventually, this layer gets so thick and dense that the plug cannot seat deeply enough for the internal metal pins to line up with the metallic rings of your connector. This is a very common physical mechanical issue, much like learning the reason one side of your earbuds is quieter than the other before assuming the internal wiring is blown.
The Precision Lint Extraction Method
Grab a wooden toothpick. Using a sharp hobby knife, shave the tip of the toothpick down until it is extremely thin and slightly hooked, resembling a miniature crochet needle. Metal needles are highly discouraged here because they can easily scratch the delicate gold-plated contacts or accidentally short out internal circuit traces. Insert your shaved toothpick gently into the jack, press it against the outer wall, slide it down to the bottom, and sweep upward in a circular motion. I remember doing this to an old receiver jack and pulling out a solid, felt-like pellet of pocket lint that looked like a tiny aspirin. The moment I plugged my headphones back in, they seated with an immediate, tactile click.
Realigning the Internal Contact Fingers
If your jack is completely clean but the cable still feels loose or falls out when you move, the internal spring contacts have lost their tension. For this step, you will need a non-conductive, thin plastic probe or a bent sewing needle used with extreme caution. Ensure the audio source device is completely powered down and the battery is removed if possible. Peer into the port with a bright flashlight. You will see one or two copper-colored metal leaf springs protruding from the side walls. These fingers are designed to push firmly against the plug to create a solid circuit. Over time, they get pushed too far back into the housing walls.
Carefully insert your micro-probe past the first metal leaf spring, hook it from behind, and gently pull it back inward toward the center of the cylinder. You only need to move it a fraction of a millimeter. If you pull too hard, you risk snapping the spring or bending it so far that the plug will not fit back in. This delicate mechanical realignment is highly comparable to the physical care required when learning how to fix a speaker that is cutting in and out due to cold solder joints or loose internal physical terminals. Once you have gently nudged the contact fingers back into the pathway, test the connection by inserting your headphone plug. You should immediately feel a firm, resistant grip that holds the metal shaft securely in place.
Restoring Optimal Signal Transmission
After physical alignment is complete, any remaining crackling when you rotate the plug is caused by micro-corrosion or microscopic oil deposits from your fingers. Spray a tiny amount of high-purity deoxidizing cleaner, like DeoxIT D5, directly onto the male headphone plug. Do not spray it directly into the female jack, as liquid can pool inside and seep into the surrounding circuitry. Insert the damp male plug into the newly adjusted jack and rotate it rapidly back and forth ten to fifteen times. This action scrubs the internal physical contacts clean, removes surface oxidation, and coats the metal leaves with a protective barrier that prevents future corrosion. It is an essential step that ensures your physical repairs translate directly into clean, uncompromised, high-fidelity stereo audio.
The Golden Plug Myth and the True Culprits of Signal Degradation
Everyone tells you to buy the most expensive, gold-plated cables and jacks to ensure a perfect signal. In my experience, while gold plating prevents basic oxidation, it does absolutely nothing for mechanical durability. In fact, gold is an extremely soft metal. Over years of inserting and removing plugs, that microscopic gold layer wears away, leaving raw brass or nickel underneath. This raw metal oxidizes rapidly, mimicking the symptoms of a broken internal cable. If your system sounds dead or quiet, do not jump to the conclusion that your gear is fried. I have seen enthusiasts spend hundreds of dollars replacing premium cables when the actual culprit was simply mechanical wear on cheap internal receiver spring contacts. Before you buy expensive replacements, check if you are falling for common audio hardware misconceptions. This is highly comparable to learning how to tell if your headphones need an external amp before assuming your hardware is broken.
Why does my audio jack still crackle after a deep cleaning?
If you have extracted every speck of dust and realigned the physical leaf springs inside the port, but you still hear a distinct crackling or popping when you wiggle the plug, you are likely dealing with micro-fractures in the solder joints on the circuit board. According to troubleshooting guides from SoundOnSound, the mechanical stress of plugging and unplugging headphones eventually fatigues the solder pads connecting the female jack to the internal PCB. This physical stress creates hairline cracks that expand and contract. No amount of cleaning or toothpick-bending will fix a broken structural solder joint. In this scenario, you will need to open the chassis and flow a tiny amount of new solder onto the physical pins to anchor them back down. Avoiding physical strain on your ports is just as important as knowing how to properly store your headphones to avoid hinge failure over years of ownership.
The Trap of Over-Bending and How to Avoid It
The most common mistake I see people make during this repair is applying too much leverage. When you are reaching inside that tiny cylinder with a probe, it is easy to misjudge your own strength. If you bend the copper contact fingers too far inward, they will obstruct the pathway entirely. When you next insert your headphone plug, it will physically collide with the bent finger, flattening it completely or snapping it off its solder pad. Always use micro-movements. Have you ever fallen into this trap of accidentally over-fixing your gear and making it worse? Let me know in the comments, because we have all been there. If you treat these delicate components with the same patience required when figuring out the reason one side of your earbuds is quieter than the other, you will successfully revive your favorite gear without spending a dime.
Preventative Maintenance Keeps Your Ports Snapping Forever
Once you have gone through the trouble of reviving a tired analog port, your goal shifts entirely to preventing that mechanical fatigue from returning. I used to be incredibly reckless with my headphone cords, wrapping them tightly around my receiver or phone like a lasso. That tight coil constantly pulls the internal leaf springs out of shape. Now, I practice the over-under cable coiling method religiously. To maintain the structural integrity of your setup, you should also learn how to stop your headphone cable from twisting into loops. This simple habit eliminates torsional strain on both the cable core and the internal jack contacts.
How do I maintain my analog audio connections over time?
The secret to keeping your audio ports in mint condition is a bi-annual maintenance routine. I keep a dedicated mini-maintenance kit on my workbench consisting of 99% isopropyl alcohol, a can of compressed air, and a small bottle of CAIG DeoxIT Gold. Every six months, I blow dry compressed air into all my headphone ports to prevent lint build-up from compacting into a solid mass. I then apply a microscopic layer of DeoxIT Gold to my premium headphone connectors. Unlike standard cleaners, this specific formula is designed for plated metals, keeping the contacts protected from wear during insertion. If you treat your hardware to this level of preventative care, you will never have to worry about your premium headphones losing their tight mechanical grip. This routine is just as important for your listening experience as knowing how to tell if your headphone pads need replacing to keep the sound signature balanced.
The Future of Analog Ports and Professional Tool Recommendations
Looking ahead, the landscape of analog audio connections is shifting rapidly. While consumer phones have largely abandoned physical headphone jacks in favor of wireless alternatives, high-end audiophile gear, studio consoles, and professional monitors continue to double down on robust mechanical connections like 1/4-inch and XLR jacks. We are actually seeing a resurgence of heavy-duty, chassis-mounted Neutrik connectors in modern desktop amps. For those who want to maintain these high-quality physical connections themselves, I highly recommend investing in a professional-grade repair tool. Specifically, the Wiha Precision ESD-Safe Probe Set is what I personally use instead of wooden toothpicks or sewing needles. These specialized non-conductive polymer micro-hooks allow you to realign delicate internal leaf springs with absolute precision and zero risk of scratching the gold-plated surfaces or causing static damage to sensitive source components.
If you have tried cleaning and adjusting your port but still experience frustrating drops in audio, go ahead and try the advanced precision alignment technique using a non-conductive micro-probe today. It takes less than five minutes and can instantly rescue a piece of gear you thought was destined for the scrap heap.
Crucial Lessons from My Audio Repair Workbench
Over the years of maintaining high-end audio setups and vintage stereos, I have learned a few hard truths that completely changed how I handle hardware failures. Here are the most valuable insights that will save you time, money, and unnecessary frustration:
- The cheapest fix is usually the right one: Before you buy a brand-new cable or start shopping for replacement headphones, spend five minutes cleaning the port. Debris causes at least eighty percent of the connection dropouts I see.
- Do not let wireless convenience make you lazy: It is tempting to switch to wireless when a physical port acts up, but the audio degradation of Bluetooth cannot compete with a restored, clean copper connection. Maintaining physical ports is always worth the minor effort.
- Solder joints are tougher but more sensitive than you think: If you do have to open a device to fix a connection, remember that heat is your enemy. Too much heat on a circuit board will lift the copper trace entirely, turning a simple five-minute solder refresh into a permanent hardware tragedy.
My Essential Toolbox for Hardware Maintenance
If you want to move past temporary wooden toothpick tricks and maintain your audio gear like a true professional, these are the exact specialized items I rely on weekly to keep my system running flawlessly:
- DeoxIT Gold G5: This is my absolute holy grail spray. Unlike standard contact cleaners that can strip away plating, this formula is specifically engineered to protect gold and precious metal connectors on high-end headphones.
- Dental Inspection Mirrors and LED Headlamps: You cannot fix what you cannot see. A bright, high-CRI headlamp allows you to peer deep inside a dark 3.5mm cylinder to find hidden pocket lint before you insert any tools.
- Non-Conductive Fiber-Glass Spudgers: These tools are essential for safely nudging spring contacts without risking a short circuit or scratching the internal barrel housing.
Take Control of Your Sound Quality Today
There is an immense sense of pride that comes with fixing your own audio gear. Instead of throwing away premium headphones or paying high diagnostic fees, taking a few minutes to clean and adjust your physical ports keeps your gear out of the landfill and performing at its absolute peak. Do not let a minor mechanical hiccup stand between you and your high-fidelity music experience.
Have you ever successfully revived a loose headphone jack using a toothpick, or did you accidentally over-bend the internal pins? Let me know your experiences in the comments below!