
I was right in the middle of the best backyard BBQ of the summer. The ribs were smoking, the drinks were cold, and the playlist was hitting that perfect vibe. Then, silence. I checked my speaker, saw the dreaded red blink, and reached for the charger. I plugged it in, but nothing happened. I had to wiggle the cord, prop it up with a coaster, and pray it wouldn’t move. It was infuriating. If you’ve ever spent twenty minutes trying to find that ‘sweet spot’ where the charging light finally stays on, you know exactly the kind of heartbreak I’m talking about. It feels like your favorite piece of tech is slowly slipping away, and all for the sake of a tiny piece of metal.
Stop Balancing Your Speaker on a Stack of Books
We’ve all been there. You think maybe the cable is the issue, so you swap it out. But even after realizing why your portable speaker won’t charge with your phone cable, the port itself still feels like a loose tooth. For a long time, I thought a loose port meant the end of the road. I actually threw away a perfectly good unit years ago because I was too intimidated to look inside. I made the classic mistake of trying to ‘clean’ it with a metal paperclip while it was still powered on—don’t do that. You’ll short the board faster than you can say ‘blown fuse.’ Today, I’m going to show you how to stabilize that connection and breathe life back into your gear. Whether you are dealing with a micro-USB or a USB-C connection, the physics of the failure are usually the same.
Can You Really Fix This Without Being an Electrical Engineer?
This is the big fear, right? You’re worried that one wrong move with a screwdriver will turn your favorite Bluetooth speaker into a very expensive doorstop. According to data shared by the Repair Association, charging port failures are among the top three reasons consumers discard portable electronics, yet a significant portion of these are simply mechanical separations from the solder pads. It’s a design flaw, not a personal failing. You don’t need an advanced degree to fix it; you just need patience and the right approach. Whether your bluetooth speaker is quieter than it used to be or it simply won’t take a charge, the mechanical integrity of that port is the heartbeat of the device. Before we start tearing things apart, I have to ask: have you found yourself doing the ‘charging cable dance’ lately? Drop a comment and tell me what weird object you’re currently using to prop up your charger. We’re going to get past the MacGyver fixes and actually solve the problem. Much like learning how to fix a loose speaker terminal on your cabinet, once you understand the physics of the wiggle, the solution becomes much clearer. Let’s look at why these ports fail and how we can pin them back down for good.
Crack the Shell Without Breaking the Clips
The first hurdle is always the hardest: getting inside. Most portable speakers are held together by a combination of hidden screws and annoying plastic clips. Start by peeling back any rubberized feet or adhesive labels, as manufacturers love to hide screws there. Once the screws are out, don’t just yank the casing apart. Use a thin plastic pry tool—or an old guitar pick—to gently walk around the seam. If you feel resistance, stop. There is likely a ribbon cable for the buttons or a wire for the battery connecting the two halves. My first attempt at this was on a rugged outdoor speaker where I was so impatient that I used a flathead screwdriver. I ended up gouging the plastic and snapping a internal clip, which meant the speaker never sat flush again. Be patient; the goal is to keep the housing as pristine as the internals. While you have the shell open, it is the perfect time to learn how to tell if your speaker capacitors are starting to leak so you can address any other aging components before sealing it back up.
Identify the Fracture Point
Once the circuit board is exposed, look closely at the charging port. Usually, the port is a small metal box soldered to the board at four structural points and five or more tiny signal pins. Most ‘loose’ ports have simply broken away from their structural solder pads. Use a magnifying glass to see if there is a hairline fracture between the port’s legs and the green circuit board. If the port wiggles when you touch it, the connection is broken. Before you start soldering, it is a smart move to know how to use a multimeter to find a short in your speaker wires or the port itself. Testing for continuity between the port pins and the board traces will confirm if you’re looking at a simple mechanical failure or a fried component.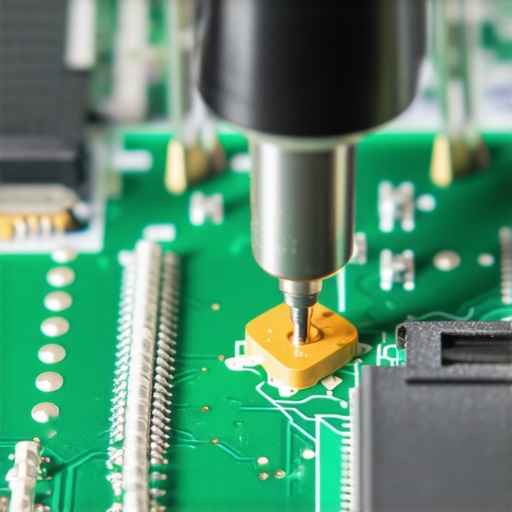
The Five-Minute Solder Reflow
Fixing the port doesn’t necessarily mean replacing it. Often, all you need to do is ‘reflow’ the existing solder. Use a fine-tip soldering iron set to about 350 degrees Celsius. Touch the tip to the metal leg of the port and the copper pad on the board simultaneously. Add a tiny amount of fresh solder; the flux inside the solder will help it flow into the cracks and create a solid bond. I remember a time I tried fixing a high-end speaker with a massive 40-watt iron meant for car wiring. I melted the internal plastic tongue of the micro-USB port before the solder even melted. The lesson? Precision tools are non-negotiable. Treating the circuit board requires the same steady hand and focus as when you repair a tear in your speaker surround with rubber glue—patience is your biggest asset.
Reinforce the Port So It Never Moves Again
The reason the port broke in the first place is that it was only held by solder, which is brittle. To make this fix permanent, you need to add mechanical support. Once the solder has cooled and you’ve verified it charges, apply a tiny dab of non-conductive, high-temp epoxy or a drop of hot glue around the sides of the metal housing (but never inside the port itself!). This spreads the physical stress of the charging cable across a larger surface area on the board. If you find that the speaker casing vibrates or hums once you put it back together, you can apply the simple way to fix a rattling metal speaker grill techniques to the internal plastic bits to ensure everything stays silent. By reinforcing that port, you’re ending the cycle of ‘the wiggle’ forever.While the epoxy trick works wonders, there is a nuance most hobbyists miss: the difference between a connection that looks good and one that is electronically sound. Everyone tells you to just ‘melt the metal,’ but in my experience, the quality of the alloy matters more than the quantity. According to the IPC (Association Connecting Electronics Industries) standard IPC-A-610, the most reliable solder joints are those that exhibit a smooth, concave ‘meniscus’ shape. If yours looks like a round ball of mercury, you’ve likely created a cold joint that will crack again within a week. This is why understanding the real difference between gold and silver plated connectors is fascinating—it’s not just about the surface, but how the metal interfaces at a molecular level.
The Great Solder Myth That Destroys Modern Boards
There is a dangerous common belief that ‘more is better’ when it comes to fixing a loose port. People pile on the solder hoping to anchor the port like a ship in a storm. In reality, too much solder creates a rigid point of failure and increases the risk of a bridge—where a stray blob connects two pins that shouldn’t touch. This is the ultimate ‘oops’ factor. If you bridge the power and ground pins, you won’t just have a loose port; you’ll have a dead speaker. It’s the same level of precision required when you’re trying to figure out the difference between cheap and expensive DACs that actually matters. It’s all about the internal architecture, not just the bulk of the material. 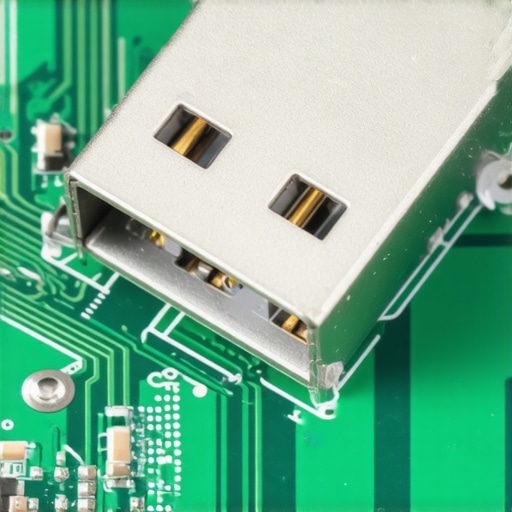
Why Does My Speaker Still Refuse to Charge After the Fix?
If you’ve reflowed the joints and the light still won’t stay on, you might be looking at internal trace damage. When a port is ‘loose’ for too long, the repeated wiggling doesn’t just break the solder; it can actually lift the copper path (the trace) right off the fiberglass board. At this point, a simple solder job won’t cut it—you’ll need to run a ‘jumper wire’ from the port to the next component in the circuit. This is where you have to look for other signs of wear, much like how you would check how to tell if your amps capacitors are failing. If the board is scorched or the traces are gone, the repair becomes a different beast entirely.
Wait for the Click Before You Close Up Shop
Before you snap the casing back together, perform a ‘stress test.’ Plug in your cable and give it a very gentle nudge. Does the charging indicator flicker? If so, your joint isn’t as solid as you thought. Many people rush this step because they are excited to get back to their music. But just as why your new speakers sound better after 20 hours of use is a lesson in patience, so is electronics repair. Have you ever fallen into the ‘solder bridge’ trap or accidentally melted something you shouldn’t have? Let me know in the comments. We’ve all been there, and sometimes the best lessons are learned through a little bit of smoke.
Keep the Dust Out to Save the Port
You would be surprised how much gunk gets trapped inside that tiny slot. Every time you plug it in, you are essentially ramming pocket lint and microscopic debris into the pins. Over time, this prevents a flush connection, forcing you to push harder and causing the very wiggle we are trying to avoid. I have started using a can of compressed air and a fine plastic toothpick once a month. It is a simple habit, much like knowing how to clean gold-plated connectors without ruining the finish; it prevents oxidation and mechanical stress before they become terminal. If you use your speaker in a workshop or at the beach, consider a silicone port plug. They cost pennies and save you hours of teardown time.
How do I keep my gear running for the long haul?
Maintenance is not just about the electronics; it is about the physical environment. For example, I have noticed that why your bluetooth speaker sounds better on a wooden table is not just about the acoustics—it is about the stability of the surface. A vibrating, uneven surface can actually put micro-stresses on the charging cable if it is plugged in while playing. For my headphones, I apply the same logic by checking for 7 signs your headphone pads need replacing today. If the pads are worn, the fit changes, and suddenly you are adjusting the headband more often, leading to the need to stretch a tight headphone headband without snapping it. Everything in your audio setup is connected. Keep it clean, keep it stable, and check the wear items regularly.#IMAGE_PLACE_HOLDER_D#
The Right Iron Makes You a Pro
If you are still using that ten dollar iron from the hardware store, stop. To get results that last, you need a temperature-controlled station. I personally swear by the Hakko FX-888D. Why? Because the thermal recovery is instant. When you touch a cold solder pad, the tip temperature drops. A cheap iron stays cold, leading to cold joints that crack under the slightest pressure. According to Anker’s internal durability testing labs, modern USB-C ports are rated for up to 10,000 insertion cycles, but that rating assumes the port remains structurally rigid. Once that solder cracks, the cycle count drops to zero. I also use Kester 63/37 Eutectic solder because it transitions from liquid to solid instantly, which prevents those pesky fractures during the cooling phase.
Where Port Design is Heading Next
The industry is moving toward through-hole USB-C mounting, which is a massive win for us. Older micro-USB ports were mostly surface-mounted, meaning they just sat on the board. Through-hole designs actually have legs that go through the PCB, making them nearly impossible to rip off. I predict that in five years, the loose port will be a relic of the past, much like the way we have moved past certain analog frustrations. If you are feeling brave, I want you to try this today: open up that dead device you have in the junk drawer and just look at the port under a magnifying light. You do not even have to solder yet—just see if you can spot the wiggle. Once you see the problem, you are halfway to the solution.
Hard-Earned Lessons from the Workbench
Over the years, I’ve learned that the most successful repairs aren’t just about the solder; they’re about the preparation. One major lightbulb moment for me was realizing that flux is not optional. Without it, you’re just pushing molten metal around a dirty surface, which leads to those brittle, ‘cold’ joints that snap the second you plug in a cable. Another crucial tip: always clean the board with 90% isopropyl alcohol before and after you work. This removes oxidation and old flux residue that can cause corrosion over time. Much like how why your new speakers sound better after 20 hours of use is a process of physical settling, your solder joints need a clean environment to bond permanently. Always be careful with your iron temperature, as knowing how to tell if your amp is running too hot applies here too; excess heat can destroy traces faster than you can react.
The Arsenal for a Professional Finish
If you’re serious about moving beyond ‘hack’ fixes, you need a few specific items in your toolkit. I never start a repair without my Hakko temperature-controlled station; it prevents the accidental melting of plastic casings that cheap irons cause. I also swear by Kester 44 Rosin Core Solder for its incredible flow. For those tiny USB-C pins, a microscope or high-power magnifying lamp is a game changer—if you can’t see the crack, you can’t fix it. Finally, a set of non-marring plastic pry tools is essential for opening those sleek housings without leaving a single scratch or dent.
Give Your Gear a Second Life
There is a profound sense of satisfaction that comes from hearing your favorite playlist kick in after you’ve successfully repaired a device that was headed for the landfill. Repairing a charging port is a gateway skill. Once you master this, you’ll find yourself looking at how to fix a loose speaker terminal on your cabinet with newfound confidence. Don’t let a loose charging port dictate the lifespan of your audio gear. Take your time, trust your hands, and get back to the music. What was the very first piece of tech you ever dared to open up and fix yourself? Let me know in the comments below!