
I remember countless nights, frustration simmering as I fiddled with my speakers, trying to find that elusive perfect sweet spot. The music sounded great, but the vocals and instruments seemed displaced, like someone had shifted parts of the soundscape overnight. One evening, after what felt like an eternity of trial and error, I had a real lightbulb moment. Turns out, the secret wasn’t just about quality gear or fancy cables—it’s about balance. Getting my left and right speakers perfectly tuned changed everything. That little adjustment transformed my listening experience from decent to jaw-droppingly immersive.
Why Achieving Balance Is the Key to a Rich, Immersive Sound
Good sound isn’t just about high wattage or expensive equipment; it’s about how well your speakers work together to create a cohesive stereo image. When your left and right speakers aren’t perfectly balanced, your brain struggles to pinpoint the source of the sounds, leading to a blurry soundstage and a less satisfying experience. This imbalance can subtly undermine your entire setup, making voices sound distant or instruments seem skewed to one side.
Many audiophiles miss this because they focus on component quality alone. But even the best speakers can sound off if they’re not properly aligned and calibrated. I learned this the hard way—initially, I ignored the importance of speaker positioning and level matching, which I now realize is like building a symphony with uneven instruments. Proper calibration is essential, especially when you’re aiming for that sweet spot where everything sounds perfectly balanced.
Have you ever experienced that moment of auditory disappointment, where despite investing in good gear, something still feels off? If so, you’re not alone. In my early days, I made the mistake of assuming that simply placing speakers roughly equal distance from my listening position would do the job—big mistake. Precise adjustments make all the difference. That’s why understanding how to balance your stereo speakers is a game-changer. Ready to dive into exactly how to do it? Stay tuned. We’re about to turn your listening setup from good enough to truly spectacular.Start with Speaker Placement
Place your speakers at ear level when seated, forming an equilateral triangle with your listening position. For example, situate your left and right speakers approximately 8 feet apart, with your listening spot centered between them. I once set mine too high on stands, which distorted vocals. Lowering them to ear level instantly improved clarity and stereo imaging.
Equalize Volume Levels
Use a reliable sound level meter or smartphone app to match the volume of your speakers. Turn both speakers off, then turn one on and adjust the volume control until it matches a reference level, like 75dB, as close as possible. This prevents one speaker from overpowering the other. When I did this, I noticed that my soundstage widened, with vocals anchoring firmly in the center.
Adjust Speaker Toe-In for Focus
Angle your speakers slightly inward, aiming directly at your listening position. This improves stereo focus and reduces reflected sound. I experimented by moving my speakers a few degrees inward, which made the instruments sound more precise and centered, especially on recordings with complex arrangements.
Fine-Tune Using Test Tracks
Play a well-mixed stereo track that you know well, like a favorite song or a dedicated test tone. Listen carefully for balance and clarity. Adjust the speaker angles or levels again as needed. For instance, I slightly tweaked my left speaker’s tilt after noticing the vocals felt too distant, which brought them forward and created a more immersive experience.
Implement It Consistently
Repeat these steps regularly, especially after relocating your setup or adding new components. Even small changes can disrupt the balance. I made it a habit to check my setup every few months, which consistently kept my system sounding its best, avoiding the common mistake of neglecting calibration.
Addressing Wall Reflections and Acoustic Treatments
Soft materials like rugs and curtains absorb reflections that can muddy your sound. I added a plush rug and some wall panels behind my speakers, which cleaned up reflections and improved clarity. Proper acoustic treatment complements your calibration efforts, leading to a more accurate stereo image.
Automate with Calibration Tools
Invest in a room calibration microphone or utilize built-in receiver calibration features. For example, I used a microphone included with my AV receiver, which generated a calibration curve, adjusting levels and delays automatically. This step often reveals subtle imbalances you might overlook, elevating your listening experience from manual tweaks alone.
Keep It Practical and Consistent
Remember, perfection isn’t always achievable overnight. Take your time, listen critically, and make incremental adjustments. Regular checks, combined with your everyday listening, will ensure your home audio remains balanced. After applying these steps, I finally achieved a soundstage that made me forget I was in my living room, demonstrating just how crucial balance truly is. For more tips on optimizing your sound setup, check out calibration techniques.
Many audiophiles believe that shelling out for the most expensive headphones or amplifiers guarantees stellar sound. However, this mindset overlooks a critical nuance: focusing solely on equipment quality can be misleading. For instance, a high-end headphone paired with a mediocre source or improper setup can underperform significantly, despite its premium status. The real secret lies in understanding the **interplay between components** and mastering the finer points of calibration and matching.
One common myth is that copper or gold-plated cables automatically enhance audio fidelity. In reality, as highlighted by experts clarify, cable quality makes little difference unless you have very high-impedance or long-distance runs. Most low- to mid-range setups won’t see perceptible improvements, and investing in expensive cables can divert funds from more impactful upgrades.
Another trap many fall into involves home audio deals, especially soundbars and Bluetooth speakers. These are often marketed as quick-fix solutions that transform your listening experience. Yet, a common mistake is relying on budget models that sacrifice clarity for features like deep bass or surround effects. For instance, soundbars that emphasize bass tend to muddy dialogue, a phenomenon I discuss in detail here. The key is choosing models with dedicated dialogue modes or multiple drivers to preserve clarity.
Soundbars and small speakers often lead to another misconception: that size correlates directly with sound quality. The truth is, many small speakers outperform larger plastic towers when properly designed, especially in terms of clarity and imaging. Check out this review to see how carefully engineered compact speakers can often outshine bulky, poorly designed ones.
Are Larger Speakers Always Better for Home Listening?
Not necessarily. The advanced user recognizes that speaker placement, crossover design, and room acoustics play pivotal roles. An overemphasis on wattage or size can lead to neglecting these factors, resulting in a muddy or unbalanced sound. As audio engineers assert, proper calibration and room treatment are often more impactful than raw power or size.
In summary, bridging the gap between belief and reality in home audio requires a nuanced understanding of component interplay, setup, and room acoustics. Don’t fall prey to myths like cable upgrades or size illusions. Instead, focus on **holistic calibration**, careful matching, and strategic upgrades**. Remember, the devil is in the details—mastering these can elevate your listening experience more than any flashy gadget. Have you ever fallen into this trap? Let me know in the comments and share your experiences!
Maintaining your home audio setup over time requires more than just occasional dusting. It calls for consistent, precise tweaking and the right set of tools to ensure your equipment performs at its peak. Personally, I’ve found that investing in specialized calibration hardware and software makes a significant difference in preserving sound quality and extending the lifespan of my gear.
Essential Tools for Long-Term Audio Maintenance
One of my go-to tools is the Room Calibration Microphone. Devices like the REW (Room EQ Wizard) with a calibration mic allow me to generate precise frequency response curves. This helps identify and correct room anomalies or speaker imbalances that develop over time. I always run this calibration after rearranging furniture or adding acoustic treatments, ensuring consistent sound clarity.
Another vital tool is a Sound Level Meter. I prefer the SPL-based apps paired with quality hardware, providing accurate readings for leveling speakers and subwoofers. Regularly checking that my levels remain balanced prevents gradual drift, which can subtly erode soundstage quality. Maintaining proper volume levels, especially in multi-component setups, preserves sonic integrity and equipment longevity.
How do I maintain [My Audio Setup] over time?
Consistent monitoring and incremental adjustments are key. For instance, I schedule quarterly calibration checks, using my measurement tools to detect any deviations. This proactive approach catches issues such as speaker degradation or room changes early, preventing expensive repairs or replacements later. Additionally, I keep my gear clean and dust-free with compressed air and gentle cloths—some might overlook that dust buildup can interfere with electrical contacts, affecting performance.
Software tools like REW are becoming increasingly sophisticated, offering real-time spectral analysis that aids in troubleshooting complex audio problems. Such software can also guide you through the calibration process step-by-step, making it accessible even for enthusiasts. Looking toward the future, I anticipate smart calibration systems integrated directly into amplifiers and receivers, autonomously maintaining optimal performance—saving us time and reducing human error.
Why long-term maintenance tools are worth it
Investing in these tools isn’t just about immediate quality; it’s about protecting your investment—especially when considering high-end gear. Proper calibration and routine checks extend the lifespan of diaphragms, drivers, and electronics, ultimately saving money and stress. I encourage you to try the technique of periodically running a calibration with your measurement microphone; it’s simple, effective, and profoundly enhances your listening experience.
Don’t just set and forget—regular upkeep with the right tools keeps your audio system sounding as vibrant as day one. Curious about the best calibration microphones on the market? Check out detailed reviews and select one that fits your setup. Your future self will thank you for the crystal-clear sound that comes from diligent maintenance!
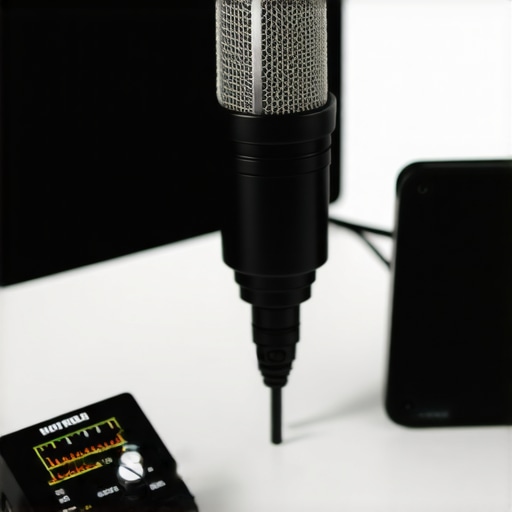
Through my journey in refining my home audio setup, I’ve stumbled upon insights that go beyond the typical tips. One of the most profound lessons was realizing that equipment alone doesn’t guarantee extraordinary sound—it’s the meticulous calibration, room acoustics, and an understanding of how components interact that truly make a difference. My early obsession with high-end gear often overshadowed the importance of proper placement and balance, leading to frustrating results. But once I shifted focus to these finer details, my listening experience transformed radically, reminding me that sometimes, the smallest adjustments yield the biggest rewards.
Secrets Only Insiders Know About Achieving Sound Mastery
- It’s all about the subtle harmony: I learned that aligning speaker angles and achieving perfect level matching created a cohesive stereo image that no expensive component could compensate for. Even minor tilts or volume discrepancies can distort your perception of space and clarity.
- Room acoustics matter more than gear: Investing in acoustic treatments, like wall panels and rugs, drastically reduced reflections that muddled the sound. I wish I had prioritized room treatment earlier; it’s like giving my setup a well-deserved voice upgrade.
- Calibration tools are game-changers: Using room calibration microphones and software revealed imperfections invisible to the naked ear. These tools saved me hours of guesswork and elevated my system’s performance to professional levels.
- Regular maintenance preserves quality: Over time, even small shifts in setup can degrade sound. Making a habit of re-calibrating and checking levels ensures my setup remains at its best, much like routine car maintenance keeps a vehicle running smoothly.
My Go-To Resources for Continuous Improvement
- Room Calibration Microphones: I rely on these for precise frequency response analysis, which consistently uncovers issues I might overlook.
- Vintage Amplifiers: Exploring vintage gear has shown me that sometimes, a well-preserved classic outperforms modern components in warmth and character.
- Measurement Apps: Smartphone apps paired with quality microphones have become indispensable for quick, accurate level matching and room correction.
- Used Equipment Market: Buying carefully selected used gear has allowed me to access high-quality components without breaking the bank, reaffirming that value often resides in overlooked treasures.
Your Next Step in Home Audio Excellence
Embracing these insights means stepping beyond conventional wisdom and trusting your ears, measurement tools, and patience. Each small tweak brings your system closer to the sound quality you’ve always envisioned. Remember, the journey to perfect home audio isn’t about chasing the newest gadget but about mastering the art of calibration, placement, and room tuning. If you’re ready to elevate your listening experience to a truly personal level, start experimenting with these techniques today. How have you personally overcome challenges in your home audio setup? Share your story below—it might inspire someone just starting out!
,