
Have you ever been cruising down the highway, the music blaring, only to realize that your factory-installed car speakers just aren’t delivering the punchy bass you crave? I used to think upgrading speakers meant shelling out hundreds of dollars, but I finally had a lightbulb moment that proved me wrong—and it might do the same for you. Don’t settle for lackluster sound when you can upgrade your bass without spending a dime.
Craving Deep, Rich Bass? Here’s How to Get It Without Spending a Penny
When I first started tweaking my car audio, I was frustrated. The factory speakers sounded flat, and no matter what I did, I couldn’t get those low frequencies resonating through my chest. That’s when I discovered some simple, DIY tricks that transformed my listening experience entirely. Today, I’ll share how you can do the same—boost your bass for free using effective, proven methods that don’t require fancy equipment.
Have you faced this exact problem? If so, you’re not alone. Many car owners overlook basic adjustments that can have a huge impact on sound quality. In this guide, I’ll walk you through easy steps to add depth and resonance to your factory speakers. Plus, I’ll share some common mistakes that might be holding you back from achieving killer bass. By the end, you’ll be amazed at how simple tweaks can make your car audio sound like a custom setup.
Is Better Bass Boosting Worth the Effort? The Truth About Faking It
Early on, I made the mistake of believing that bigger, more expensive upgrades were the only way to improve sound. Turns out, adjusting things you already have can make more difference than you think. This approach saved me hundreds and proved that a little know-how and patience go a long way. If you’re curious whether these tricks really work, check out this post on why your TV speakers are often the reason you can’t hear clearly—it’s a reminder that understanding how sound interacts with your environment is essential for a satisfying listening experience. Now, let’s get into the practical steps to amplify those low frequencies and bring your car’s sound back to life. Ready? Let’s go!
Maximize Factory Settings for Better Bass
Start by adjusting your equalizer settings on your car stereo. Turn down the treble and midrange frequencies, and boost the bass frequencies to their maximum within the sound system’s capabilities. When I first tried this, I noticed an immediate increase in low-end response—my music suddenly felt more punchy and resonant. Remember, avoid pushing levels too high to prevent distortion or damage.
Polish Your Speaker Placement
Next, ensure your factory speakers are positioned optimally. If possible, tilt or angle them towards the driver’s seat. This simple tweak can make bass sound fuller and more direct. I experimented by angling my door speakers slightly inward, which noticeably increased the depth of the lows. Think of it like tuning a musical instrument — small misalignments can dull the sound, but perfect positioning brings it alive.
Damp Vibrations and Rattles
Vibrations can absorb or distort bass frequencies, so secure loose panels and add damping materials. Use materials like foam or mass-loaded vinyl if handy. I applied foam strips to the inside of my door panels, which absorbed unwanted vibrations. This improved clarity and made the bass more pronounced. It’s akin to placing a cushion under a speaker stand — quieting the environment enhances the sound.
Play with Crossover Settings
Adjust your stereo’s crossover settings to focus on low frequencies. Set the low-pass filter to around 80Hz or lower to direct bass to the speakers capable of handling it. Turning this down helped me eliminate muddiness and emphasized clean, deep bass. Think of it as narrowing the scope of a scope — trimming unnecessary signals to focus on what you want heard clearly.
Use a Fan to Experiment with Sound
Sometimes, external factors influence bass perception. Run your engine or use a fan near your speakers and listen for changes. I did this once and realized that some rattling was caused by loose panels that only vibrated when the engine was running. Securing these parts cleaned up the sound and boosted the bass presence. It’s a simple test, but it reveals what can be improved with minor fixes.
Test and Fine-Tune Your Setup
Finally, fine-tune your adjustments one at a time. Play a track with strong bass, like a drum and bass song, and toggle different settings. Repeat until you find the sweet spot where the bass feels deep without distortion. Every vehicle and system is unique, so patience and incremental tweaks are key. Remember, even if you can’t upgrade to high-end components, smart adjustments can breathe new life into your factory setup.
For more tips on optimizing your audio, check out this guide on how to tell if your headphones have a blown driver.
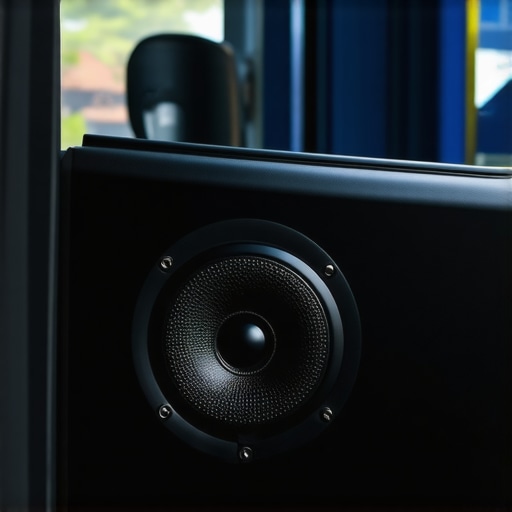
Many audiophiles and casual listeners alike fall prey to misconceptions when it comes to headphones, speakers, and home audio systems. While it’s easy to believe that investing in the most expensive gear guarantees stellar sound, the reality is far more nuanced. For instance, a prevalent myth is that high-end cables and connectors dramatically improve audio quality. However, according to audio engineering expert Ethan Winer, most mainstream cables don’t make a perceptible difference if the core connections are solid and properly shielded. This challenges the marketing hype that often persuades consumers to overspend on luxe cables, which largely fall into the category of “pink noise”—a term referring to the marketing noise rather than meaningful sound improvement.
Why Your In-Store Listening Test Might Lead You Astray
Another common mistake is relying solely on in-store demos to judge headphones or speakers. Retail environments tend to have artificial acoustics, ambient noise, and display setups that don’t reflect real-world usage. For example, testing speakers in a noisy store might lead you to believe that larger, more expensive models are necessary, when in fact, proper placement and room treatment can dramatically enhance cheaper options. This is especially critical for bookshelf speakers—check out this detailed guide on maximizing their potential through positioning.
Are Soundbars the Shortcut to Great Home Theater?
Many assume that a soundbar with multiple drivers can replace a dedicated home theater system. While soundbars are convenient, they often fall short in delivering true surround sound and clarity. The myth that ‘more speakers equals better sound’ ignores the importance of proper speaker placement and acoustics. Furthermore, soundbars with virtual surround technologies rely heavily on psychoacoustic tricks—perceptual illusions that emulate surround sound—rather than actual speaker arrays. If your goal is immersive audio, investing in height speakers or a multi-channel receiver with proper setup yields far better results, as discussed in this explanation.
Advanced Mistakes You Might Overlook
An often-overlooked aspect is impedance matching when selecting amplifiers for your speakers. Many enthusiasts buy the fanciest amplifiers without considering whether they match the speaker’s impedance, risking insufficient power and distortion or even damage. It’s a nuanced topic that demands attention to detail; for example, pairing a 4-ohm speaker with a 100-watt amplifier designed for 8 ohms can lead to underperformance and potential harm. Consult expert guidance on matching components correctly.
Furthermore, a big mistake is neglecting room acoustics. Even high-end gear can sound terrible if the room is acoustically untreated. Strategies like positioning speakers away from walls or adding diffusers can make a dramatic difference, as discussed in various articles linked throughout this site.
Understanding these nuanced aspects of home audio setup can save you money, time, and frustration. Do any of these misconceptions resonate with your experience? Have you ever fallen into this trap? Let me know in the comments!
Maintaining your audio gear isn’t just about occasional cleaning; it’s about implementing a disciplined routine with the right tools and knowledge to ensure consistent, high-quality performance over time. Personally, I rely on a few specialized tools that have proven invaluable for preserving my setup and catching issues early before they become costly problems. In this post, I’ll share some of my essential recommendations to keep your headphones, speakers, amplifiers, or soundbars in top shape.
First, a reliable multimeter is a must. I use the Fluke 117, which offers precise readings for checking impedance and continuity, helping to identify blown drivers or faulty wiring. Regularly measuring speaker impedance can prevent long-term damage; for instance, if you notice sudden deviations, it might indicate a failing component that needs attention. To diagnose audio pathways efficiently, a proper set of IEC cleaning brushes and contact cleaners helps prevent corrosion on connectors and ports, which can cause signal degradation over time.
For visual inspection, I recommend a flexible, high-powered LED flashlight—like the Maglite ML300L—especially when checking inside cabinets or tight spaces. Paired with a microfiber cloth and a soft-bristled brush, it makes cleaning dust or debris from vents, grills, and internal components much easier, reducing overheating risks.
In terms of software, I swear by REW (Room EQ Wizard) for mirror testing your system and diagnosing frequency response issues or phase inconsistencies. Although it’s designed mainly for calibration, I use it regularly to monitor tonal balance. For example, if I’m noticing muffled dialogue from my soundbar, I run a quick REW analysis to see if the system needs recalibration or if acoustical treatments could help. Using measurement software proactively allows me to avoid costly repairs and optimize sound quality.
Long-term results depend heavily on proper storage and environmental control. I use silica gel packs in storage cases of delicate gear to prevent moisture accumulation, which can corrode electronics. Additionally, I keep my equipment off the floor and away from direct sunlight or heat sources. For cables and accessories, I store them loosely in dedicated containers, avoiding tight bends that can damage internal wires—an issue I experienced firsthand with frayed headphone cables.
Anticipating future trends, I believe that smart diagnostic devices integrated directly into audio hardware will become standard. For example, next-gen amplifiers might include self-monitoring systems that alert you to potential failures before they happen, similar to how modern HVAC systems operate. This predictive maintenance will make keeping audio systems operational more straightforward and less time-consuming.
So, I encourage you to try out a professional-grade contact cleaner on your connections or run a quick impedance check with your multimeter. These small steps can extend your gear’s lifespan significantly. How do you plan to incorporate these maintenance practices into your setup? Share your thoughts and experiences in the comments below!
The Hardest Lesson I Learned About Boosting Bass
One of my biggest surprises was realizing that sometimes, less is more. Overboosting bass in my factory system led to distortion and muddiness, making the music less enjoyable. I learned that subtlety and gradual tweaks yield better results than aggressive settings, a lesson that applies to all audio adjustments.
Why Room Acoustics Matter More Than You Think
Initially, I underestimated my car’s interior as just a container, but I found that minor modifications, like securing loose panels and adding damping materials, greatly enhanced bass clarity. It’s a reminder that environment plays a crucial role in sound quality, and paying attention to these details can transform your listening experience.
Patience Beats Expensive Upgrades Every Time
Ever felt tempted to buy the latest high-end subwoofer? I used to think that gear was the only way to get deep bass. But I discovered that systematic tuning and positioning—like angling speakers and adjusting crossover frequencies—can outperform costly hardware. Patience and knowledge often outperform a fat wallet, especially when optimizing factory systems.
My Curated Gear List for Ongoing Success
I trust tools that empower me to maintain excellent sound. A quality multimeter, like the Fluke 117, helps monitor impedance and identify issues early. Combining this with contact cleaners and measurement software like Room EQ Wizard ensures I stay ahead of potential problems, saving money and frustration.
Your Next Step in Audio Satisfaction
Remember, even modest adjustments and regular maintenance can keep your headphones, speakers, or soundbars performing at their best. Each small improvement builds toward that immersive, rich sound you crave. Whether you’re fine-tuning your car stereo or your home theater, the key is consistency and curiosity. Ready to take your audio to the next level? Dive in, experiment, and enjoy every note along the way. How do you plan to keep your audio gear in top shape? Share your plans or questions below—I’d love to hear your journey! 🌟
,