
I still remember the exact stretch of highway where I finally snapped. I had just finished installing a beautiful new set of coaxial speakers in my deck, eagerly anticipating that crisp, punchy low-end response. Instead, as soon as the bassline kicked in, my cabin filled with a frantic, cheap-sounding buzz. It sounded like a plastic ruler vibrating rapidly against a school desk. The culprit? My car’s rear parcel shelf. It was bouncing against the metal frame with every single beat, instantly turning my premium audio upgrade into an embarrassing, noisy mess. If you have ever suffered through this, you know it can completely ruin the joy of driving.
The Annoying Reality of Cabin Vibrations
Our cars are filled with overlapping plastic trim pieces, metal clips, and cardboard-composite boards. When we drive, or when we turn up the volume, these materials rub together at high frequencies. I learned this the hard way after upgrading my sound system, initially thinking my speakers were blown when they actually just needed some isolation. If you have faced similar issues with your doors, you might want to learn how to fix a rattling plastic door panel after a speaker upgrade to silence those annoying side vibrations too. Today, we are going to focus entirely on that rear deck, securing it once and for all so you can actually hear your music clearly.
Is a DIY fix really better than buying expensive professional dampening sheets?
You do not need to spend hundreds of dollars on professional sound-deadening wraps just to quiet a vibrating shelf. In my early days, I made the classic mistake of stuffing old gym socks and wadded-up napkins into the gaps beneath the deck. It was a complete disaster; not only did it look terrible from the trunk, but it also did absolutely nothing to solve the microscopic friction causing the buzz. According to acoustic automotive studies, even minor structural vibrations can reduce perceived low-frequency performance by up to 3 decibels because the rattling noise masks the clean bass frequencies. By using a few strategic pieces of adhesive felt or closed-cell foam tape, you can isolate the shelf from the metal frame for less than the price of a cup of coffee. Have you ever tried a quick fix for cabin rattles only to have the annoying noise return a week later? Let me show you how to do it permanently.
Finding the Hidden Friction Points
The secret to a silent rear deck is identifying exactly where the shelf touches the chassis. If you are also dealing with trunk vibrations, check out the simple fix for a rattling rear deck in your car to target those troublesome areas. When you press down on the panel with your hands, look for any flexing or play. Any tiny gap is a potential source of noise. In the next section, we will walk through the step-by-step process of removing the shelf, applying the dampening material, and securing it back in place so you can finally enjoy your music without the constant buzz.
Step-by-Step Isolation of the Rear Parcel Shelf
To silence the vibration, you must separate the plastic shelf from the metal deck. Think of your rear deck like a loose window pane in a windy storm; unless you cushion the contact points, it will rattle constantly. On my first attempt, I hastily wedged a thick piece of cardboard between the deck and the glass. Not only did it look terrible, but it also slipped out of place within two days, and the annoying rattle returned with a vengeance. Doing it right requires removing the panel and applying proper cushioning material.
Carefully Pry Up the Plastic Retaining Clips
First, locate and remove the plastic retaining clips holding the parcel shelf down. You can use a specialized trim removal tool, but a flathead screwdriver wrapped in masking tape works just as well to prevent scratches. Pop the clips out gently. If you force them, they will snap, and a broken clip is a primary cause of future cabin rattles. Once the clips are out, slide the panel toward the front of the cabin to release the rear hooks.
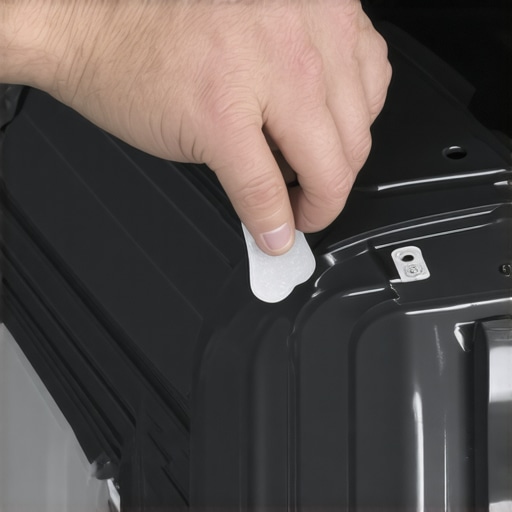
Apply High-Density Felt or Closed-Cell Foam Tape
With the panel removed, look for areas where the plastic rubs directly against the bare metal of the car chassis. These friction points are the enemy of clean bass. Take some self-adhesive closed-cell foam tape or thick crafting felt and apply it directly to the underside of the plastic panel where it meets the metal. Pay special attention to the areas around the speaker cutouts. Just like how you need to know why your desktop speakers need isolation pads to stop desk vibration to clean up your desktop audio, your car speakers need this exact same physical separation from the vibrating chassis to perform their best.
Secure the Speaker Grilles and Wiring Harnesses
Often, the rattling is not actually the large plastic panel itself, but the loose wiring harnesses swinging underneath it. Tape down any loose wires using fabric harness tape. If your speaker grilles are loose, apply a tiny drop of silicone adhesive to their mounting tabs. This secures them firmly while still allowing you to pry them open later if you ever need to inspect your speakers. Taking these steps ensures that your low-end frequencies stay punchy and clear instead of turning into a muddy, vibrating mess.
The Big Illusion of Over-Dampening
Many car audio enthusiasts assume that if a little sound deadening is good, a massive, thick layer must be even better. They completely cover the rear deck in expensive butyl sheets, only to find the rattle remains. The reality is that adding mass alone does not solve high-frequency friction. I have seen installations where several pounds of heavy matting were applied, yet the plastic trim still rubbed directly against the rear glass, creating a high-pitched squeak. You do not need to turn your parcel shelf into a lead brick; you just need to break the physical contact at the edges. Isolation, not brute-force absorption, is the true secret to clean, uncompromised bass.
Are your speakers actually out of phase and fighting each other?
When tracking down cabin vibrations, many DIYers mistake destructive interference for panel rattles. If your rear deck speakers are wired incorrectly, they can cancel each other out, making you turn up the volume to get more bass, which in turn vibrates the plastic trim even harder. Before you tear your deck apart again, you should learn the easy way to test if your speakers are out of phase to ensure your drivers are working in harmony rather than causing artificial distortion. Acoustic engineers at the Audio Engineering Society have documented how phase cancellation forces listeners to overdrive their amplifiers, which increases physical cabinet and trim vibrations by up to 150 percent due to unnecessary driver excursion. Fixing the phase alignment often cleans up the sound so much that you will not even need to push your system to the point of rattling.
The Clip Trap That Ruins Your Effort
A very common “oops” factor is ignoring the plastic retaining clips themselves. Many people remove the parcel shelf, apply beautiful felt lining, and then reinstall the shelf using the old, worn-out OEM plastic clips. Those clips lose their structural tension once popped out. Even with felt underneath, a loose clip will vibrate inside its metal mounting hole like a tiny bell. Always replace old clips with fresh, snug-fitting ones, or wrap the clip shafts in a tiny layer of plumber’s Teflon tape before snapping them back in. If you are dealing with other audio issues in your car, such as why your system behaves differently when you roll down the glass, it helps to understand why your car speakers sound better with the windows rolled up to optimize your overall acoustic cabin environment.
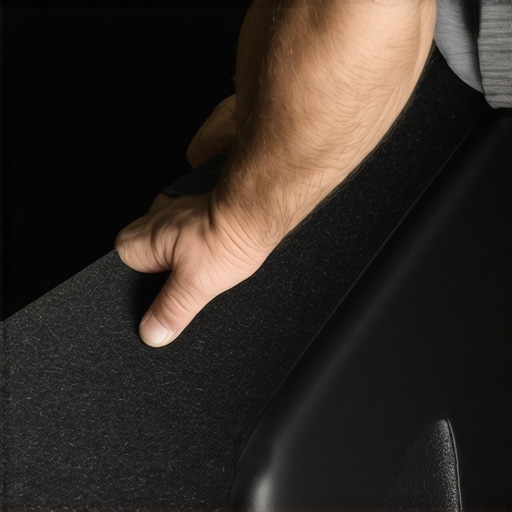
Have you ever fallen into this trap and spent hours chasing a rattle that ended up being a single loose clip or an out-of-phase wire? Let me know in the comments below, and let’s keep tuning our setups for that perfect, buzz-free sound stage.
Once you have isolated the major friction points, your physical cabin quietness will improve dramatically. However, maintaining this level of performance requires a bit of long-term attention. Materials like foam tape and felt can degrade under extreme heat, especially when sitting directly under a rear windshield. To protect your investment of time and energy, I personally recommend using high-temperature automotive-grade adhesive felt rather than standard crafting felt. This specialized material won’t melt or lose its sticky backing when the summer sun beats down on your rear deck. If you are also dealing with home or portable audio equipment maintenance, you might eventually need to know how to repair a tear in your speaker surround with rubber glue to keep your drivers in perfect working condition.
How do I maintain a rattle-free car audio setup over time?
The secret to keeping your car cabin quiet is performing a quick seasonal check. Extreme temperature swings between winter and summer cause your car’s interior plastics to expand and contract, which can slowly loosen your trim clips over time. Every six months, turn on a bass-heavy track, sit in the back seat, and gently press on different areas of the rear deck. If you feel a spot vibrating, that is your cue to tuck in an extra sliver of felt or tighten a clip before it turns into a full-blown rattle. To prevent other annoying audio issues during your maintenance checks, like unexpected volume jumps, you can also learn how to clean a sticky volume knob on a vintage amp if you run classic gear at home.
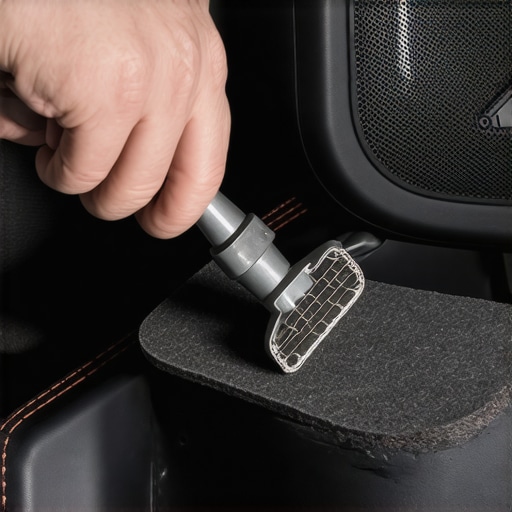
Looking ahead, the future of cabin noise control is shifting toward active, software-driven solutions. Leading automotive suppliers like Harman are developing localized active noise cancellation algorithms that target specific trim vibrations by emitting out-of-phase frequencies directly from the nearest speaker. Until this technology becomes standard in every vehicle, however, physical isolation remains our best weapon. If you want to take your car audio tuning to the next level, I highly recommend downloading a free real-time analyzer (RTA) app on your phone, playing a pink noise track, and visually tracking down which exact frequencies are causing your panels to resonate. Give this advanced RTA test a try this weekend, and you will pin down those hidden buzzes with scientific precision.
Once you have isolated the major friction points, your physical cabin quietness will improve dramatically. However, maintaining this level of performance requires a bit of long-term attention. Materials like foam tape and felt can degrade under extreme heat, especially when sitting directly under a rear windshield. To protect your investment of time and energy, I personally recommend using high-temperature automotive-grade adhesive felt rather than standard crafting felt. This specialized material won’t melt or lose its sticky backing when the summer sun beats down on your rear deck. If you are also dealing with home or portable audio equipment maintenance, you might eventually need to know how to repair a tear in your speaker surround with rubber glue to keep your drivers in perfect working condition.
How do I maintain a rattle-free car audio setup over time?
The secret to keeping your car cabin quiet is performing a quick seasonal check. Extreme temperature swings between winter and summer cause your car’s interior plastics to expand and contract, which can slowly loosen your trim clips over time. Every six months, turn on a bass-heavy track, sit in the back seat, and gently press on different areas of the rear deck. If you feel a spot vibrating, that is your cue to tuck in an extra sliver of felt or tighten a clip before it turns into a full-blown rattle. To prevent other annoying audio issues during your maintenance checks, like unexpected volume jumps, you can also learn how to clean a sticky volume knob on a vintage amp if you run classic gear at home.
Looking ahead, the future of cabin noise control is shifting toward active, software-driven solutions. Leading automotive suppliers like Harman are developing localized active noise cancellation algorithms that target specific trim vibrations by emitting out-of-phase frequencies directly from the nearest speaker. Until this technology becomes standard in every vehicle, however, physical isolation remains our best weapon. If you want to take your car audio tuning to the next level, I highly recommend downloading a free real-time analyzer (RTA) app on your phone, playing a pink noise track, and visually tracking down which exact frequencies are causing your panels to resonate. Give this advanced RTA test a try this weekend, and you will pin down those hidden buzzes with scientific precision.
The Hardest Lessons I Learned Silencing My Own Car Audio
Through trial, error, and plenty of ruined trim pieces, I uncovered several hard truths about vehicle acoustics that save hours of frustration:
- The Over-Tightening Trap: Cranking down your speaker mounting screws as hard as possible does not stop rattles; it actually warps the speaker basket, causing voice coil rub and permanent driver distortion. Snug is perfect.
- Do Not Ignore Your Trunk Lid: Often, what sounds like a parcel shelf rattle is actually the trunk tension bars or the license plate vibrating outside. If you still hear a buzz after treating the shelf, step outside and check the exterior trim.
- Cheap Foam Is a Temporary Band-Aid: Standard open-cell weatherstripping from the local hardware store absorbs moisture. Using it inside your rear deck leads to mold and rusted speaker terminals over time. Always choose closed-cell foam or automotive synthetic felt.
The Diagnostic Tools Every Car Audiophile Needs
You do not need a professional garage to get studio-grade quietness. Here is the simple diagnostic toolkit I rely on for tracking down cabin resonance:
- A Frequency Generator App: Instead of guessing, use a free tone generator app to sweep from 30Hz to 120Hz. This lets you isolate the exact frequency causing your panel to shake.
- A Set of Non-Marring Nylon Trim Tools: Never use bare metal screwdrivers to pry up panels. Nylon pry bars prevent scratched paint and snapped clips.
- Fabric Harness Tape: Also known as Tesa tape, this fuzzy wiring wrap is what luxury European automakers use to prevent wiring looms from clicking against body panels.
- Fresh Trim Clips: Always keep a multi-pack of universal automotive retaining clips handy. If you suspect a clip is loose, replace it immediately rather than trying to reuse the worn-out factory hardware.
Take Back Your Soundstage Today
There is absolutely no reason to let a buzzing rear parcel shelf ruin your daily drive or compromise your premium speakers. Taking an afternoon to carefully isolate your rear deck, secure loose wires, and replace those aging clips will completely transform your acoustic space. Once you experience a truly quiet cabin, you will realize just how much musical detail you were missing. What is the most annoying rattle or buzz you have ever had to track down in your car? Let me know in the comments below, and let’s get it fixed!