
It was a blistering Tuesday afternoon in July, and I was sitting at a red light in my sedan, sweating through my shirt. I had just finished installing a brand new set of component door speakers. I rolled up the windows, dialed the air conditioning to its maximum arctic blast, and cranked up one of my favorite acoustic tracks. Expecting pure sonic bliss, I was instantly deflated. The vocals sounded thin, the acoustic guitar lacked that crisp wood-and-string resonance, and the overall soundstage felt incredibly muddy. Frustrated, I pulled over, shut down the engine, turned off the keys, and then restarted the car—leaving the AC completely off this time. Suddenly, the music breathed. The mid-bass tightened up, and the details practically leaped out of the dashboard. I realized right then that my power-hungry climate control was actively robbing my music of its soul.
The Invisible Thief of Your Car Audio Quality
For years, I made the classic rookie mistake of blaming my components when things sounded off. I used to think I needed to buy expensive sound deadening, adjust my amplifier gains constantly, or that my system was experiencing some weird hardware failure. I even spent hours researching why your car speakers sound like they are underwater because I was convinced my wiring was damp. But the culprit wasn’t a bad connection or cheap gear; it was the massive mechanical and electrical strain of my vehicle’s climate control system. When you run your air conditioner, your car’s alternator is pushed to its absolute limits, leaving very little high-quality electrical current for your aftermarket amplifiers and head unit.
Is Turning Off the AC Actually Worth the Sweat?
You might be thinking, “Come on, is a little cold air really going to ruin a premium sound system?” It sounds like an audiophile myth designed to make you suffer in the heat, but the science is indisputable. According to automotive engineering data, a vehicle’s air conditioning compressor can draw up to 4 to 6 horsepower from a small engine, while the electrical blower motor and condenser fan pull a massive amount of continuous amperage from your alternator. When your amplifier demands sudden bursts of power to reproduce a heavy bass hit or a dynamic transient, the electrical system simply cannot keep up with both the AC and the music. This voltage drop directly limits your amplifier’s headroom, causing early clipping and a flatter, more compressed sound. Have you ever noticed your music losing its punch the exact moment you turn the climate dial to high? Let me know in the comments if your ears have picked up on this frustrating phenomenon, because you are definitely not imagining things.
How to Stop Climate Control from Robbing Your Amp of Power
To reclaim your system’s dynamic range without sweating through your clothes, you need to address the electrical bottleneck. Think of your car’s electrical system like a plumbing setup in a small house. If you are taking a shower and someone flushes the toilet, the water pressure drops instantly. In your car, the air conditioner is that flushing toilet, and your amplifier is the shower head trying to maintain a steady, high-pressure stream of music. To fix this, we must optimize how power is distributed and stored within your vehicle’s charging system.
Upgrade Your Big Three Wiring First
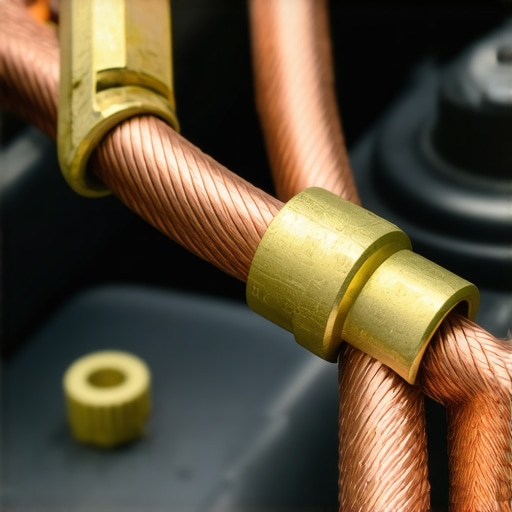
Before you run out and buy a larger alternator, you need to make sure the electrical path is as clear as possible. Upgrading the ‘Big Three’ cables is the absolute cheapest way to maximize your voltage stability. This process involves replacing or adding secondary, heavy-gauge wires to three critical points: your alternator bracket to the chassis, your engine block to the chassis, and your battery negative terminal to the chassis. I remember when I first did this on my old sedan using some leftover best gauge wire for a 500 watt car subwoofer. The ground wire from the factory looked like a pathetic little telephone cord. After replacing it with a thick, zero-gauge copper wire, my headlights stopped dimming every time the AC compressor kicked on, and my mid-bass instantly regained its punchy character.
Install a Stiffening Capacitor to Buffer the Hits
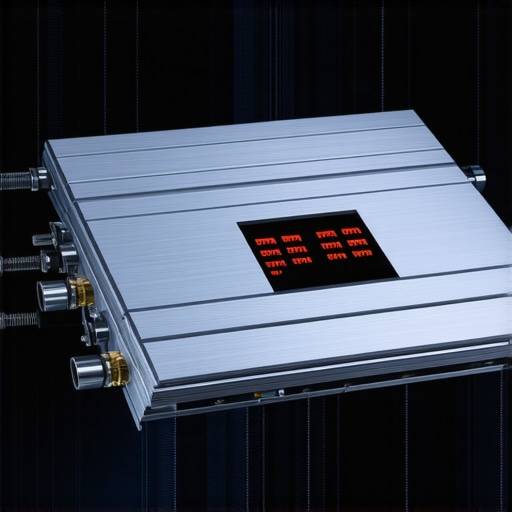
A capacitor acts as a fast-acting energy reservoir placed right next to your amplifier. While your battery is great for long-term storage, it is incredibly slow to discharge power. When your air conditioner compressor clutches on, it creates a massive, sudden spike in current draw. A high-quality capacitor stores electrical energy and releases it in milliseconds, keeping your amplifier’s internal rail voltage stable during those demanding musical peaks. This prevents the amp from clipping and protects your speakers from sounding muddy or distorted when the cabin climate gets hot.
Safely Isolate Your Power Delivery
If you are running multiple aftermarket amplifiers, you should consider a dual-battery setup with an isolator. This keeps your starting battery dedicated to running the car’s vital components, like the starter motor and the heavy-drawing climate control blower fan, while a secondary deep-cycle battery remains dedicated solely to your audio gear. If you are worried about trunk space, you can learn how to hide a car amp under the passenger seat safely to keep your installation incredibly clean, compact, and far away from any major heat sources.
Calibrate Your Gain Settings with the AC Running
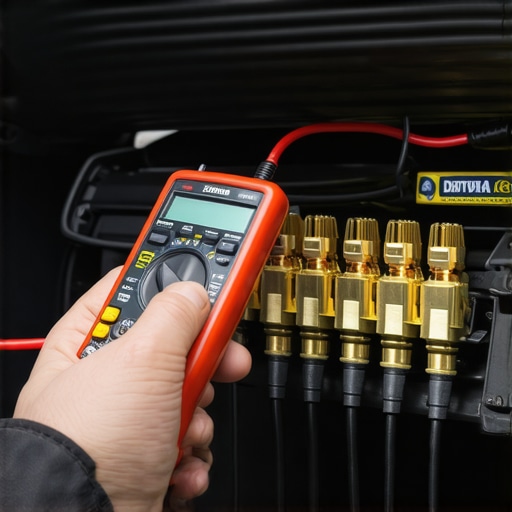
Most DIYers set their amplifier gains while parked in a quiet garage with the engine idling and all accessories turned off. This is a massive mistake. When you set your gains under ideal electrical conditions, your amplifier will quickly run out of headroom and begin clipping the moment you hit the road and crank up the air conditioning. To prevent this, always set your gains under real-world load. Turn your vehicle’s climate control to its maximum setting, turn on your headlights, and then use your multimeter or oscilloscope to set the amplifier’s input sensitivity. This ensures you never push the amp into distortion when the vehicle’s electrical system is under heavy mechanical stress.
When you start diving deeper into high-fidelity car audio, you quickly realize that standard consumer advice barely scratches the surface. Most forum gurus will tell you to simply buy a higher wattage amplifier or swap out your drivers if the dynamics feel compressed. But there is a massive difference between raw marketing specifications and real-world in-car electrical performance. In my years of tuning custom setups, I have watched countless enthusiasts waste thousands of dollars replacing perfectly good equipment because they fell victim to common power delivery myths and ignored the nuanced physics of mobile charging systems.
Why Do People Keep Buying Massive Amplifiers Instead of Fixing Voltage Drop?
Everyone in the DIY car audio community says you need a massive 1000-watt monoblock to get true, bone-rattling bass. But in my experience, a highly efficient 500-watt system running on a stable 14.4 volts will absolutely destroy a poorly powered 1000-watt system struggling at 11.8 volts. In fact, running an oversized amplifier on stock electrical wiring is one of the quickest ways to damage your gear. It leads directly to thermal runaway and clipping. If you are struggling with low-volume output, the solution isn’t a bigger amp; it is addressing the electrical bottleneck. You might even find that your speakers are physically struggling because your amplifier is choking on current. I always advise enthusiasts to investigate how to tell if your amplifier is truly class a or if it is a class D model that demands less resting current, rather than just throwing raw wattage at a weak electrical foundation.
The absolute worst trap you can fall into is attempting to compensate for this lack of power by cranking your amplifier’s gain control all the way up. I see this “oops” moment happen constantly. Enthusiasts confuse gain with a volume knob, turn it to its maximum setting to make up for the power lost when the air conditioning is running, and instantly destroy their voice coils. Understanding the difference between gain and volume on your amplifier is crucial if you want to avoid blowing your brand-new component set. When the voltage drops, your amplifier’s maximum clean output capability drops with it. If your gain is set too high, that drop in voltage forces the amplifier to output a heavily clipped square wave, which generates intense heat and burns out your speaker’s delicate voice coils in minutes.
This reality is backed up by extensive electrical engineering principles. According to Ohm’s Law, when input voltage drops, the current (amperage) must increase to deliver the same amount of power. In a car, this spike in amperage quickly exceeds the thermal limits of your amplifier’s internal power supply. This is why many high-end home theater systems face similar electrical bottlenecks, often leading to situations where the reason your home theater receiver keeps shutting off randomly is actually a protective response to voltage sags or short circuits. In your car, the amplifier might not shut off immediately, but it will sound hollow, compressed, and lifeless. Have you ever fallen into this trap of upgrading your gear when a simple wiring upgrade was the real fix? Let me know in the comments below!
That thermal strain is exactly why I keep a digital multimeter and an infrared thermometer in my glovebox. I don’t trust the dashboard voltage display anymore; it is often too slow to register micro-sags. When I am dialing in a system, I measure the voltage drop directly at the amplifier’s input terminals under a heavy thermal load with the air conditioning blasting. According to the technical manuals published by mobile electronics experts like Bil Dwyer, even a minor 0.5-volt drop along your power wire can cause a noticeable reduction in your amplifier’s maximum clean output power. If you want your investment to last, you have to treat your electrical system like a precision machine.
How do I maintain my car audio system performance over time?
Maintaining pristine audio quality year-round requires more than just a one-time tuning session. Seasonal temperature changes drastically affect both your car’s battery chemistry and the physical materials of your speakers. During the summer, extreme heat increases the electrical resistance of your copper power wires, which means your amp has to work even harder to pull the same amount of current. I make it a habit to check my power and ground connections every spring and autumn. I clean off any micro-corrosion on the ring terminals with a quick spray of electronics cleaner, and I double-check that my ground bolts haven’t vibrated loose. If you notice a sudden drop in output, it is always smart to learn how to tell if your speaker is blown or just loose before you start buying replacement drivers.
Looking ahead, the future of car audio power management is shifting rapidly toward lithium-ion auxiliary batteries (like LTO or LiFePO4 chemistry) and ultra-efficient Class-D smart amplifiers that dynamically adjust their power draw based on real-time alternator output. But until those advanced systems become the standard in every consumer vehicle, the best thing you can do today is optimize your physical wiring and protect your equipment from thermal abuse. If you are tired of your music losing its life every time the summer heat hits, I highly recommend trying one advanced tip this weekend: upgrade your main battery-to-chassis ground wire with a piece of high-quality zero-gauge copper. It takes less than twenty minutes, costs next to nothing, and will instantly give your amplifier the breathing room it deserves.
When you start diving deeper into high-fidelity car audio, you quickly realize that standard consumer advice barely scratches the surface. Most forum gurus will tell you to simply buy a higher wattage amplifier or swap out your drivers if the dynamics feel compressed. But there is a massive difference between raw marketing specifications and real-world in-car electrical performance. In my years of tuning custom setups, I have watched countless enthusiasts waste thousands of dollars replacing perfectly good equipment because they fell victim to common power delivery myths and ignored the nuanced physics of mobile charging systems.
Why Do People Keep Buying Massive Amplifiers Instead of Fixing Voltage Drop?
Everyone in the DIY car audio community says you need a massive 1000-watt monoblock to get true, bone-rattling bass. But in my experience, a highly efficient 500-watt system running on a stable 14.4 volts will absolutely destroy a poorly powered 1000-watt system struggling at 11.8 volts. In fact, running an oversized amplifier on stock electrical wiring is one of the quickest ways to damage your gear. It leads directly to thermal runaway and clipping. If you are struggling with low-volume output, the solution isn’t a bigger amp; it is addressing the electrical bottleneck. You might even find that your speakers are physically struggling because your amplifier is choking on current. I always advise enthusiasts to investigate how to tell if your amplifier is truly class a or if it is a class D model that demands less resting current, rather than just throwing raw wattage at a weak electrical foundation.
The absolute worst trap you can fall into is attempting to compensate for this lack of power by cranking your amplifier’s gain control all the way up. I see this “oops” moment happen constantly. Enthusiasts confuse gain with a volume knob, turn it to its maximum setting to make up for the power lost when the air conditioning is running, and instantly destroy their voice coils. Understanding the difference between gain and volume on your amplifier is crucial if you want to avoid blowing your brand-new component set. When the voltage drops, your amplifier’s maximum clean output capability drops with it. If your gain is set too high, that drop in voltage forces the amplifier to output a heavily clipped square wave, which generates intense heat and burns out your speaker’s delicate voice coils in minutes.
This reality is backed up by extensive electrical engineering principles. According to Ohm’s Law, when input voltage drops, the current (amperage) must increase to deliver the same amount of power. In a car, this spike in amperage quickly exceeds the thermal limits of your amplifier’s internal power supply. This is why many high-end home theater systems face similar electrical bottlenecks, often leading to situations where the reason your home theater receiver keeps shutting off randomly is actually a protective response to voltage sags or short circuits. In your car, the amplifier might not shut off immediately, but it will sound hollow, compressed, and lifeless. Have you ever fallen into this trap of upgrading your gear when a simple wiring upgrade was the real fix? Let me know in the comments below!
That thermal strain is exactly why I keep a digital multimeter and an infrared thermometer in my glovebox. I don’t trust the dashboard voltage display anymore; it is often too slow to register micro-sags. When I am dialing in a system, I measure the voltage drop directly at the amplifier’s input terminals under a heavy thermal load with the air conditioning blasting. According to the technical manuals published by mobile electronics experts, even a minor 0.5-volt drop along your power wire can cause a noticeable reduction in your amplifier’s maximum clean output power. If you want your investment to last, you have to treat your electrical system like a precision machine.
How do I maintain my car audio system performance over time?
Maintaining pristine audio quality year-round requires more than just a one-time tuning session. Seasonal temperature changes drastically affect both your car’s battery chemistry and the physical materials of your speakers. During the summer, extreme heat increases the electrical resistance of your copper power wires, which means your amp has to work even harder to pull the same amount of current. I make it a habit to check my power and ground connections every spring and autumn. I clean off any micro-corrosion on the ring terminals with a quick spray of electronics cleaner, and I double-check that my ground bolts haven’t vibrated loose. If you notice a sudden drop in output, it is always smart to learn how to tell if your speaker is blown or just loose before you start buying replacement drivers.
Looking ahead, the future of car audio power management is shifting rapidly toward lithium-ion auxiliary batteries (like LTO or LiFePO4 chemistry) and ultra-efficient Class-D smart amplifiers that dynamically adjust their power draw based on real-time alternator output. But until those advanced systems become the standard in every consumer vehicle, the best thing you can do today is optimize your physical wiring and protect your equipment from thermal abuse. If you are tired of your music losing its life every time the summer heat hits, I highly recommend trying one advanced tip this weekend: upgrade your main battery-to-chassis ground wire with a piece of high-quality zero-gauge copper. It takes less than twenty minutes, costs next to nothing, and will instantly give your amplifier the breathing room it deserves.
3 Crucial Power Delivery Realizations I Learned the Hard Way
Over a decade of testing different alternators, batteries, and ground paths taught me that clean juice matters far more than speaker brand names. Here are the core truths that completely transformed how I build mobile audio setups:
- A massive amplifier on a weak charging system is a ticking time bomb. If your voltage drops below 12.5 volts while playing music with the climate control running, you are actively cooking your amp’s power supply and starving your speakers.
- The factory ground wire is almost always a joke. Car manufacturers design vehicle ground straps to handle stock electronics, not aftermarket class D monoblocks. Adding heavy copper grounds is the single best favor you can do for your soundstage.
- Heat is the ultimate acoustic dampener. As your amplifier climbs in temperature, its internal resistance spikes, compressing the audio signal. Keeping your amp cool and physically isolated from direct heat sources preserves that crisp, punchy dynamic response.
My Essential Toolkit for Perfect Mobile Electrical Tuning
To stop guessing and actually solve your vehicle’s power starvation issues, I highly recommend keeping these specialized diagnostic tools in your garage:
- A True RMS Digital Multimeter: Essential for measuring real-time voltage drop directly at the amplifier input terminals under a heavy thermal load.
- An Optical Oscilloscope: The absolute safest way to set your amplifier gains while the alternator is under full load from your air conditioning, ensuring zero signal clipping.
- Heavy-Gauge Pure Copper Ground Straps: I always use oxygen-free copper (OFC) rather than copper-clad aluminum (CCA) because of its superior conductivity and resistance to harsh under-hood temperatures.
Take Back Control of Your Mobile Listening Experience
You don’t have to suffer through quiet, muddy, or lifeless car audio just because the summer sun is beating down on your windshield. By tackling the electrical bottleneck head-on and shielding your amplifier from voltage drops, you can enjoy robust, chest-thumping bass and crystal-clear high frequencies even when the climate control is working overtime. Your sound system is only as good as the power feeding it. Treat your electrical system right, and your music will reward you with pure, uninterrupted performance on every drive.
Have you ever noticed your car audio quality take a massive dive the second you turn on the air conditioning? Let me know your experiences in the comments below!