
I sat there in the dark, staring at my brand-new studio monitors, and all I could hear was a faint, high-pitched whistle coming from the tweeters. I’d saved up for months, thinking I was finally graduating to the big leagues of home audio. But every time I moved my mouse or my computer’s cooling fan ramped up, my speakers joined in with a chorus of digital chirps and static. It was heartbreaking. I initially spent hours searching for how to stop the hissing sound in your studio monitors, convinced that I’d bought a defective pair of speakers or a bum interface. It turns out, I made the most common rookie mistake in the book: I was using unbalanced cables in an environment crawling with electromagnetic interference. Today, I’m going to show you why switching to balanced XLR cables isn’t just an ‘audiophile thing’—it is a functional necessity for anyone tired of hearing their refrigerator’s motor through their sound system.
Stop Letting Interference Ruin Your Favorite Tracks
If you are currently using RCA or standard TS cables for long runs, you are basically inviting every power brick and Wi-Fi router in your house to dump noise into your signal. I used to think that buying ‘shielded’ cables was enough, but shielding can only do so much. I learned the hard way that why expensive speaker cables are mostly a marketing trick applies to passive speakers, but when we talk about line-level signals between an interface and a powered monitor, the rules change completely. Balanced XLR cables use a clever trick called Common Mode Rejection. They carry two versions of the audio signal—one with the polarity inverted—and when they reach the other end, the receiving gear flips the phase back and cancels out any noise picked up along the wire. According to the experts at Sound on Sound, this process can reduce induced noise by upwards of 60dB to 80dB in real-world scenarios.
Is This Just Overpriced Hype for Gear Snobs?
You might be wondering if you really need to drop extra cash on XLR when your current setup sounds ‘fine.’ I used to be a skeptic too, especially since I knew that the truth about gold-plated audio connectors for home stereos is that they rarely offer a perceptible change in sound quality. But balanced cables are different because they solve a physical problem, not a perceived one. Have you ever plugged in a new piece of gear only to be met with a buzz that drives you crazy? If so, you’ve likely dealt with a ground loop or RFI, and that is exactly what we are going to fix today.
Check for the magic balanced label on your interface
Before you buy anything, you need to confirm your gear can actually talk in balanced mode. Look at the back of your audio interface and your monitors. You are looking for those three-pin circular XLR ports or 1/4-inch jacks specifically labeled ‘TRS’ or ‘Balanced.’ If you only see the red-and-white RCA holes, you’re dealing with an unbalanced system where the signal is much more vulnerable. I remember helping a friend set up his first home studio; he was using the difference between active and passive speakers explained simply to understand his gear, but he was still getting a nasty hum because his interface was balanced but his cables weren’t. We swapped in a pair of TRS-to-XLR cables, and the silence was so immediate he thought we’d blown a fuse.
Stop routing your audio cables like extension cords
Even with balanced cables, you shouldn’t be lazy with placement. Think of your audio cable as a delicate messenger and your power cables as a loud, messy construction site. If you run them parallel to each other, the power cable will eventually leak noise into your audio through electromagnetic induction. If they have to cross, make them cross at a 90-degree angle. This minimizes the surface area where interference can jump from one to the other. This is especially important because why your studio monitors sound boxy against a wall is often a physical placement issue, but the electronic ‘fuzz’ is purely about cable management. I once spent an hour taping cables to the underside of my desk just to keep them away from my PC’s massive power supply, and the clarity in my high-end was instantly noticeable. 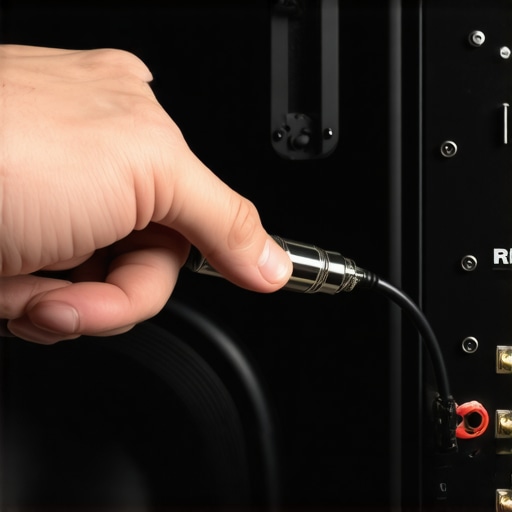
Perform the silence test to confirm your fix
Once everything is plugged in, turn your volume up slowly without playing any music. In a perfectly balanced setup, you should hear almost nothing until you reach the very top of the gain range. If you still hear a crackle when you adjust the levels, it might not be the cable at all. You might need to learn how to fix the crackling noise when you turn your amp volume if the internal components are dirty. Also, pay attention to your startup sequence. I used to get a massive, heart-stopping thud every morning until I researched why your amplifier makes a popping sound when you turn it on and realized I was turning my monitors on before my interface. Balanced cables fix the steady hiss, but proper power-on etiquette saves your physical speakers.
Match your output levels for the best signal-to-noise ratio
Finally, make sure your interface is outputting a ‘Pro’ line level, usually +4dBu, rather than the ‘Consumer’ -10dBV level. Balanced connections love that higher voltage because it pushes the signal further above the noise floor. It’s like trying to talk to someone across a crowded room—you can either whisper and hope they hear you, or you can use a megaphone. The +4dBu setting is your megaphone. When I first switched, I had my monitors turned up way too high and my interface output too low. This forced the monitor’s internal amp to work harder, which actually introduced more hiss. By cranking the interface output and lowering the physical gain knobs on the back of the speakers, the background noise vanished completely.
I see it all the time in audiophile forums: someone buys a thousand-dollar set of cables and then wonders why their system still sounds ‘thin’ or ‘brittle.’ While we’ve established that balanced connections are a lifesaver for killing ground hum, they aren’t a magic wand for a poorly matched signal chain. A common myth I’d like to challenge is the idea that high-resolution audio files are the ‘ultimate’ fix for sound quality. In reality, most people can’t distinguish between a 24-bit/192kHz file and a standard CD-quality stream once the music starts playing. Often, the real bottleneck is your hardware’s ability to handle those signals without falling apart at the seams. For example, why your high-res audio stream keeps buffering on Wi-Fi is usually a bandwidth issue, but even if it plays perfectly, your room acoustics or speaker placement will have a much larger impact on what you actually hear.
Your amplifier might be fighting your speakers
One of the biggest ‘oops’ factors I’ve encountered involves impedance mismatching. People often assume that any ‘pro’ interface can drive any set of headphones or speakers. I learned this the hard way when I tried to run a pair of 600-ohm studio cans off a budget interface. It sounded like a tinny AM radio. You might find the $50 amp that drives high-impedance cans without a struggle, but if the output impedance of your gear is too high relative to your headphones, you lose your ‘damping factor.’ This results in loose, muddy bass. If your gear is working too hard, you’ll also notice the real reason your amp is getting hot to the touch is that it’s struggling to provide the necessary current, which can lead to thermal shutdown or permanent damage.
Why do high-end monitors still feel ‘lifeless’ in a treated room?
Even with a balanced setup, you might encounter the ‘impedance bridge’ problem. According to technical studies by Benchmark Media Systems, the ratio between the source impedance and the load impedance should ideally be at least 1:10 to ensure flat frequency response and maximum voltage transfer. When this ratio is off, the frequency response of your speakers can actually change based on the cable’s own electrical properties. This is where people start blaming their cables for being ‘dark’ or ‘bright,’ when the issue is actually the electronics at either end. It’s also why the truth about using your phone to power high-end headphones is so disappointing; the internal DAC-amp combo just isn’t built to handle the load, regardless of how ‘clean’ the digital file is.
The proximity trap you’re probably walking into
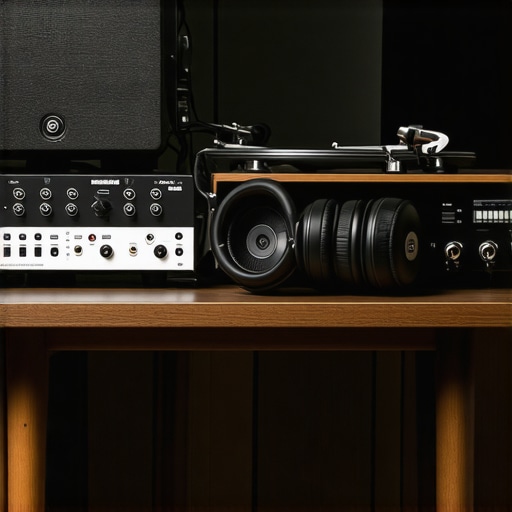
If you’ve gone through the trouble of balancing your cables, don’t ruin it by placing your sensitive gear in an ‘interference sandwich.’ A major trap for vinyl enthusiasts is the placement of the phono stage. I’ve seen beautiful setups where the owner tucked the preamp right on top of a massive power amplifier. This is a recipe for disaster. Knowing why your phono preamp needs to be far away from the power amp is crucial because the tiny signal from a turntable is incredibly susceptible to the massive electromagnetic fields generated by a power amp’s transformer. Similarly, keep your digital gear separate. If you hear a high-pitched whine that changes when you move your mouse, why your digital to analog converter is making a clicking sound might be due to USB bus noise bleeding into the analog stages. Have you ever fallen into this trap? Let me know in the comments.
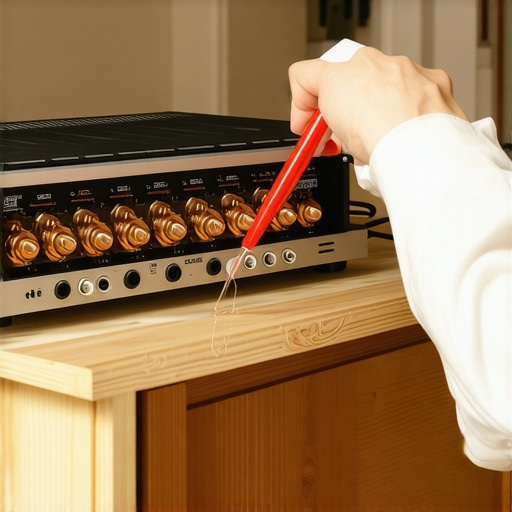
I learned the hard way that high-end gear isn’t a ‘set it and forget it’ investment. After a year of pride in my setup, I noticed the high-end sparkle started to dim, and a subtle grit crept into the volume sweeps. It wasn’t the speakers failing; it was basic physics. Oxygen is the enemy of every metal-on-metal connection in your signal chain. I now swear by DeoxIT D5 for every patch point. Unlike generic contact cleaners that can leave a sticky residue or strip away necessary lubricants, D5 specifically targets oxidation while leaving a protective layer. This is the first thing you should reach for when you need the easy way to fix a scratchy volume slider on your radio or that annoying intermittent crackle in your input selector. Even if you believe why gold-plated connectors aren’t always better for sound, they still require a clean surface to maintain their conductive integrity over the years.
Stop oxidation before it kills your dynamics
Every six months, I pull every cable and give the terminals a quick wipe. It’s a tedious Sunday task, but the cumulative effect on your noise floor is massive. If you’ve ever wondered how to fix the crackling noise when you turn your amp volume, 90% of the time it’s just dust and micro-corrosion that a professional-grade cleaner can solve in thirty seconds. For those with vintage gear, this isn’t optional; it’s a rescue mission. I’ve seen enthusiasts find incredible the $5 thrift store find that fixed my muddy guitar amp simply because the previous owner didn’t know that a little contact cleaner could restore a dead input.
How do I maintain my high-end audio gear over time?
Maintenance is as much about physical protection as it is about electronic cleaning. For headphones, the biggest failure point is the pads. Sweat and skin oils break down protein leather and foam, which fundamentally changes the acoustic seal against your head. If your bass feels like it’s disappearing, why your headphone pads are peeling and how to replace them is likely the first guide you should consult. I also keep a simple 9V battery in my toolkit; it’s the most reliable way to perform a quick diagnostic. Knowing how to use a 9v battery to check your speaker polarity can save you hours of frustration when you’re wiring up a complex 5.1 system and feel like the phantom center is ‘missing.’ If the cone moves out, you’re in phase; if it sucks in, you’ve got a wiring swap somewhere in the wall.
Precision tools for the modern listener
Beyond the physical, we now live in the era of ‘software maintenance.’ I used to ignore those ‘Update Available’ pop-ups on my soundbar and wireless streamers, thinking they were just adding features I didn’t want. Then, I experienced a week of random digital pops and realized why your soundbar needs a firmware update to fix audio drops—manufacturers often release patches for HDMI handshake bugs that occur with new TV models. According to the IEC 60268-1 international standard for sound system equipment, maintaining a stable operating temperature and signal-to-noise ratio is critical for long-term component health. If you feel your gear is running too hot, why your new amplifier gets hot after only twenty minutes might be a sign of poor ventilation or a bias issue that needs a technician’s touch.
Looking ahead, the future of home audio is moving toward ‘self-healing’ systems driven by AI-based DSP. We are already seeing why your smart speaker is actually listening to your room acoustics to adjust its EQ in real-time. Soon, our amplifiers will likely be able to detect a failing capacitor before it pops and alert our phones. For now, my best advice is to be proactive. Go grab a multimeter and a can of contact cleaner today. My personal challenge to you: pull out one piece of gear you haven’t used in months because it ‘sounded a bit off,’ clean the contacts, and check the polarity. You might just find your new favorite speaker was hiding under a layer of dust.
The Hardest Truths I Learned About Signal Noise
Reflecting on my journey from a noisy bedroom setup to a professional-grade environment, there are a few “lightbulb moments” that changed everything for me. First, high-end gear cannot fix a fundamental electrical problem; if your foundation is shaky, even the most expensive monitors will sound poor. Second, I realized that 3 budget upgrades that make cheap speakers sound expensive often start with something as simple as cable management and isolation. Third, never underestimate the power of a clean connection—a quick wipe of your terminals can do more for your high-end clarity than a brand-new DAC ever could. Finally, I stopped chasing “perfect” specs and started focusing on the noise floor. Once the hiss is gone, you can actually hear the nuances of the music you love.
#IMAGE_PLACEHOLDER_E#
My Personal Toolkit for Pure Audio
I don’t believe in hoarding gear, but I do believe in having the right tools for the job. To keep your system running at peak performance, I recommend these essentials:
- DeoxIT D5: As I mentioned earlier, this is non-negotiable. It is the single best way to ensure your signal path remains pristine year after year.
- Acoustics over Electronics: Before you buy new monitors, try the simple rug trick that instantly improves your room acoustics. It is a cheap way to tame reflections that interfere with your perception of clear sound.
- A Trustworthy Multimeter: This tool is vital for checking cable health. If you ever have to deal with how to fix one headphone side being louder than the other, a multimeter can tell you if the problem is a broken wire or a failing driver in seconds.
Your Journey Toward Perfect Clarity
Your audio journey should be about the joy of listening, not the frustration of troubleshooting. By switching to balanced XLR cables, managing your signal paths, and keeping your contacts clean, you are removing the barriers between you and the artist’s intent. Don’t be afraid to pull everything apart and rebuild it from the ground up; sometimes the cleanest sound comes from the simplest corrections. You have got the knowledge—now it is time to enjoy the silence. Have you ever found a surprising source of noise in your studio that was driving you crazy? Let me know in the comments below!