
I remember the smell first—a dry, metallic scent that usually means something expensive is about to die. I reached over to my rack, touched the top plate of my favorite receiver, and nearly lost a layer of skin. It was hot. Not just worked out warm, but could fry an egg on the chassis hot. I panicked, shut everything down, and spent the next three hours scouring forums. The thing is, heat is the natural byproduct of making music, but there is a very fine line between operating temperature and impending meltdown. If you have ever noticed why your new amplifier gets hot after only twenty minutes, you are not alone in that cold sweat moment. Today, we are going to demystify that heat and figure out if your gear is doing its job or slowly dying.
Stop Panic-Checking Your Warranty Card
Most people assume that heat equals damage. In reality, some of the most expensive high-end gear is designed to run blistering hot. Class A amplifiers, for instance, are notoriously inefficient, turning about 80% of their energy into pure heat just to keep the transistors fully on. It is a design choice for sound quality, not a flaw. However, if your budget-friendly Class AB receiver is acting like a space heater, we might have a problem. I learned this the hard way years ago when I tucked a powerful amp into a tight, unventilated bookshelf because it looked aesthetic. I did not realize I was essentially slow-cooking my electronics. You have to give these things room to breathe, or you will end up wondering how to tell if your vintage amplifier needs new capacitors much sooner than you would like.
Is My Living Room About to Become a Fire Hazard?
It is a valid fear. According to technical specs from manufacturers like Cambridge Audio, a well-designed amp can safely reach internal temperatures of 60°C (140°F) without failing, but that feels alarmingly hot to human skin. The real reason your amp is getting hot to the touch often boils down to impedance mismatch. If your speakers are hungry (low impedance) and your amp is not rated to handle them, it is going to work overtime and sweat. It is the same kind of stress that causes why your car audio system drains your battery overnight if things are not balanced properly. We are going to look at your speaker wires, your ventilation, and your volume habits today to figure out exactly which one is the culprit. Have you ever had to yank your hand back after touching your gear? I want to hear about it—was it a specific song or a long listening session that did it? Before we start tearing things apart, let’s look at the simple stuff first, because sometimes the fix is as easy as how to stop your portable speaker from vibrating off the shelf by just moving a few things around and creating some airflow.
Give Your Amp Some Breathing Room
First, let us talk about the physical space around your setup. If your receiver is currently sandwiched between a Blu-ray player and a game console inside a closed wooden cabinet, you are effectively running a sauna for your electronics. I remember my first real setup—I thought it looked so sleek tucked away in a tight shelf. Within an hour, the top plate was hot enough to warp a plastic CD case sitting on top. Most manuals recommend at least 4 to 6 inches of clearance on top for passive convection. If you cannot provide that, you might need to install a small USB fan to pull that stagnant hot air out of the enclosure.
Watch Out for the Wrong Speaker Match
The most common technical reason for excessive heat is an impedance mismatch. Think of your amplifier as a weightlifter; if you give it 8-ohm speakers, it is lifting a standard, manageable weight. But if you connect 4-ohm speakers to an amp only rated for 8 ohms, you are asking that weightlifter to double their load without a break. It will work for a while, but the output transistors will get incredibly hot as they struggle to deliver the extra current required. I once paired a set of power-hungry vintage floorstanders with a tiny desktop amp, and the chassis stayed blistering hot even at low volumes. You need to know how to choose the right amplifier power for your desktop speakers to avoid this exact scenario. If your amp starts to shut down intermittently, pay attention—it is likely why your surround sound receiver keeps clicking into protect mode.
Kill the Dust Before It Kills Your Gear
Dust is a silent insulator. Over several years, it builds up on the internal heatsinks, trapping heat against the components like a heavy winter coat. If you have bought used gear, this check is non-negotiable. I have opened up thrift-store receivers that looked like they were stuffed with dryer lint. Grab a can of compressed air and blow it out through the top vents. While you are at it, check your connections. A single stray copper strand from a speaker wire touching the chassis or another terminal can create a partial short, generating massive heat before it eventually blows a fuse or kills a channel. Taking the time to how to repair a loose speaker terminal in under five minutes can save you from a catastrophic failure later.
Check for Failing Components and Shorts
If your ventilation is perfect and your speakers are a correct match, but the heat is still localized to one specific side of the chassis, you might be looking at internal component failure. Old electrolytic capacitors can leak or bulge, causing the circuit to draw more power than intended. If you hear a persistent buzz or notice how to fix the crackling noise when you turn your amp volume, it might be a sign that the internal components are reaching the end of their functional life. Learning how to tell if your vintage amplifier needs new capacitors is the best way to prevent a fire hazard before it starts. Sometimes, a quick check of your wiring logic—like knowing how to use a 9v battery to check your speaker polarity—can reveal simple setup errors that were making your amp work twice as hard for half the sound quality.
We need to talk about the ‘more is better’ fallacy because it is the quickest way to waste money in this hobby and often leads to the very heat issues we discussed earlier. Everyone tells you to buy the beefiest cables and the most gold-plated connectors you can find, but here is the truth: for most home setups, why expensive speaker cables are mostly a marketing trick is a lesson learned only after the return window closes. I have seen enthusiasts spend $500 on ‘audiophile’ wires when their room acoustics are so bad they might as well be listening in a tiled bathroom. Unless you are dealing with extreme humidity or long runs over 50 feet, the truth about gold-plated audio connectors for home stereos is that they prevent oxidation, but they do not magically ‘expand the soundstage’ for your ears.
Roger Russell, the former Director of Acoustic Research at McIntosh, famously debunked many of these wire myths, noting that resistance is the only factor that truly matters for speaker cables. If your wire is thick enough for the distance, you are 99% of the way there. Spending more on cables than on your actual speakers is a trap designed for people who prefer reading marketing copy over listening to music. Focus on the actual output stage of your gear instead of the shiny bits at the end of the wire.
Why Does Your 100-Watt Amp Outperform a 500-Watt Receiver?
This is the ‘Oops’ factor that catches almost everyone. We get blinded by the big numbers on the box. Most budget receivers list ‘Peak Power,’ which is a measurement they can only hit for a fraction of a second before the power supply gives up. If you see the reason your car radio dims when the bass hits, you are seeing a real-time power supply failure. A high-quality 50-watt integrated amp with a massive toroidal transformer will always sound better and run cooler than a cheap 500-watt ‘all-in-one’ system that weighs less than a bag of flour.
The real nuance lies in current delivery, not just voltage. If your amp cannot handle the dips in your speaker’s impedance, it will distort and overheat regardless of the ‘wattage’ rating. This misunderstanding often leads to clipping, which is the fastest way to fry your gear. If you push a weak amp too hard, it sends a distorted signal that can destroy your speakers, leaving you wondering how to tell if your headphones have a blown driver or why your tweeters suddenly went silent.
I once bought a ‘2000W’ car amp from a flea market that could barely push a pair of 6x9s without clipping and eventually caused a how to fix the crackling noise when you turn your amp volume because the internal components couldn’t handle the heat stress. Don’t be me. Look for the ‘Continuous RMS’ rating into 4 ohms—it tells you how much ‘muscle’ the power supply actually has. Have you ever fallen into this trap? Let me know in the comments.
I have seen enough burnt-out circuit boards to know that heat is the slow, silent killer of great sound. It starts with a slight smell, then a distorted signal, and finally, the dreaded silence. If you have been ignoring that toaster-like warmth coming from your rack, you are playing a dangerous game with your investment. Maintaining your gear is not just about wiping off dust; it is about managing the thermal lifecycle of every component. I have learned that the best way to extend the life of an amp is to treat it like a living thing that needs to breathe. If you have noticed why your new amplifier gets hot after only twenty minutes, you already know the stakes are high. Let us look at how to keep that magic smoke inside the box where it belongs.
How do I keep my audio gear running for twenty years?
Consistency is the secret. I personally use a small infrared thermometer—the kind you find at a hardware store—to map out the hotspots on my gear twice a year. It sounds overkill until you realize that one transistor running 10 degrees hotter than the others is a flashing red light for a future repair. According to technical whitepapers from Hypex Electronics, even high-efficiency Class D modules require a robust thermal interface with their chassis to prevent localized heat buildup that can dry out nearby electrolytic capacitors. If you neglect this, you will eventually be searching for how to tell if your vintage amplifier needs new capacitors much earlier than necessary. I also make it a habit to check my physical connections; a loose wire generates heat through resistance, so knowing how to repair a loose speaker terminal in under five minutes is a skill that pays for itself in avoided fire hazards.
The Cheap Gadgets That Save Expensive Gear
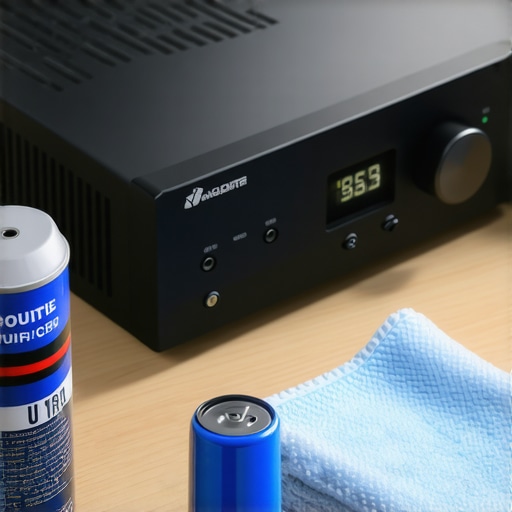
You do not need a degree in electrical engineering to maintain your setup, but you do need the right chemistry. I never go a month without using a high-quality electrical contact cleaner like DeoxIT D5. It is the only thing I trust for how to fix the crackling noise when you turn your amp volume or for the easy way to fix a scratchy volume slider on your radio. Oxidation acts like an insulator, forcing your components to work harder and run hotter. While you are in maintenance mode, do not forget the mechanical parts. For my vinyl setup, the best way to clean a turntable stylus without breaking it is a gel-based cleaner that lifts debris without stressing the cantilever. These small interventions prevent the ‘cascading failure’ where one dirty contact leads to a clipped signal that eventually leaves you wondering how to tell if your headphones have a blown driver.
The Future of Cool Audio
We are moving toward a world where ‘hot’ gear might become a thing of the vintage past. The rise of Gallium Nitride (GaN) transistors is changing the game. These components can switch much faster than traditional silicon with significantly less energy loss as heat. This means we will soon see 1000-watt amplifiers the size of a paperback book that stay cool to the touch. Until then, you have to be the guardian of your gear. If you see why your headphone pads are peeling and how to replace them, it is a reminder that everything in audio eventually wears out—but the electronics do not have to if you keep them cool. My best advice? Go buy a can of contact cleaner today and treat every knob and button on your amp to a quick spray; it is the single most effective five-minute upgrade you can give your ears.
What My Blistered Thumb Taught Me About Thermal Limits
Over the years, I have realized that the “hand test” is more accurate than any spec sheet. If you cannot hold your palm on the top of the chassis for five seconds, you are courting disaster. One major takeaway is that idle heat is often more dangerous than volume-induced heat. Some amps are biased so high that they cook themselves while you are just choosing a playlist. This is especially true for older gear; you really have to watch out for the hidden costs of buying a vintage receiver on the internet because a previous owner might have left it in a dusty environment that clogged the internal heatsinks.
Another hard truth: ventilation is not a suggestion, it is a requirement. I once lost a beautiful integrated amp because I thought it looked fine tucked away in a cabinet. It was not. If your gear is trapped, the heat has nowhere to go but back into the capacitors, shortening their functional life significantly.
Lastly, pay attention to your wire gauge. Thin wires over long distances increase resistance, forcing the amp to work harder and generate unnecessary heat. It is a simple physical bottleneck that many enthusiasts overlook when focusing only on the components themselves.
The Survival Kit for High-Performance Audio Gear
I do not leave my system’s health to chance anymore. I rely on a few specific tools that have saved me thousands in repair bills over the decades:
- AC Infinity AIRCOM Series: These are dedicated cooling fans that sit right on top of your receiver. They are whisper-quiet and pull the heat out of the chassis before it can settle and cause damage.
- DeoxIT D5 Contact Cleaner: Before you assume your amp is dying, try the easy way to fix a scratchy volume slider on your radio. Clean contacts mean less resistance, better signal flow, and lower operating temps.
- Infrared Temp Gun: For under twenty dollars, you can see exactly which internal component is struggling. It is part of the best way to test a used receiver before you buy it.
- Canned Compressed Air: A quick blast once a quarter prevents the dust-blanket effect that insulates heat against the circuit board.
Let Your Music Breathe
At the end of the day, your audio gear is an investment in your relaxation. Taking five minutes to check your airflow or blow out some dust ensures that your sessions stay focused on the melody, not the smell of melting plastic. Knowing why your new amplifier gets hot after only twenty minutes is the first step toward becoming a proactive owner rather than a reactive one. Treat your setup with respect, give it the space it needs, and it will reward you with clear, distortion-free sound for decades to come. Have you ever had a piece of gear get so hot you could cook on it? Let me know the brand and how you fixed it in the comments below!