
I spent years thinking that “real” audio equipment was something you had to save up months of salary for, or at least something you bought from a guy in a suit at a boutique showroom. Then came the “Great Klipsch Regret” of 2021. I was browsing the dusty back corner of a local thrift shop, looking for cheap kitchenware, when I saw a pair of massive, walnut-veneered towers. I poked at the grills, saw a bit of dust, and walked away because they looked “too old.” That night, I Googled the model number from memory. They were Klipsch Heresy IIs. The price tag? $40 for the pair. The market value? Nearly twenty times that. I went back the next morning, but of course, they were gone. That stinging realization changed how I look at every donation bin in the city. [IMAGE_PLACEHOLDER]
Stop Walking Past Your Next Dream Setup
Since that day, I’ve refined a system. We aren’t just looking for stuff that works; we’re hunting for the “sleeper” gear that everyone else thinks is obsolete. I want to help you build a system that sounds like $5,000 but costs less than a fancy dinner. We’re going to cover how to identify the heavy hitters, what to ignore, and how to find high-end audio gear at thrift stores before anyone else snags them. While you’re at it, don’t forget to check the media bins; knowing the secret to finding high quality vinyl records at thrift shops can often land you a collection worth more than the turntable itself.
Is it actually possible to find “real” gear in a junk shop?
I get the skepticism. Most thrift stores are filled with plastic “Home Theater in a Box” units from 2004 and broken alarm clocks. But according to data from Statista, the global secondhand market is projected to reach $350 billion by 2027, and premium electronics are a massive part of that turnover. People donate their “old” stuff when they move or upgrade to soundbars without realizing the gold they are giving away. My biggest early mistake was judging a book by its cover—or a speaker by its dust. I once bought a receiver that looked pristine but had the hidden costs of buying a vintage receiver written all over it because I didn’t know the best way to test speakers at a garage sale without an amp. Have you ever passed on a piece of gear only to find out later it was a legendary model? It’s a gut-wrenching feeling, but it’s the best teacher you’ll ever have in this hobby. Stick with me, and I’ll show you the weight-test, the grill-peek, and the terminal-check that will save your wallet and your ears.When you’re standing in the aisle, forget the brand names for a second. Use your muscles first. High-quality audio components from the golden era were built like tanks because they needed massive power transformers to drive speakers efficiently. If a receiver feels like it’s filled with air, it probably is. I once hauled a back-breaking Sansui AU-717 off a bottom shelf that looked like a discarded radiator. It was filthy, but that weight told me there was a massive dual-mono power supply inside. If you find a unit that’s light but looks fancy, be cautious; understanding why your amplifier gets hot enough to burn your hand is often a lesson in how cheap internal heat sinks struggle to dissipate thermal energy. 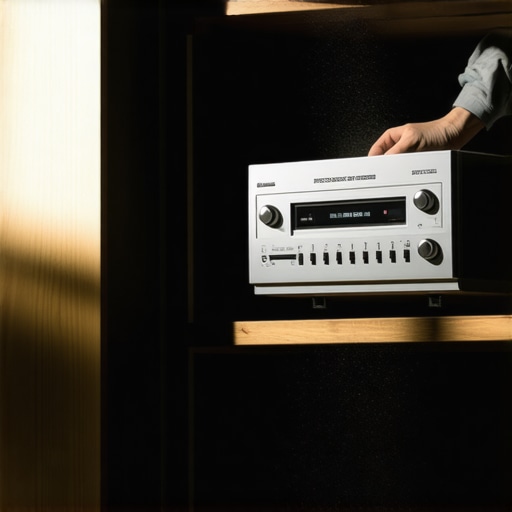
Peek Behind the Curtain
You’d never buy a used car without looking under the hood, and you shouldn’t buy speakers without seeing the drivers. Gently pry the fabric grills off. If the shop owner looks nervous, tell them you’re checking for foam rot—the process where the outer ring of the speaker cone disintegrates into dust. It’s not a dealbreaker, but it’s a massive bargaining chip. While you’re in there, look for pushed-in dust caps. Even if they look ruined, you can usually learn how to safely remove a pushed-in speaker dust cap with a vacuum or some specialized tape once you get the units home.
Bring a Secret Weapon to the Shop
Most thrift stores don’t have a listening station, and even if they do, the wiring is usually a rat’s nest. I always carry a 9V battery in my pocket. It’s the fastest way to see if a speaker is actually alive without an amp. By briefly touching the speaker wires to the battery terminals, you’ll hear a slight pop if the voice coil is intact. This is also how to use a 9v battery to check your speaker polarity on the fly. If you’re evaluating a receiver, plug it in and turn the knobs before handing over your cash. If you hear a physical grinding sound or see the display lights flicker, you’ll want to know how to fix the crackling noise when you turn your amp volume using electronic contact cleaner. I remember finding an old Grundig radio that emitted a piercing static every time I touched the dial; applying the easy way to fix a scratchy volume slider on your radio saved it from the landfill and turned it into my favorite office setup. Always remember the best way to test a used receiver before you buy it is to trust your hands and ears during that first five-minute inspection.
Stop Chasing Gold Plugs and Fairy Dust
The biggest lie in high-end audio isn’t about the speakers themselves; it’s the stuff connecting them. Salespeople love to tell you that you need $500 cables to “unleash” the sound. In my experience, and backed by double-blind testing, why expensive speaker cables are mostly a marketing trick becomes obvious once you realize a standard 14-gauge copper wire performs identically over short distances. People get obsessed with aesthetics, wondering is gold plated hardware really worth the extra cash, when gold is actually a worse conductor than copper. Its only real benefit is corrosion resistance, not some magical sonic clarity. You are much better off spending that money on room treatment rather than shiny connectors.
Why does that dusty 40-watt vintage amp sound louder than your new receiver?
This is where most beginners get fleeced by the numbers on the box. Modern mass-market receivers often brag about “100 Watts Per Channel,” but they achieve that by measuring a single channel at a high distortion level. High-end vintage gear was often “underrated,” providing high current that could handle dips in speaker impedance. According to research by Dr. Floyd Toole in his book ‘Sound Reproduction,’ the way a speaker interacts with a room and the amplifier’s ability to manage varying loads is far more important than the peak wattage listed on a sticker. It comes down to current delivery versus rail voltage. A cheap receiver might have high voltage but no “muscle” behind it. When your speakers’ impedance drops at certain frequencies, that cheap amp gasps for air. This is a common reason the real reason your amp is getting hot to the touch is often that it’s working way outside its comfort zone. If you don’t match them right, you’ll find why your surround sound receiver keeps clicking into protect mode when the bass hits. #IMAGE_PLACE_HOLDER_C#
Watch Out for the DC Offset Trap
The most dangerous mistake you can make with a thrift store score is plugging it in and cranking it up immediately. I once found a “pristine” Marantz that looked like it had been kept in a vacuum seal. Ten minutes in, it emitted a foul smell and sent a surge of DC voltage straight into my favorite woofers, frying the voice coils instantly. This is part of the hidden costs of buying a vintage receiver on the internet or at a junk shop—internal capacitors dry out over decades. Even if the outside is clean, you need to be wary of why your amplifier gets hot enough to burn your hand or why it makes a loud thump when powering on. To avoid this, I always keep my why your phono preamp needs to be far away from the power amp rules in mind to minimize interference, but more importantly, I use a multimeter to check the speaker terminals for DC voltage before connecting anything valuable. Before you start worrying about how to choose the right amplifier power for your desktop speakers, make sure the amplifier isn’t a ticking time bomb for your gear. Have you ever fallen into this trap and lost a pair of speakers to a bad amp? Let me know in the comments.
Once you’ve successfully scouted a legendary piece of gear, the real work begins. You can’t just let a thirty-year-old piece of machinery sit in a rack and expect it to perform like it did the day it left the factory in Tokyo or Berlin. High-end audio is a relationship, and if you ignore it, it will literally start screaming at you through your speakers. I’ve found that the difference between a system that lasts fifty years and one that ends up back in the donation bin is about five dollars worth of chemicals and a little bit of patience. You need to be proactive. If you start hearing strange noises, don’t ignore them; understanding why your amplifier makes a popping sound when you turn it on is the first step toward preventing a total circuit failure. If your radio dial feels stiff or emits static, you need to master the easy way to fix a scratchy volume slider on your radio before the internal contacts wear down completely.
Keep Your Gear Out of the Graveyard
The most important tool in my arsenal isn’t a fancy expensive screwdriver; it’s a can of DeoxIT D5. This specialized electronic contact cleaner is the gold standard for restoring vintage gear. Over decades, oxygen reacts with the metal contacts in your switches and potentiometers, creating a layer of non-conductive oxidation. This is what causes that annoying crackle when you turn the volume. Beyond just the knobs, you should be looking at the physical connections on the back of the unit. Learning how to repair a loose speaker terminal in under five minutes can prevent a short circuit that might otherwise fry your output transistors. For my vinyl enthusiasts, maintenance is even more critical. You need to know the best way to clean a turntable stylus without breaking it, because a dirty needle doesn’t just sound bad—it physically carves away the grooves of your records like a tiny, vibrating chisel.
How do I maintain this vintage gear over time?
Consistency is more important than occasional deep cleaning. Dust is the silent killer of electronics because it acts as insulation, trapping heat inside the chassis. Every six months, I take the cover off my main amp and use a can of compressed air to blow out the dust bunnies. While you have the hood open, look at the electrolytic capacitors. As noted in the Audio Engineering Society (AES) technical papers on component aging, these components have a functional lifespan of roughly 20 to 25 years. If the tops of the capacitors look bulged or if there is a crusty residue at the base, they are leaking and need to be replaced. This isn’t just for speakers and amps, either; your wearable gear needs love too. If you notice your music sounding muffled, it might be as simple as learning the best way to clean your ear tips for better noise isolation or finding out how to replace the foam pads on your favorite headphones to restore the original acoustic seal.
#IMAGE_PLACE_HOLDER_D#
Why Modular Setups are the Future of Home Audio
I predict that we are moving away from the era of “smart” all-in-one speakers and heading back toward modularity. Smart speakers have a built-in expiration date because their software eventually becomes obsolete. A pair of high-quality passive speakers from 1980, however, will still work in 2080. The trick is to bridge the gap between old-school hardware and modern convenience. You can easily bring a vintage receiver into the 21st century by learning how to add an optical input to your old home stereo using a cheap DAC. If you want more low-end punch, you don’t need to buy a whole new system; knowing how to wire a passive sub to an active receiver without frying the circuit can give your thrift store towers the cinematic scale of a modern theater. My challenge to you is this: don’t just collect gear; restore it. Go grab a can of contact cleaner and fix that one scratchy knob or loose terminal you’ve been ignoring. The satisfaction of bringing a piece of history back to life is better than any “new in box” purchase you’ll ever make.
What the Pro Hunters Know That You Don’t
Price and value are rarely the same thing in a thrift store. I’ve seen $200 plastic soundbars priced at $100 and $1,000 vintage receivers priced at $20. The sticker is usually just a guess by a volunteer who doesn’t know what they have. Another secret? The best cables are often buried in the bottom of the ‘misc electronics’ bin. I’ve found high-end interconnects mixed in with old printer cables because people assume why expensive speaker cables are mostly a marketing trick applies to everything. While that is true for some generic brands, high-quality shielding is always worth digging for. Finally, remember that cosmetic damage is your best friend for negotiating. A scratch on a walnut veneer doesn’t change the way the crossover handles power, but it will definitely lower the price at the register.
The Essential Restoration Kit for Your New Finds
If you’re serious about this hobby, you need a few non-negotiable tools. First, get a can of DeoxIT D5; it is the gold standard for how to fix the crackling noise when you turn your amp volume without damaging the delicate copper contacts inside. Second, I always recommend keeping a cheap digital multimeter in your glovebox to check for DC offset at the terminals before you hook up your best speakers. For aesthetics, a pack of magic erasers and some Howard Feed-N-Wax can make a thirty-year-old speaker look like it just came out of the factory. These 3 budget upgrades that make cheap speakers sound expensive are usually more about maintenance and positioning than adding new hardware. #IMAGE_PLACEHOLDER_E#
Why Your Ears Will Thank You for Going Vintage
Building a high-end system doesn’t require a second mortgage. It requires an eye for detail and a willingness to get your hands a little dirty. Whether you’re trying to get theater quality sound out of a small living room or just want to hear your favorite album the way the artist intended, the journey is half the fun. Finding the best home audio deals is about more than saving money; it’s about preserving a piece of engineering history that still has plenty of life left in it. Don’t be afraid to take a chance on a heavy, dusty box—it might just be the best sound you’ve ever heard. What’s the one ‘legendary’ piece of gear you regret walking away from at a thrift shop? Let me know in the comments below.